Read time: 7 minutes
If you’ve ever set up containers for your .NET app with Docker Compose, you know the routine:
Write some YAML, expose a few ports, map a volume, fiddle with environment variables, then spend a good 30 minutes wondering why your API still can’t talk to Postgres.
It works, eventually. But it always feels like you’re stepping out of the .NET world just to get your dev environment up and running.
And it only gets worse when someone new joins your team and expects F5 to magically work.
What if your container setup could live inside your .NET solution? What if you could define it in C# instead of YAML?
That’s exactly what .NET Aspire offers.
Today I’ll show you how I took a working Docker Compose setup — with Postgres, Azurite, and Keycloak — and migrated it to Aspire with less code and better tooling.
Let’s dive in.
The app and its dependencies
Here’s the .NET application I’ve been working with. A CRUD style ASP.NET Core API for games management that works with 3 external services:
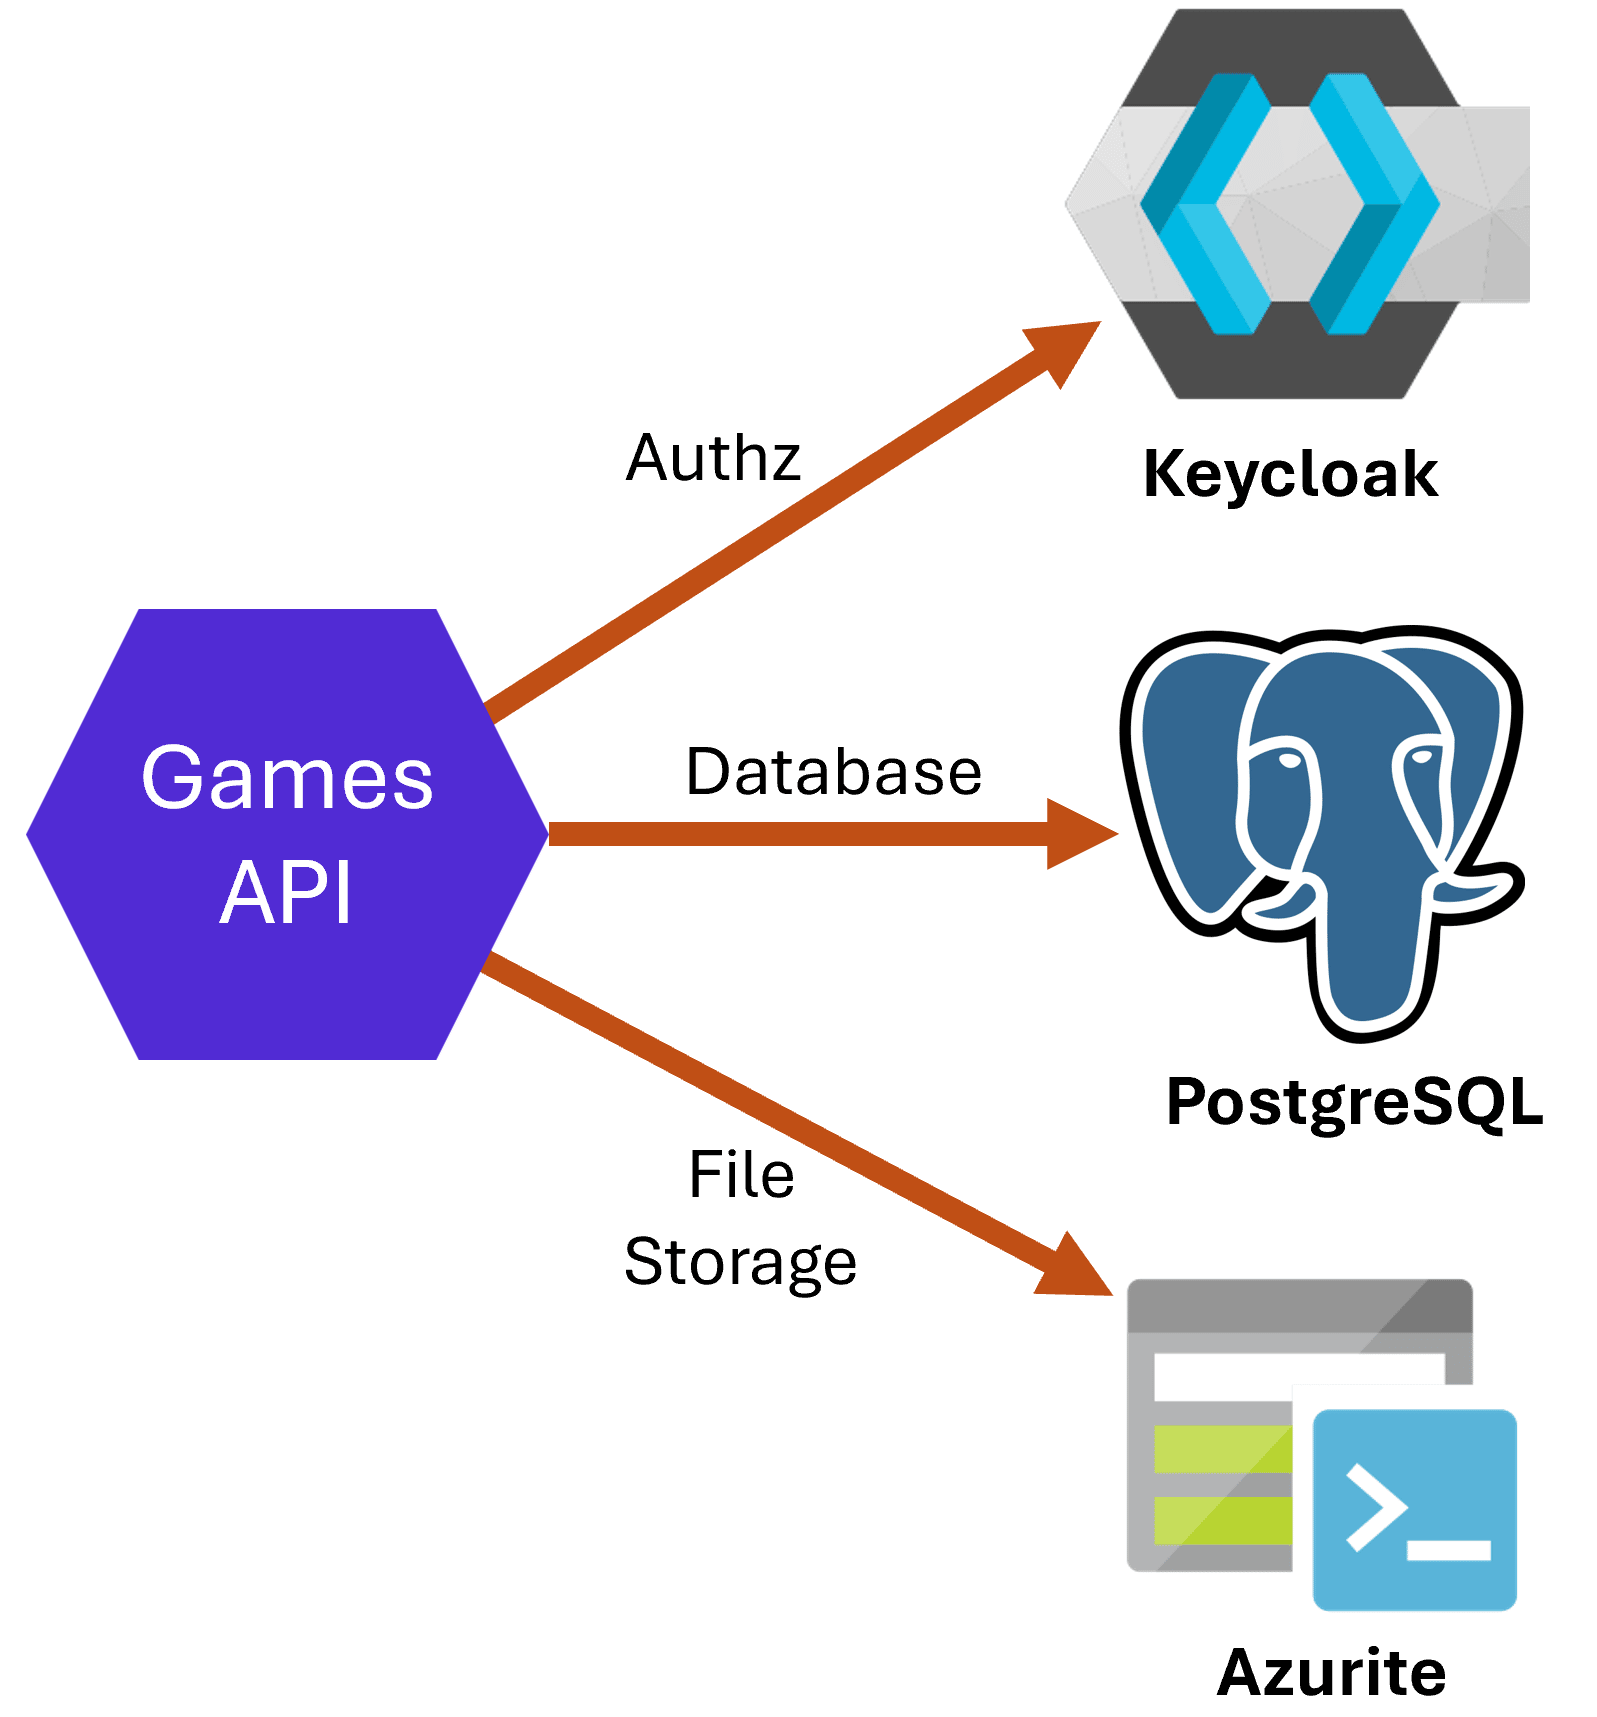
This app needs to:
- Store and retrieve games data from a PostgreSQL database
- Store and retrieve the images for those games from blob storage, using Azurite for local development
- Ensures all POST/PUT/DELETE requests include an access token generated and validated by a Keycloak server
Implementing the API is not rocket science, but how to test the app with those 3 external dependencies during local development?
Well, that’s a prime use case for Docker containers.
And ideally, you don’t want to run those containers manually, remembering the configurations for each one.
That’s where Docker Compose comes in handy.
Using Docker Compose
Docker Compose is a tool for defining and running multi-container applications.
To use it, you start by crafting a docker-compose.yml file that defines exactly how to stand up those containers for PostgreSQL, Azurite and Keycloak in my case.
Here’s what I ended up using for my app:
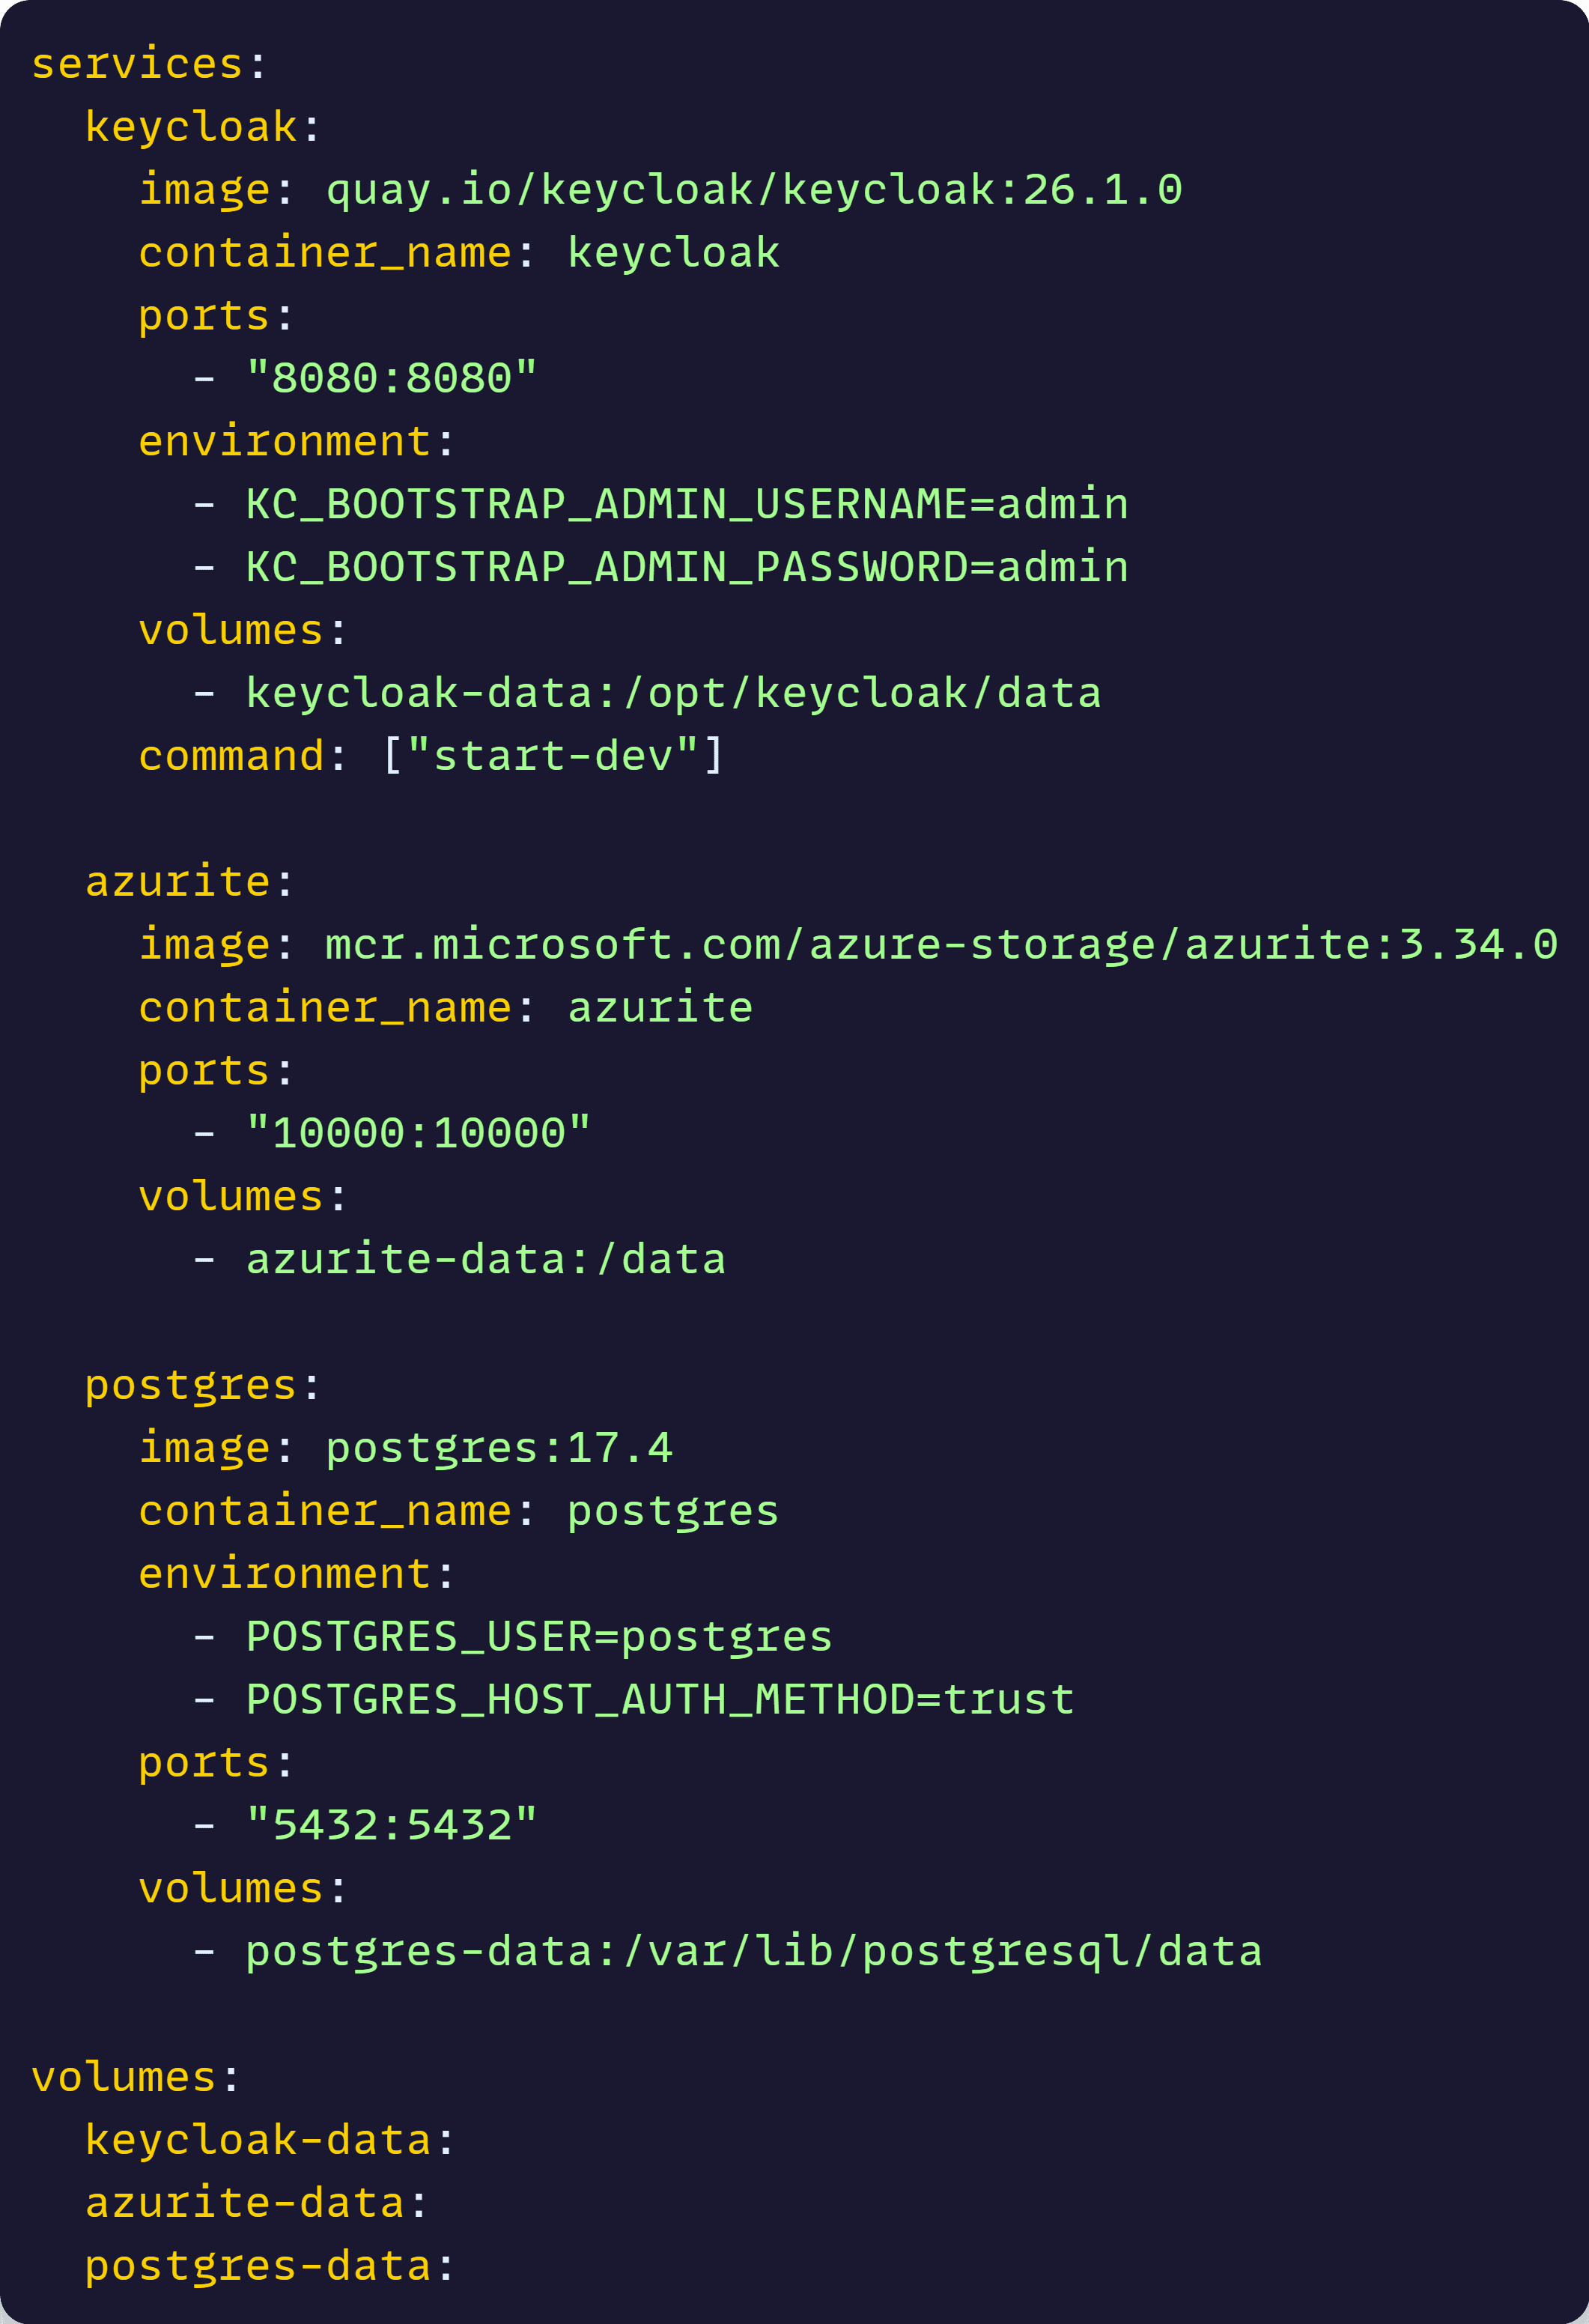
As you can see, for each container we define which ports to open so our app can talk to them, which environment variables to set to configure them, and ideally a volume to not lose data when containers are destroyed.
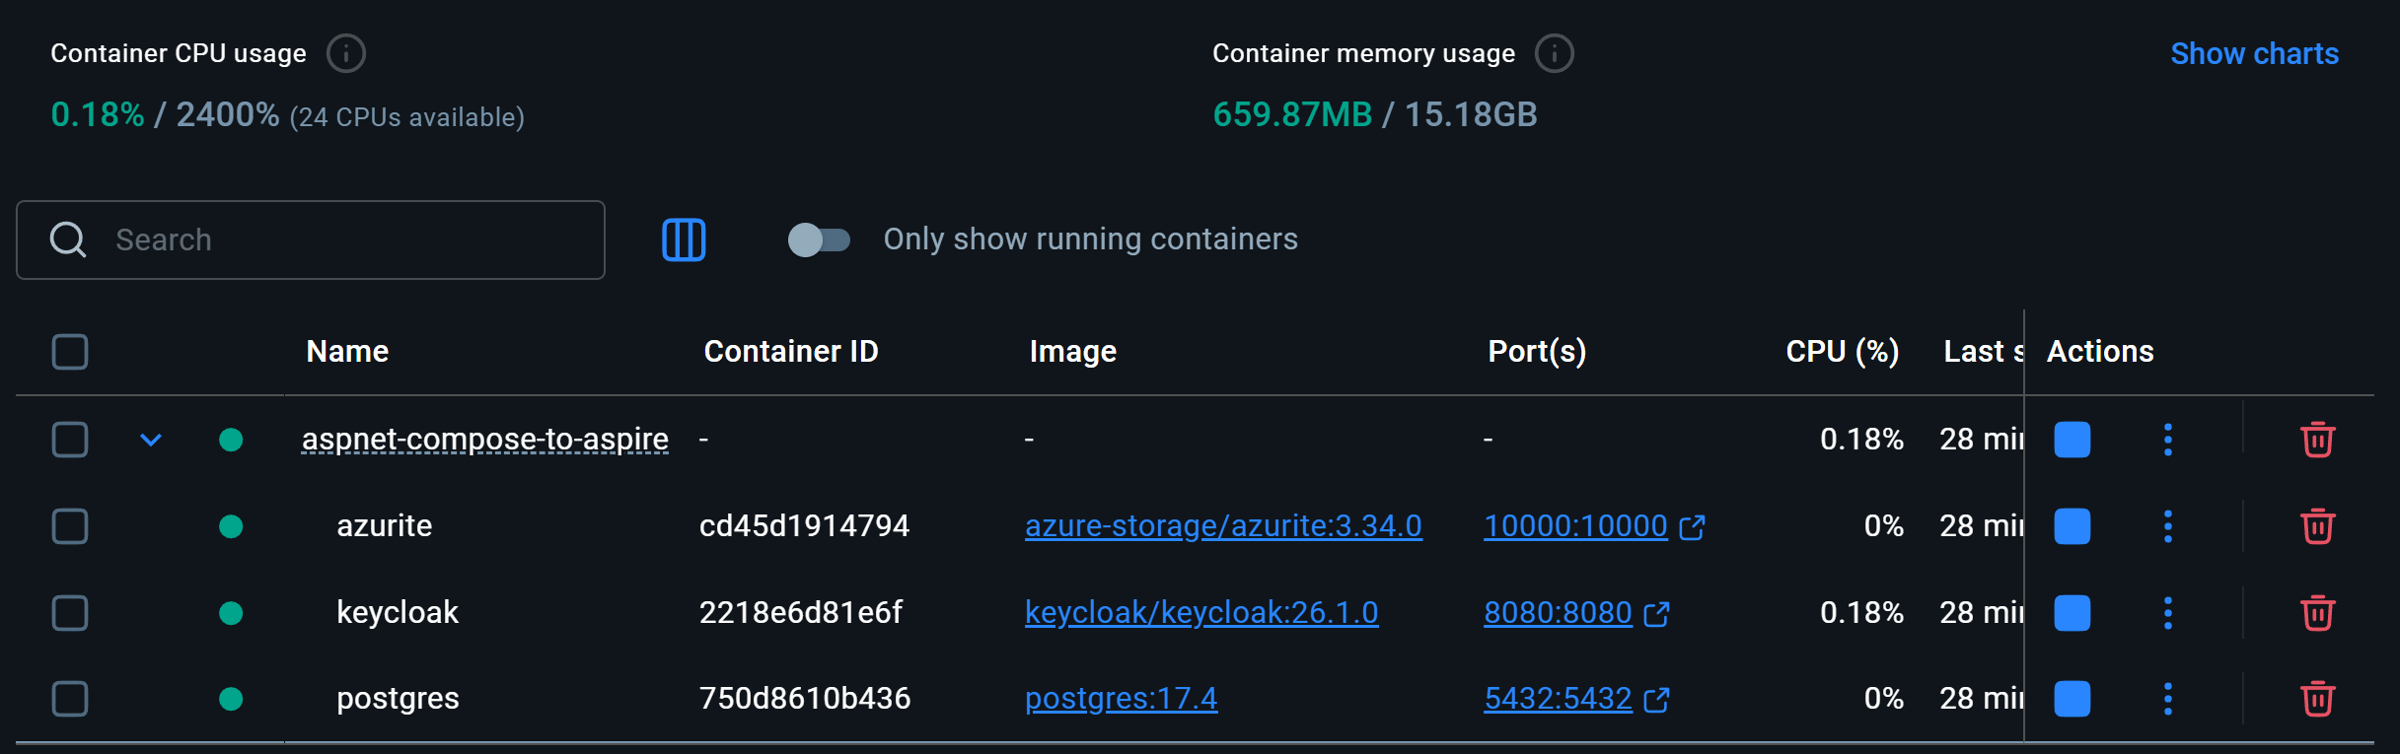
Then all you do is run this command wherever you have that file:

And your containers are up and ready to go, as shown in my Docker Desktop app:
But wait, how did I come up with those 36 lines of Docker Compose?
The problem with Docker Compose
A year or two ago, you would figure out how to craft a docker-compose.yml by googling around to find good examples to use as a starting point, or that hopefully just work.
Today, you might as well just ask ChatGPT, which will have no trouble coming up with a working starting point.
But if you are a C# developer, new to Compose, that’s just the start of your problems, which include:
- Switching to a different language (yaml)
- Figuring out the right settings, ports and volumes for each container
- Remember to start and stop Docker Compose on each coding session
Eventually, you’ll get used to all those, but what happens when a new dev joins the team?
How long until the new dev figures out why doing F5 doesn’t just work?
There has to be a better way.
Using .NET Aspire Hosting Integrations
Hosting Integrations are a set of NuGet packages, included with .NET Aspire, that know exactly how to provision all of these external resources needed by your app.
To use them, start by adding a new AppHost project to your solution:

This AppHost project becomes the new hosting process for your app, also known as the local orchestrator.
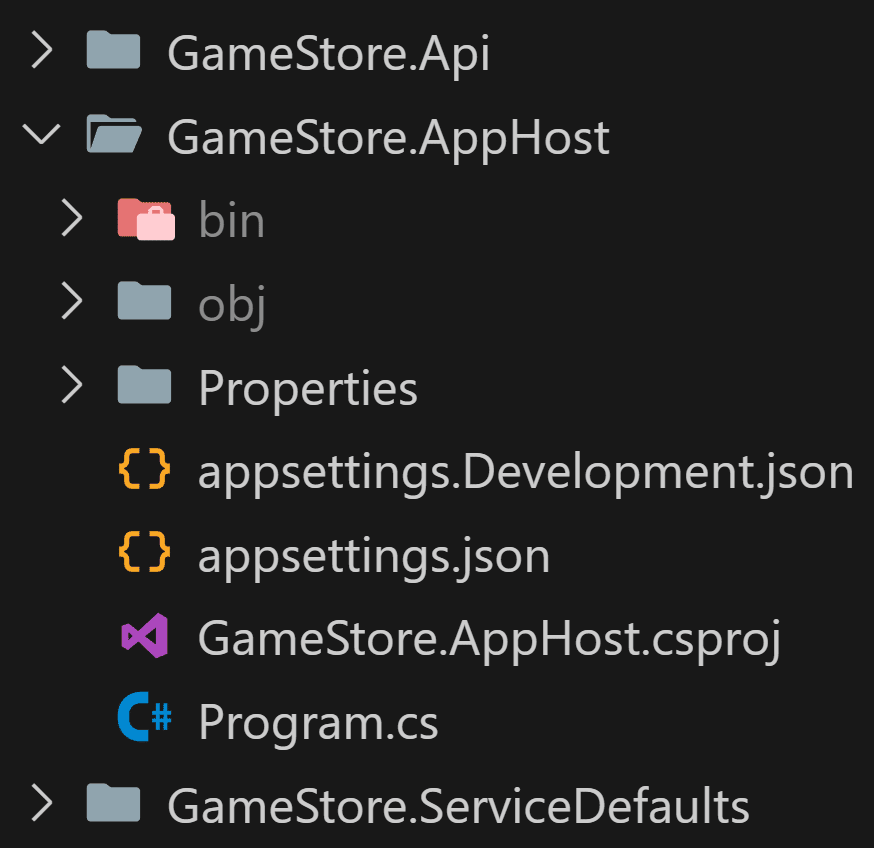
It comes with a Program.cs file where you can define your application model by declaring which external resources are needed by your app and how they relate to it.
Next, install the NuGet packages for the hosting integrations needed by your app:

With that in place, I can add a PostgreSQL database to my app model, by adding these few lines to the AppHost Program.cs:
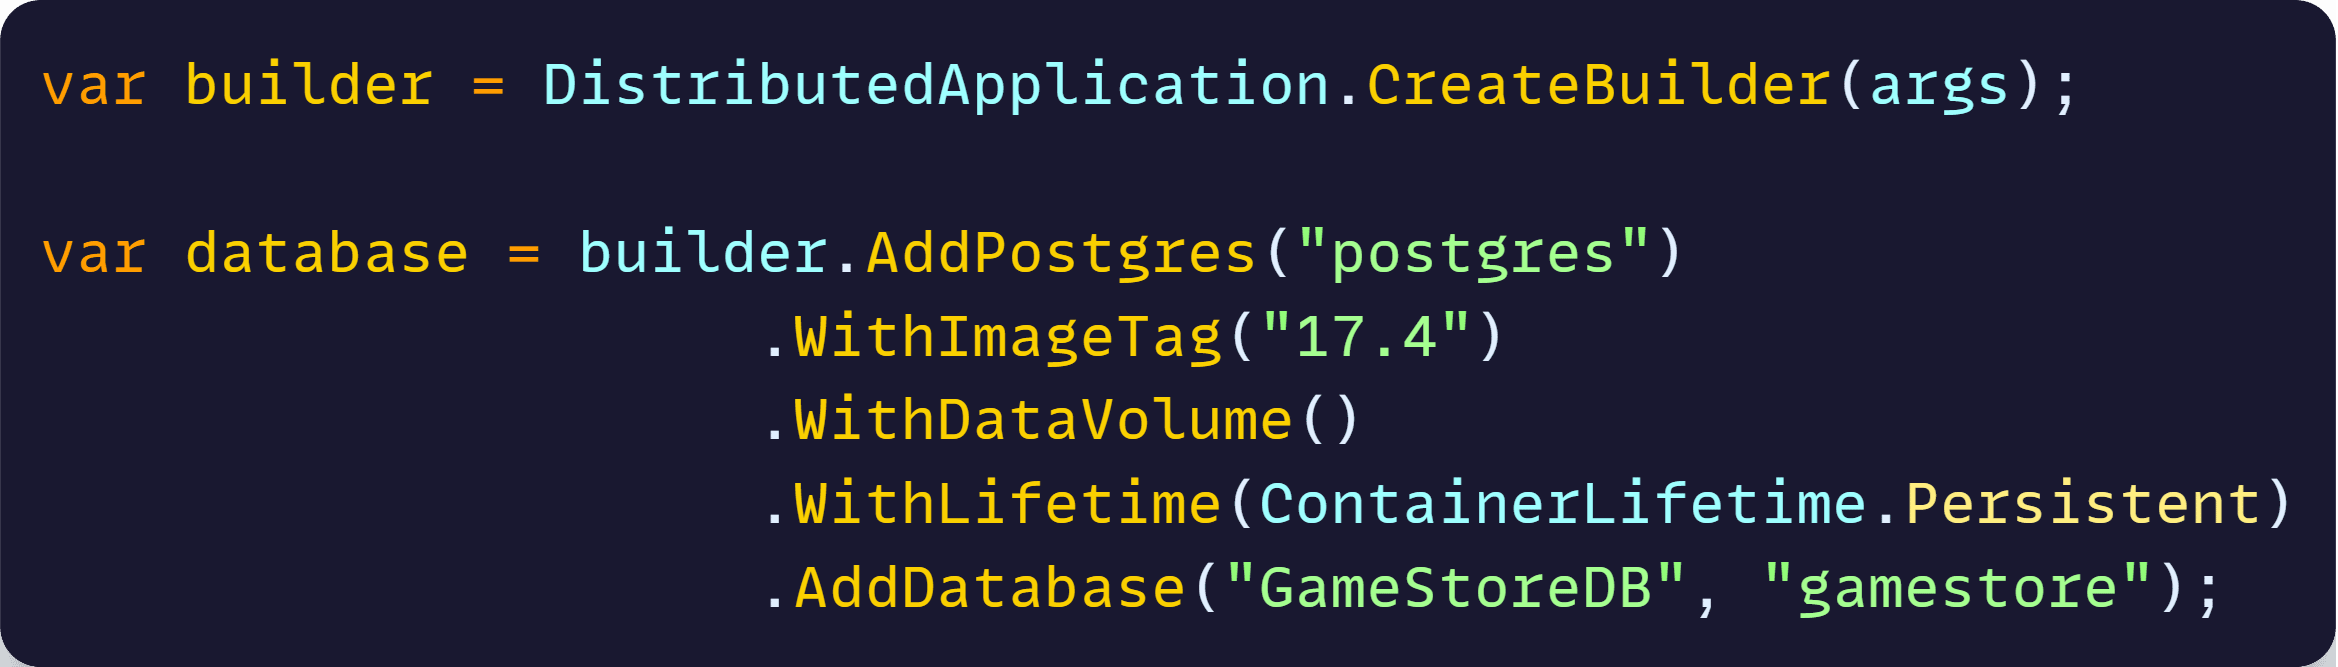
This is the exact equivalent of the Postgres container defined in the earlier docker-compose.yml file, but with a few important differences:
- It’s all C#. No YAML needed.
- I don’t need to specify a port. .NET Aspire will figure it out.
- I don’t need to specify the container tag, but I can do it if my app needs a specific one.
- I don’t need to know the exact location to map my data volume
- By default, I don’t need additional env vars or commands to configure the container (but I can add them if I want)
Need Storage? Here you go:
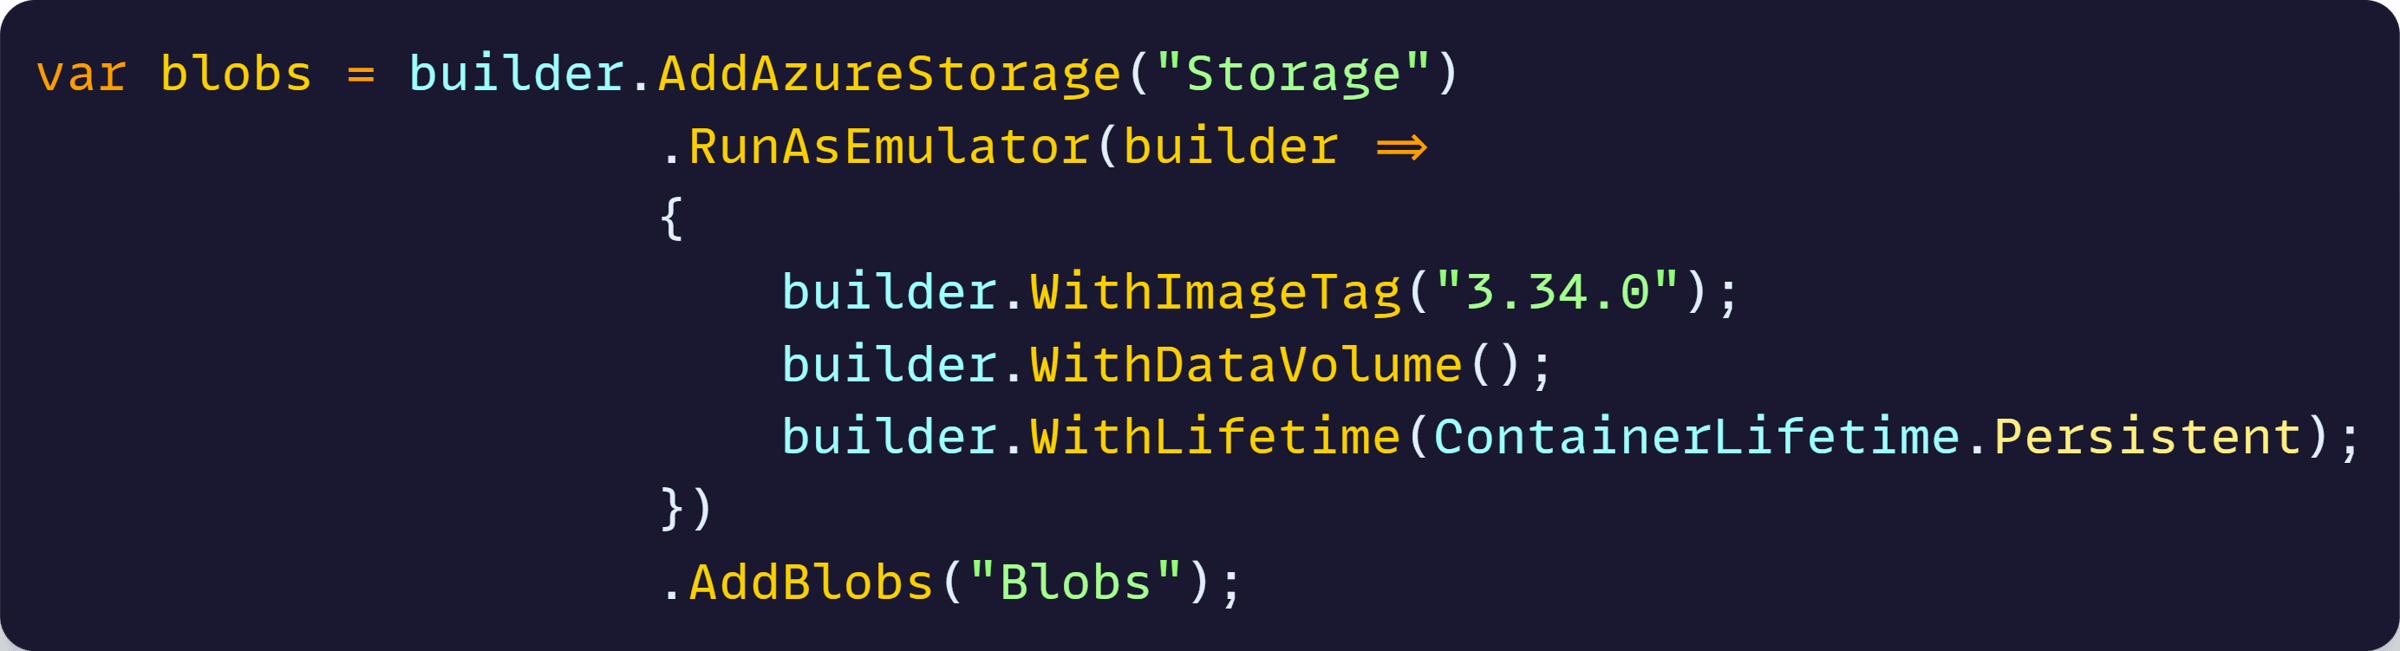
This adds Azure Storage support, but also allows me to call RunAsEmulator to use the Azurite container for local development, which is the same thing I was doing with docker-compose.yml before.
And here is Keycloak:

Now, hit F5, and just as before you will see your containers up and running in your Docker Desktop install:

But more importantly, you will also get a nice dashboard with all the specific resources needed by your app and their current state:
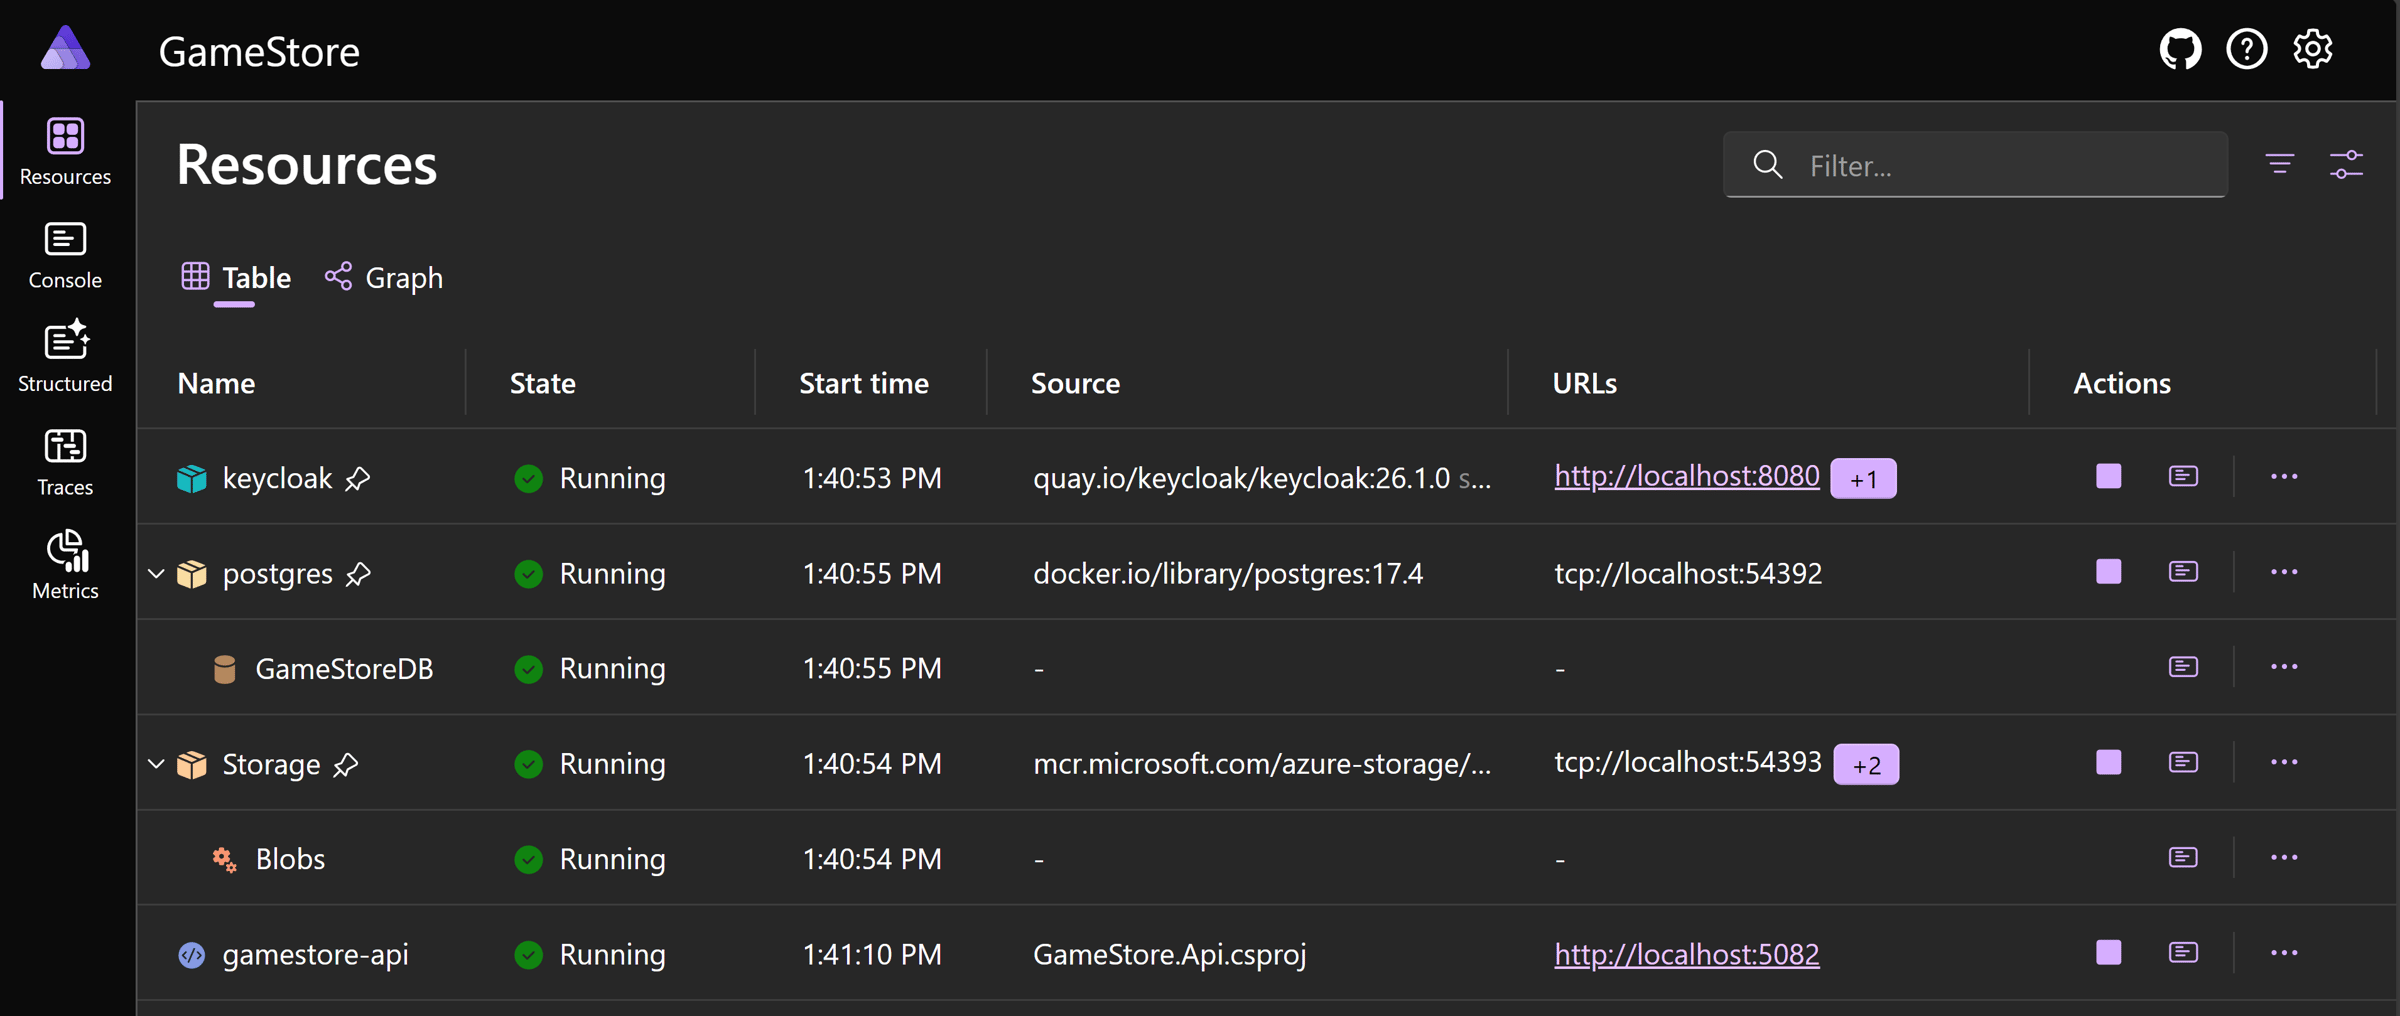
But how does your .NET API actually talk to those resources? And how did gamestore-api end up in the dashboard too?
I’ll walk you through that part in next week’s newsletter — including how Aspire handles connection strings and wiring behind the scenes.
Wrapping up
Docker Compose was a great stepping stone for running containerized dev environments.
But for .NET devs, Aspire feels like home.
You get everything Compose gave you — but now it’s all in C#, with first-class support for .NET devs and a dashboard that just works.
Until next time!
Whenever you’re ready, here’s how I can help:
The .NET Developer Bootcamp: A complete path from ASP.NET Core fundamentals to building, containerizing, and deploying production-ready, cloud-native apps on Azure.
