Read time: 5 minutes
In this tutorial, I’ll show you how to use the HttpClient in your ASP.NET Core apps to make HTTP requests to other services or APIs.
It is almost inevitable that sooner than later you’ll need to make HTTP requests to interact with services or APIs that live outside of your app.
The HttpClient is the class you want to use for that purpose, but if used the wrong way it can lead to performance issues and resource leaks.
Fortunately, there’s a powerful and elegant way to integrate the HttpClient in your .NET apps, and that’s what I’ll cover in this tutorial.
Let’s dive in.
What is the HttpClient?
The HttpClient is an ASP.NET Core class that allows you to send HTTP requests and receive HTTP responses from a URL.
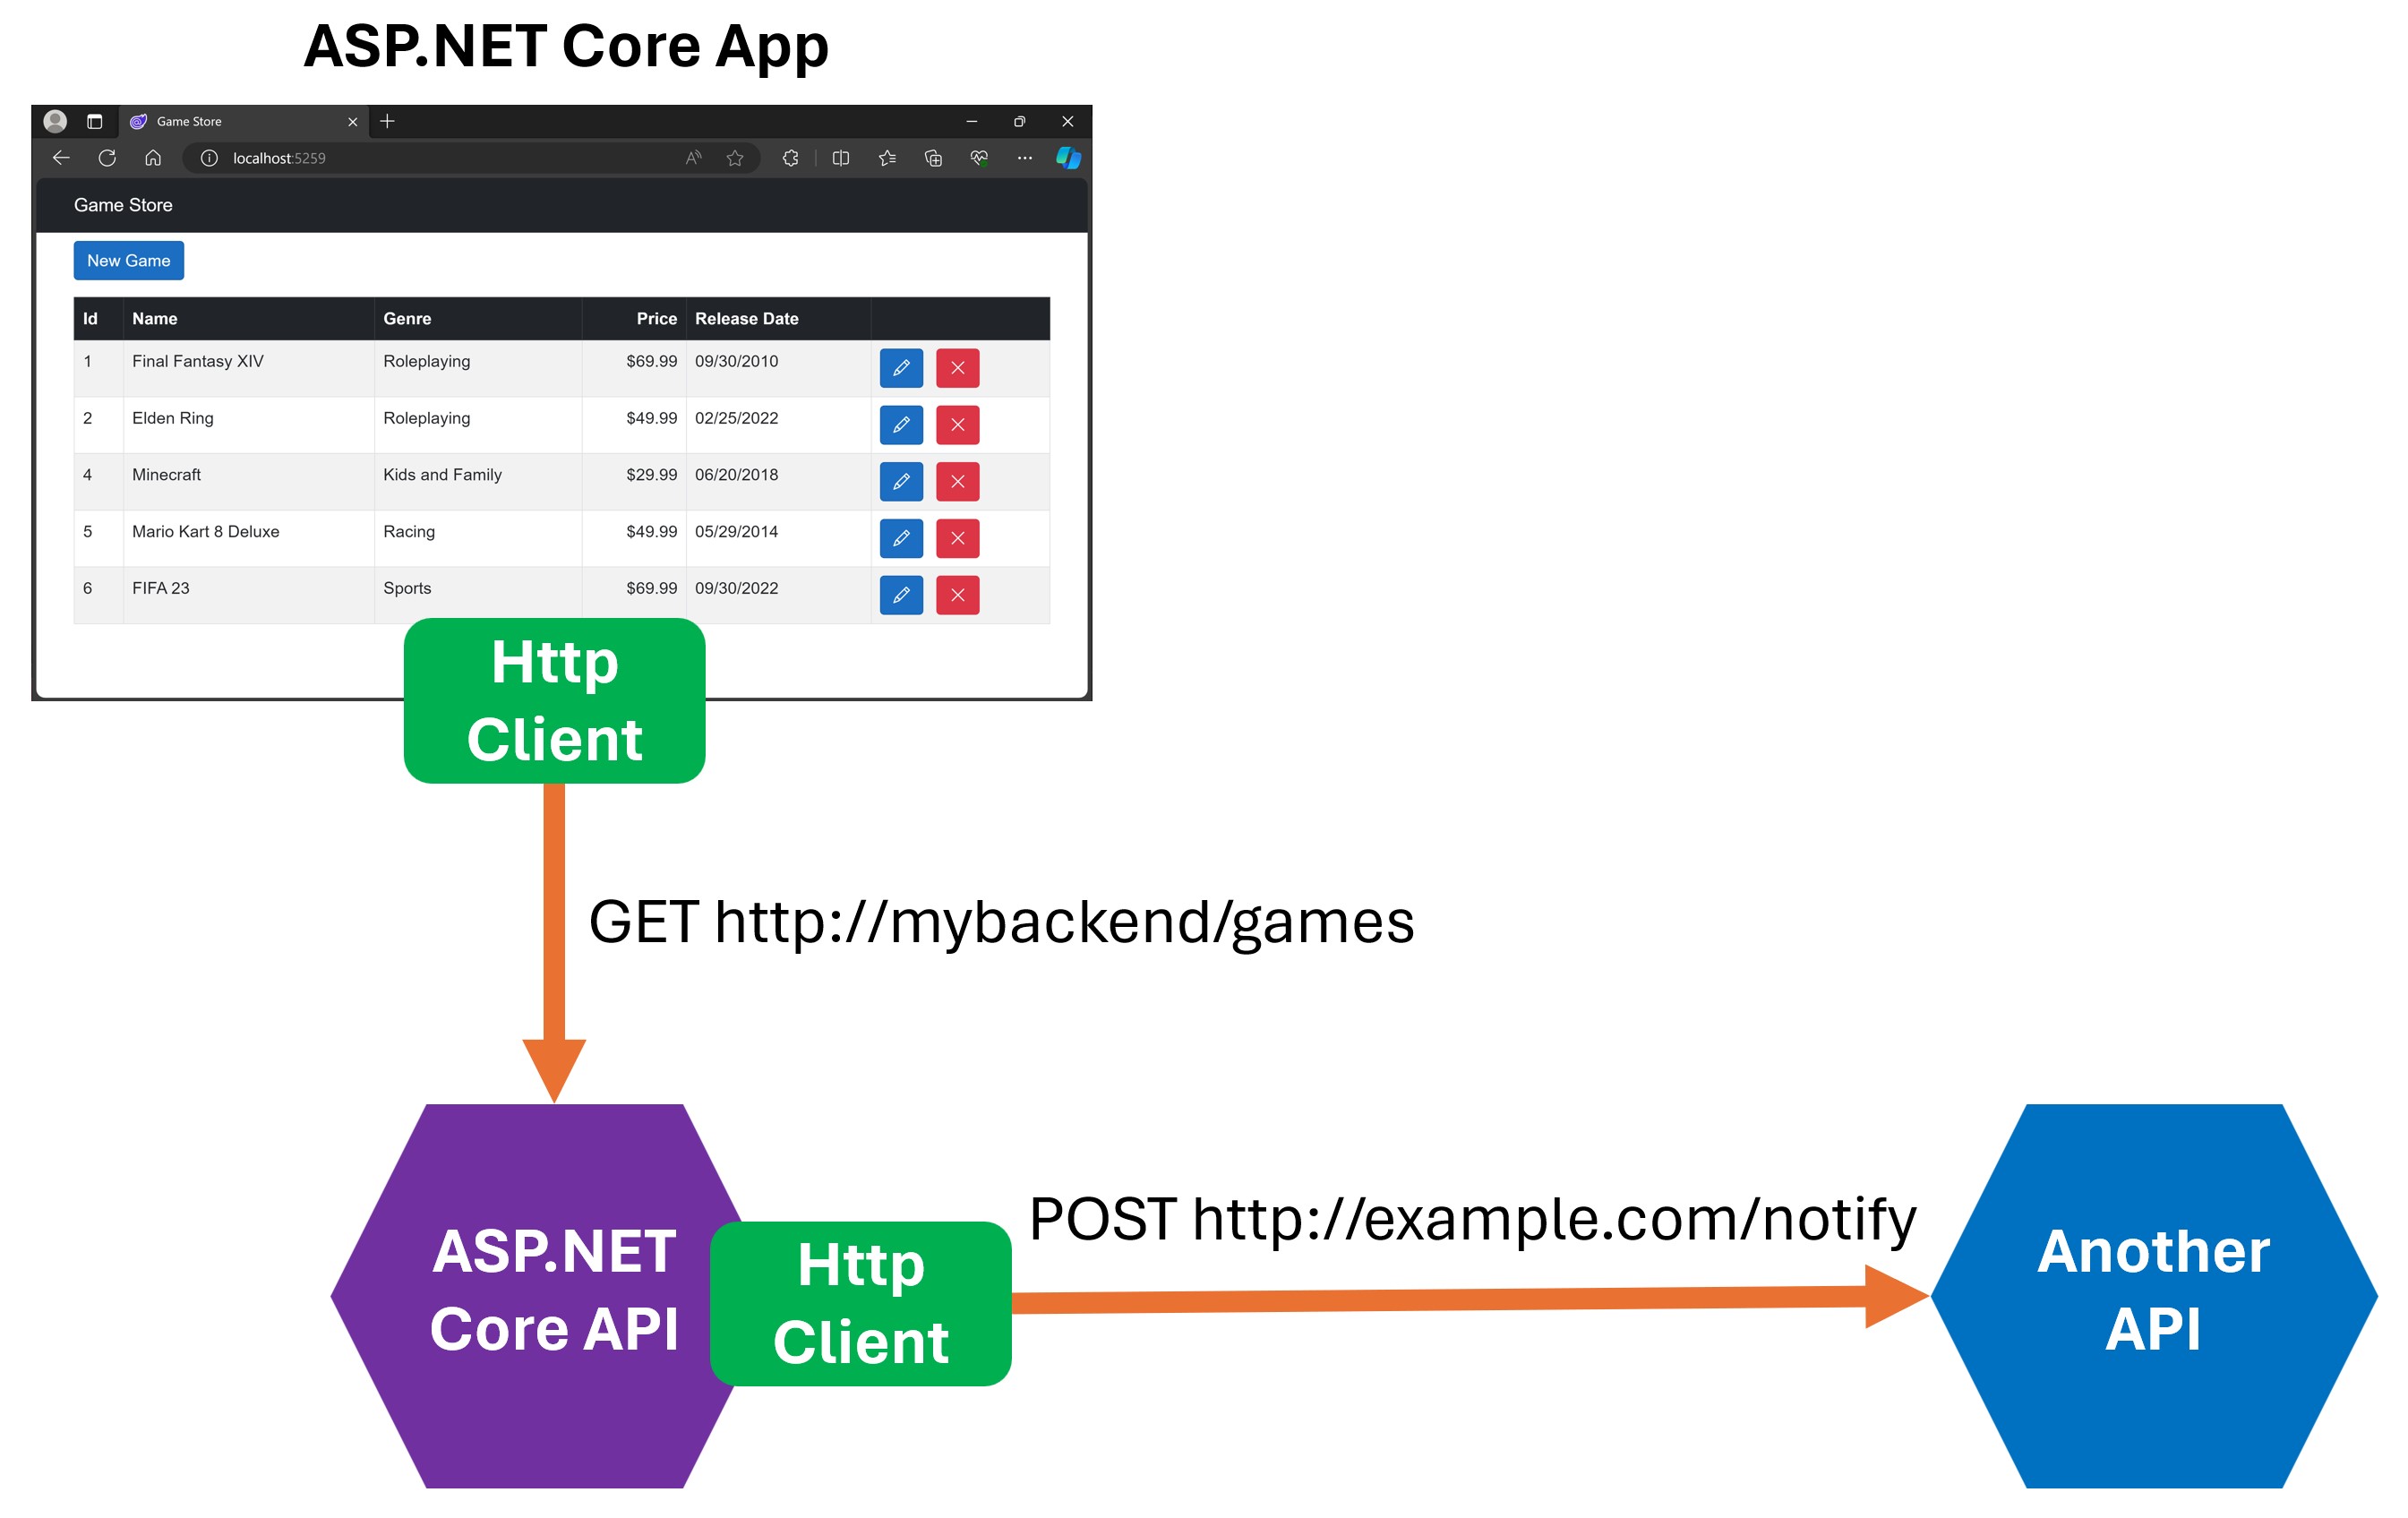
This is the class that any of your .NET apps can use to talk to any web service or API.
For instance, you can use the HttpClient in your Blazor frontend to talk to your ASP.NET Core backend APIs, or you can use it in your backend APIs to talk to a third-party API.
There are multiple ways to integrate the HttpClient in your .NET apps, but before we dive into the right way to use it, let me quickly go over the wrong way to use it.
How not to use the HttpClient
Let’s say your frontend app needs to retrieve the list of games from your ASP.NET Core backend API. After reading the docs, you decide to use the HttpClient like this for that purpose:
private GameSummary[]? games;

protected override async Task OnInitializedAsync()
{
    using (HttpClient client = new HttpClient())
    {
        client.BaseAddress = new Uri("http://localhost:5274");
        HttpResponseMessage response = await client.GetAsync("games");

        response.EnsureSuccessStatusCode();

        games = await response.Content.ReadFromJsonAsync<GameSummary[]>();
    }
}
Here are a few of the issues with this approach:
-
Creating a new HttpClient for each request: The HttpClient is designed to be reused across multiple requests. Creating a new HttpClient for each request is inefficient and can lead to socket exhaustion.
-
Not disposing of the HttpClient: The HttpClient implements the IDisposable interface, which means you should dispose of it when you’re done using it. Not disposing of the HttpClient can lead to resource leaks.
-
Duplicated code: If you need to make multiple requests to the same API, you’ll end up duplicating the code to create and configure the HttpClient.
-
Hardcoding the base address: Hardcoding the base address in your code is a bad idea since it makes your code less flexible and harder to maintain.
Fortunately, there’s a much better and more elegant way to use the HttpClient.
Enter the IHttpClientFactory
IHttpClientFactory is a factory abstraction that can be used to configure and create HttpClient instances in an app.
The main benefit of using it is that it manages the lifecycle of the HttpClient instances for you, which means you don’t have to worry about creating and disposing of them.
Plus, it gives you a few other benefits, such as:
-
Typed clients: You can create typed clients that encapsulate the logic to interact with a specific API, which makes your code cleaner and easier to maintain.
-
Extensibility: You can use delegating handlers to add cross-cutting concerns to your HTTP requests, such as logging, retry policies, or authentication.
-
Logging: It adds logging to your HTTP requests by default, which can be useful for debugging purposes.
There are many ways to use the IHttpClientFactory, but in the quick steps below I’ll go straight to my favorite way, which is to use it with typed clients.
Step 1: Implement your typed client
A type client is a class that encapsulates the logic to interact with a specific API.
Here’s a typed client that can interact with our Games backend API:
public class GamesClient(HttpClient httpClient)
{
    public async Task<GameSummary[]> GetGamesAsync()
        => await httpClient.GetFromJsonAsync<GameSummary[]>("games") ?? [];

    public async Task<GameDetails> GetGameAsync(int id)
        => await httpClient.GetFromJsonAsync<GameDetails>($"games/{id}")
            ?? throw new Exception("Could not find game!");

    public async Task AddGameAsync(GameDetails game)
        => await httpClient.PostAsJsonAsync("games", game);

    // Other methods omitted for brevity
}
Main points to note here:
-
The HttpClient instance is injected into the constructor. GamesClient does not need to worry about where or how the HttpClient is created; it just uses it.
-
The methods in the GamesClient class are simple and clean. They encapsulate the logic to interact with the Games API.
-
The methods use extension methods like GetFromJsonAsync and PostAsJsonAsync to simplify deserializing and serializing from and to JSON data.
That looks nice, but where does the HttpClient instance come from?
Step 2: Use the IHttpClientFactory
As mentioned before, the IHttpClientFactory is the one in charge of creating and managing the HttpClient instances for you.
The way to register it is by using the AddHttpClient extension method during your application startup sequence (Program.cs):
var gameStoreApiUrl = builder.Configuration["GameStoreApiUrl"] ??
    throw new Exception("GameStoreApiUrl is not set");

builder.Services.AddHttpClient<GamesClient>(
    client => client.BaseAddress = new Uri(gameStoreApiUrl));
AddHttpClient will:
- Add the IHttpClientFactory and related services to the IServiceCollection
- Configure GamesClient to receive an HttpClient instance with the specified base address
- Register GamesClient as a service in the DI container
Notice how we are using configuration to retrieve the base address of the Games API, as opposed to hardcoding it. This is how that configuration could be defined in appsettings.json:
{
  "Logging": {
    "LogLevel": {
      "Default": "Information",
      "Microsoft.AspNetCore": "Warning"
    }
  },
  "GameStoreApiUrl":"http://localhost:5274",
  "AllowedHosts": "*"
}
Step 3: Use your typed client
Now that we have our typed client set up, we can use the GamesClient in our ASP.NET Core apps as any other injected dependency.
For instance, here’s how you could use it in a Razor component:
@inject GamesClient Client

@code {
    private GameSummary[]? games;

    protected override async Task OnInitializedAsync()
    {
        games = await Client.GetGamesAsync();
    }
}
So simple and clean!
But wait, there’s more…
Step 4: Add a DelegatingHandler
Many times you’ll want to prepare your HTTP requests before they are sent or process the responses after they are received.
For instance, you might want to add an authorization header to all requests, in cases where you need to authenticate with the API.
You can achieve this by creating a DelegatingHandler like this:
public class AuthorizationHandler(IHttpContextAccessor httpContextAccessor)
    : DelegatingHandler
{
    protected override async Task<HttpResponseMessage> SendAsync(
        HttpRequestMessage request,
        CancellationToken cancellationToken)
    {
        var httpContext = httpContextAccessor.HttpContext ??
            throw new InvalidOperationException("No HttpContext available!");

        var accessToken = await httpContext.GetTokenAsync("access_token");

        if (!string.IsNullOrEmpty(accessToken))
        {
            request.Headers.Authorization = new AuthenticationHeaderValue(
                "Bearer",
                accessToken);
        }

        return await base.SendAsync(request, cancellationToken);
    }
}
There we extract the access token from the HttpContext and add it as a Bearer token to the Authorization header of the request (I go over how to configure OIDC to get that access token into your HttpContext on this article).
You can execute similar logic for every request made by the HttpClient instances configured with this DelegatingHandler.
To register the DelegatingHandler, you can chain a call to the AddHttpMessageHandler method to your typed client registration:
builder.Services.AddHttpClient<GamesClient>(
    client => client.BaseAddress = new Uri(gameStoreApiUrl))
    .AddHttpMessageHandler<AuthorizationHandler>();
Now, there’s one more thing you should do these days to significantly improve the resilience of your HTTP requests.
Step 5: Add resiliency
How frequently do you think your HTTP requests will fail? Quick answer: A LOT.
And that’s not because of bugs in your code, but because of the nature of the internet and the services you’re interacting with.
To make your app more resilient to these failures, you should configure your HttpClient instances with a series of well-known strategies like retries, circuit breakers, timeouts and more.
You can configure those strategies manually or, if you are using .NET 8, you can install the Microsoft.Extensions.Http.Resilience NuGet package and then you can chain a call to AddStandardResilienceHandler when registering your typed client:
builder.Services.AddHttpClient<GamesClient>(
    client => client.BaseAddress = new Uri(gameStoreApiUrl))
    .AddHttpMessageHandler<AuthorizationHandler>()
    .AddStandardResilienceHandler();
That single call will turn on a series of default resilience strategies that will make your app more robust and reliable.
You will also get that resiliency for free, plus a bunch of other benefits, if you use .NET Aspire, which I previously covered here.
And that’s it for today, I hope it was helpful.
Whenever you’re ready, here’s how I can help:
The .NET Developer Bootcamp: A complete path from ASP.NET Core fundamentals to building, containerizing, and deploying production-ready, cloud-native apps on Azure.
