Read time: 5 minutes
For the last month or so, many folks have been asking some version of this question on my YouTube channel:
“Even after I installed C# Dev Kit extension, I am not able to see solution explorer… Can I know how to get that solution explorer?”
If you have the same question, be assured that it is not a bug but a major change in the C# Dev Kit, the VS Code extension that used to include a Solution Explorer for your C# projects.
But if such an important part of the experience is now gone, how do you build projects, add new C# files, add project references and, actually, how do you even open your existing solutions in VS Code now?
Today I’ll show you what can and cannot be done anymore with the updated C# Dev Kit.
Let’s start.
Why would they take away the Solution Explorer?
Microsoft explains that the goal is to provide a clearer way to understand your workspace:
We’ve consolidated C# Dev Kit’s Solution Explorer view with VS Code’s Explorer to ensure one primary way to navigate and understand your files and folders.
You can read more about it here and here, but the truth is that the solution explorer should have never been there to start with because of multiple reasons:
- It made C# behave differently. Other VS Code ecosystems primarily use the filesystem and workspace.
- It duplicated UI infrastructure. A second tree needed its own refresh, context menus, filtering, and synchronization.
- It implied solutions were required. Beginners often assumed no
.slnmeant a broken project. - It encouraged hidden solution dependencies. Build relationships could live in
.slnfiles instead of the projects that actually require them. - It mixed physical and virtual items. Files, packages, frameworks, and analyzers appeared in one conceptually muddy tree.
- It made C# onboarding unique. Developers had to learn a second navigation system just for .NET.
That being said, the introduction of this change is, as of today, only half implemented, which makes the experience sadly worse than just keeping the solution explorer around.
Yet, you can still do most things you could do before, once you understand where everything moved.
You don’t need a solution
The key thing to understand is that you no longer need a solution to work with your C# projects, not in VS Code at least.
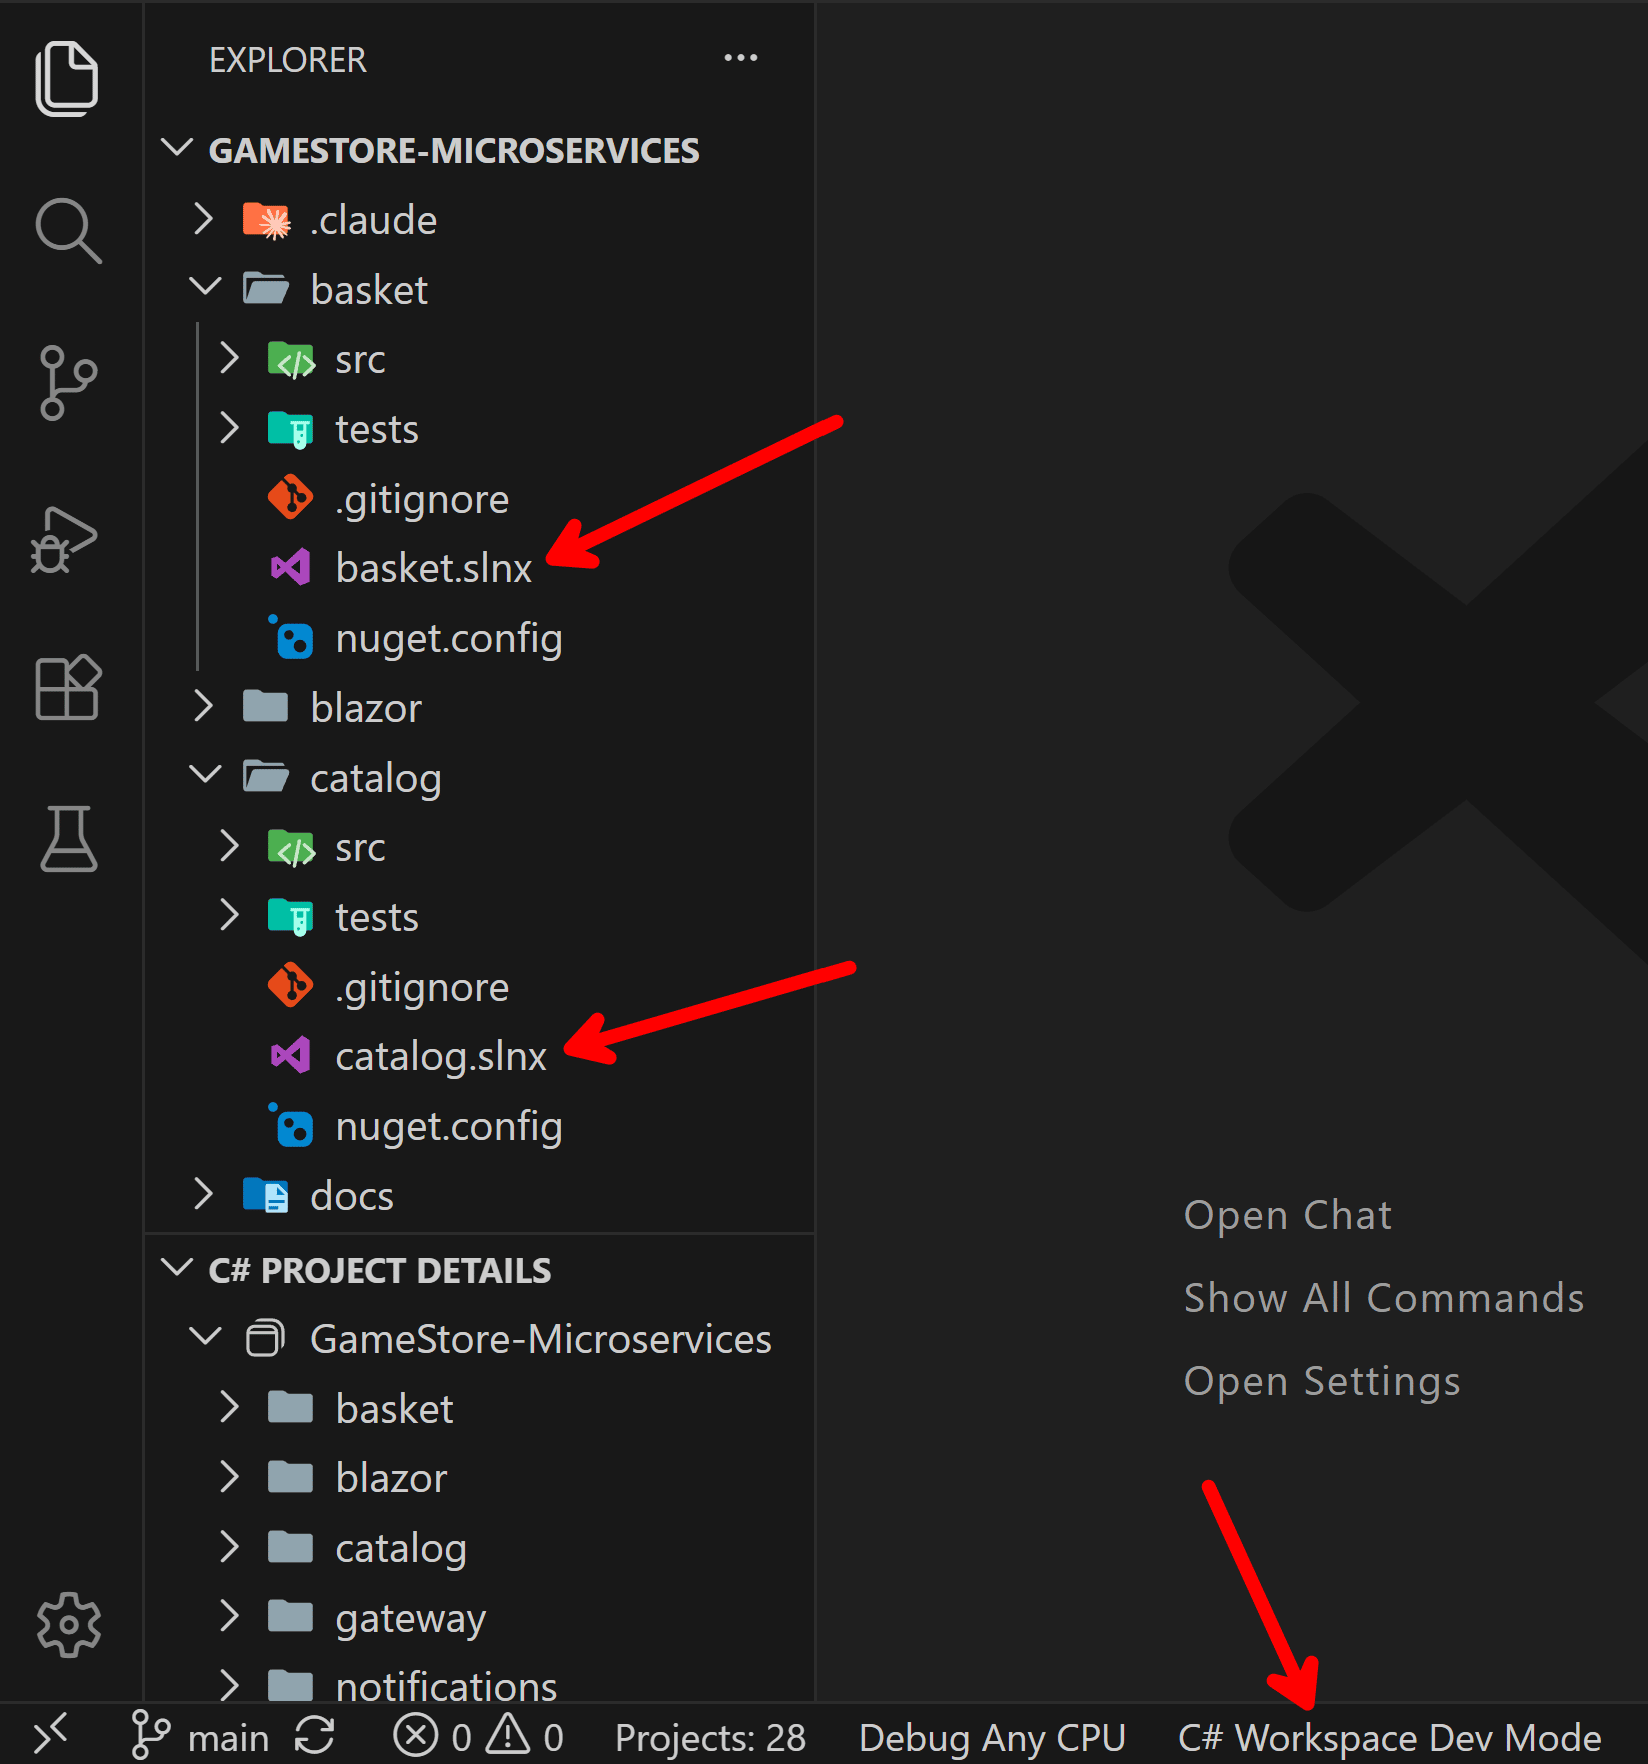
If you open a repository with no solution you’ll default to the new C# Workspace Dev Mode:

This just means that the C# Dev Kit is working without an opened .sln or .slnx file. VS Code will load projects directly from the workspace folder instead of using a solution as the container.
So, your “solution” is now your entire VS Code workspace, and any C# file you open across it should work just like before, with all the IntelliSense and other niceties you would expect there.
The C# Project Details panel
This new panel sits where you had your solution view before and gives you a virtual view of things like dependencies, packages, linked files, and more.
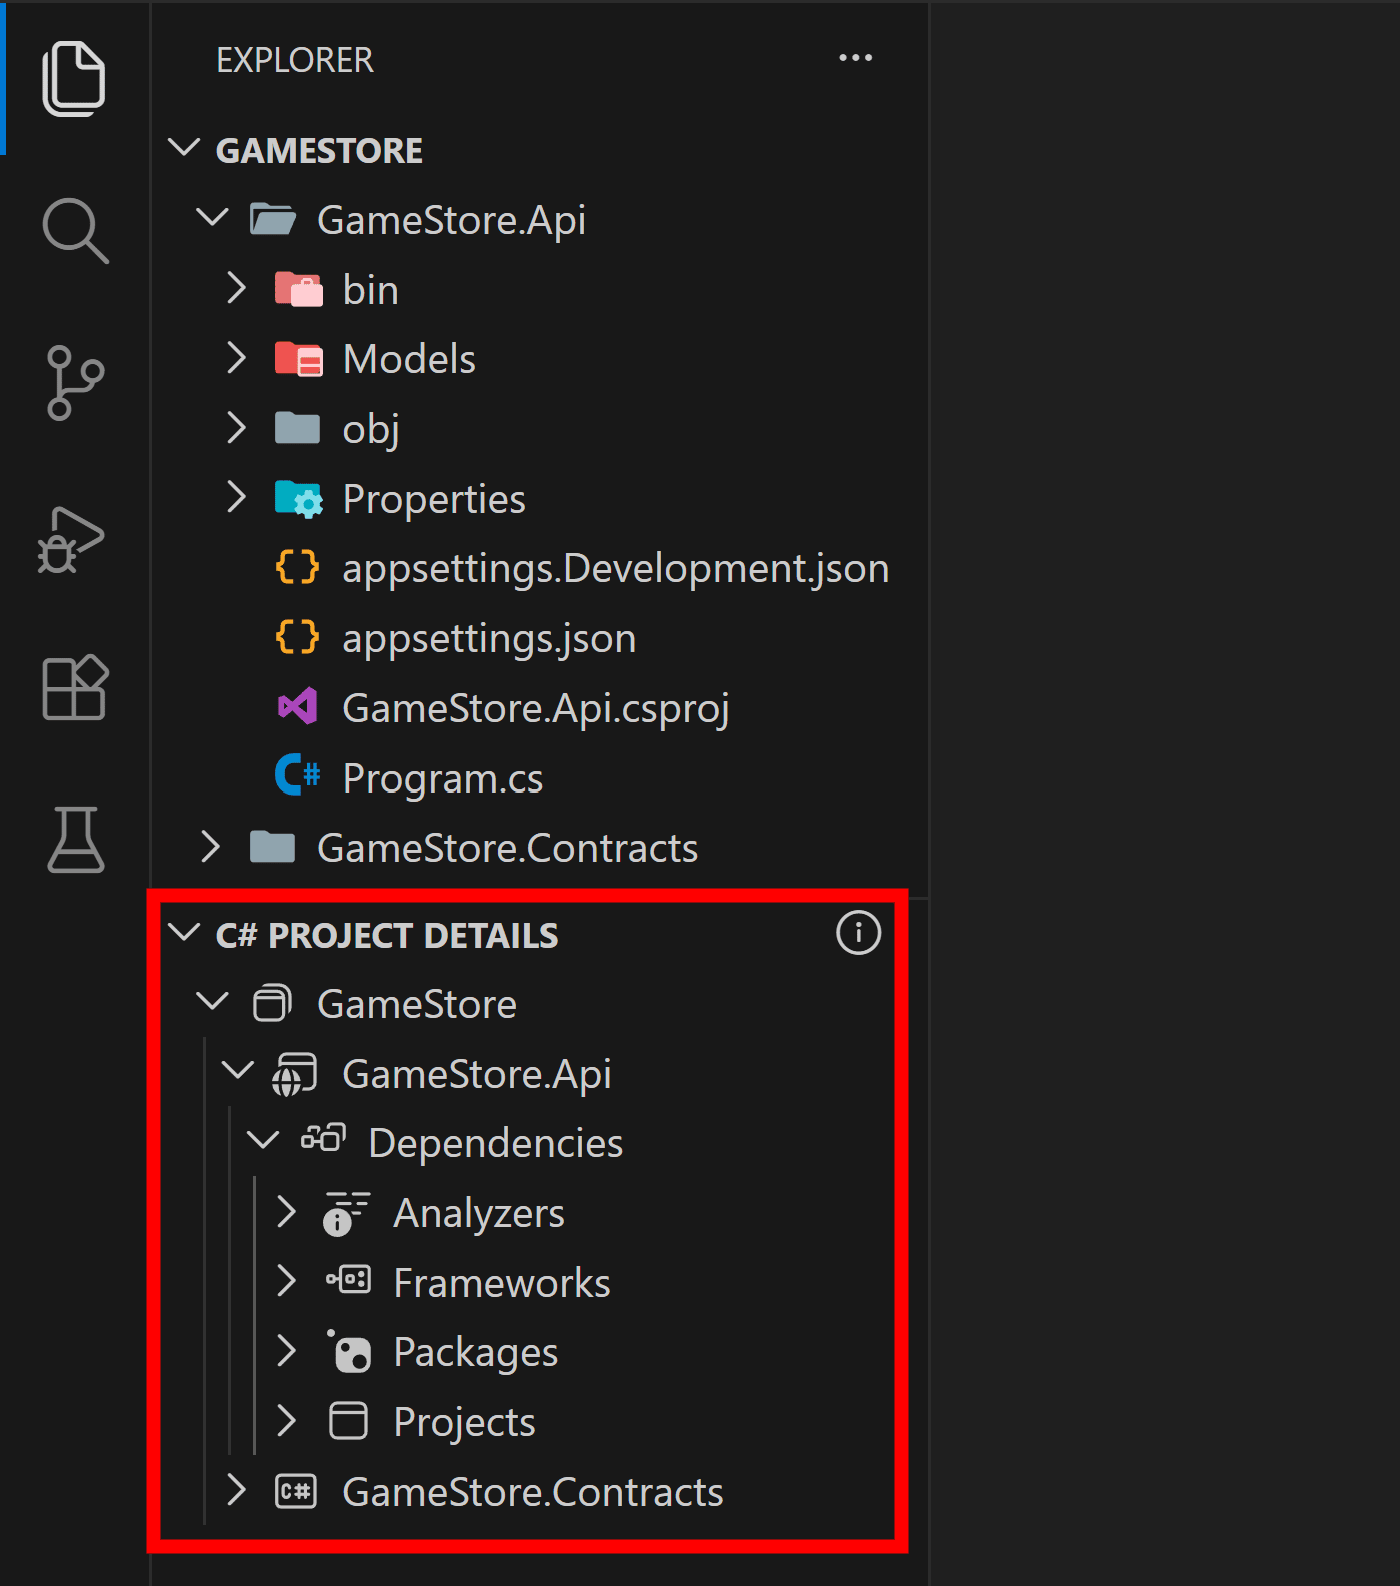
However, it is a read-only view. Clicking things there will bring no sub menus, no actionable items.
So how do you work with your C# projects now?
Building and debugging projects
There are several ways to build your projects in VS Code, but if you were used to doing it via the Solution Explorer, you can now do it by right clicking the relevant project:
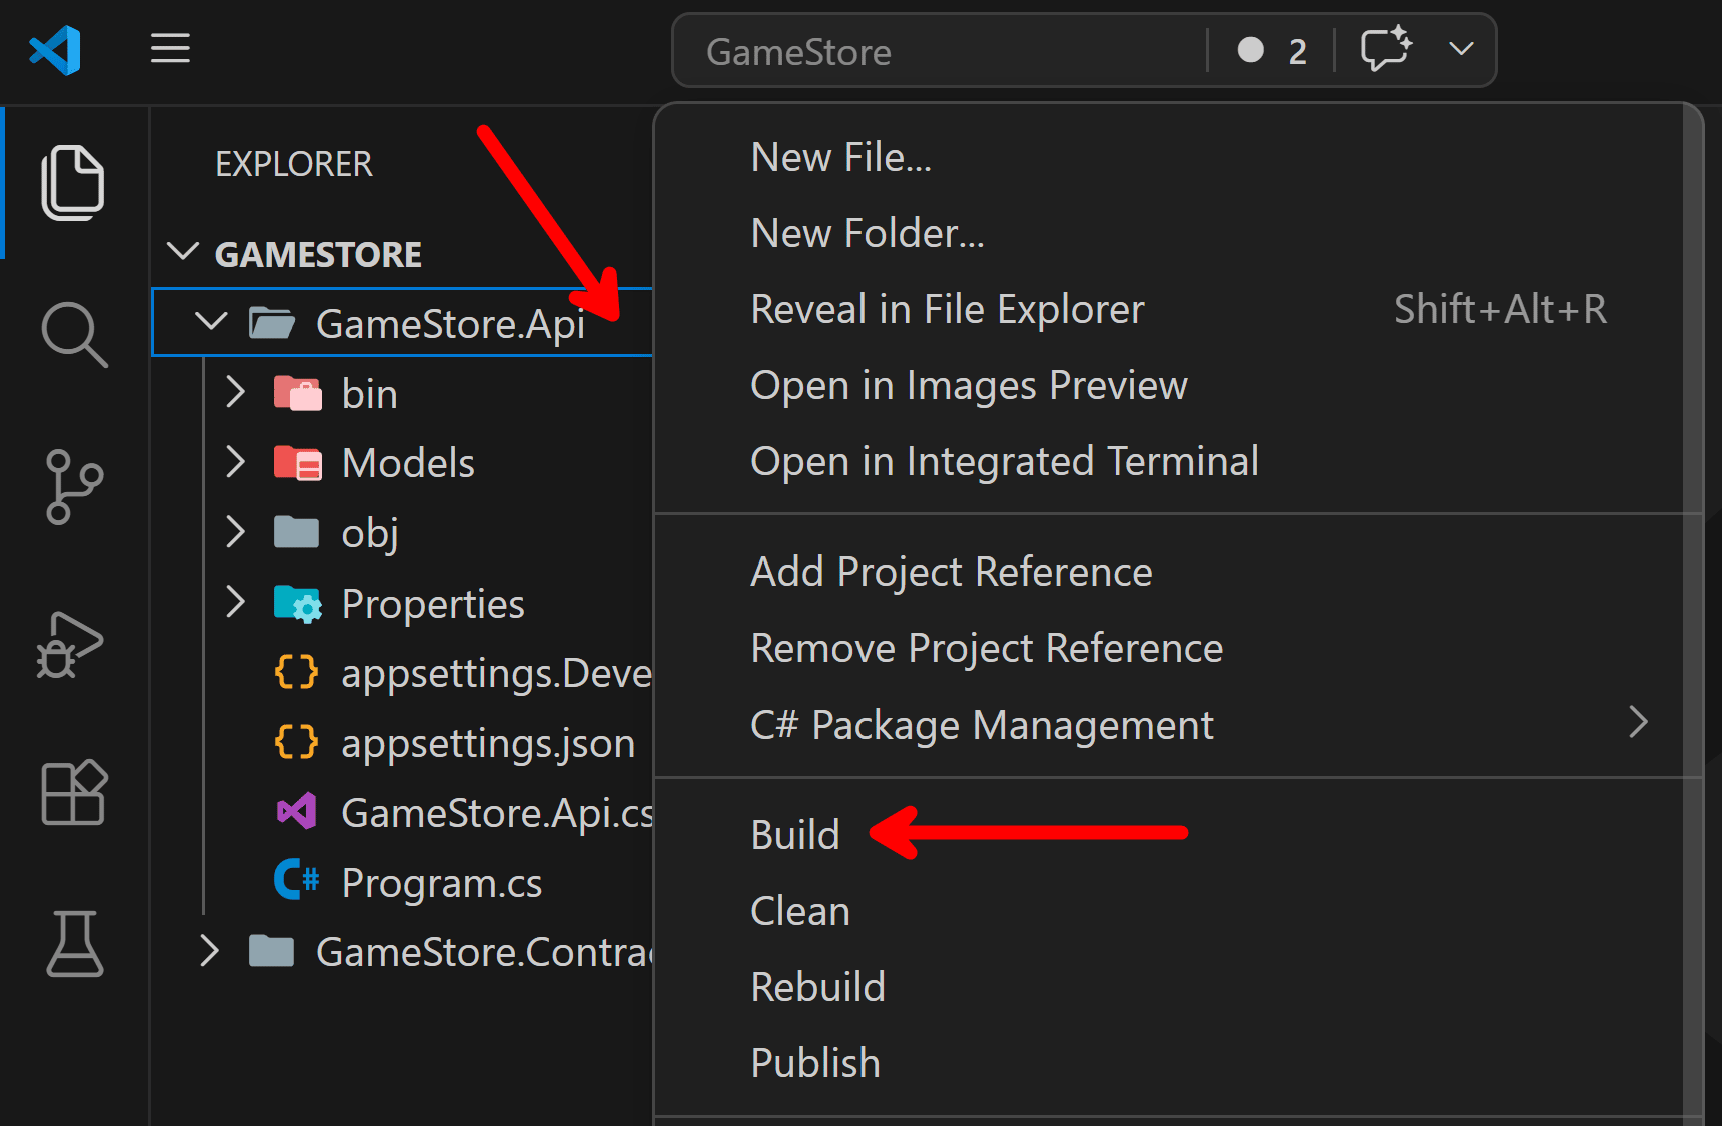
Build, Rebuild and similar commands now show in the folder context menu.
And, if you need to build the entire thing, you can always use the Ctrl+Shift+B keybinding to kick off the Run Build Task, which builds all projects, as if they were all part of a big solution.
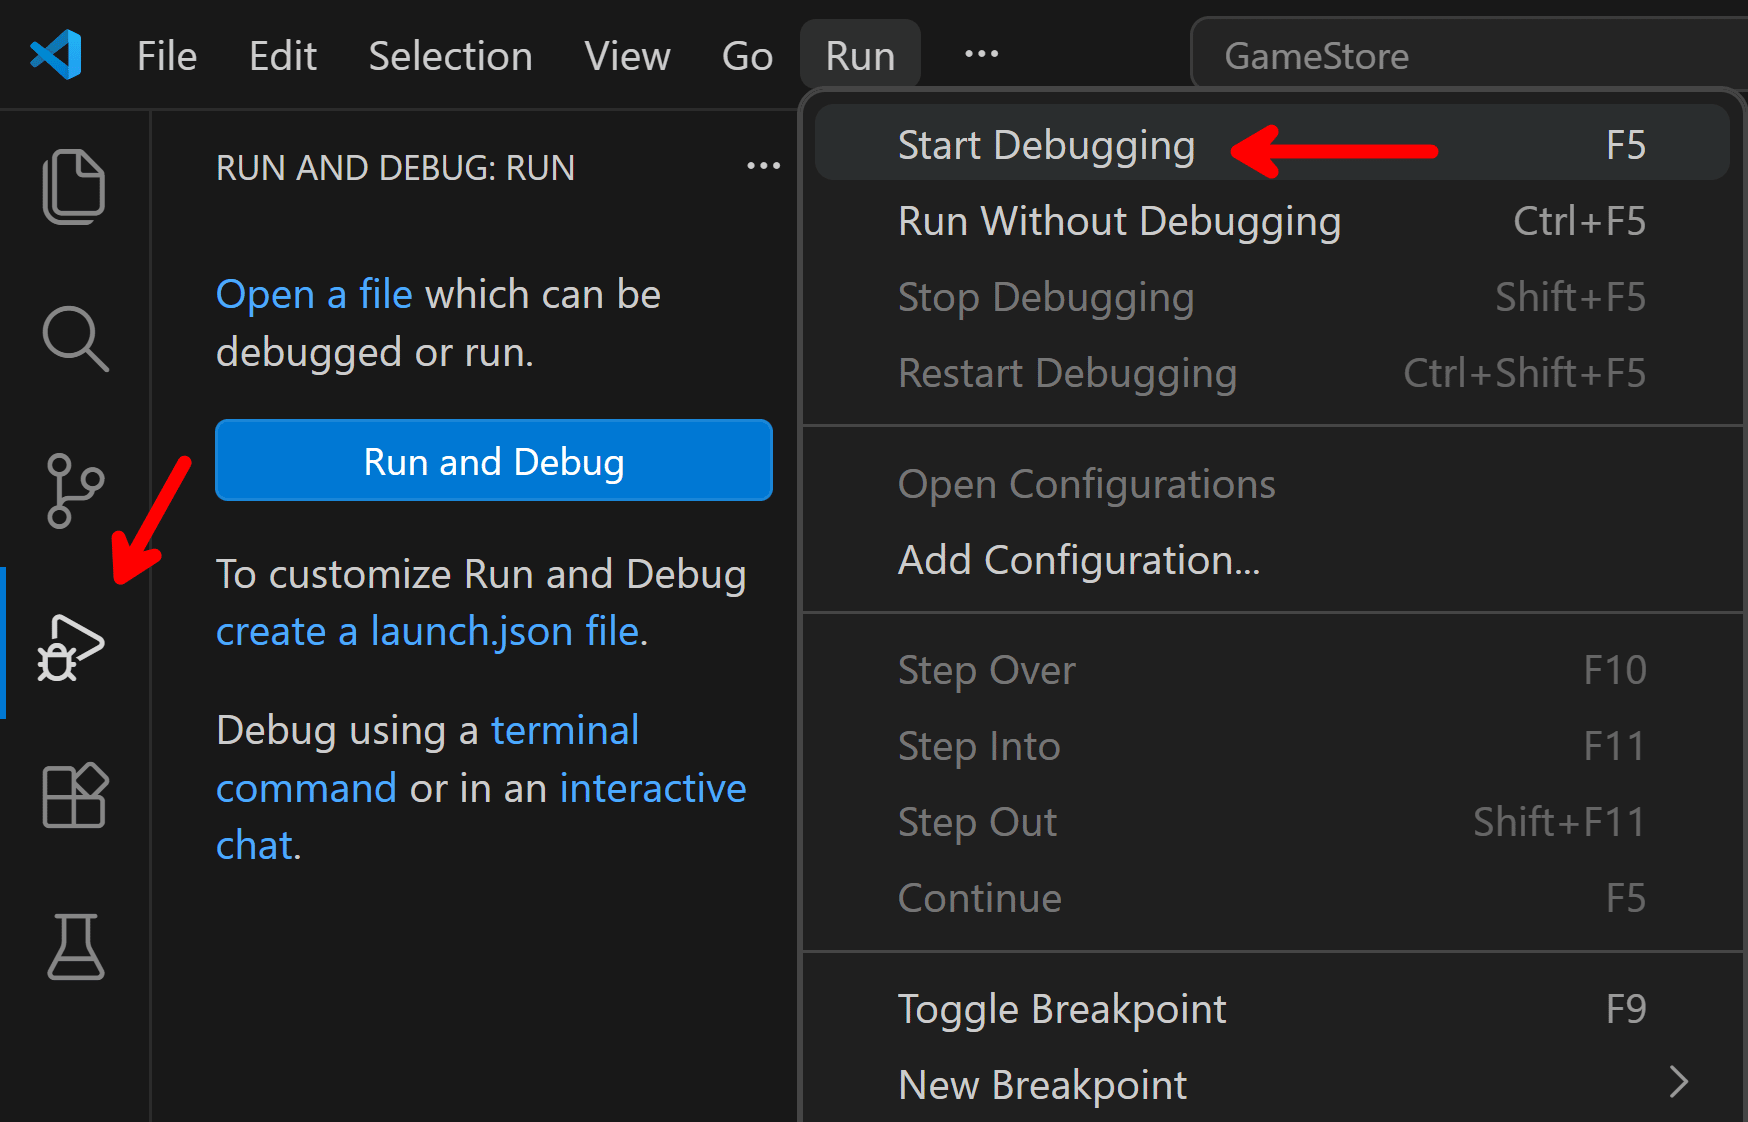
However, you won’t find any menu there to start debugging or run your project. To do that, you can use the Run and Debug view or the Run menu, or you can just hit F5.
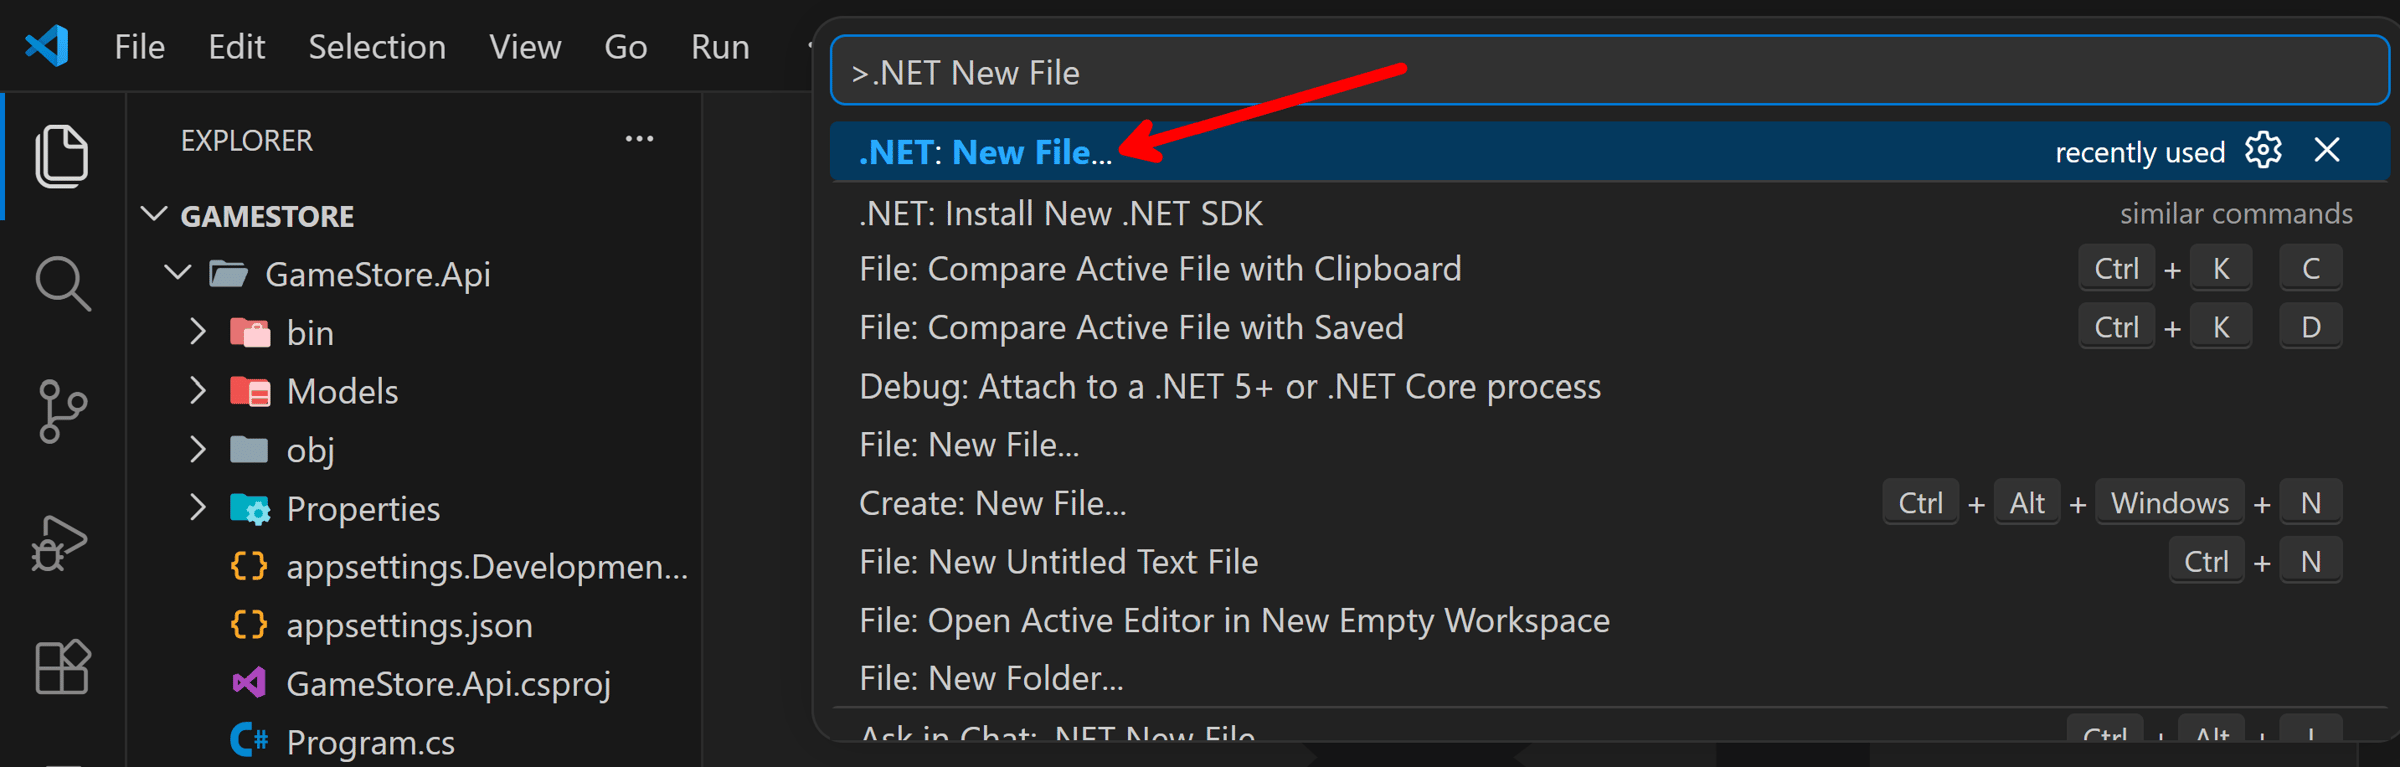
Creating new C# files
Sadly, you won’t be able to create new C# files by right clicking any folder in your C# projects. This is the biggest incomplete part of the new experience.
To create a new C# file, use Ctrl+Shift+P to open your Command Palette, and then look for the .NET: New File... entry.
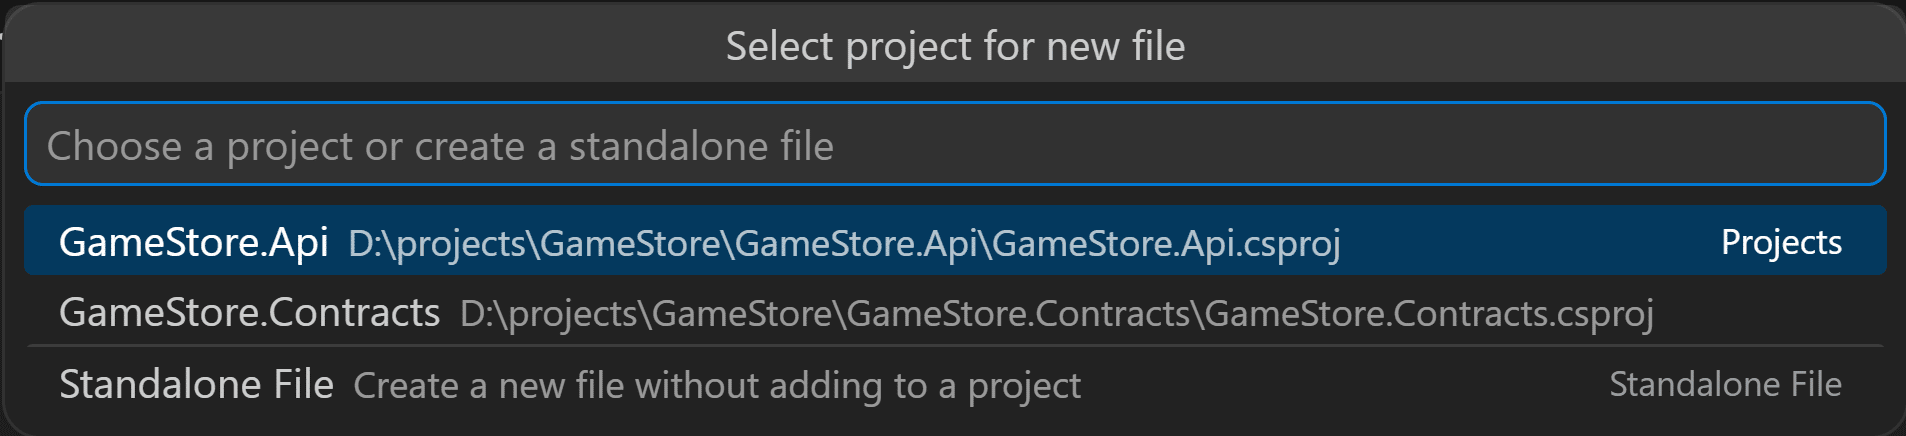
Then pick the project where the file should be added:
And then you’ll be able to select from the familiar project item templates:
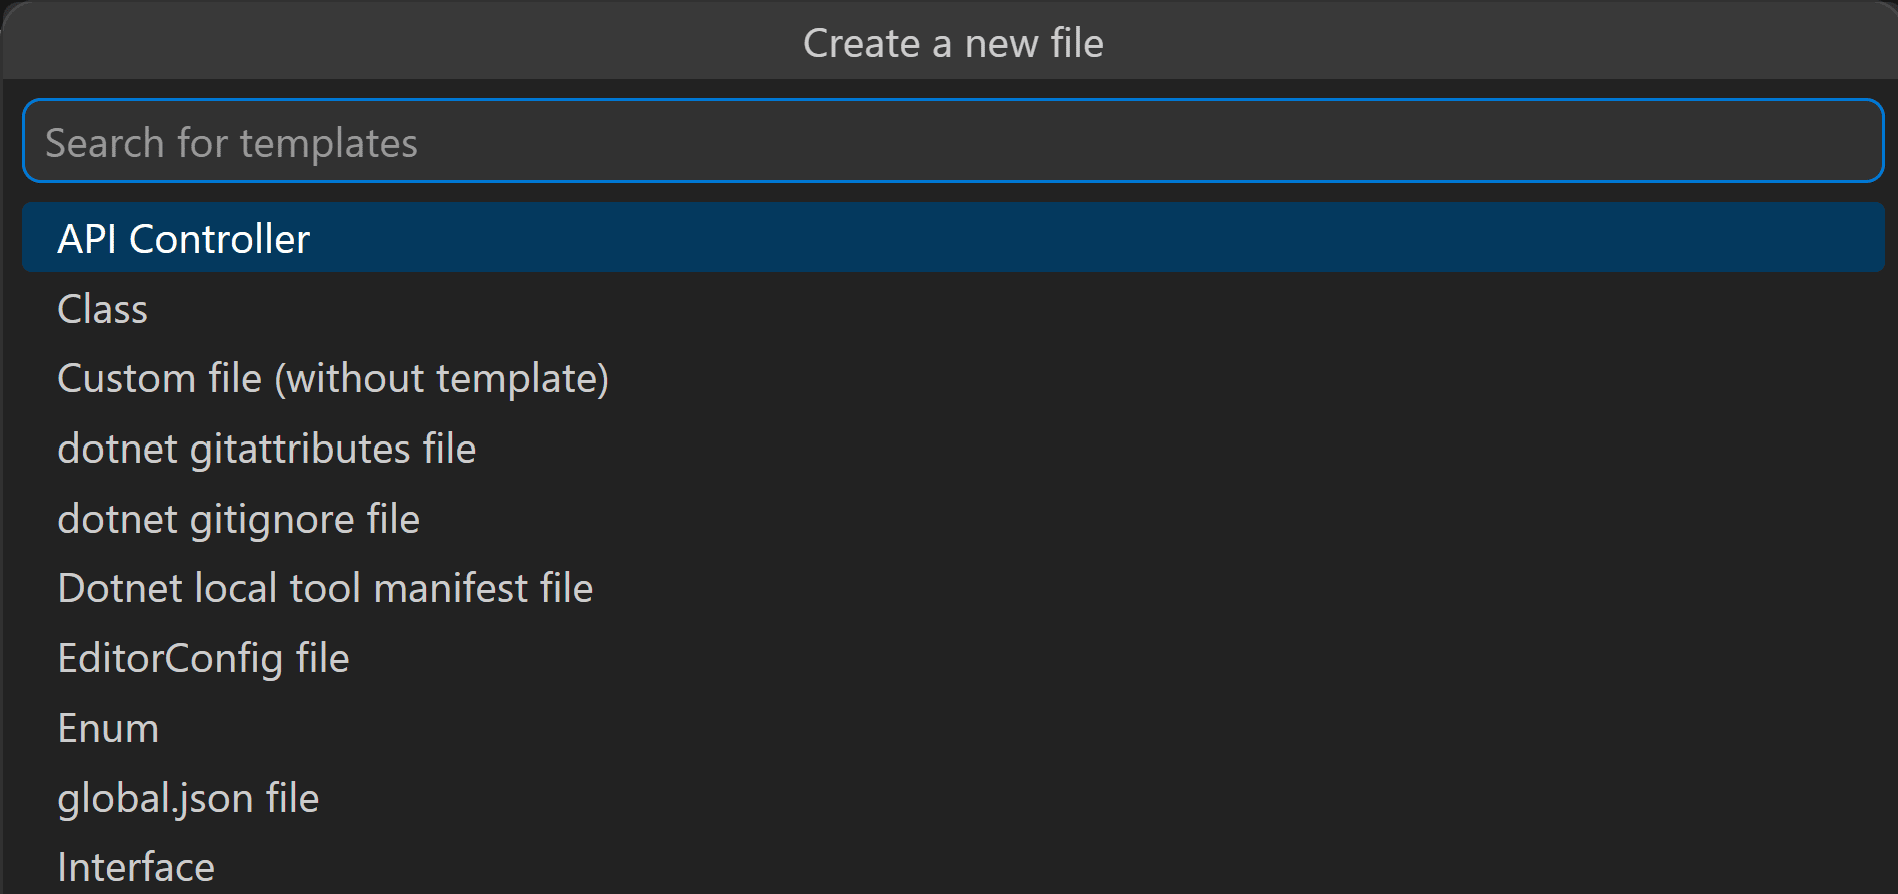
Unfortunately, this will always put the file at the root of the selected project. So, if you need the file in a subfolder, you’ll need to move it there manually.
Adding new projects
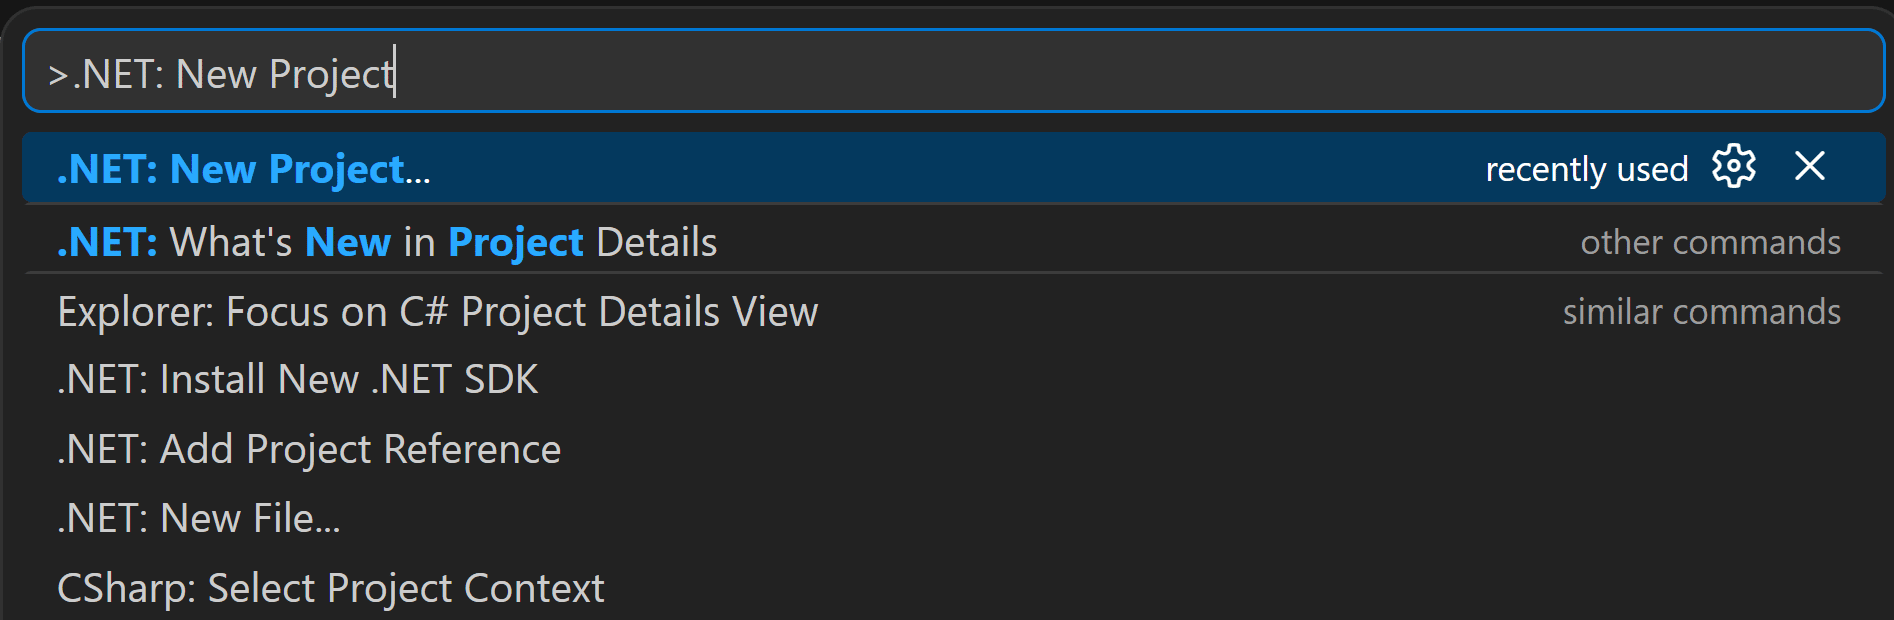
To add a new project, choose the .NET: New Project... option in your Command Palette:
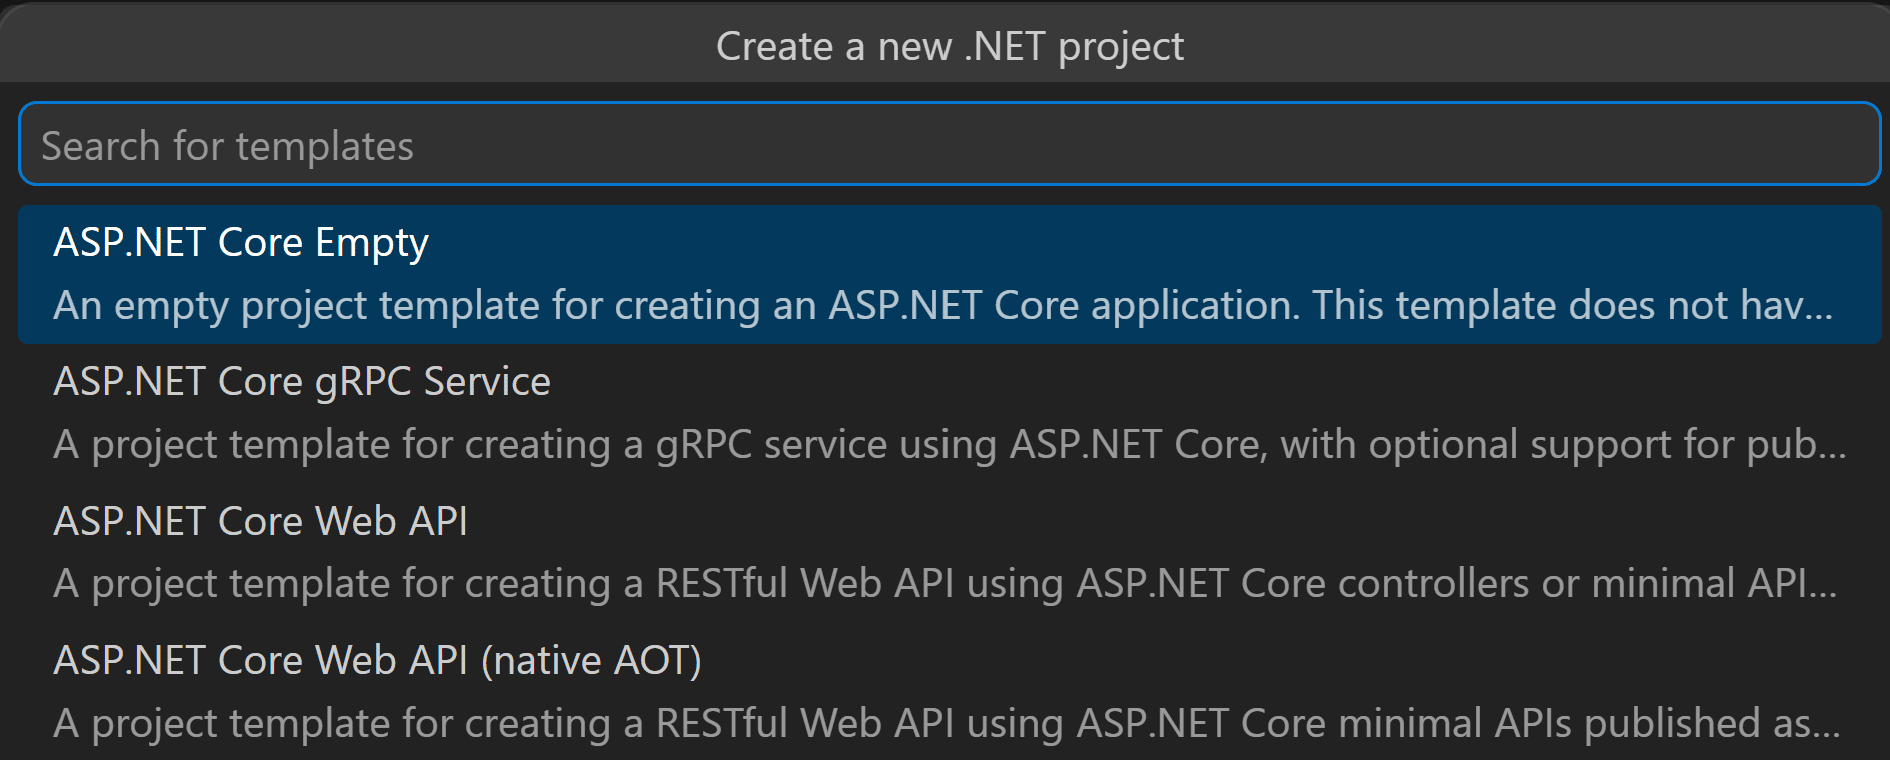
And then follow the wizard to pick your project template, project name and location:
Adding NuGet packages
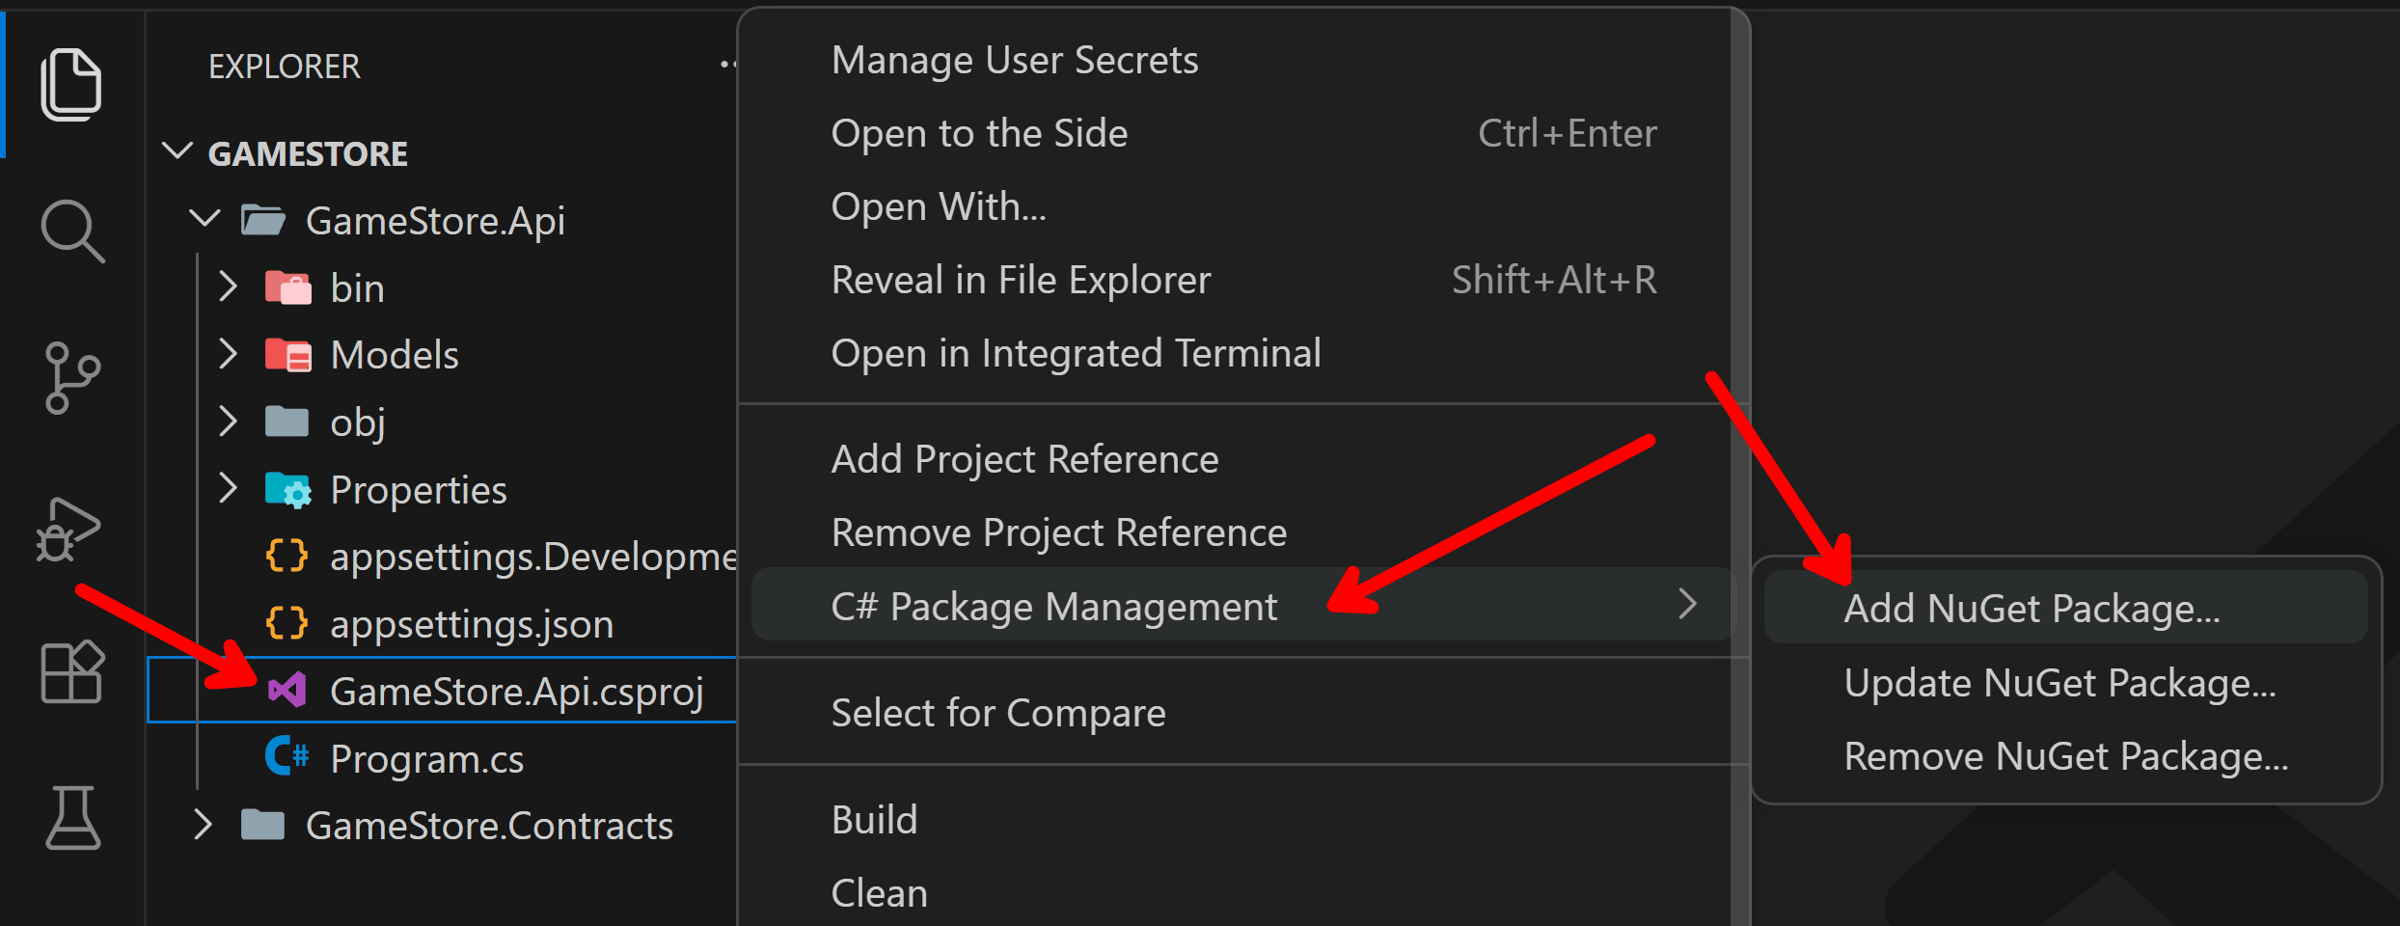
The C# package management experience has also moved to the file explorer. You will find the relevant menus by right clicking either your project folder or project file:
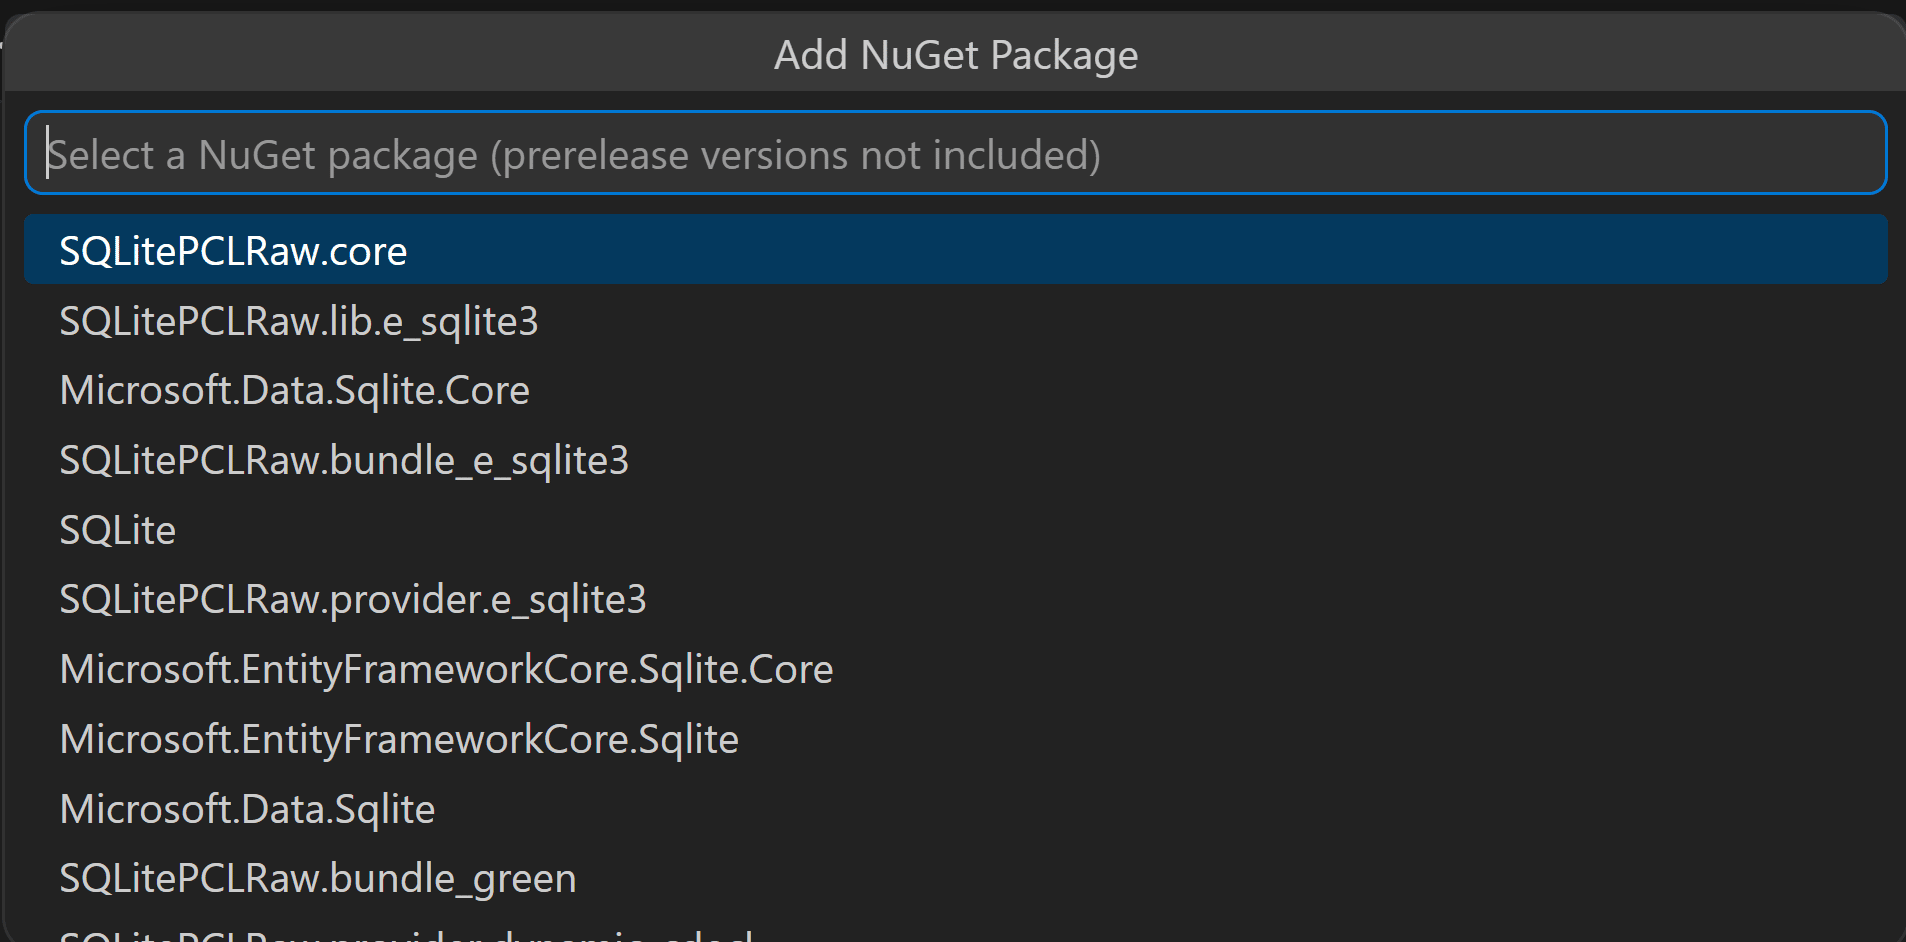
Find your NuGet package and version and you are good to go:
Adding a solution
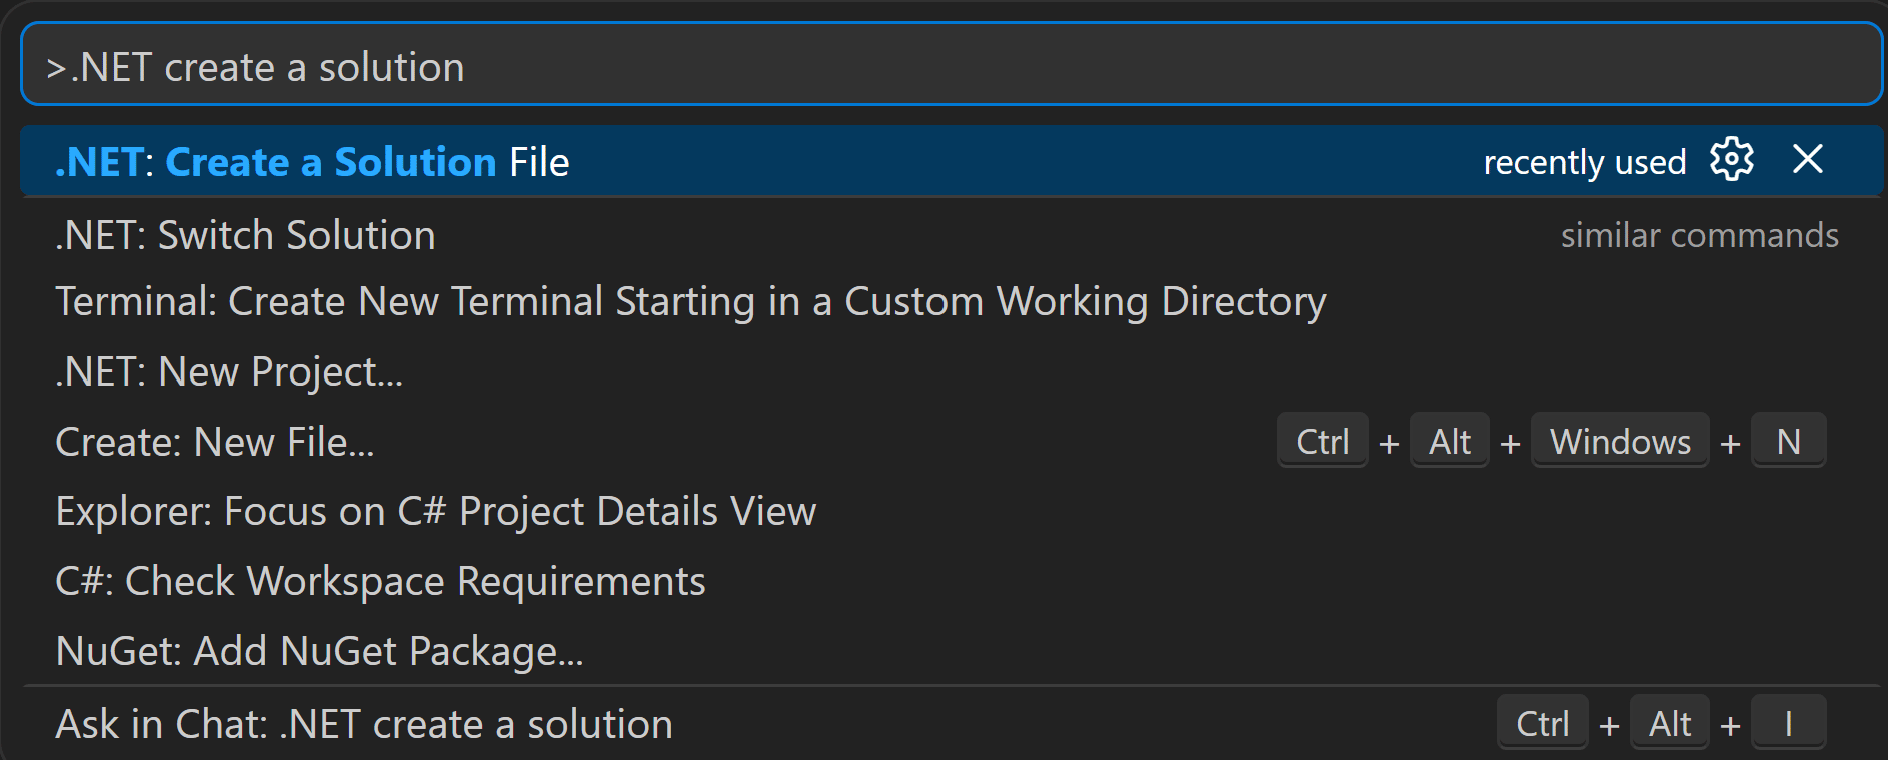
What if you want to, for some reason, add a solution to your workspace? It’s doable, via the Command Palette:
You can even pick the format:

And any time the C# Dev Kit detects a solution in your workspace, it will automatically switch to it as the main driver of the discovered projects, just like before:
Working with multiple solutions
It’s not uncommon to find multiple solutions in larger codebases. How does the updated C# Dev Kit experience deal with this?
Well, by default, you will start in C# Workspace Dev Mode, just as if you had no solution:
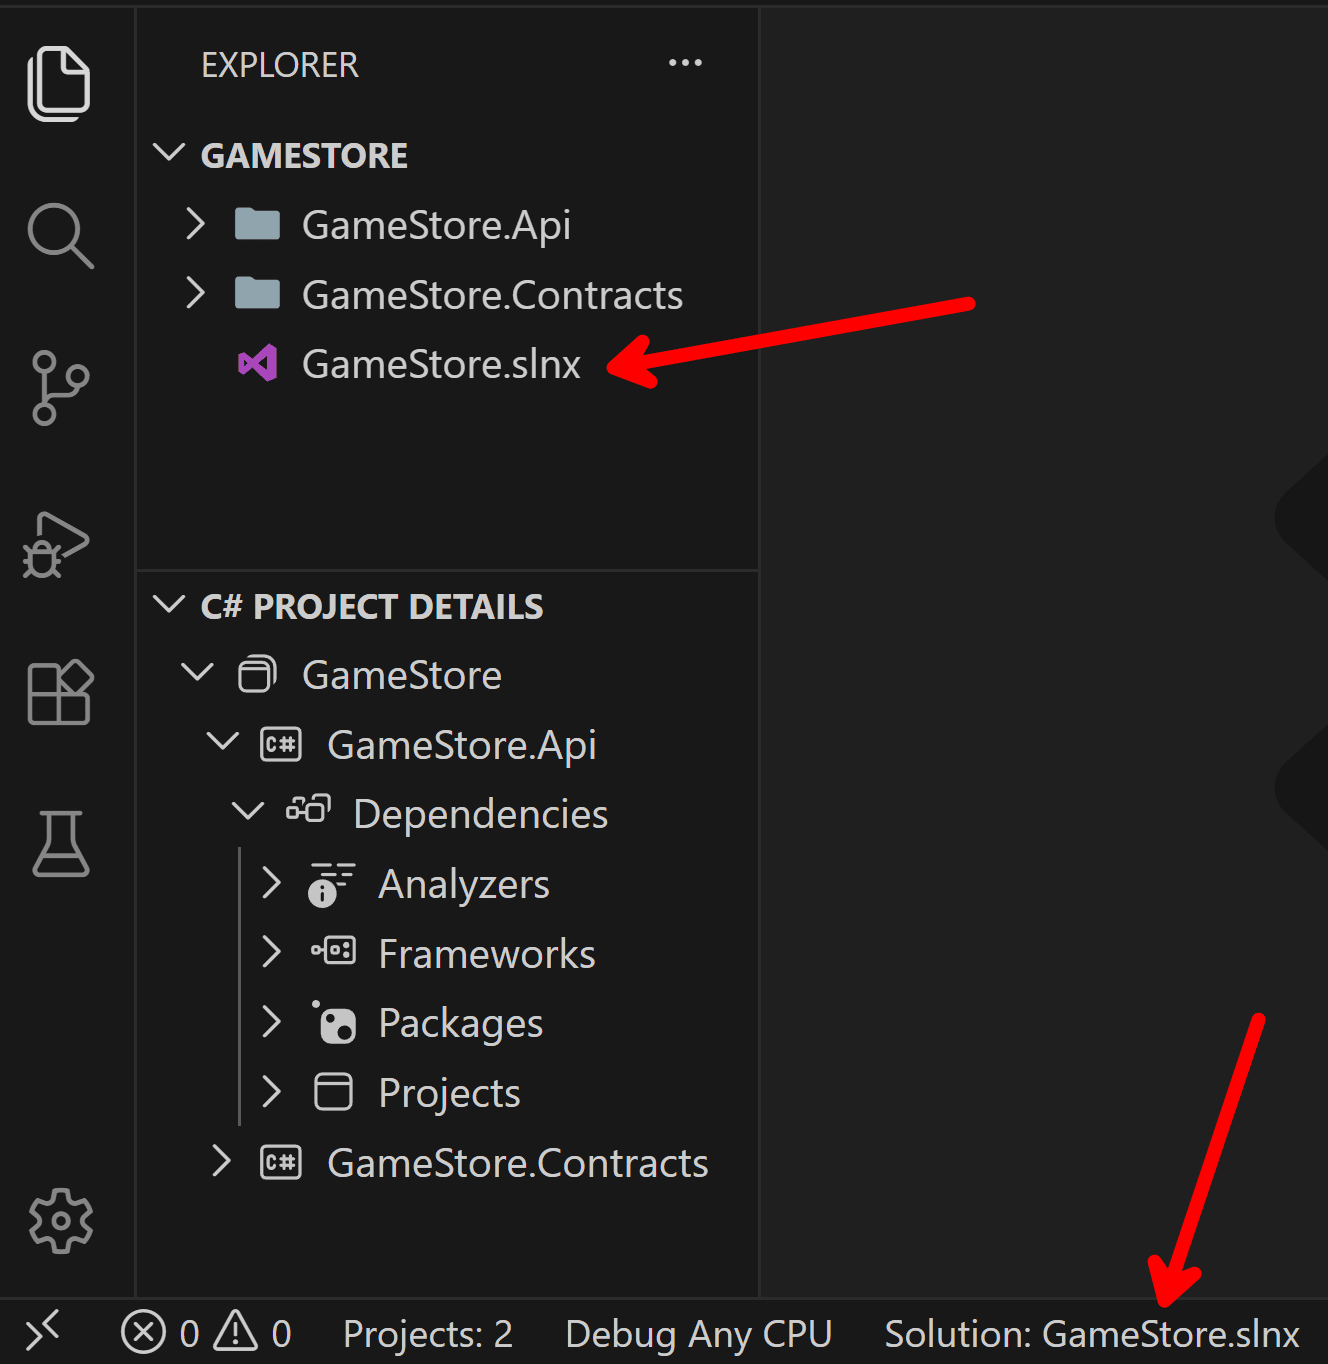
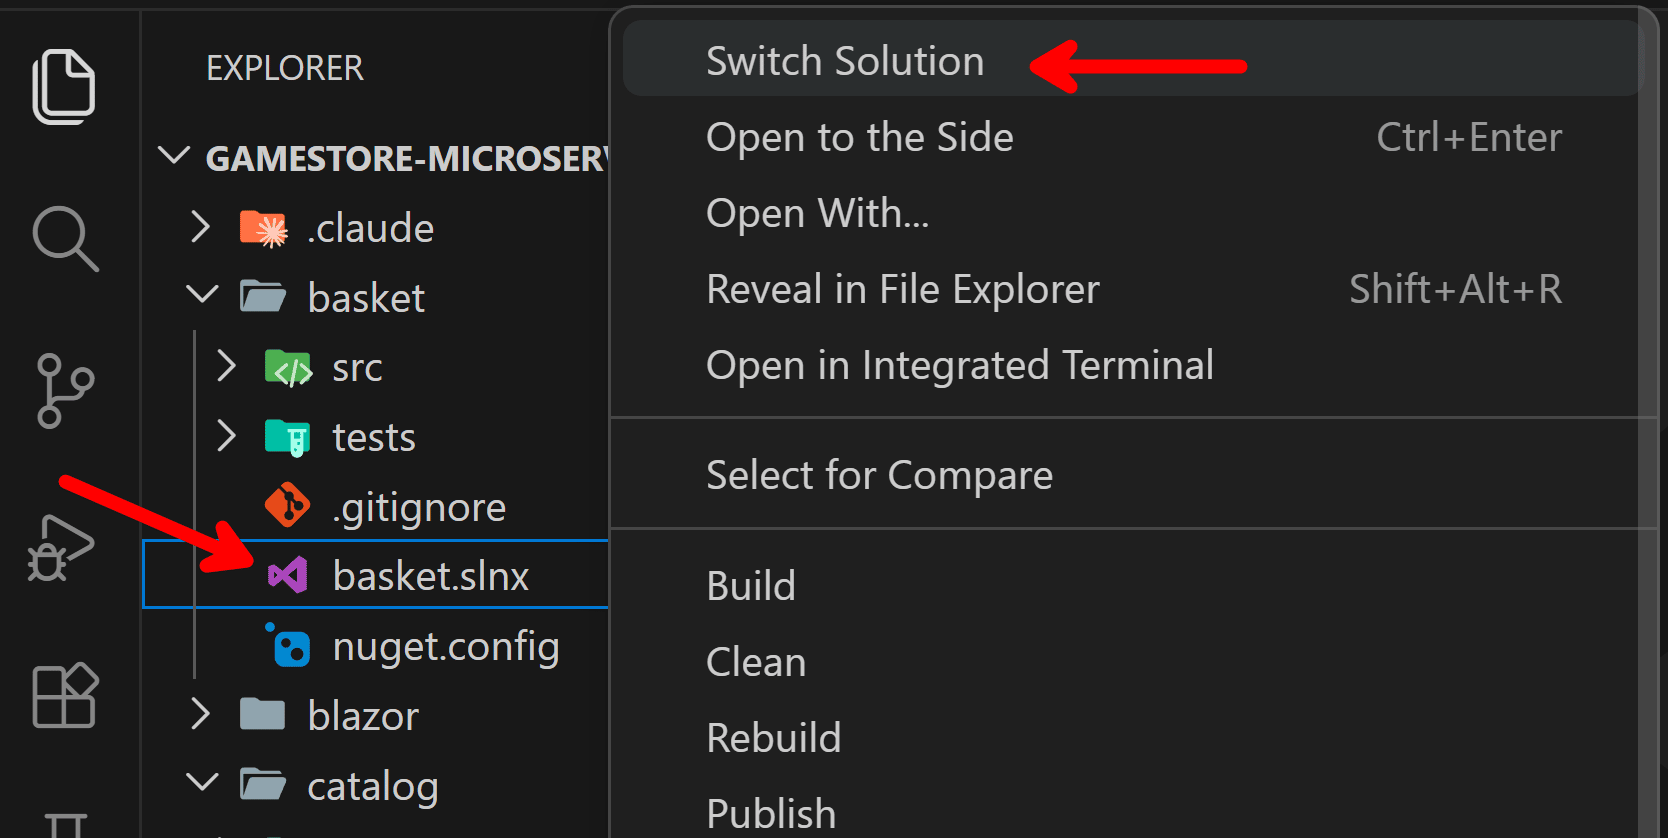
But if you need to set a specific solution as your project discovery root, you can always switch to it by right clicking it on the file explorer:
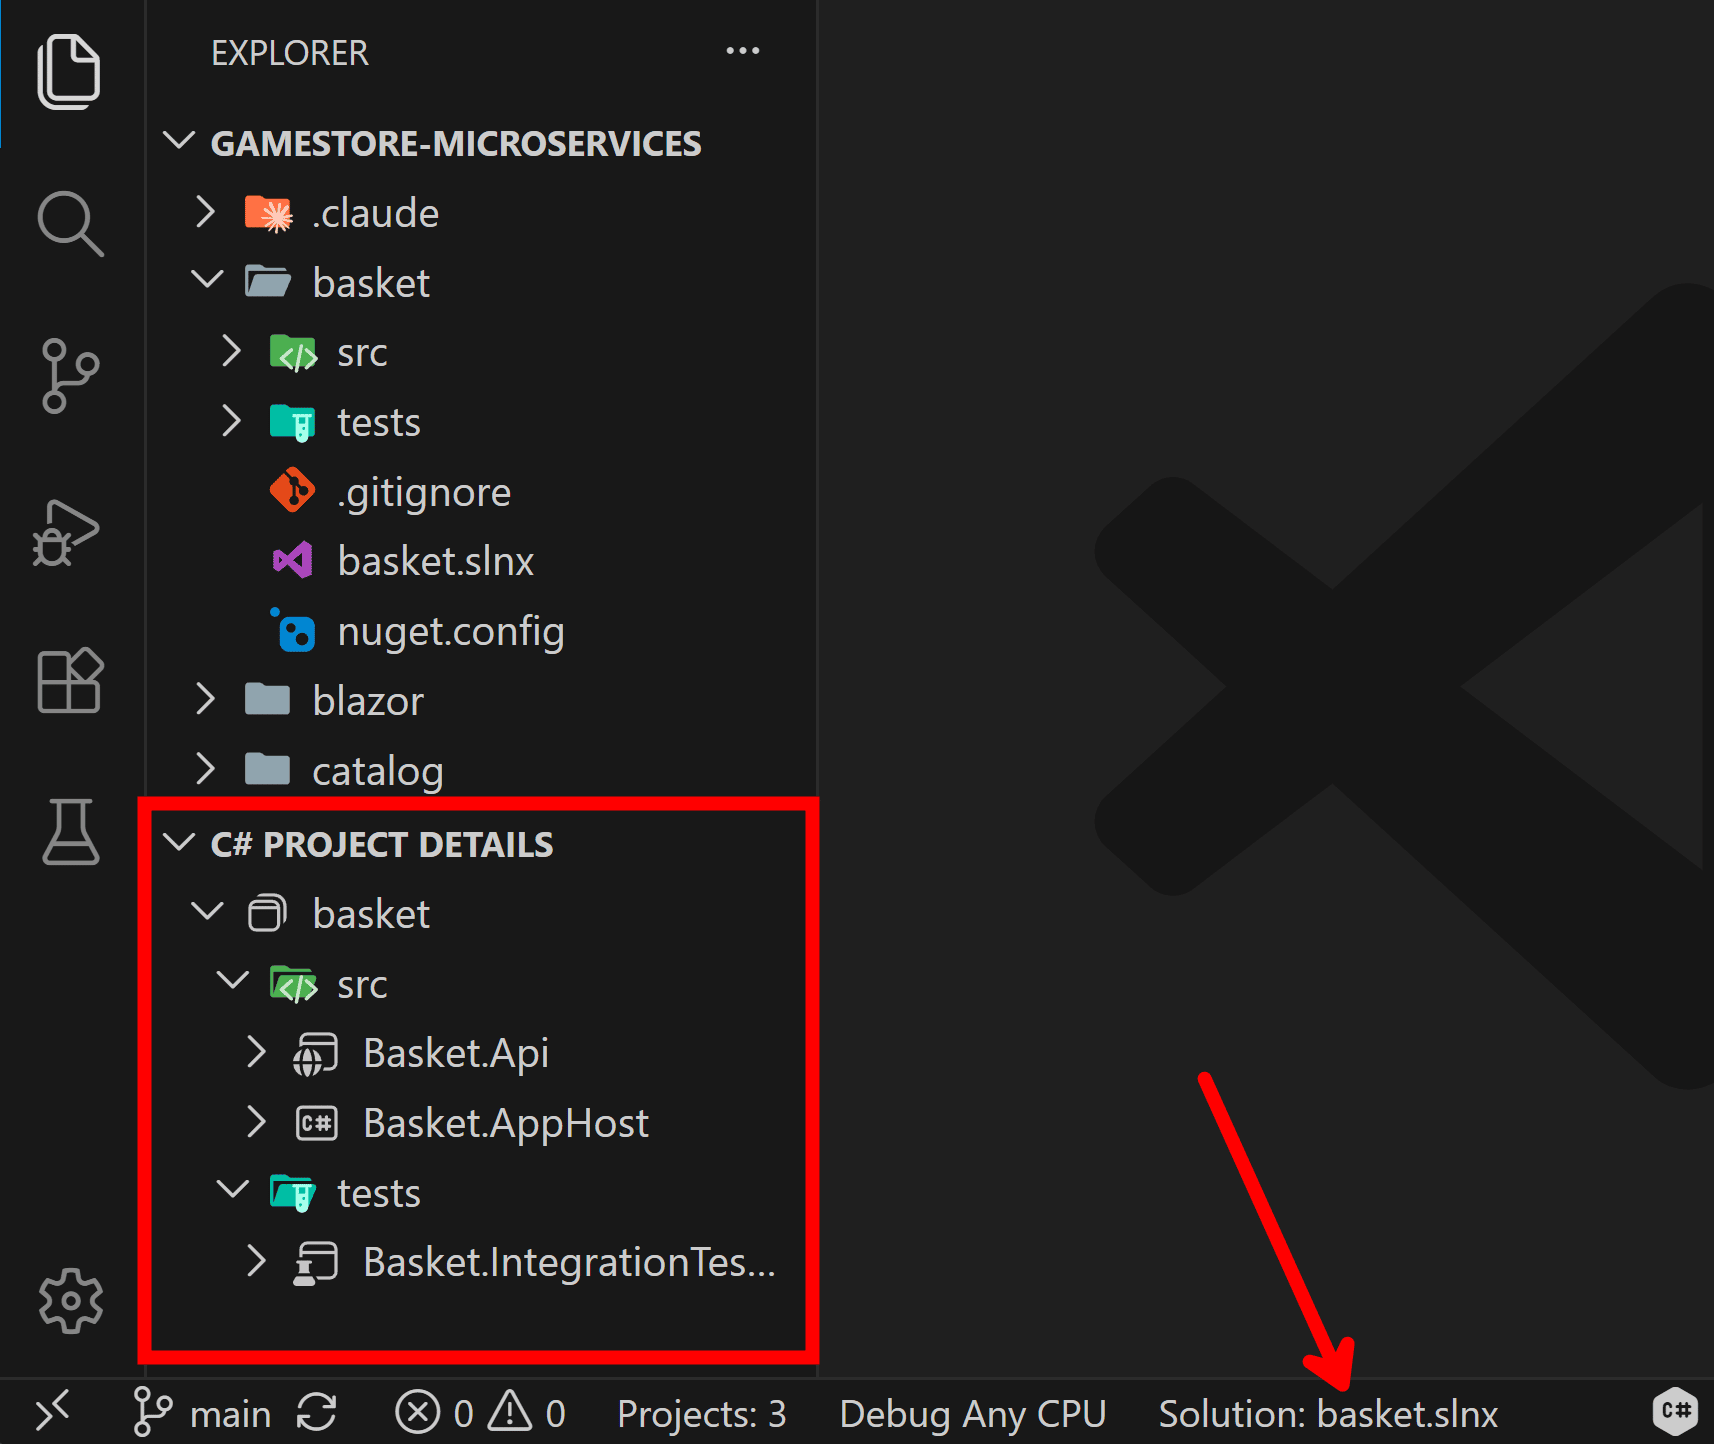
And you’ll notice how the C# Project Details window and status bar reflect the selected solution.
Wrapping up
The Solution Explorer is not coming back. And once the C# Dev Kit team finishes the job, I don’t think you’ll miss it.
For now, the Command Palette plus the file explorer context menus cover most of your day to day: new files, new projects, building, debugging, packages. The rest is a few weeks of muscle memory.
If you learned .NET inside Visual Studio, working without a solution will feel wrong for a while. That’s fine. Your projects don’t care which tree view you use to open them.
Prefer to watch the full walkthrough? Here’s the video:
And that’s it for today.
See you next Saturday.
Whenever you’re ready, here’s how I can help:
The .NET Developer Bootcamp: A complete path from ASP.NET Core fundamentals to building, containerizing, and deploying production-ready, cloud-native apps on Azure.
