Read time: 5 minutes
A few days ago, during a key 3-day enrollment window for the .NET Academy All-Access Pass, a number of customers encountered a critical error on the Thinkific checkout page:
“Your order has timed out. Please try again.”
Thinkific is the external learning platform I use, and despite engaging their support team as soon as the issue was reported, it took several hours to resolve.
The issue was due to a misconfigured product ID, but this delay cost me sales, time, and peace of mind.
As a software engineer, I’ve always known that I could own this part of the flow. And that’s exactly what I’ve started doing—by replacing Thinkific’s Stripe integration with my own custom ASP.NET Core + Stripe checkout integration, deployed to Azure.
Today, I’ll walk you through the first working slice of that integration.
Step 1: Create Stripe products and prices
Using my Stripe dashboard (in test mode), I defined two test products:
- .NET Backend Developer Bootcamp
- .NET Academy All-Access Pass
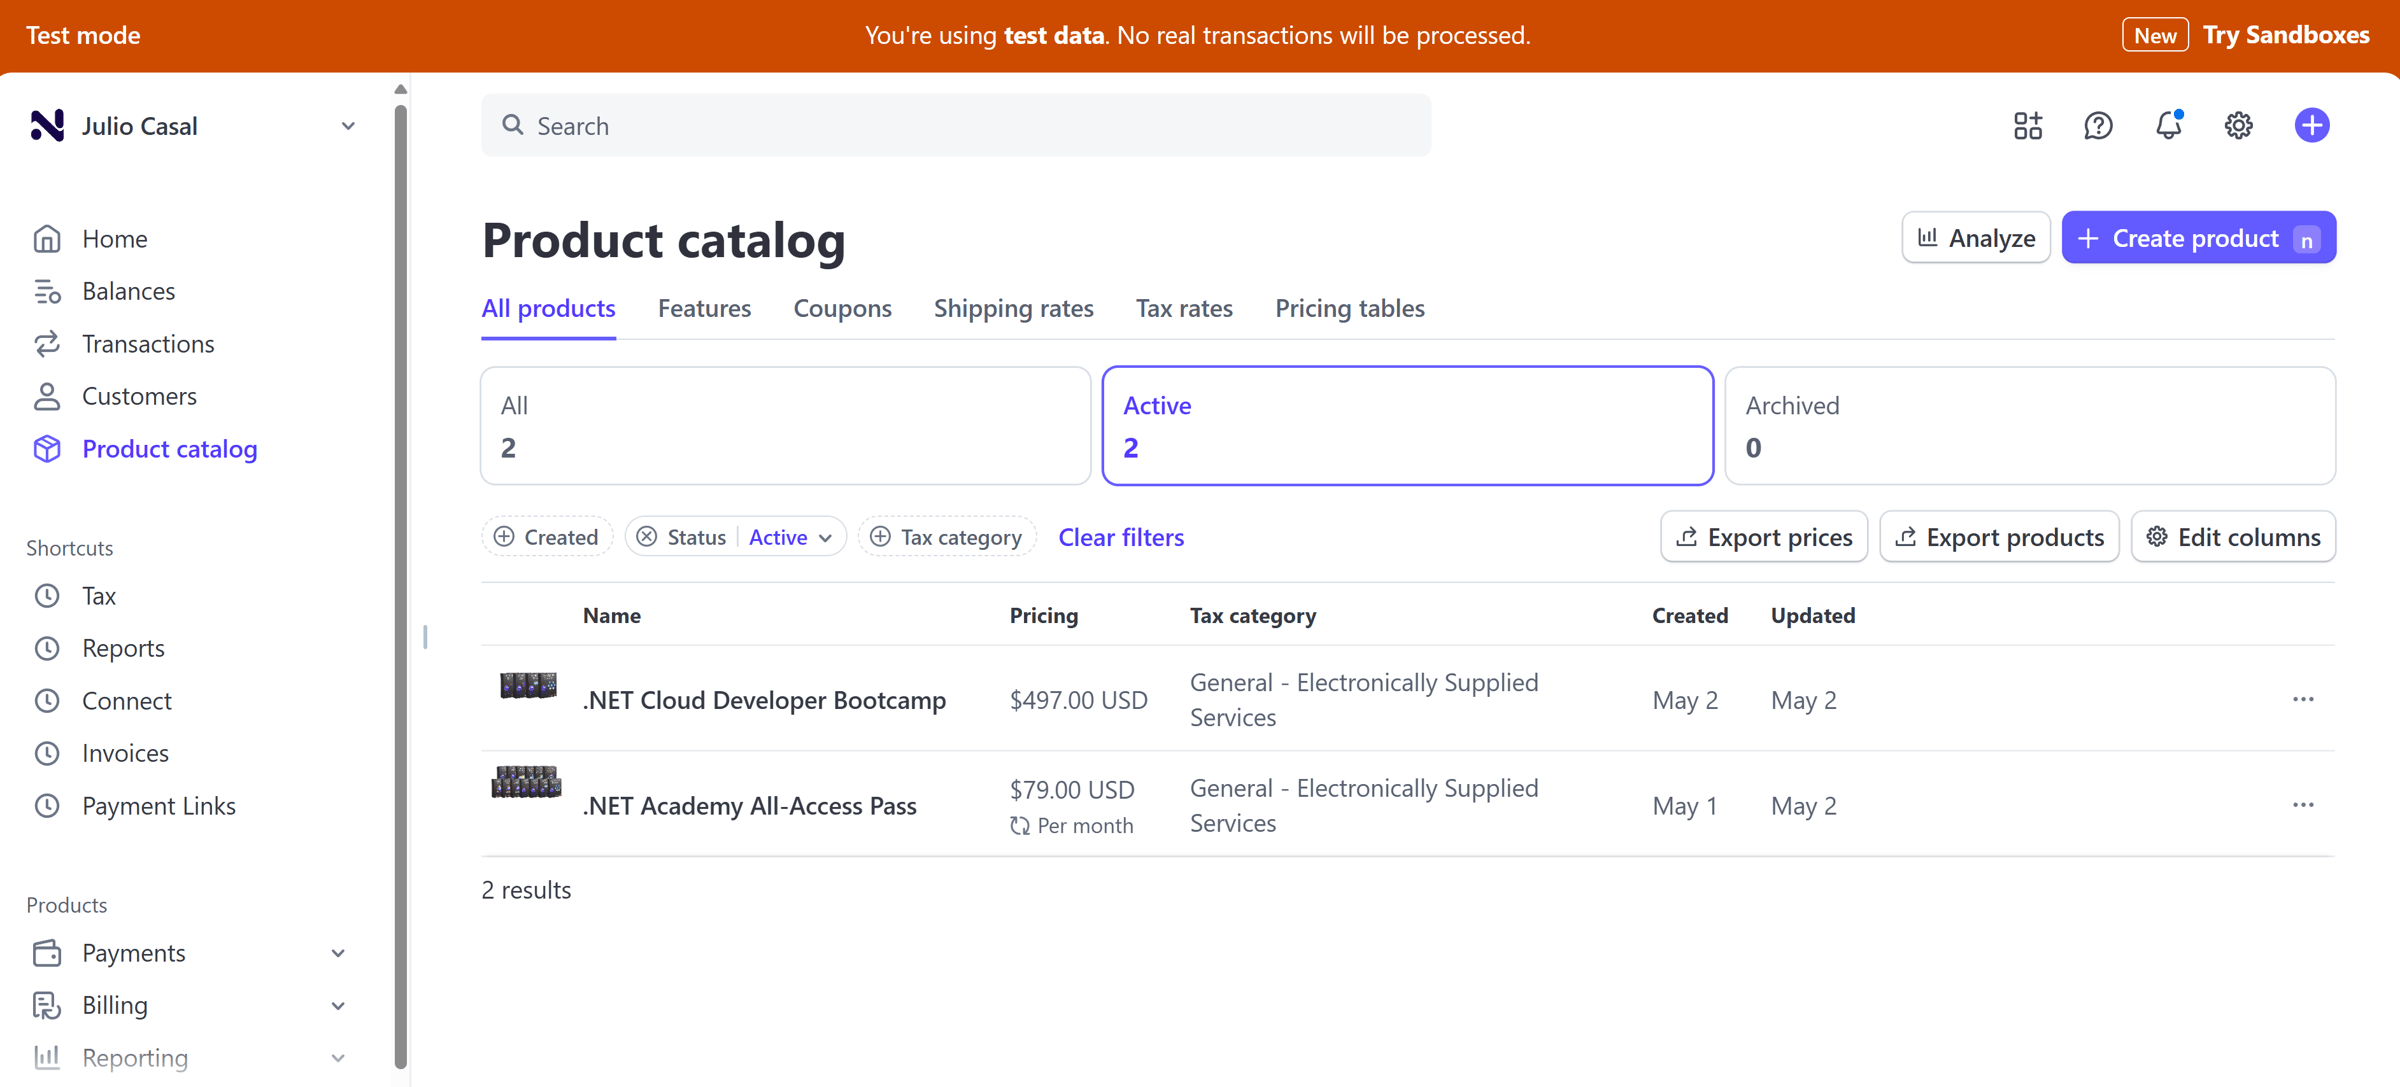
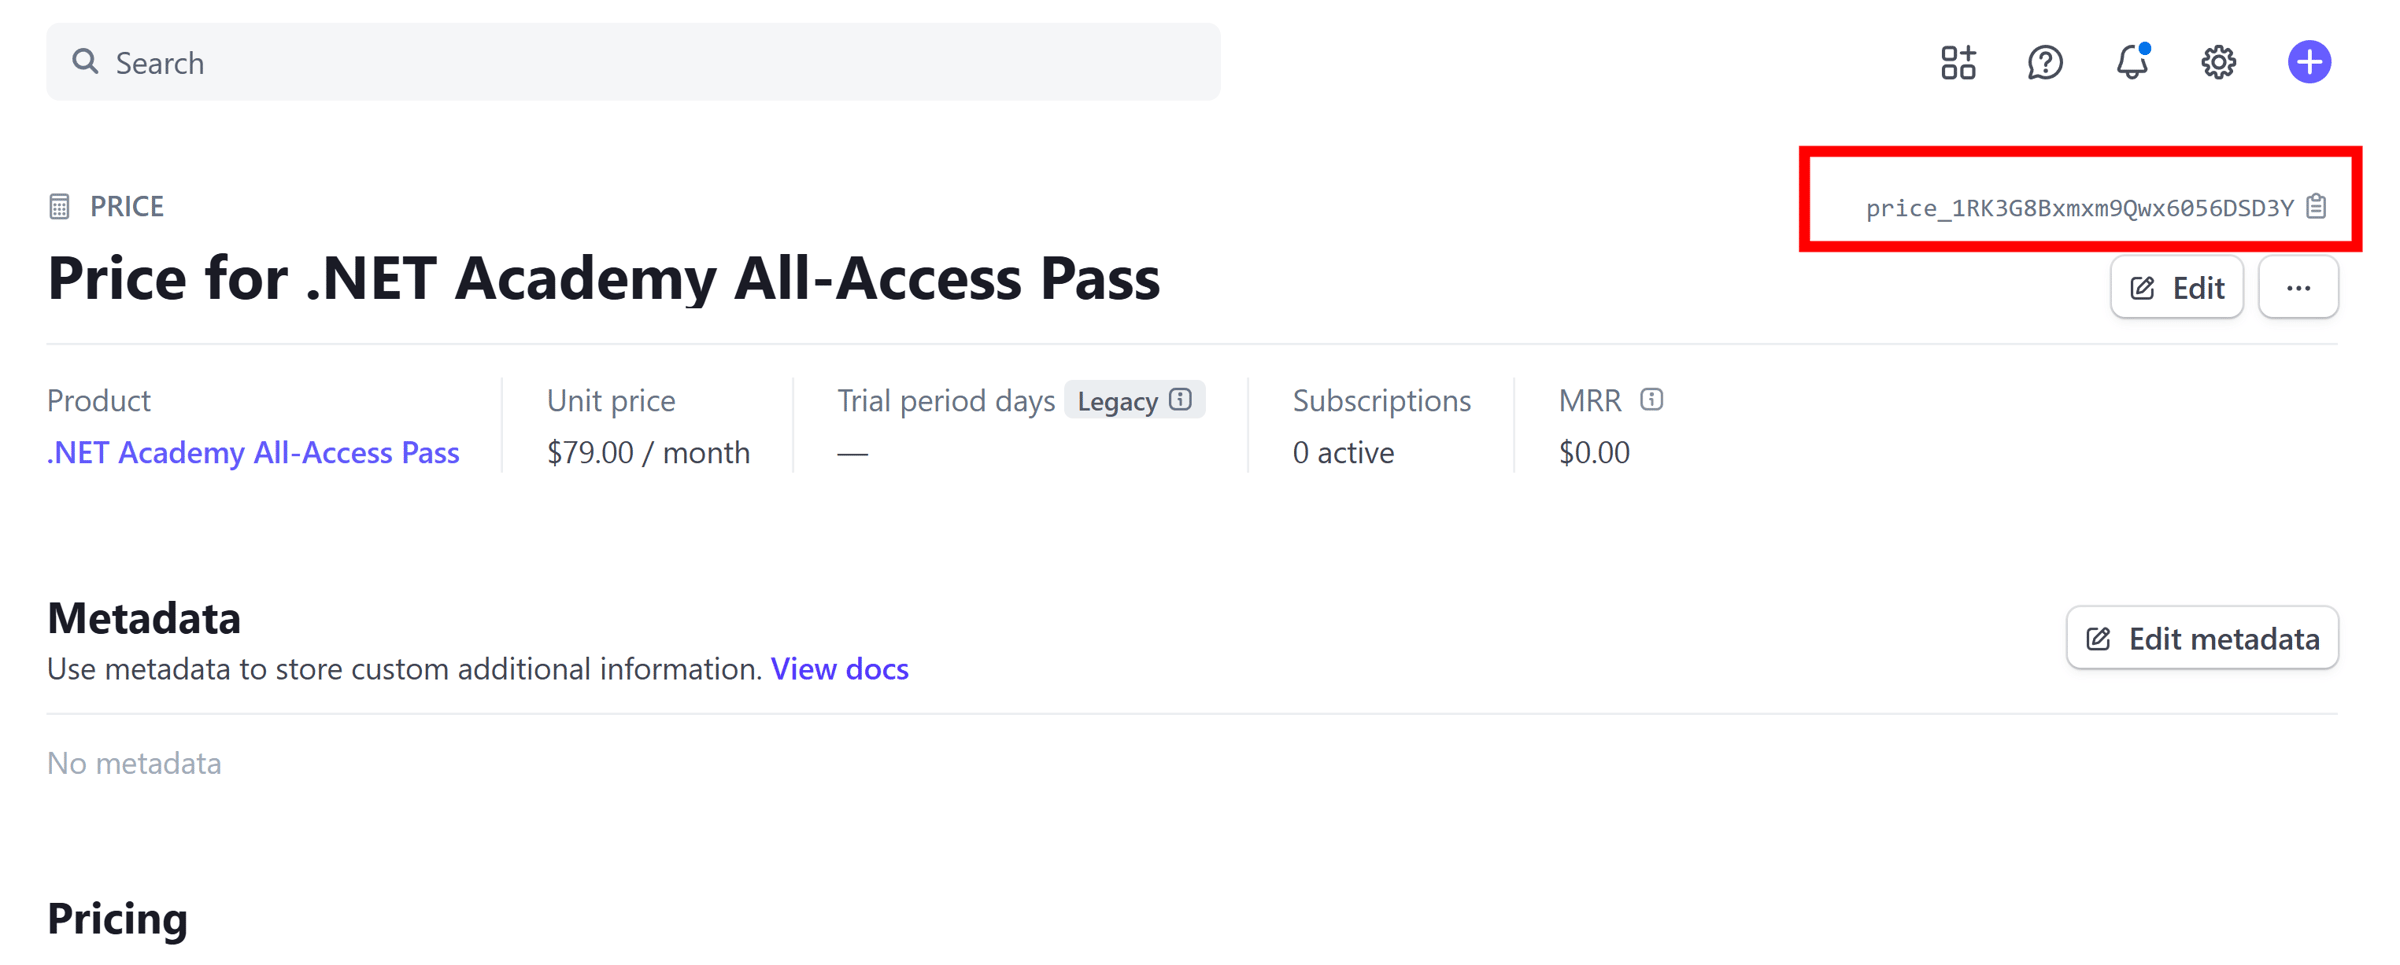
Each product has one or more prices associated with it, which define the billing model (e.g. one-time vs. subscription).
Stripe generates a Price ID for each price configuration—this is what we’ll use in our checkout logic.
Step 2: Build the create checkout session endpoint in ASP.NET Core
I spun up a minimal API called payments-api, which will act as a standalone microservice. I installed the official Stripe .NET SDK via NuGet:

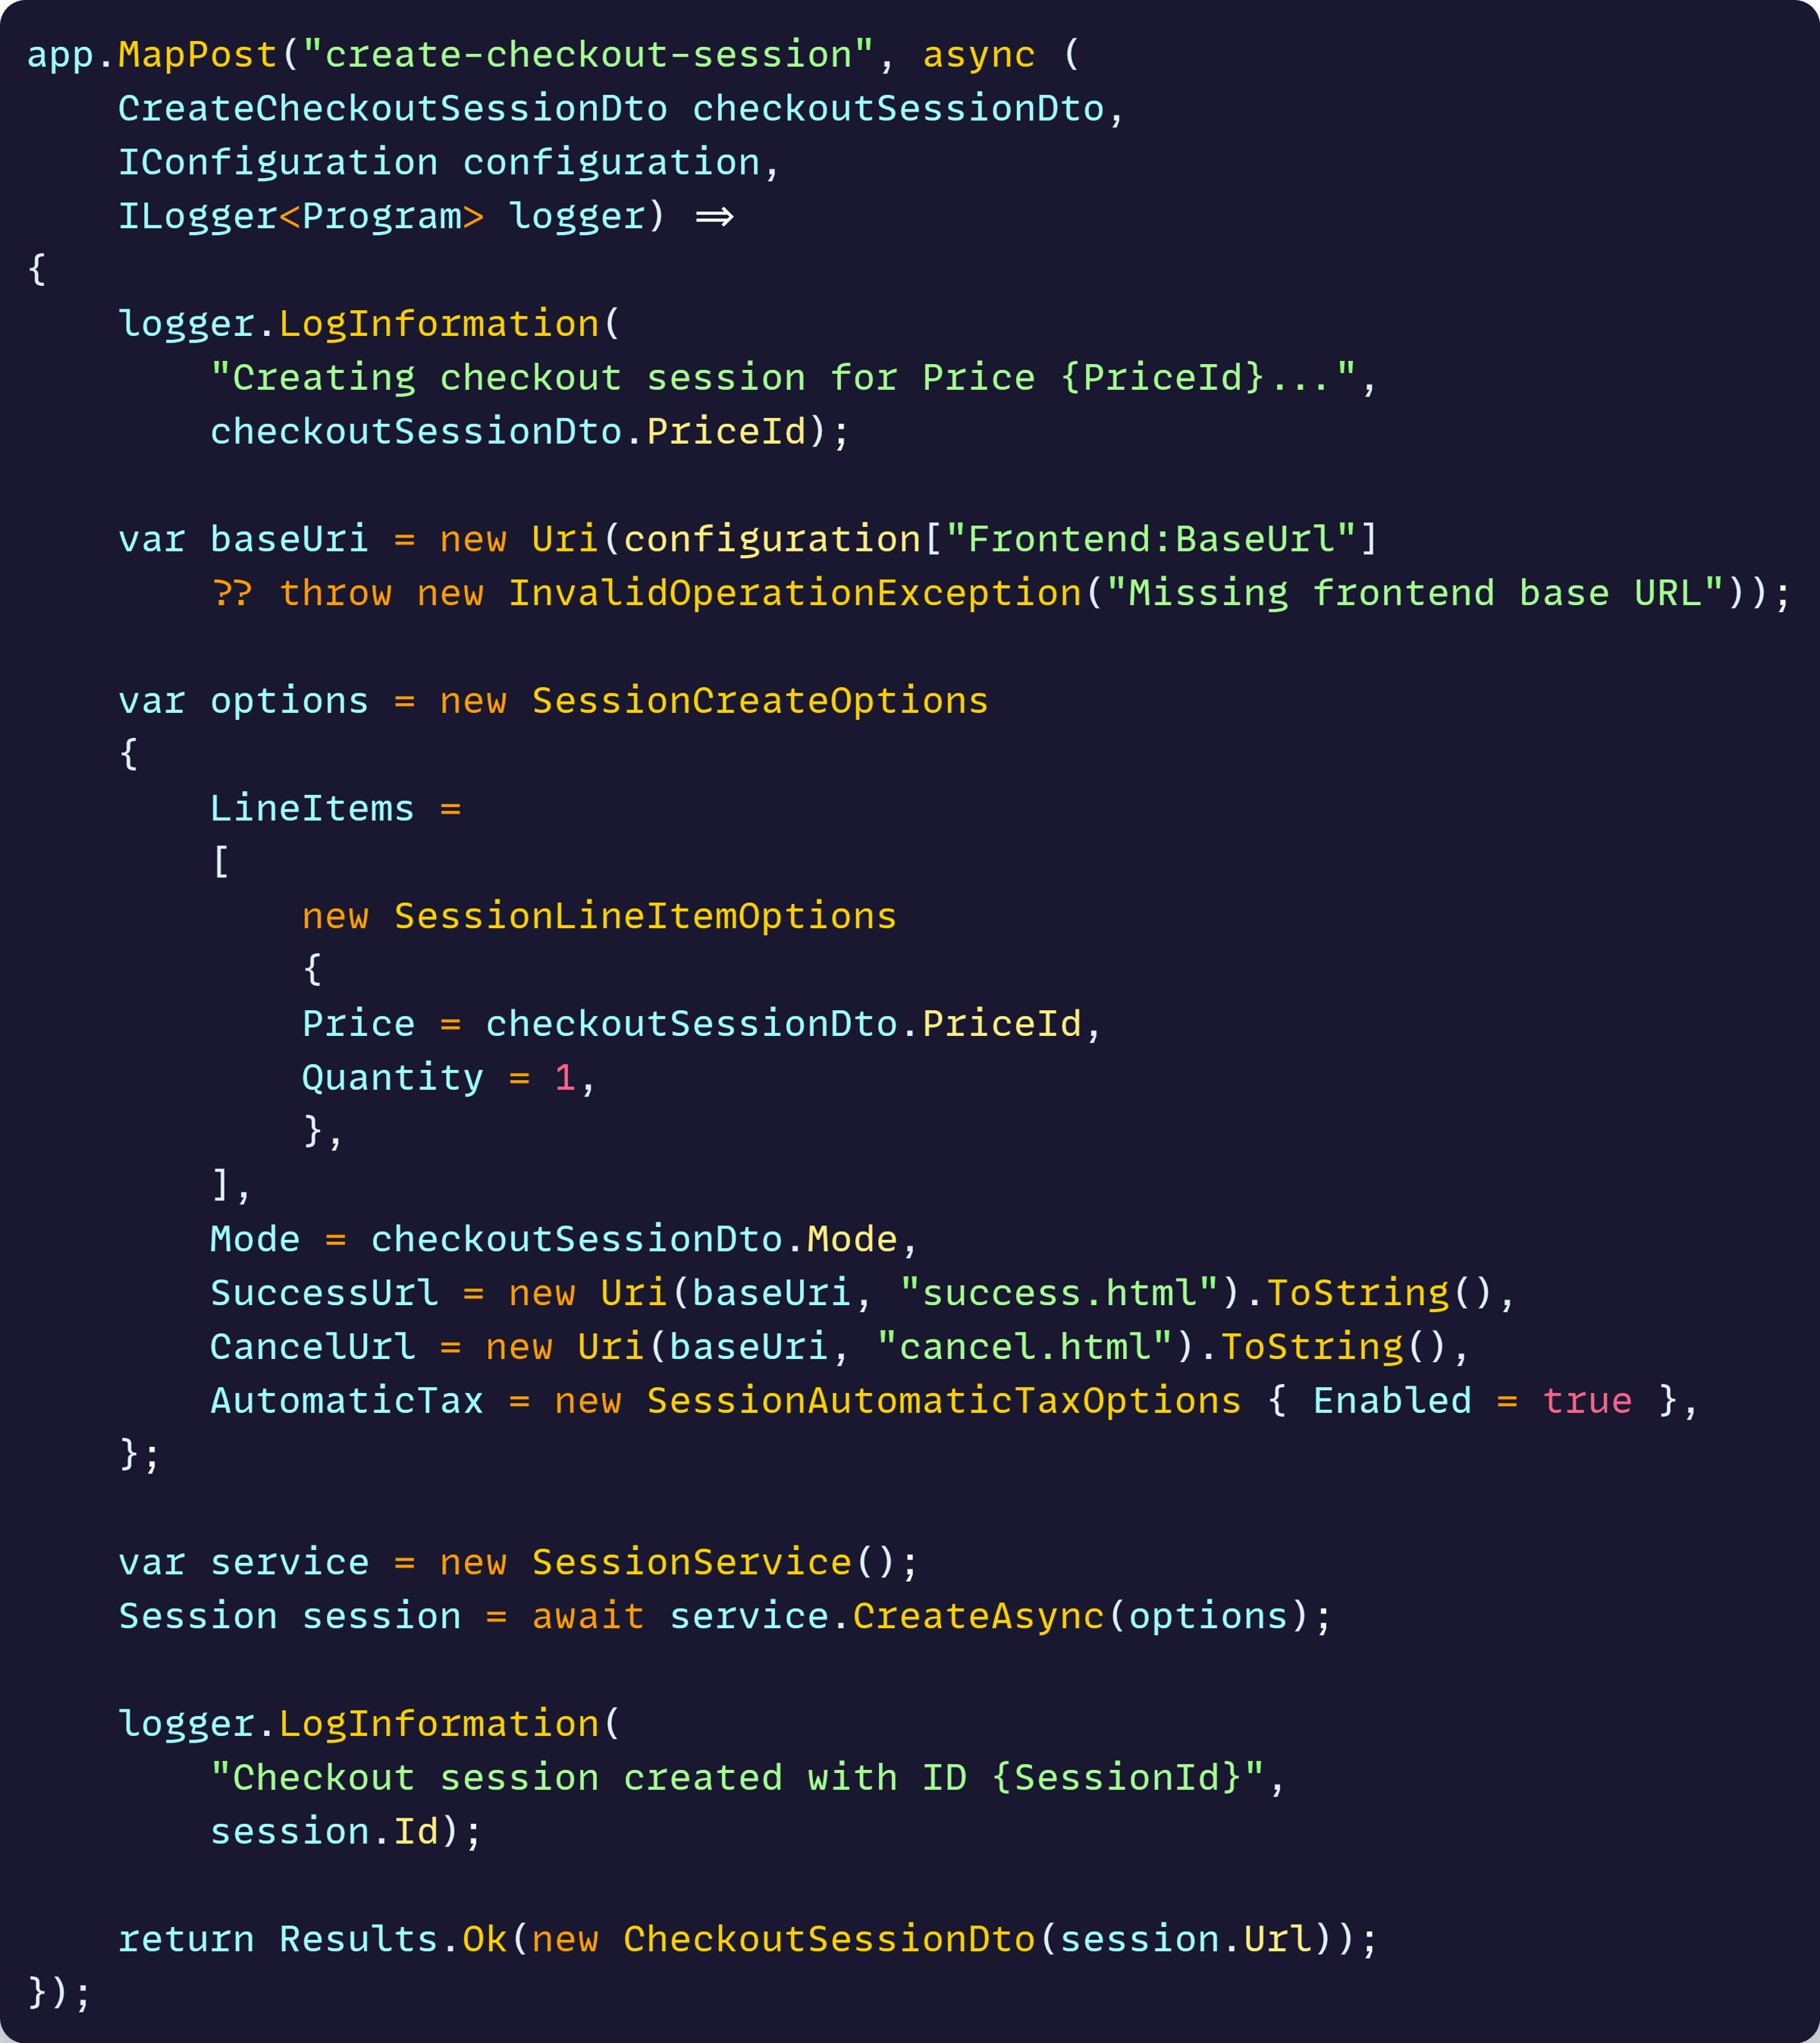
Then, I created a vertical slice feature called CreateCheckoutSession. This is a POST endpoint that accepts this DTO:

The endpoint constructs SessionCreateOptions, then calls Stripe’s API via SessionService:
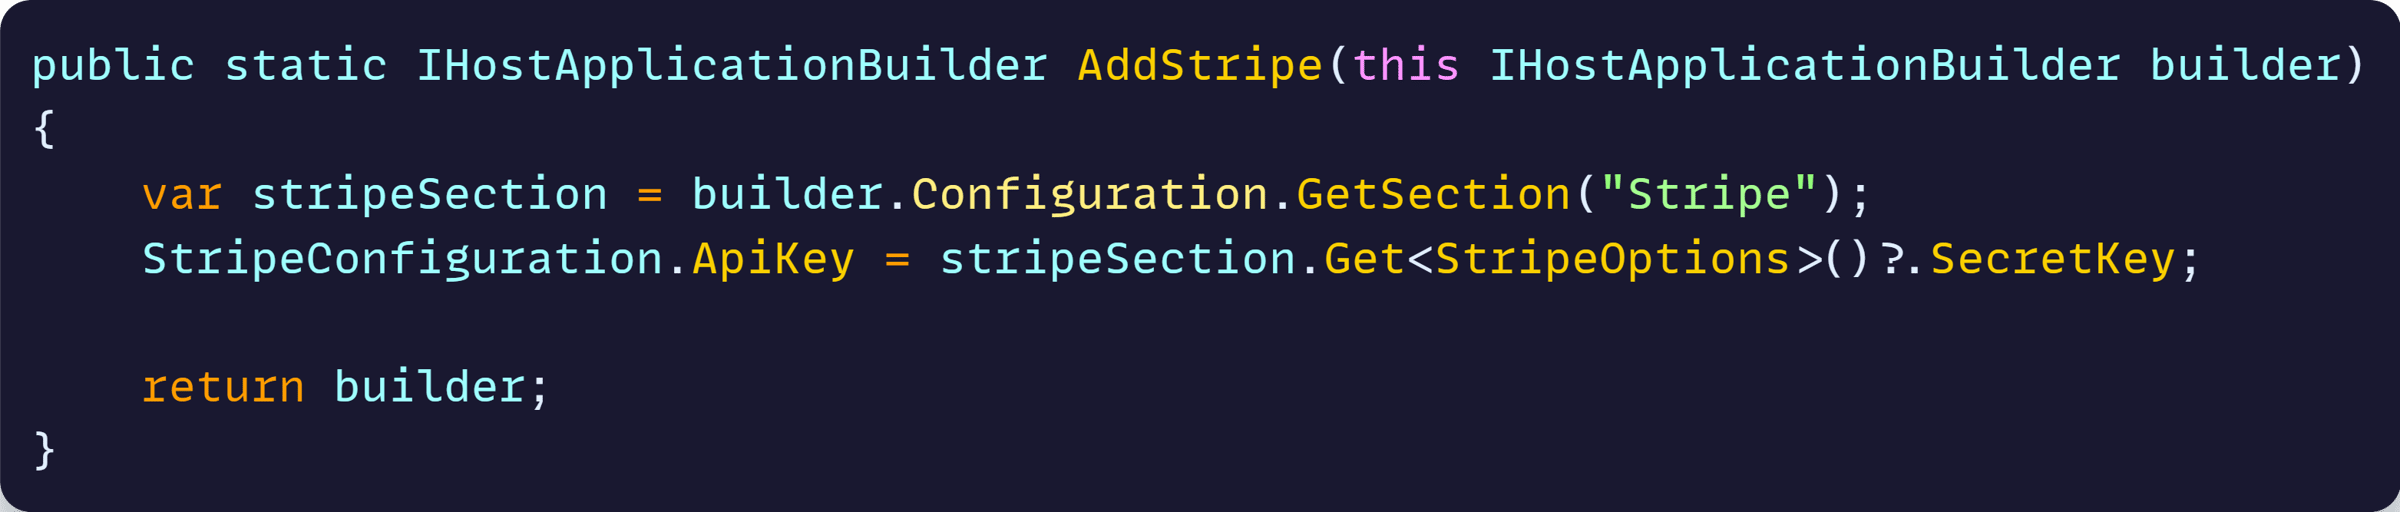
We also need to configure Stripe’s API key, which is available in their Developers dashboard, and I read from user secrets:
Stripe handles the rest—UI, taxes, even payment method selection.
Step 3: Test it with a static page
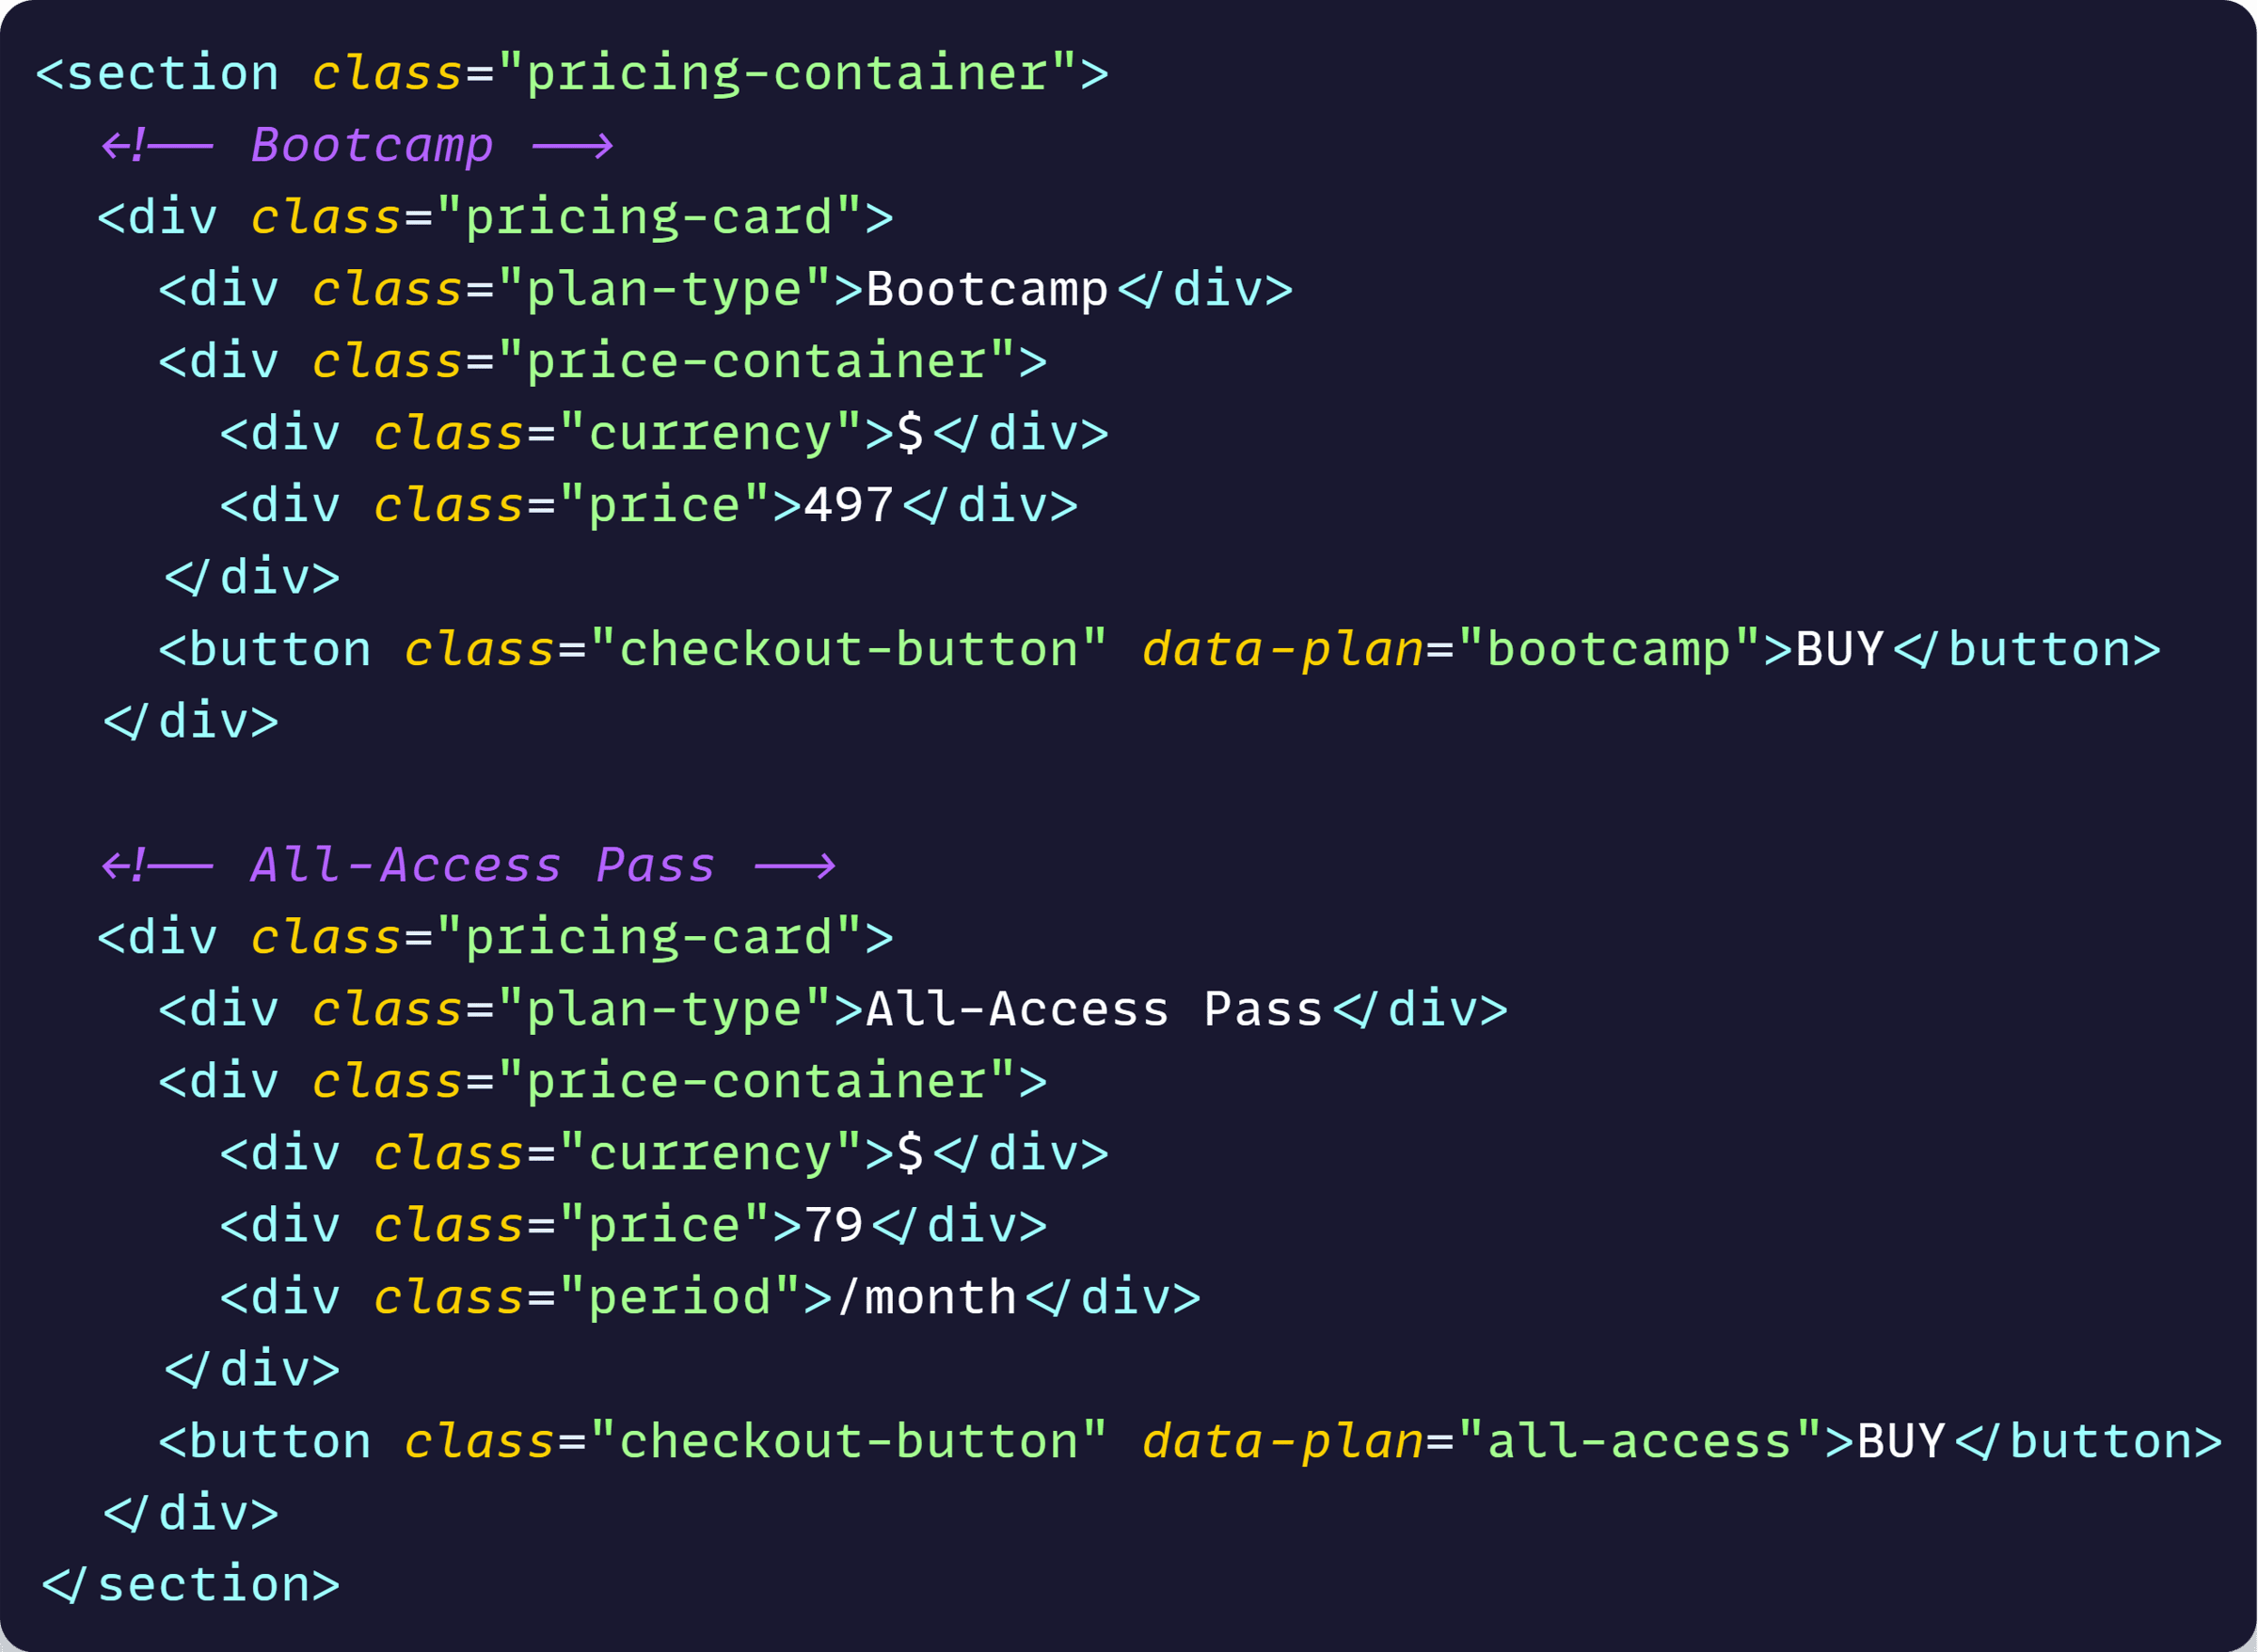
To test the flow end-to-end, I asked Copilot (Agent Mode) to generate me a simple static HTML file with two “Buy” buttons for each of the test products I defined in Stripe:
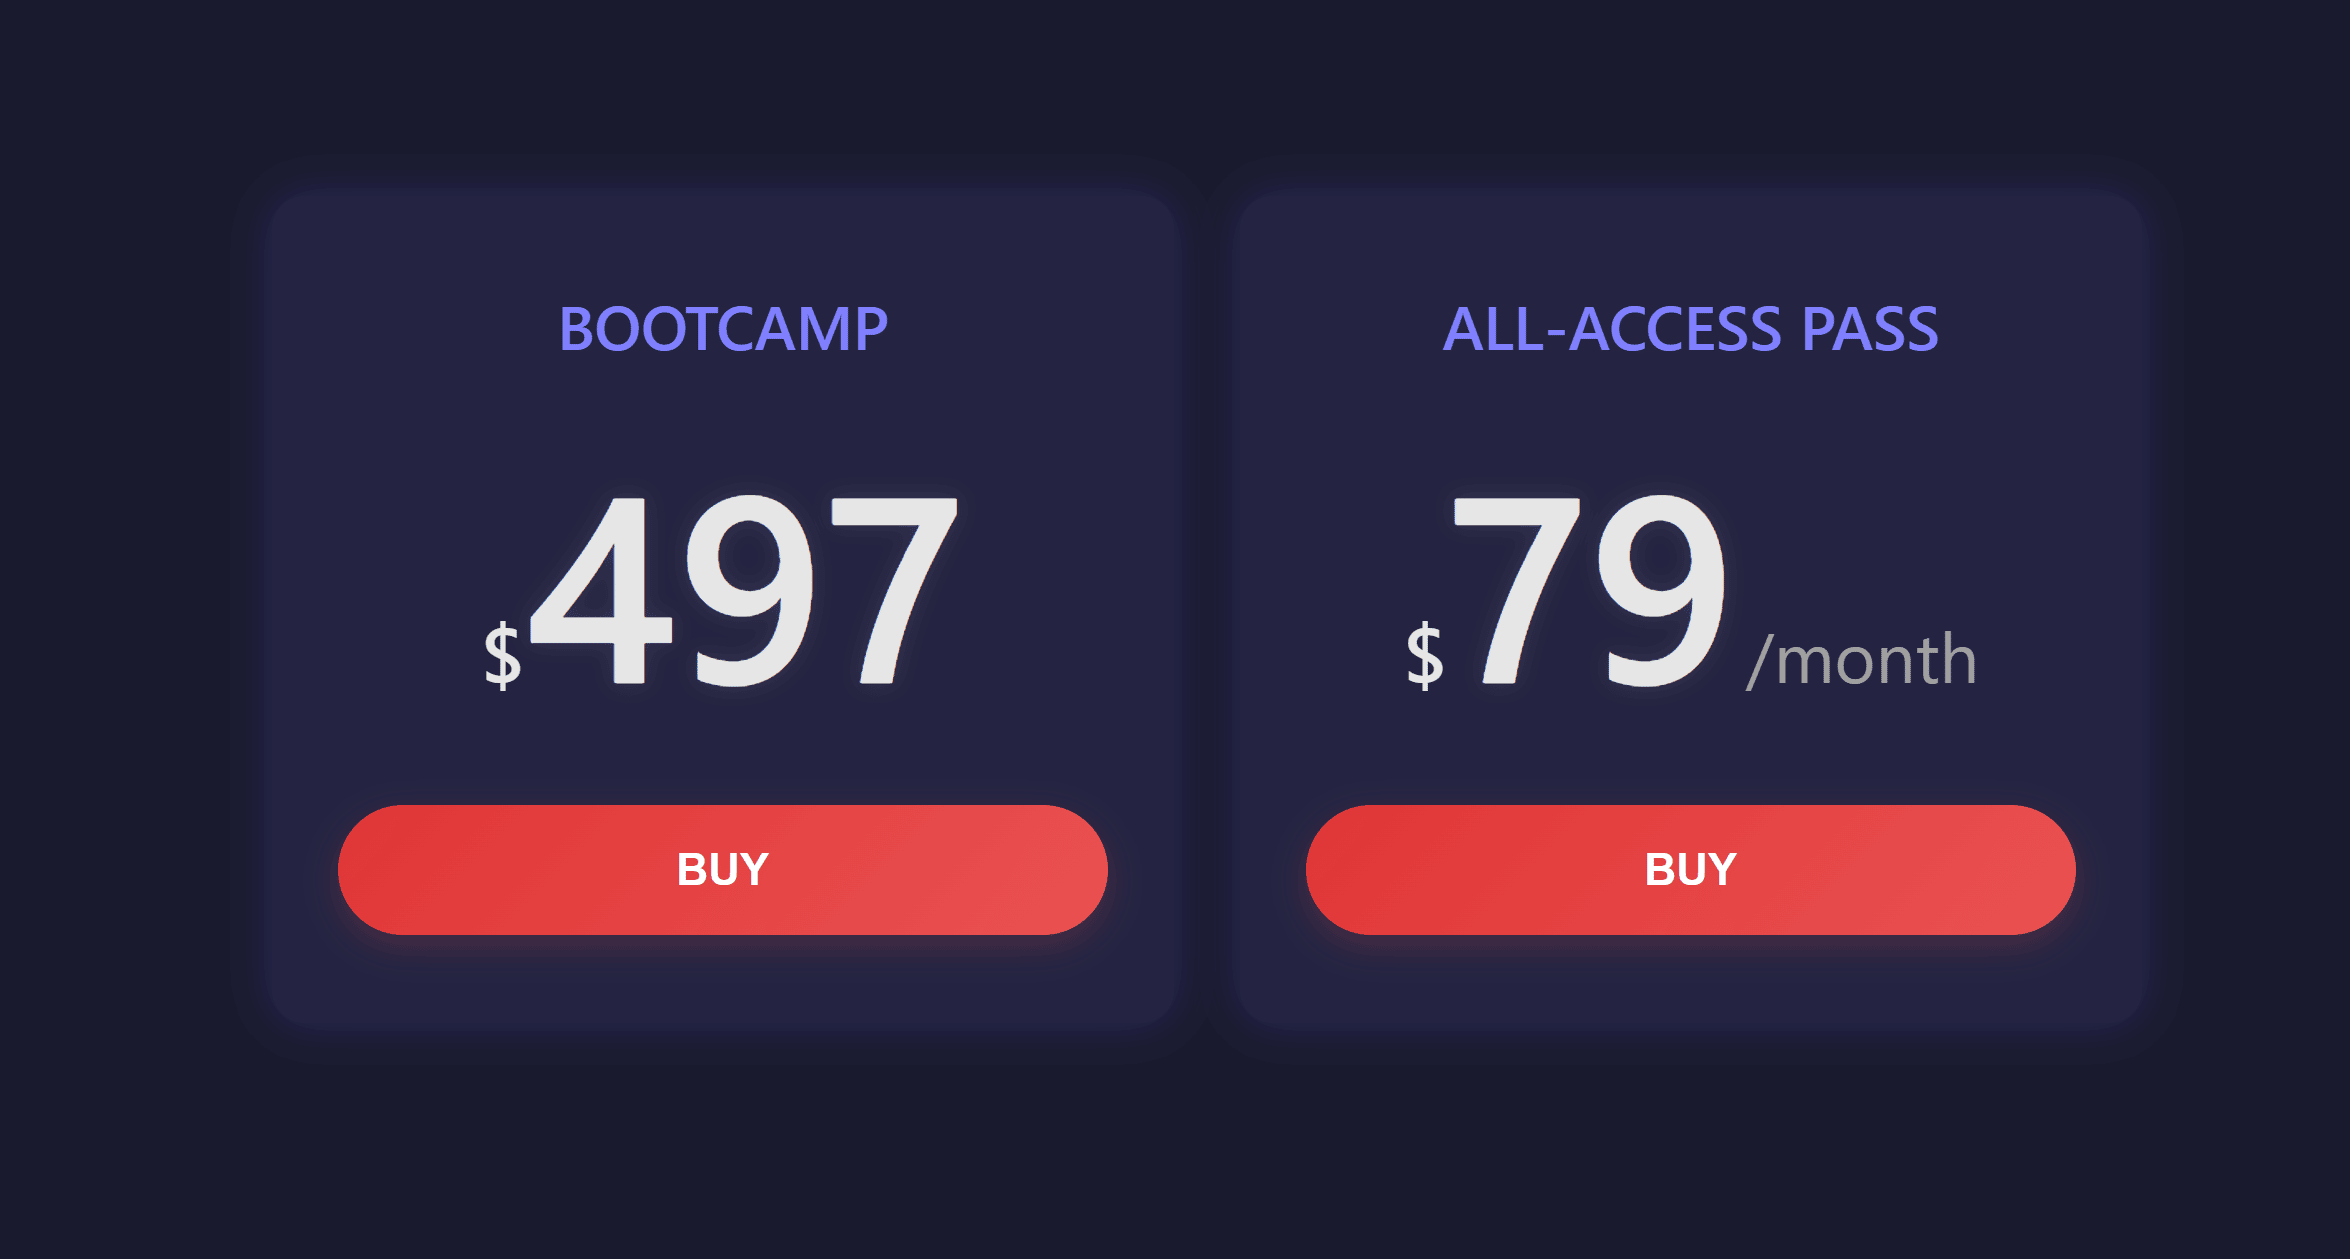
Each button has a data-plan attribute that maps to a specific Price ID and mode (one-time or subscription).
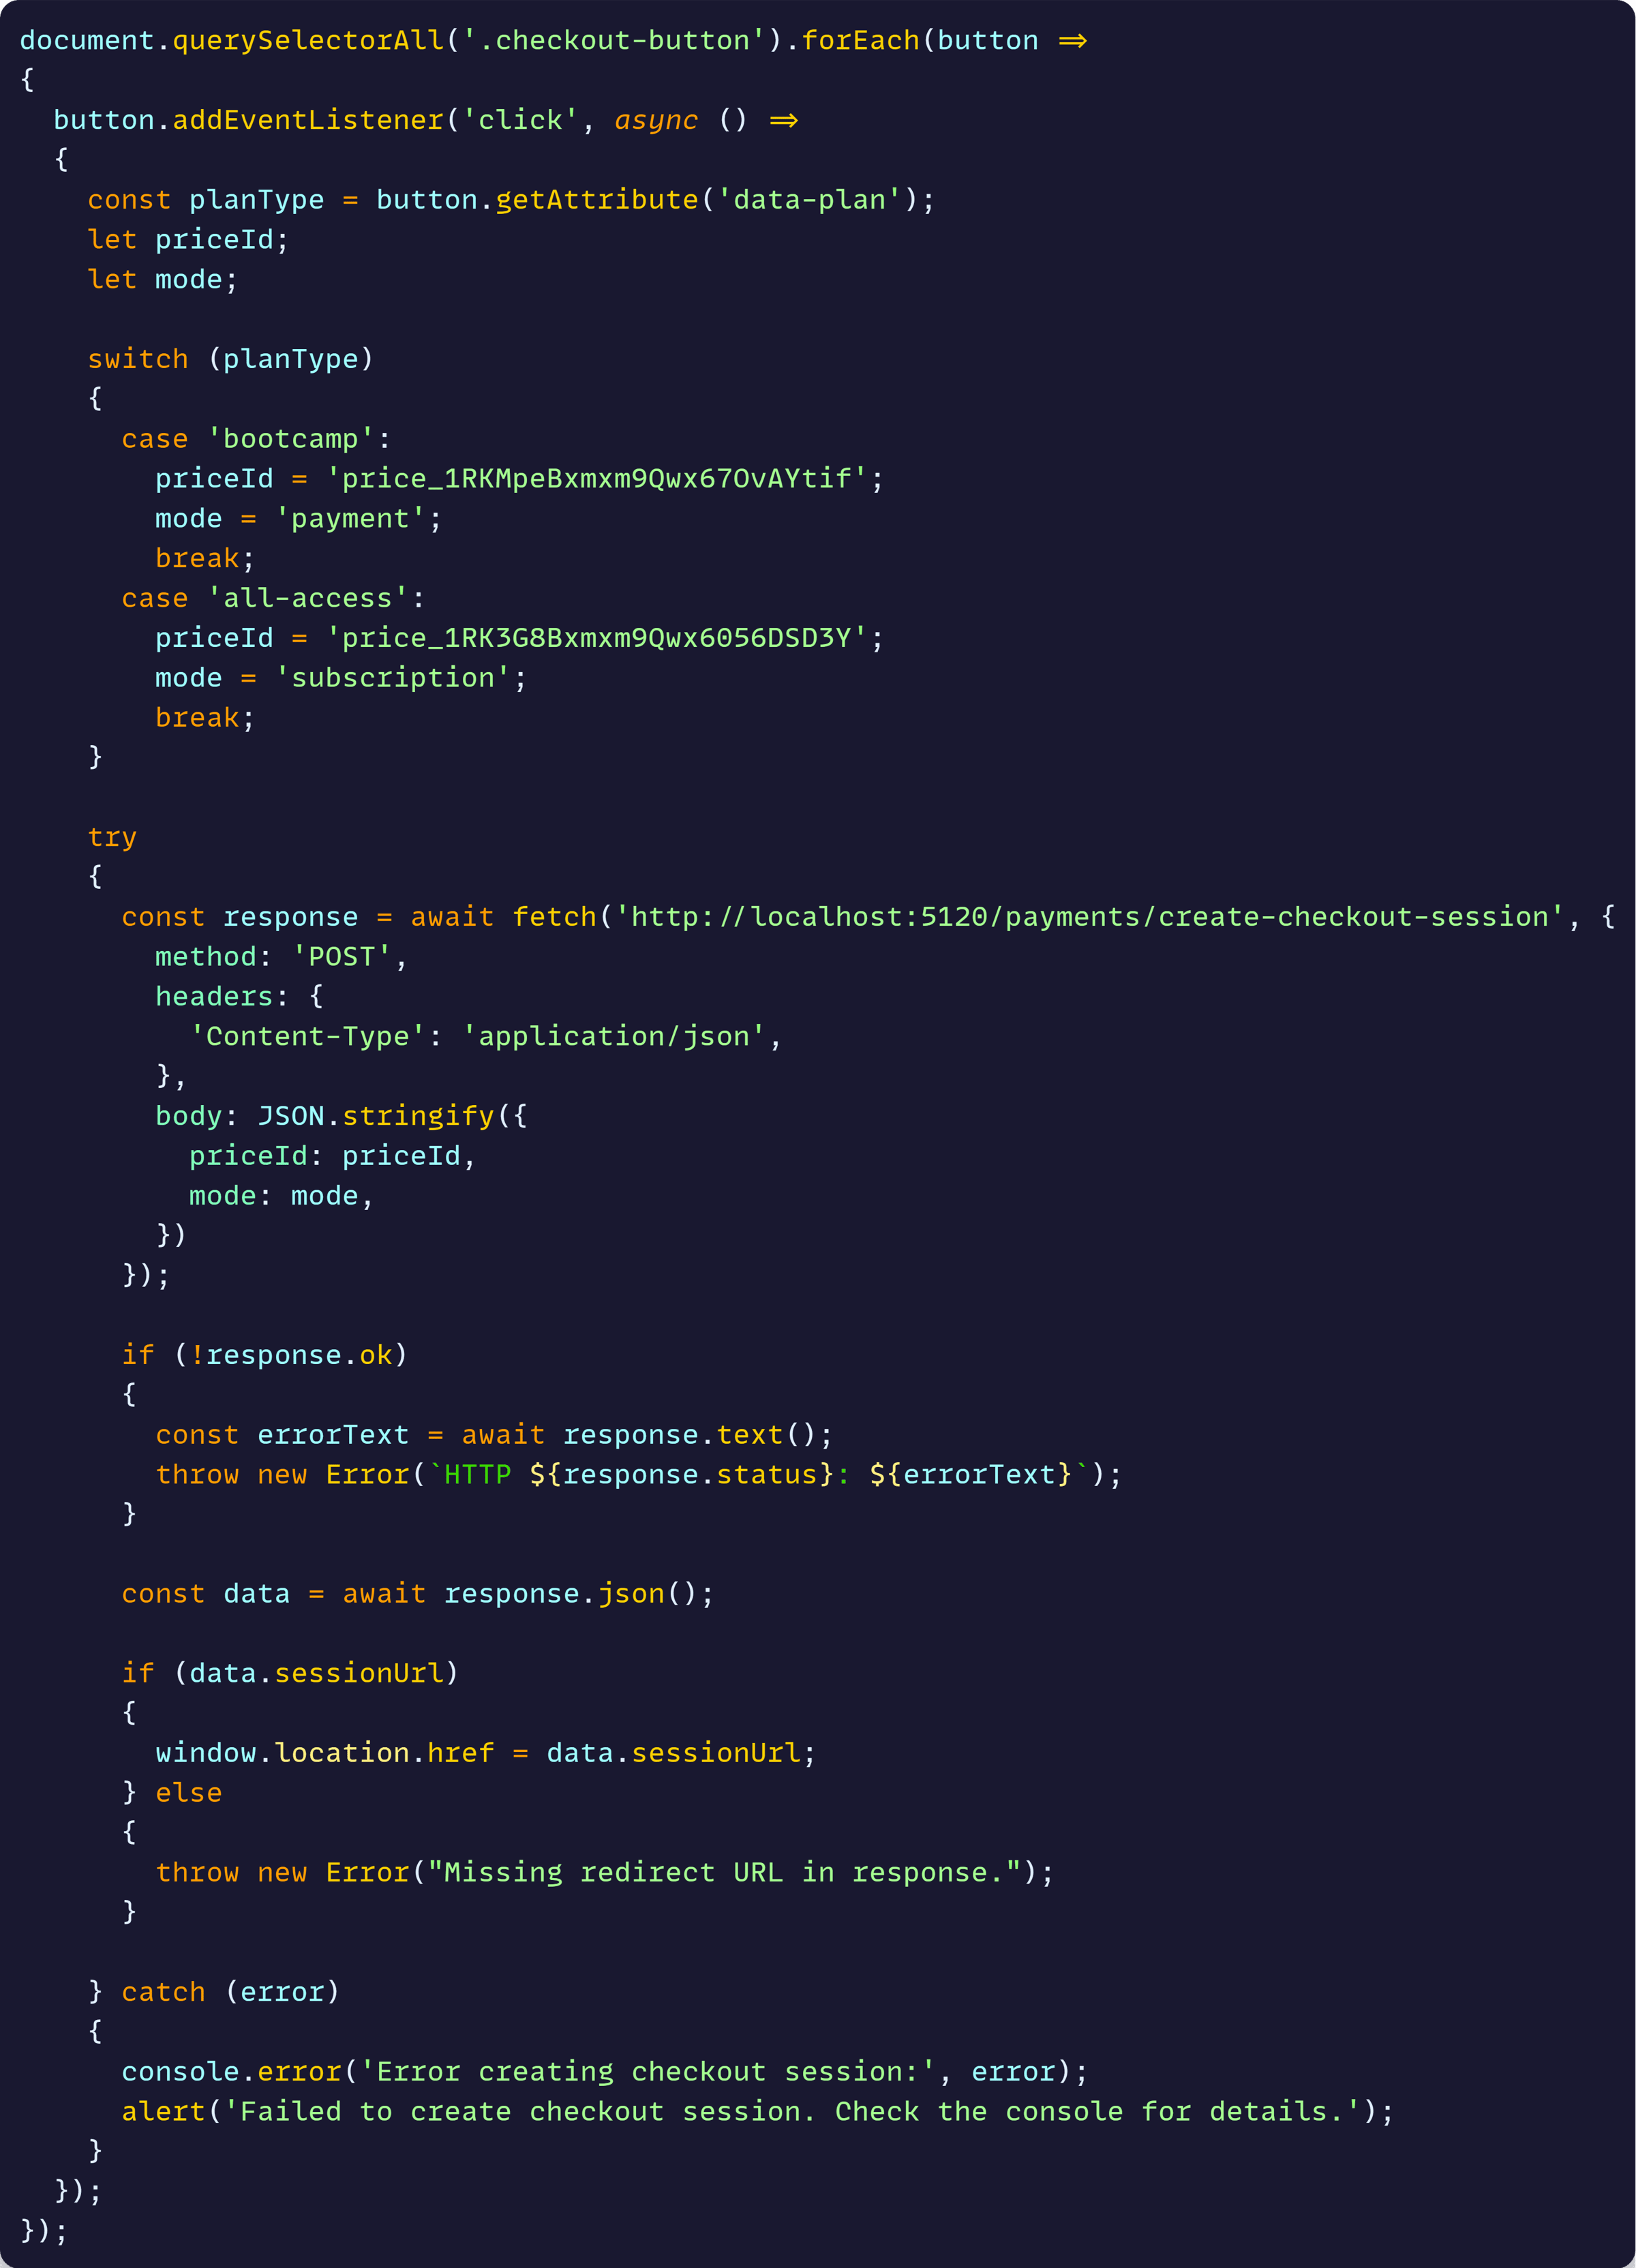
When clicked, JavaScript fetches the create-checkout-session endpoint and redirects to the returned session URL:
When the user clicks the button, and after talking to my payments API locally, we land on a page like this:
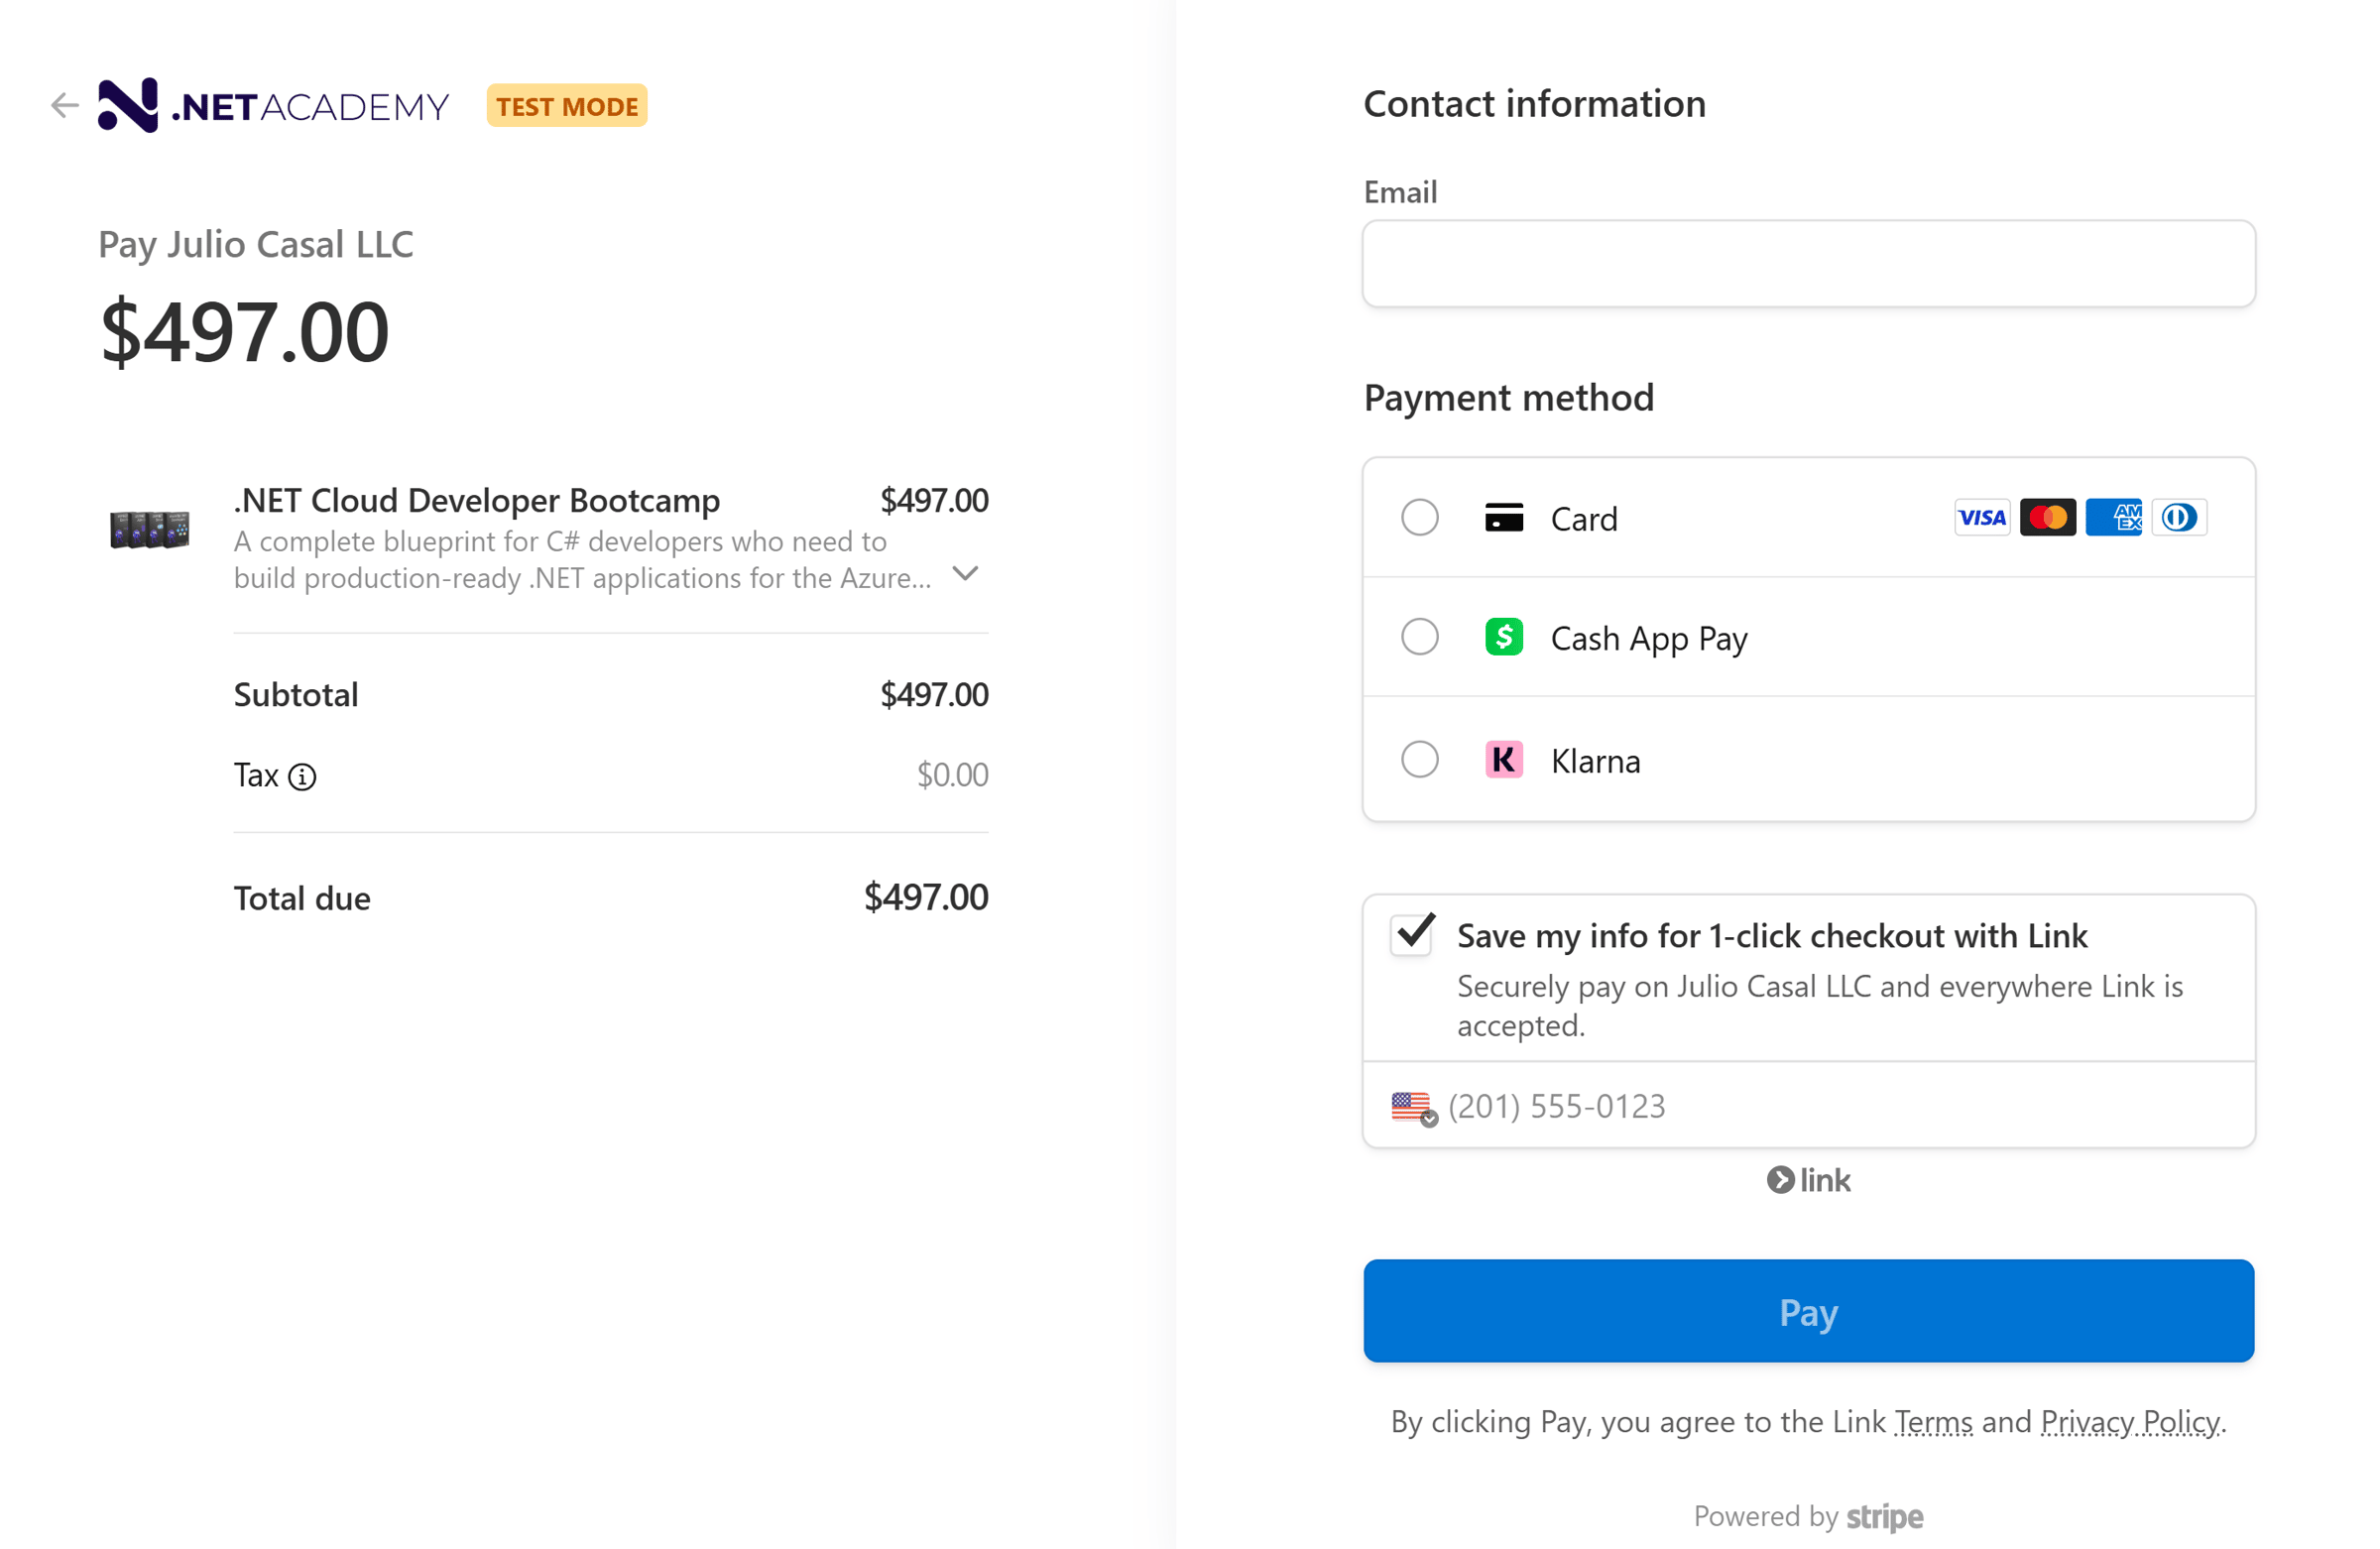
It’s not a lot, but not a bad start!
Next steps
The next natural step would be to set up a webhook to listen for Stripe events—like when a payment is confirmed—so you can proceed to enroll the user in the purchased course or subscription.
That’s what I’d be working on next… if I had the time, and I hope to get back to this at some point.
But with most of my energy going toward the upcoming Containers and Cloud Native course, I’m pausing this side exploration for now.
If you want to go deeper and build the full Stripe integration—from checkout creation to webhook handling to order creation—you’ll find the complete implementation in Course 6 of the bootcamp.
Until next time!
Julio
Whenever you’re ready, there are 3 ways I can help you:
-
.NET Backend Developer Bootcamp: A complete path from ASP.NET Core fundamentals to building, containerizing, and deploying production-ready, cloud-native apps on Azure.
-
Building Microservices With .NET: Transform the way you build .NET systems at scale.
-
Get the full source code: Download the working project from this article, grab exclusive course discounts, and join a private .NET community.
