Read time: 9 minutes
It’s back to school season and my family has been quite busy adjusting to the regular drop-off/pick-up schedule. As my youngest starts kindergarten, my oldest enters high school, and the wife goes back to work, things will get very quiet in my home office, which will be great to start recording videos :)
But, since we only have one car, and 2 out of 3 kids didn’t get a school bus (because 1.3 miles is too close to school?), I might end up doing a lot of driving, which I’m not looking forward to :(
The good thing is that even with all the randomization, I made tons of progress on the Game Store application, specifically on the integration testing side.
But first, let me go over another important aspect I almost forgot and I dived in quite a bit this week: health checks.
On to this week’s update.

What are health checks?
Let’s say we have deployed our Game Store web application (which I’m preparing for the upcoming .NET Developer Bootcamp) as a Docker container to our cloud environment. How do we know if that container is ready to receive traffic?
What if it’s still seeding users/roles or doing any other sort of initialization? What if you missed some config value or the container ran out of memory and crashed?
Your container orchestrator, say Kubernetes, can detect some of those situations, like a container crash, and do something about it, like restarting the container.
But it’s better if you can explicitly provide a way for the orchestrator to know for sure that your container is alive and ready to receive traffic. And for this, you need 2 things:
- Health check endpoints provided by your app
- Health probes enabled in the orchestrator that can use the health check endpoints
But before looking at how to create those health checks and probes, let’s quickly look at the 2 scenarios you need to account for.
Is the app alive?
A key feature of modern container orchestrators like Kubernetes (K8s) is ensuring that your containers are always running and ready to receive traffic. You are expected to provide the Docker images, declare how many instances of the container (pods) you need and K8s will take care of the rest.
K8s will deploy your containers, but it needs to know if the deployed containers are healthy. Otherwise, it needs to kill them and start new ones until it meets your requirements.
To help K8s tell if your containers are healthy, you can set up a liveness health endpoint and configure a health probe that will invoke it periodically.
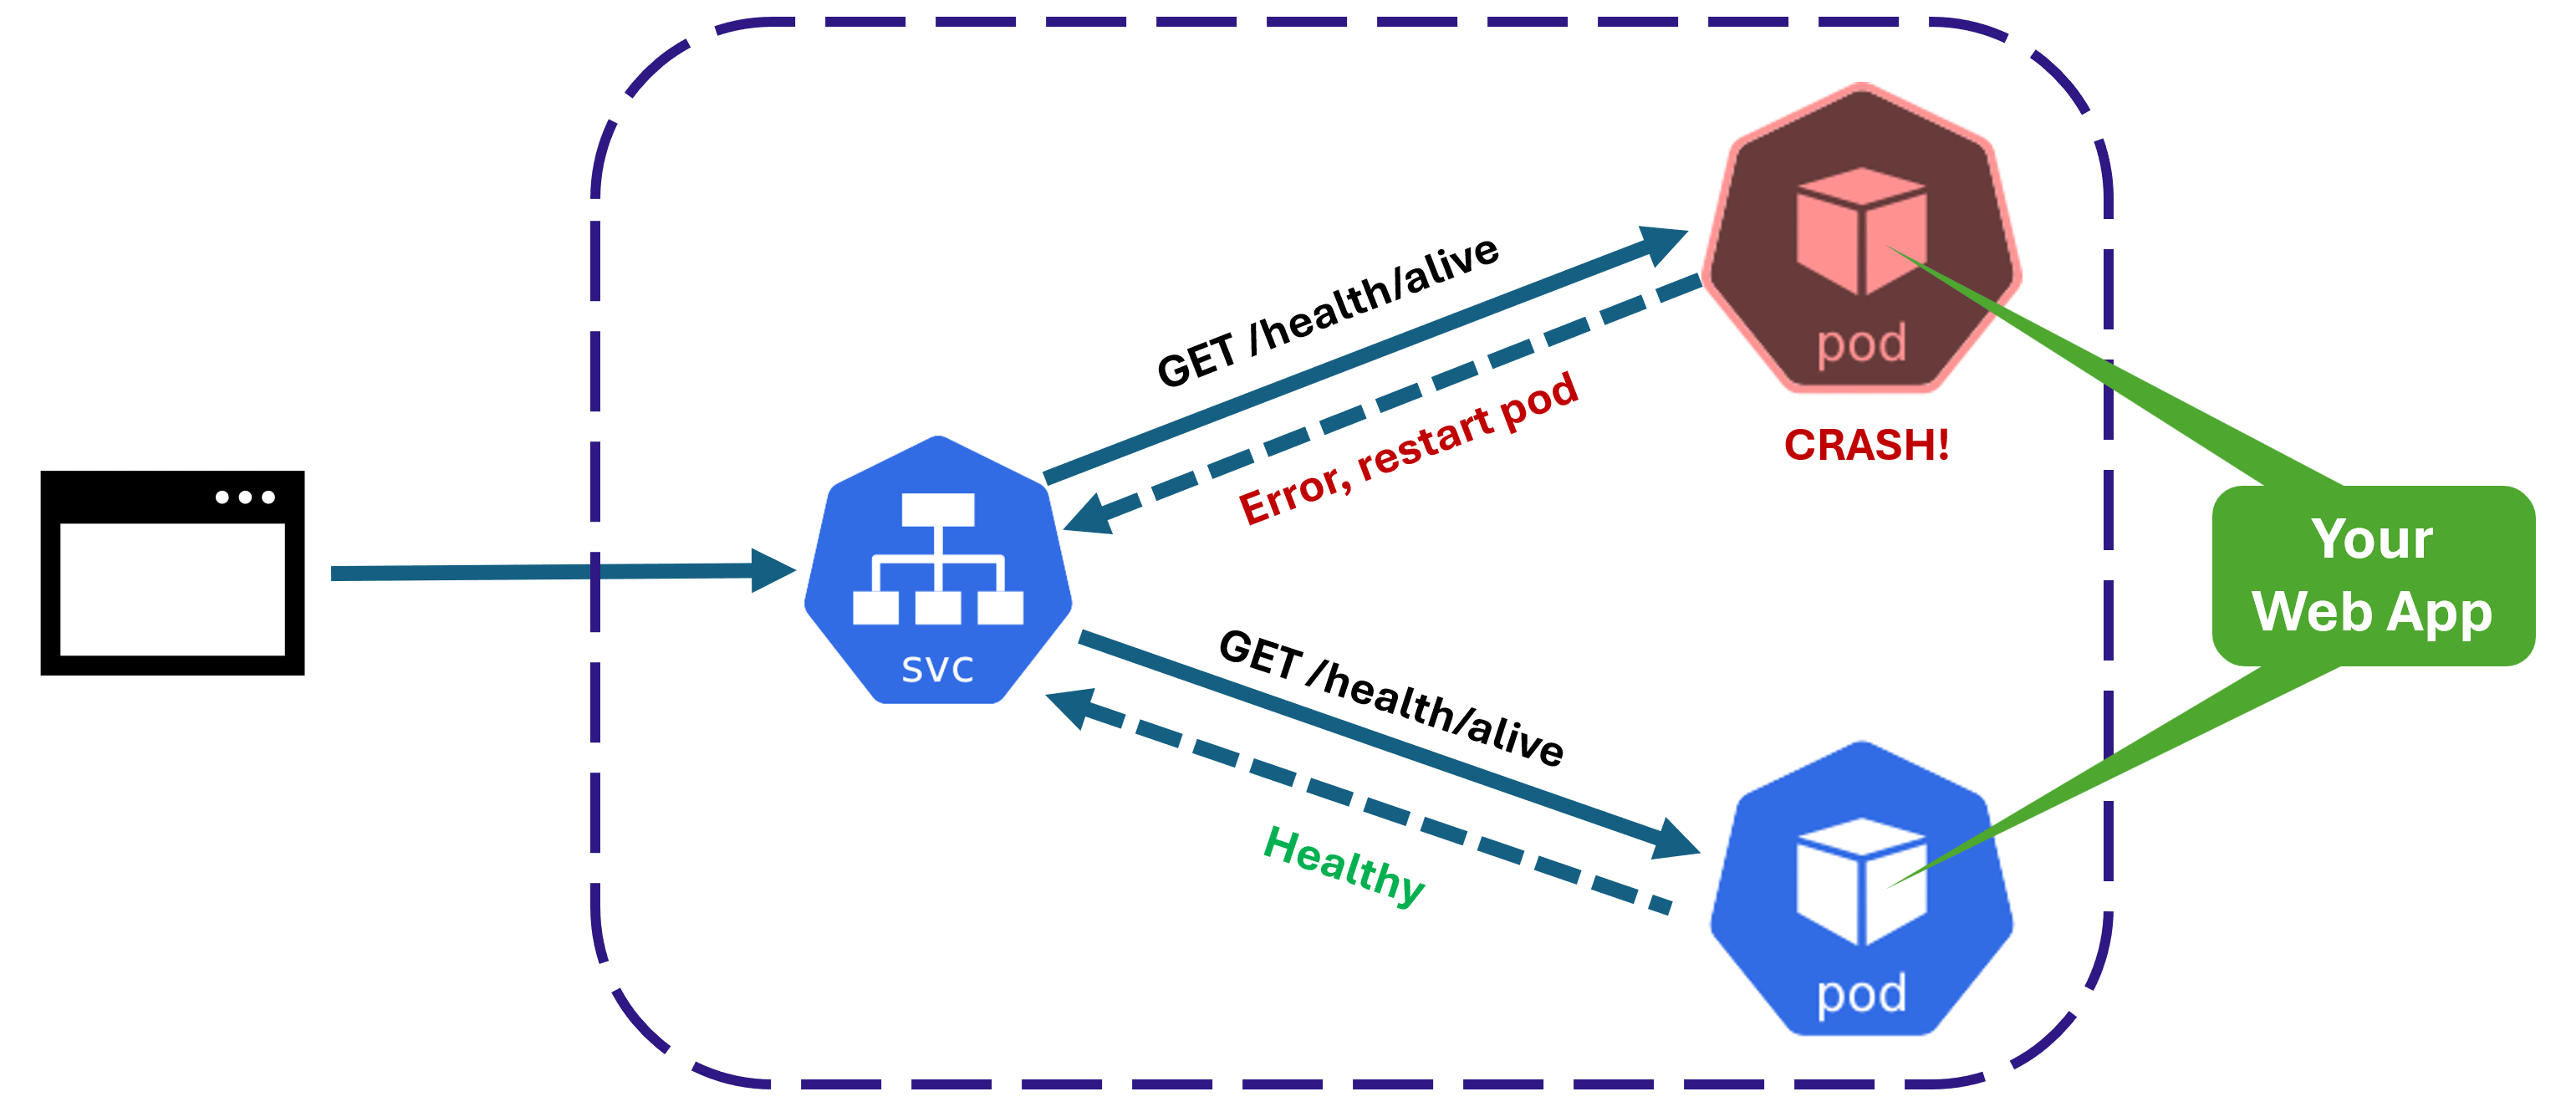
If the /health/alive endpoint returns an error or doesn’t respond at all, K8s knows there’s a problem and that pod needs to be killed. At the same time, it will spin up a brand-new container to compensate for the failing pod.
Beautiful, isn’t it? But what if the web app has not crashed, but is not quite ready to receive traffic?
Is the app ready for traffic?
Many times you will have to do some sort of initialization in your web app before being ready to receive traffic. For instance, in my last team at Microsoft, many of the microservices would fetch a bunch of configuration values from another microservice on startup, to know what kind of environment it had to work with.
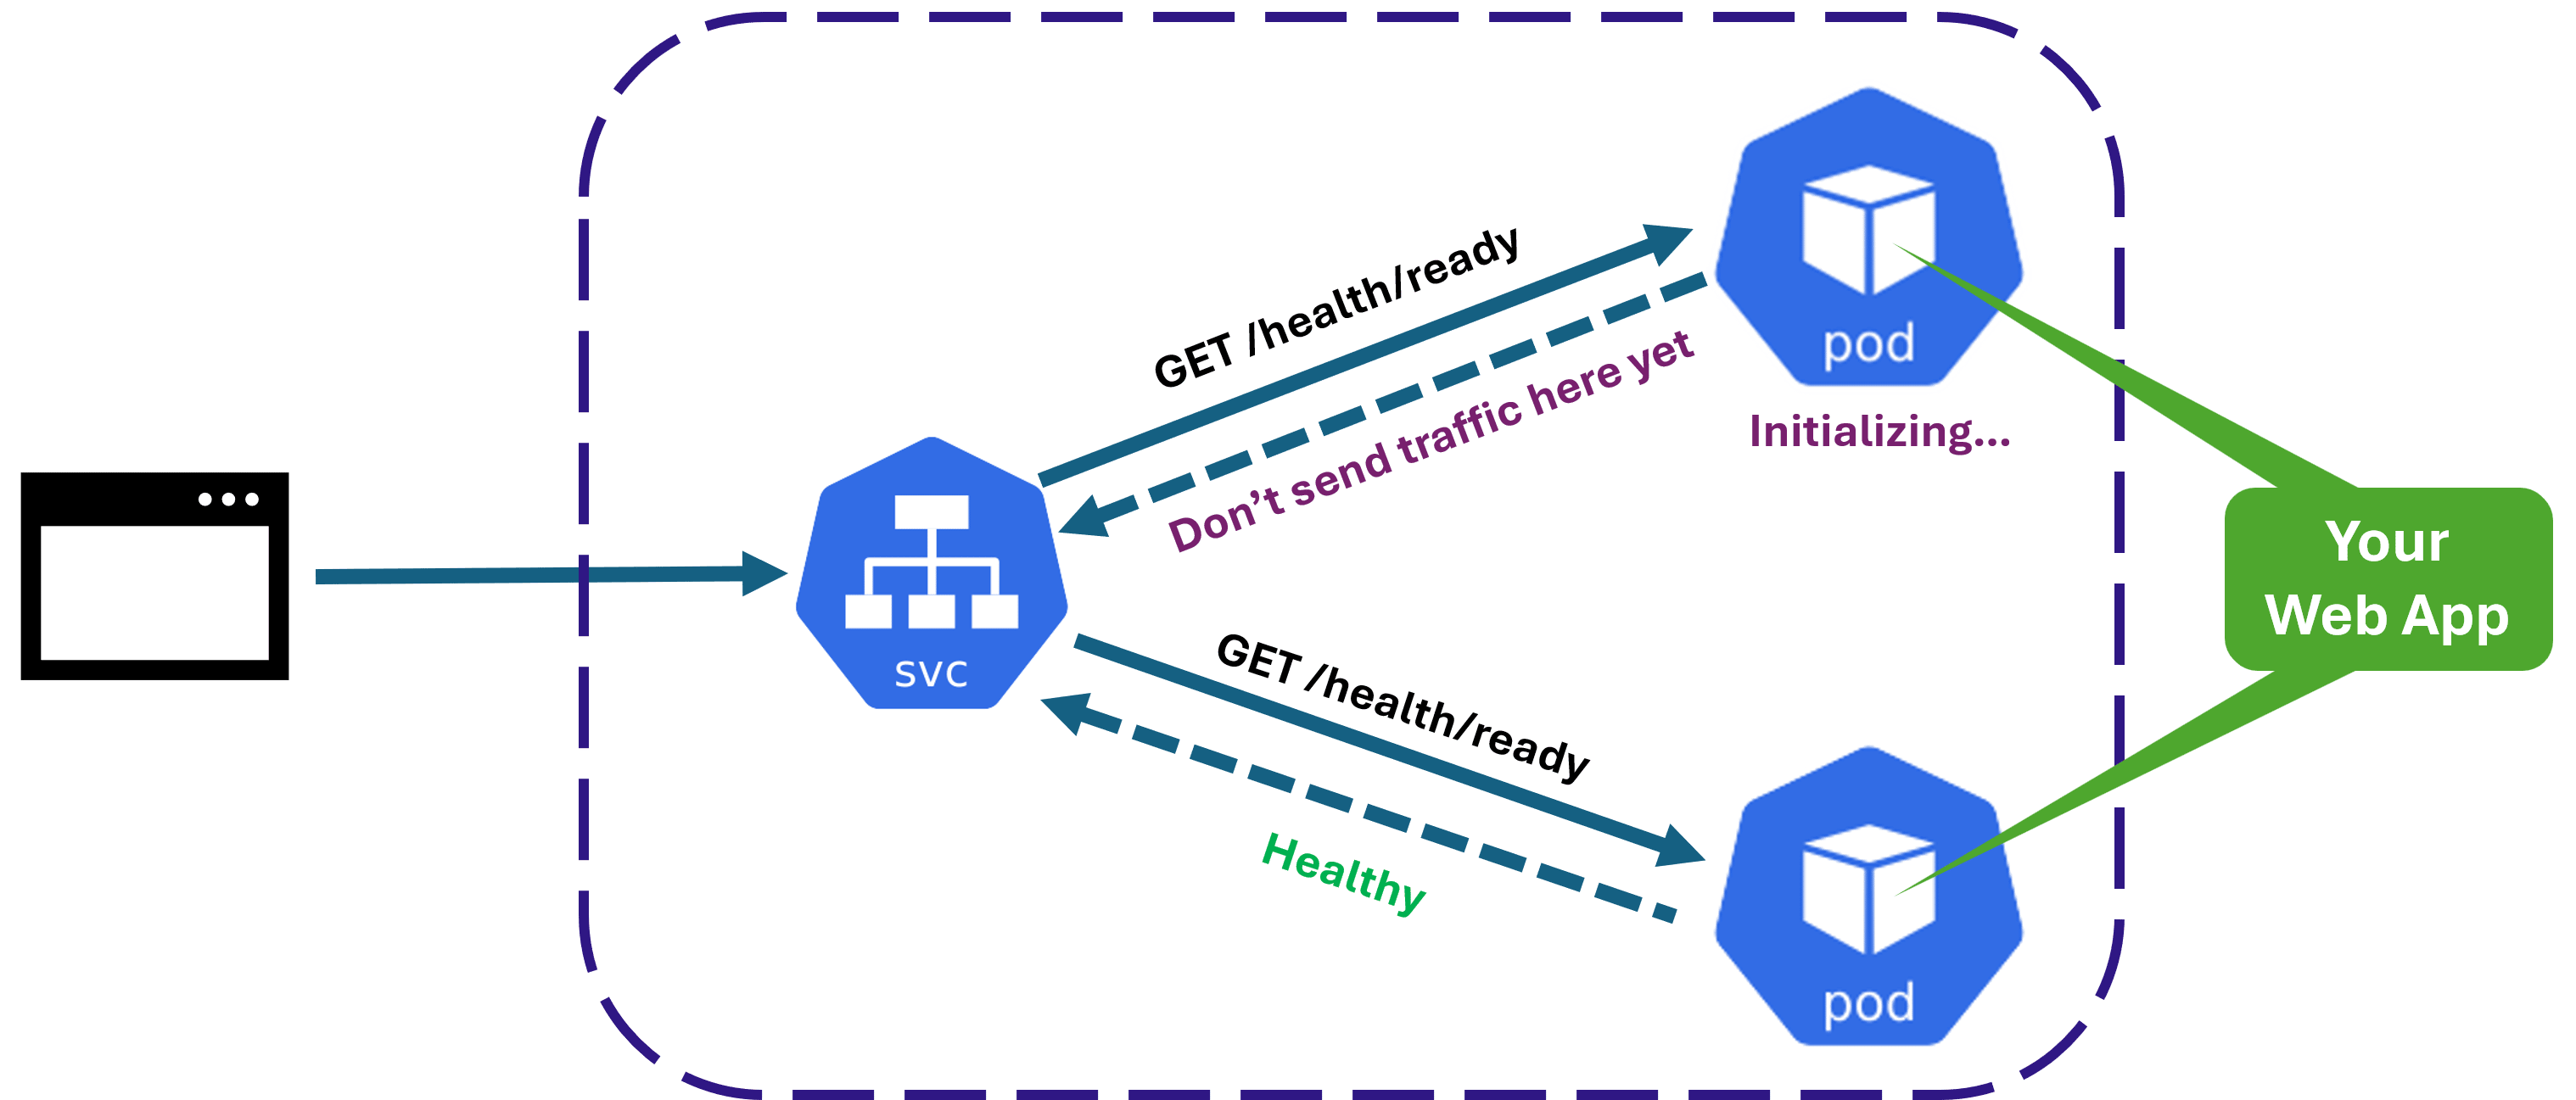
For that, you can stand up a readiness health endpoint and a corresponding probe. K8s will call it periodically and won’t allow the pod to receive any traffic until it reports a healthy status.
The combination of the liveness and readiness health probes is an essential aspect of running containerized apps in the cloud and you should learn how to take advantage of it.
Now, let’s see how to define health checks in .NET web applications.
Adding health check endpoints
In ASP.NET Core, adding health checks is very straightforward. For the simplest scenario you can do just this:
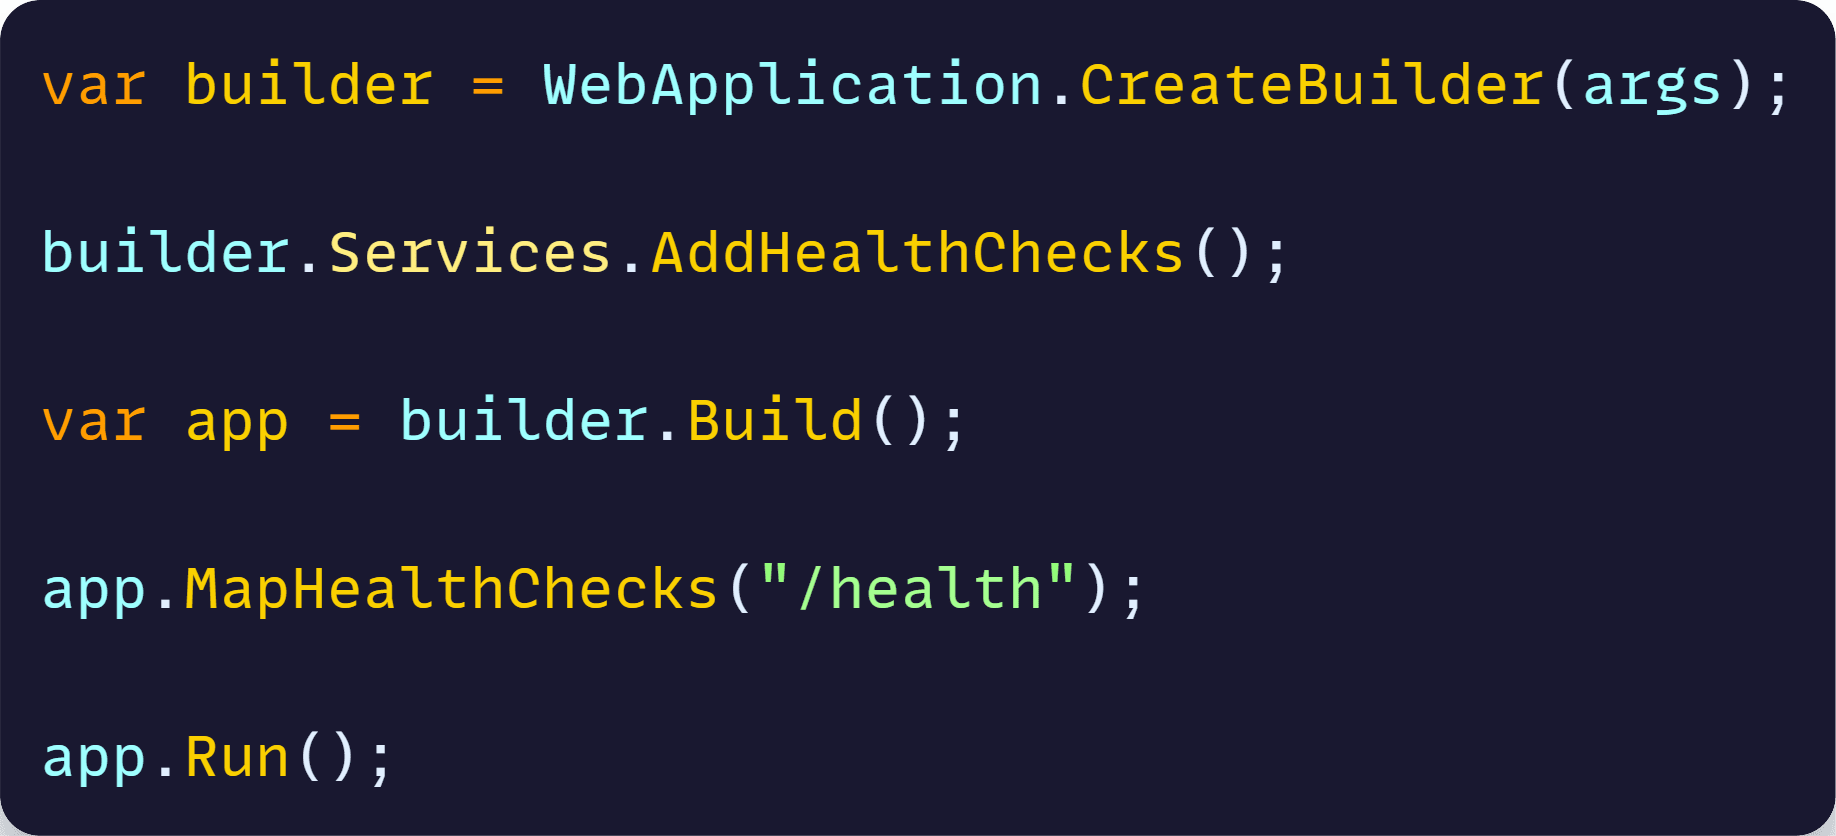
That will stand up a /health endpoint that the K8s health probe can call. If the endpoint responds, K8s can assume that the app is healthy.
However, you usually want to do a bit more than that. For instance, you may not want to consider your app healthy unless you know it can talk to your database or your message broker. Here is where the built-in .NET Aspire Service Defaults project and the several available integrations (aka components) can help.
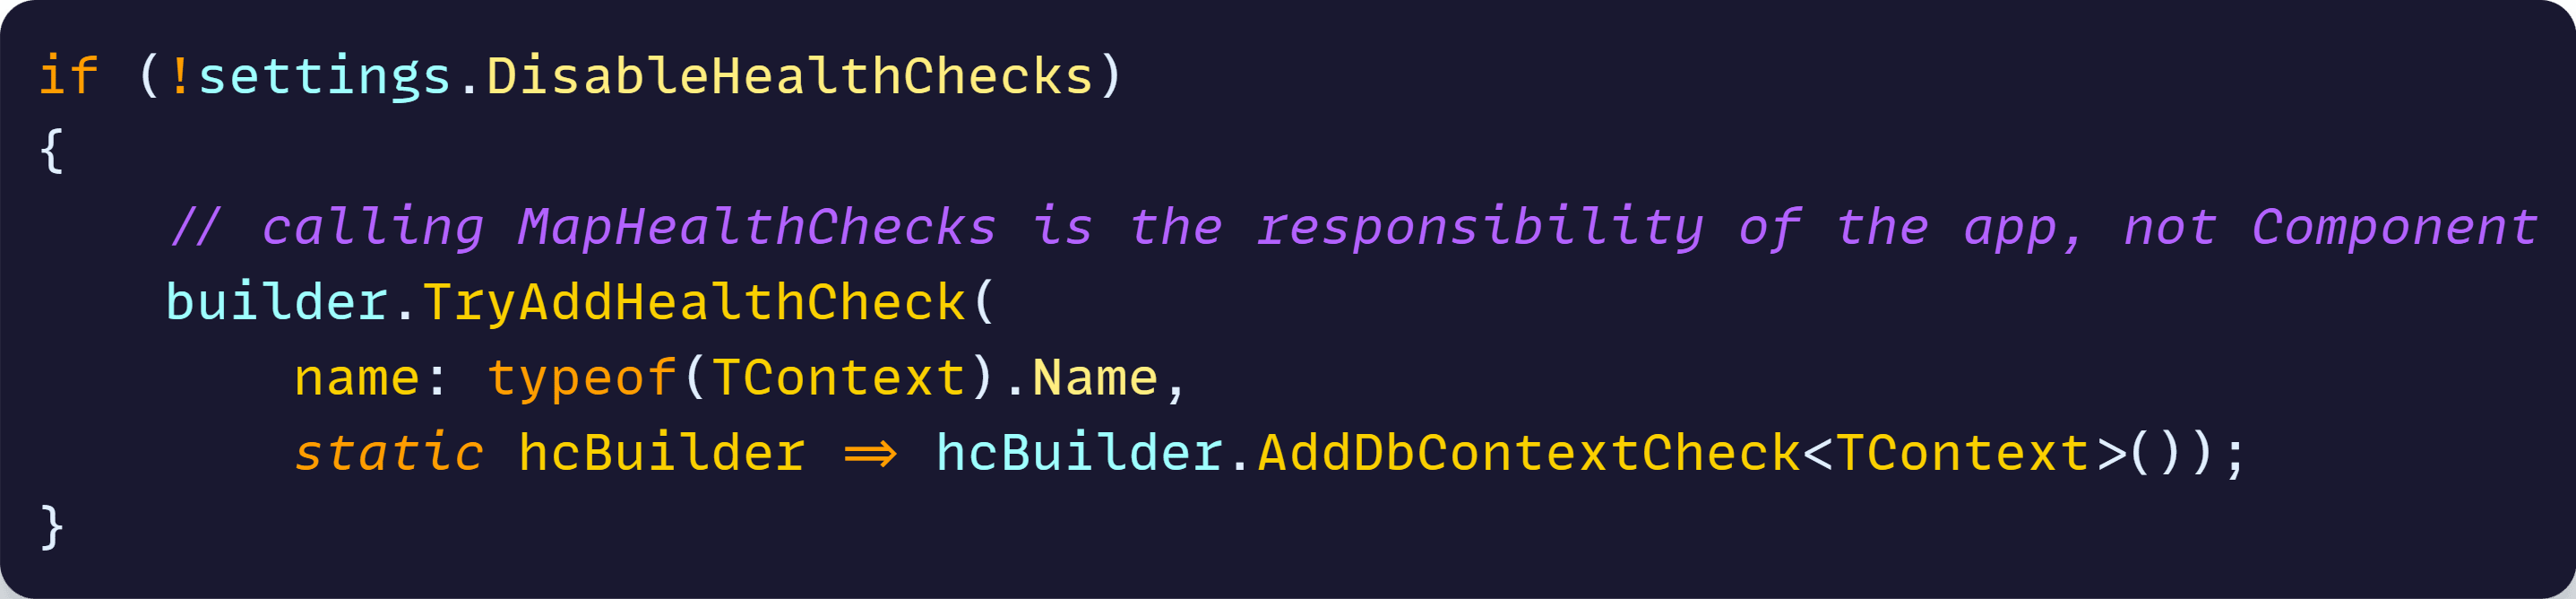
All the .NET Aspire integrations, like the ones you use to talk to a PostgreSQL database, an Azure Service Bus namespace, or a Storage Account, include their own health checks.
For instance, here’s a small snippet of the PostgreSQL integration adding its health check when you register a DBContext:
So, just by using the built-in integrations, you get health checks for them for free. On top of that, you’ll get this in the .NET Aspire Service Defaults project:

AddDefaultHealthChecks adds health check services for your web app using the live tag, meaning that it will be part of the checks that must pass as part of the /alive endpoint.
MapDefaultEndpoints sets up the 2 endpoints for liveness (/alive) and readiness (/health). Most Aspire integrations will join the /health endpoint and a few of them, the ones tagged with live, will join the /alive endpoint.
No health checks enabled default
Did you notice that if (app.Environment.IsDevelopment()) in the previous code snippet? Turns out that, because of that, none of the health check endpoints will be defined in your Production deployed app.
That is for security reasons as it’s well explained over here. Just keep in mind that if you actually want to use health checks, you’ll have to get rid of that conditional, as I did in the Game Store app:
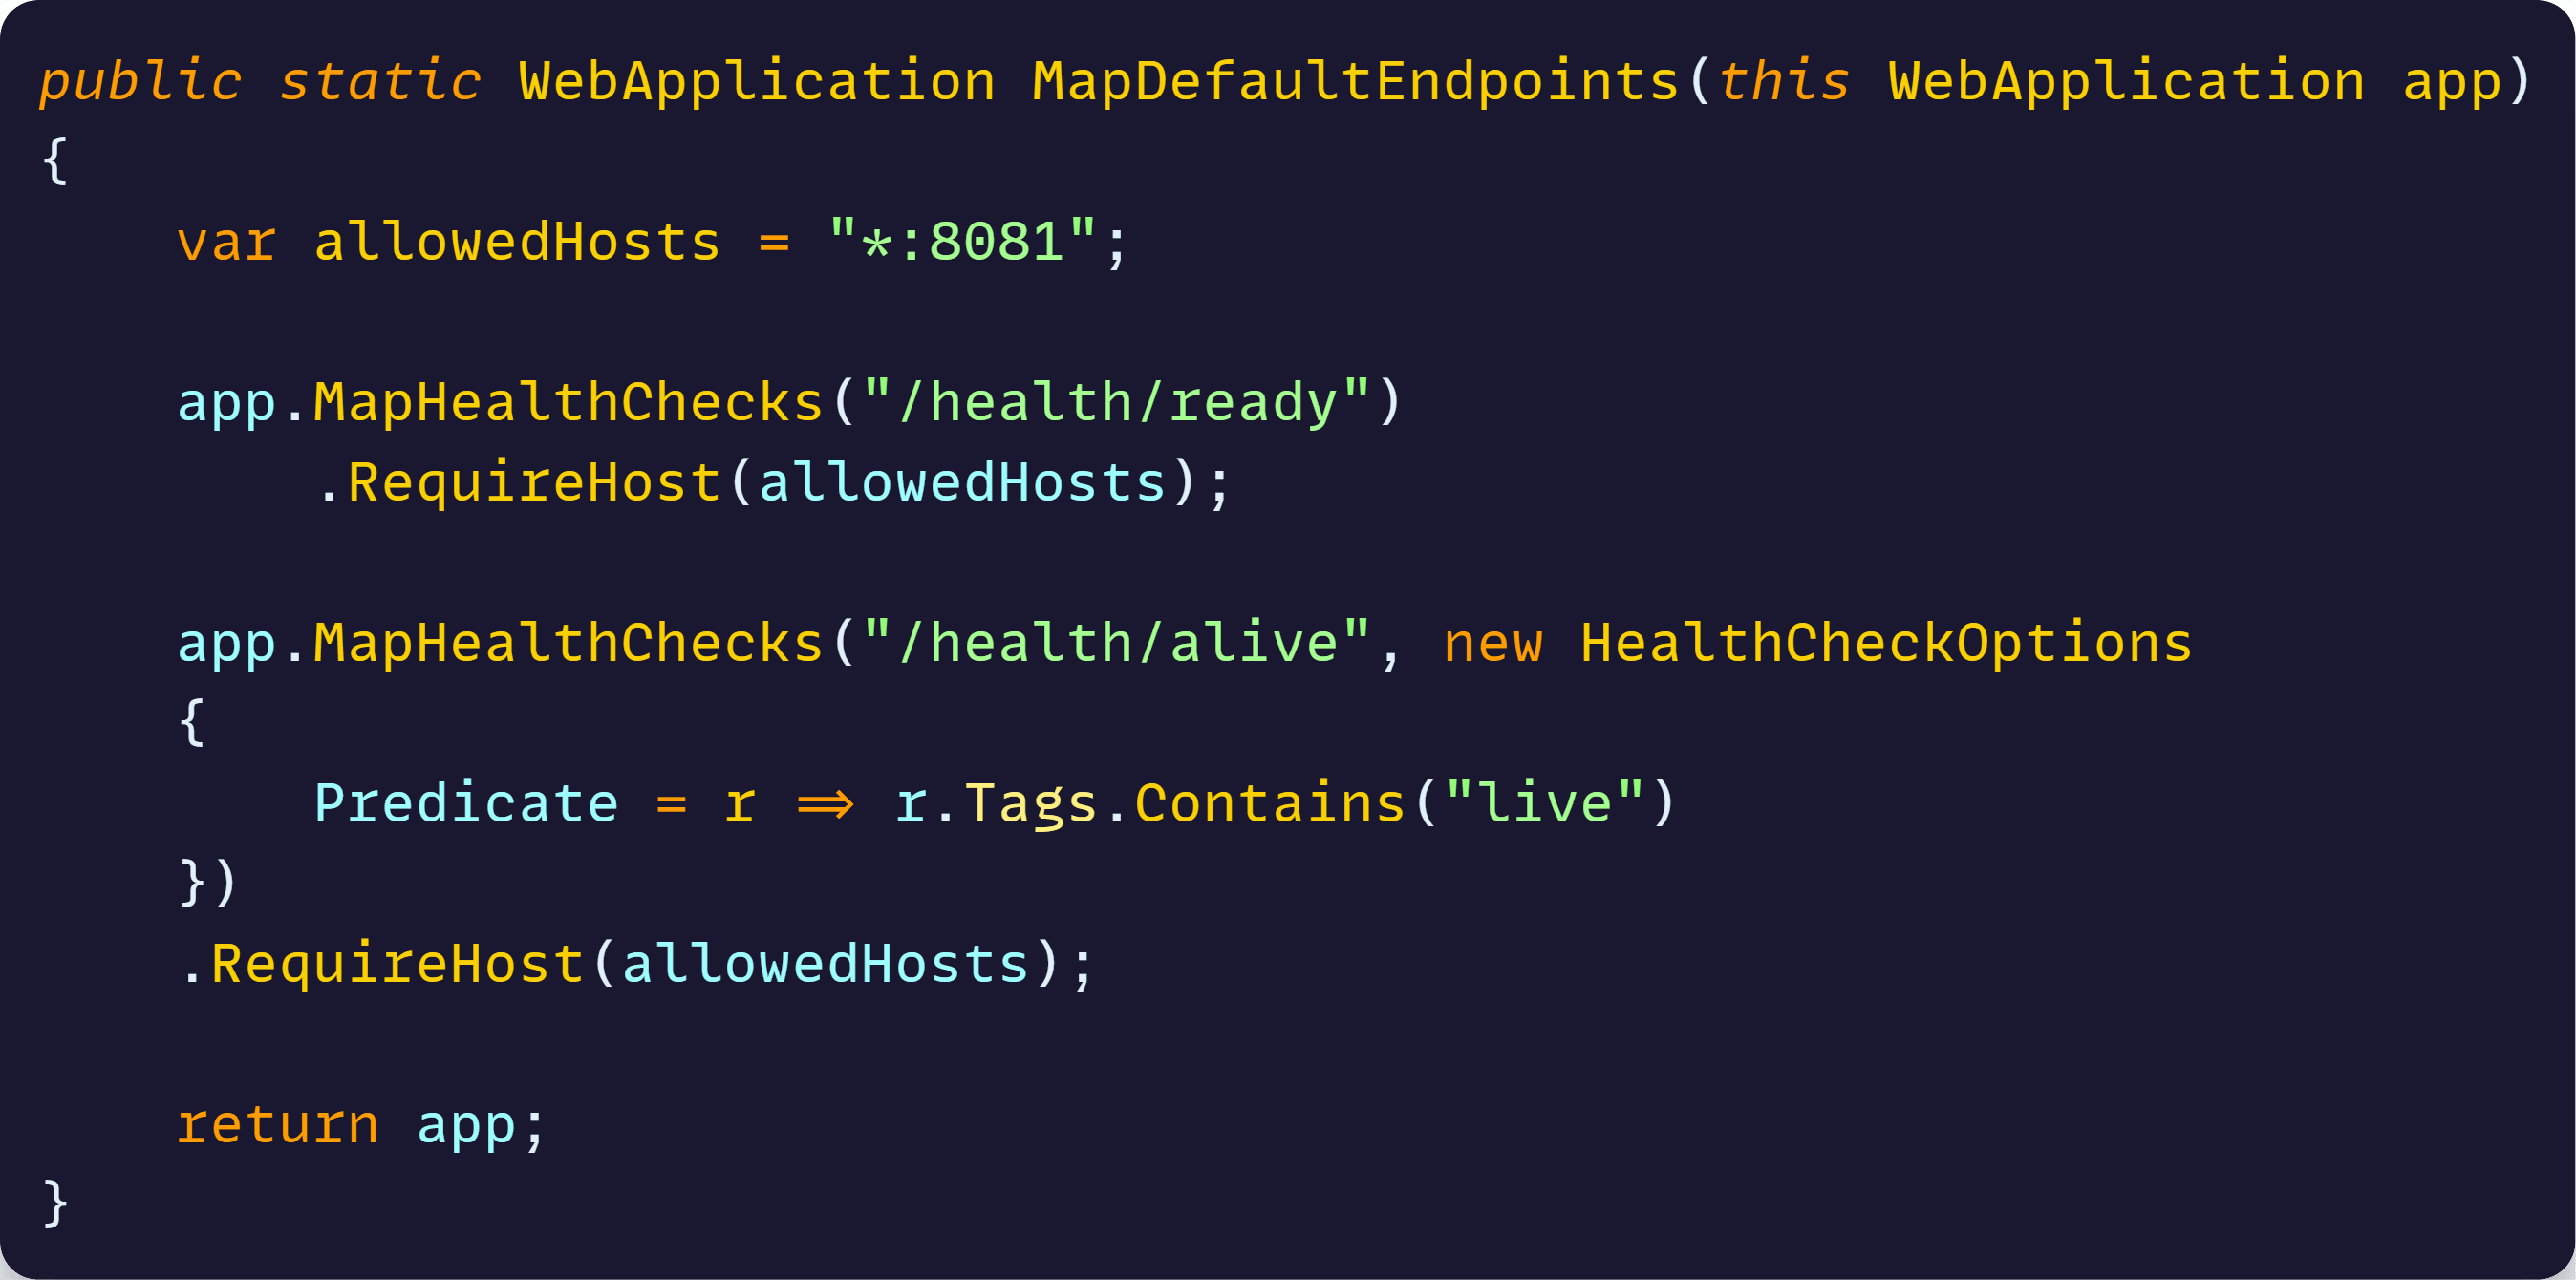
As you can see, the way I’m protecting the endpoints, which I renamed to /health/ready and /health/alive, is by using that RequireHost call, which will ensure that only requests coming into port 8081 will be accepted.
Also, to let the orchestrator talk to your app on that special port you need to tell .NET Aspire to open that additional endpoint:

Notice that the WithHttpEndpoint call will open a new internal endpoint, not a public one, which is all we need for the orchestrator to talk to it. Nobody in the outside world needs to talk to this endpoint.
Now all that’s missing is configuring the health probes in the orchestrator.
Adding the health probes
This is the part that is not well supported currently in .NET Aspire. By default, your app will deploy to Azure Container Apps (ACA), but Aspire will not auto-configure any health probes there, and it does not offer any API for you to configure those probes.
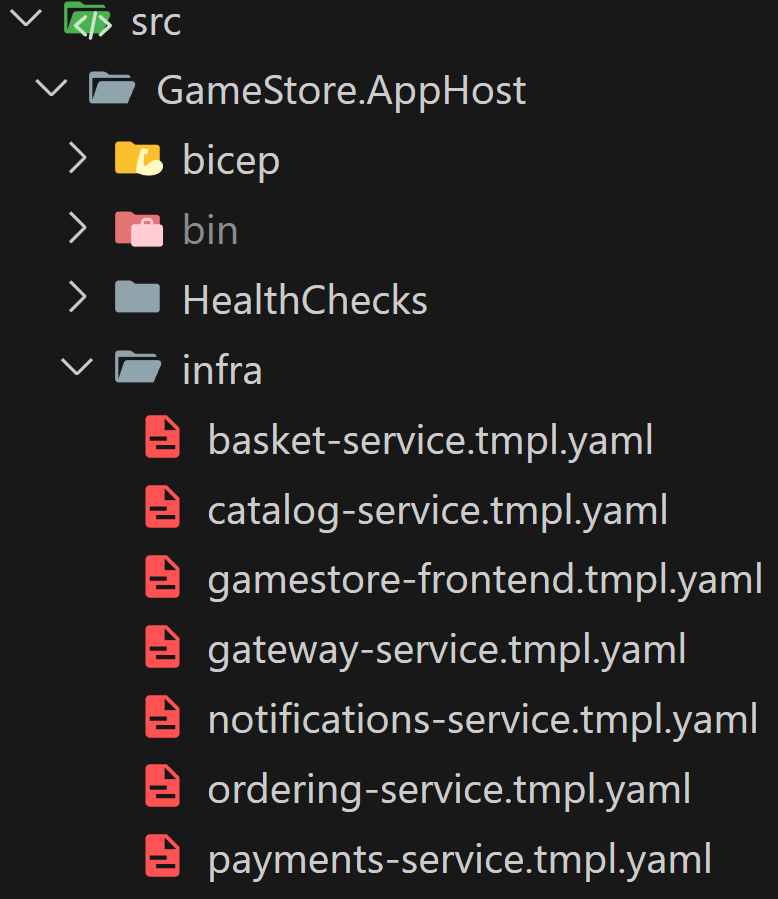
Therefore, the only way to define the probes is by exiting the C# app model into YAML files that you can modify and that can be fed into ACA.
So, after running azd infra synth, you’ll end up with one YAML file per each of the apps defined in your AppHost:
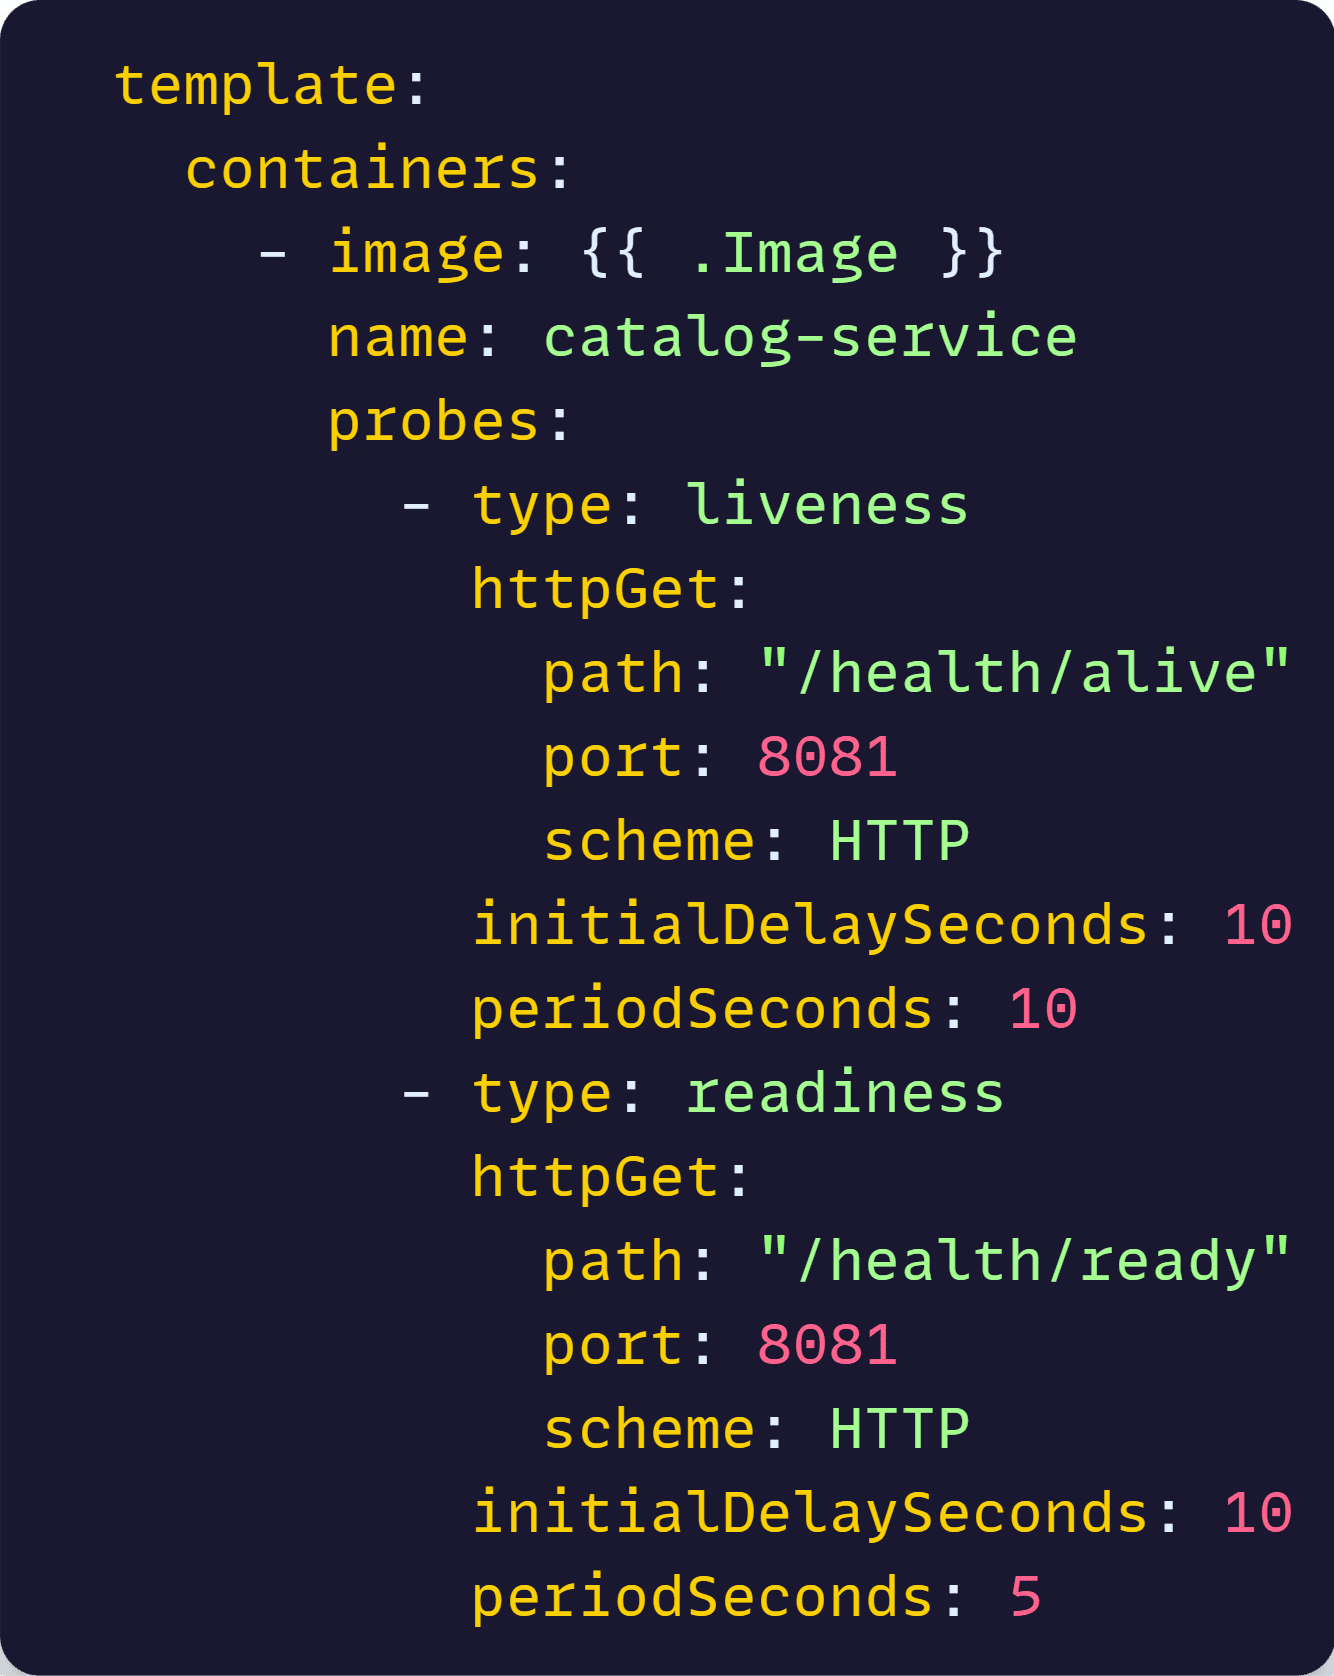
The generated YAML files are huge, so here I’ll just show you the piece I added to enable the health probes for one of the microservices:
And, with that in place, you are ready for deployment.
The end result
After deploying the apps to ACA (azd deploy), you should notice that none of the containers will complete deployment until the health checks (for your app and all dependencies) report healthy.
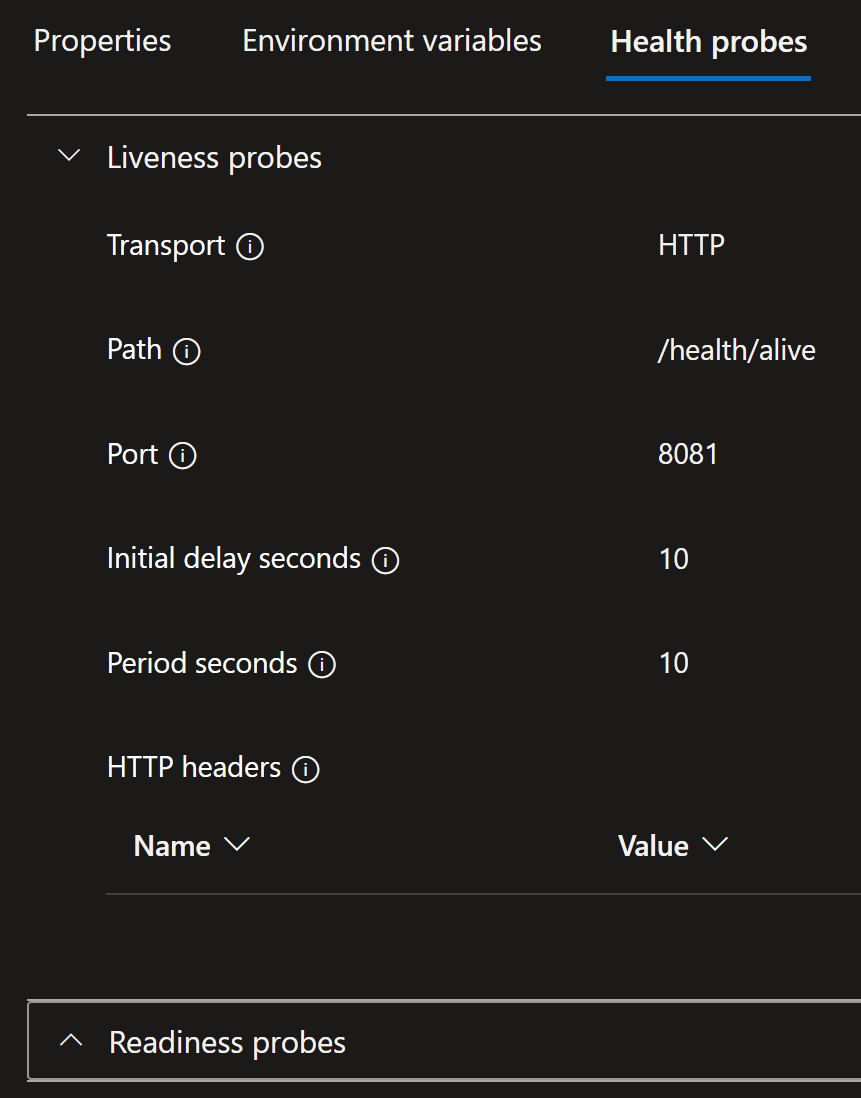
In ACA the health probes look like this:
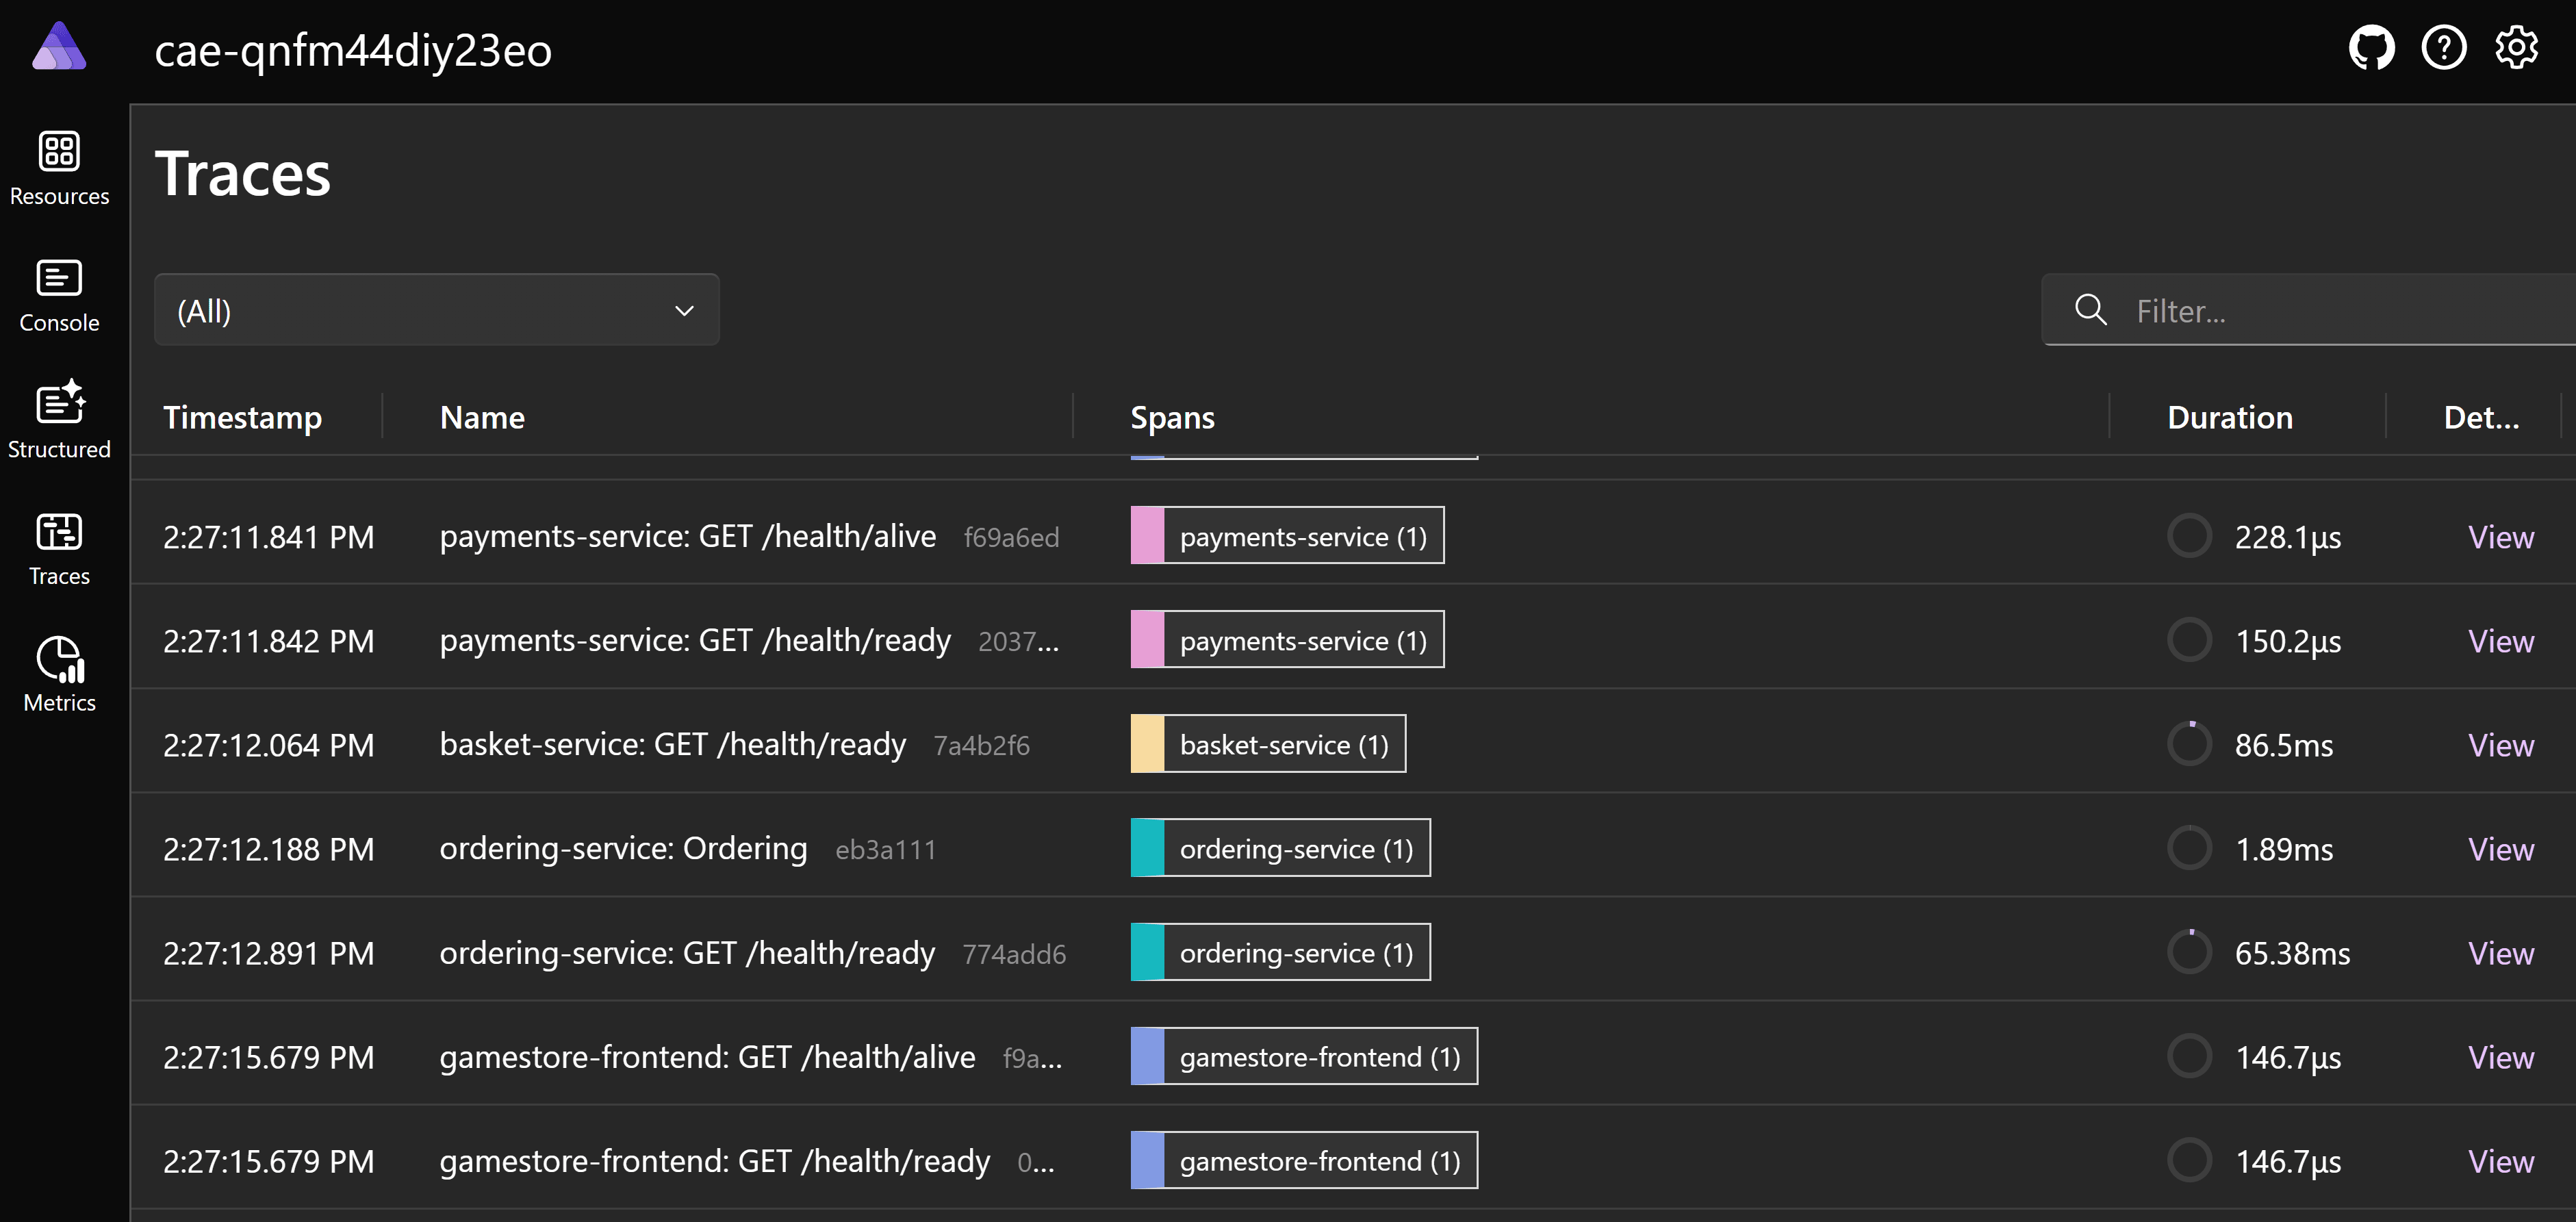
And you can confirm ACA is using the probes by taking a look at the traces in the deployed .NET Aspire dashboard:
That’s it for today.
Next week: integration tests!
Julio
Whenever you’re ready, here’s how I can help:
The .NET Developer Bootcamp: A complete path from ASP.NET Core fundamentals to building, containerizing, and deploying production-ready, cloud-native apps on Azure.
