Read time: 7 minutes
A few months ago, I needed to deploy a small ASP.NET Core API to Azure—fast. But I quickly realized how confusing it can be, especially for newcomers.
Azure offers a lot of hosting options for .NET apps, each with trade-offs depending on how much control you need and how your app scales.
So how do you cut through the noise and pick the simplest way to get your app running in the cloud?
That’s exactly what I’ll break down for you today.
Let’s dive in.
Choosing an Azure hosting model
The Microsoft Azure official docs offer some guidance on how to choose a compute service to host your application:
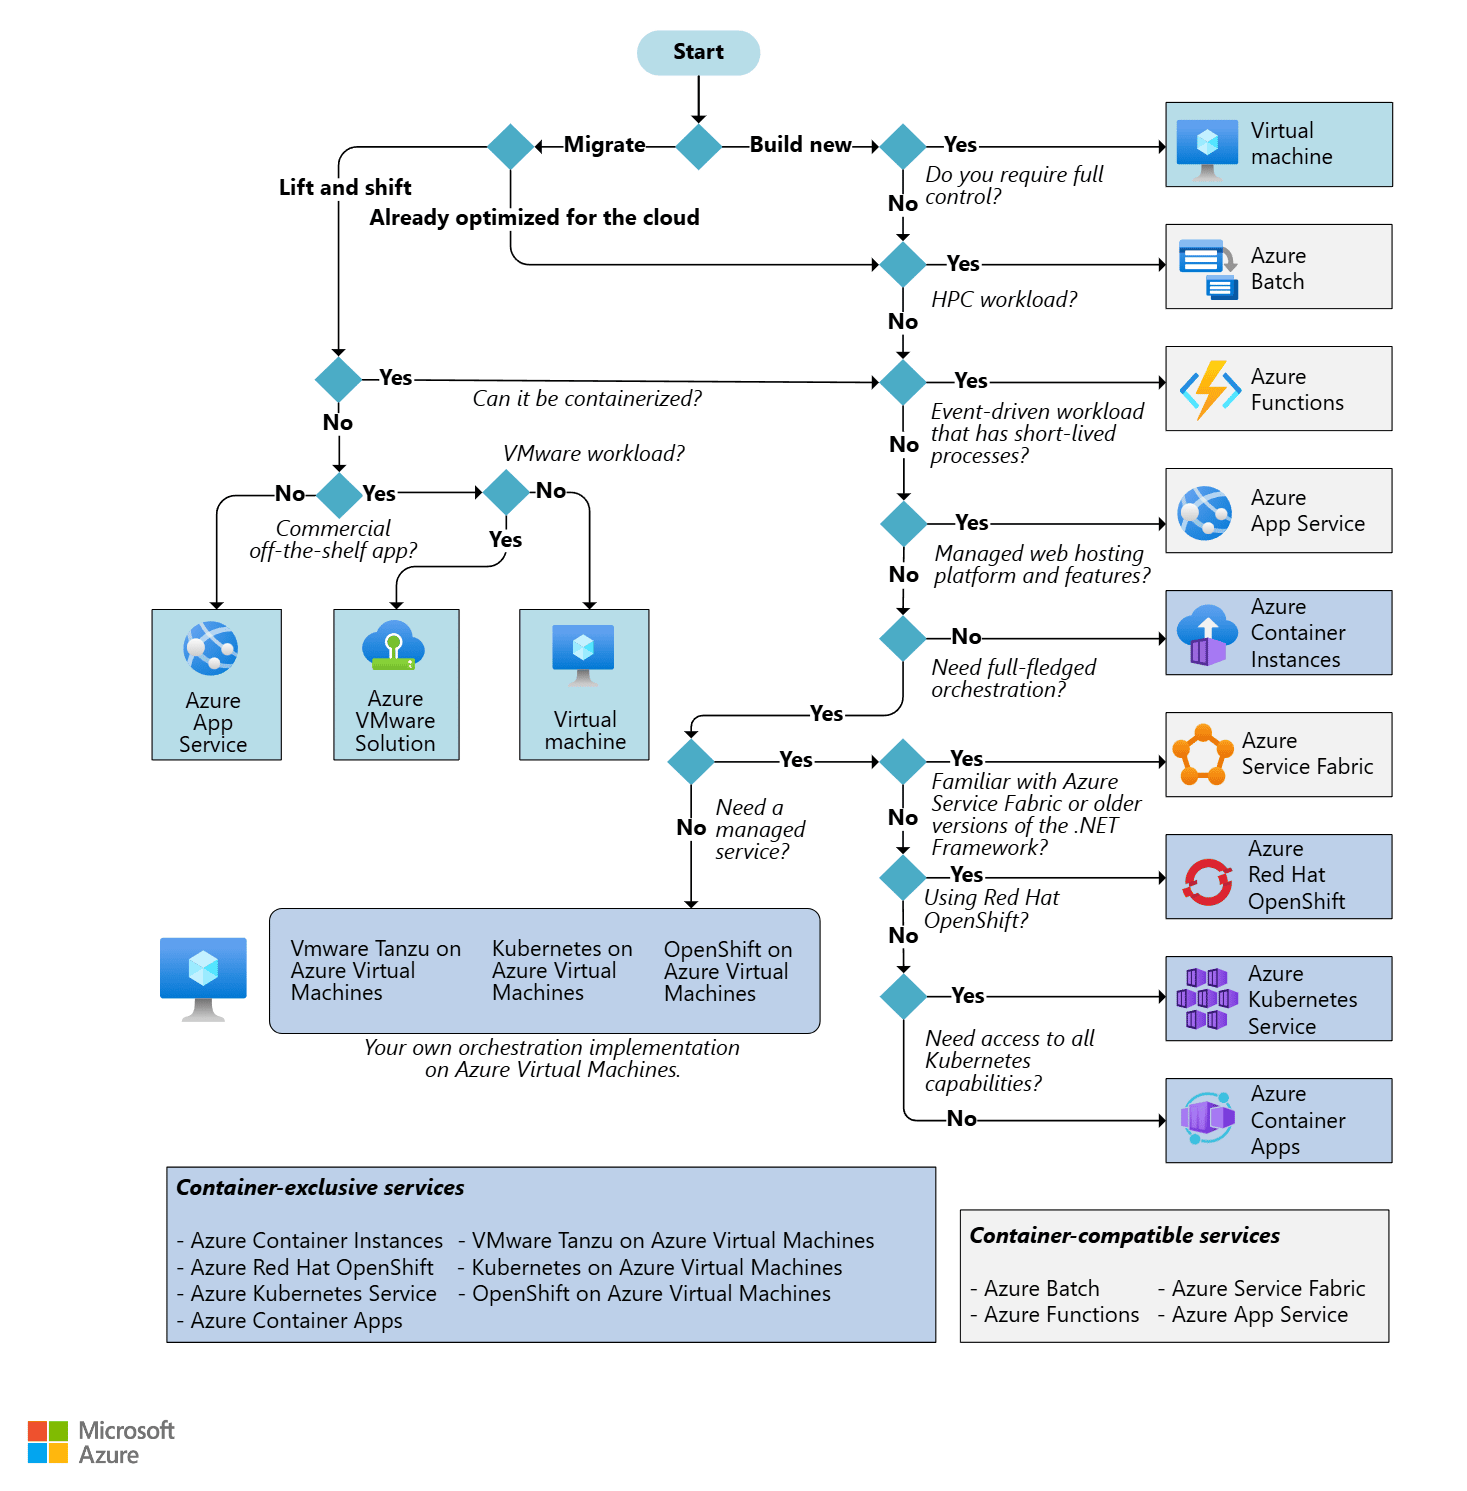
However, I think that decision tree is a bit more complicated than it needs to be, especially for .NET applications.
Here’s a simpler version that should fit most scenarios where you need to deploy some sort of .NET app to Azure:
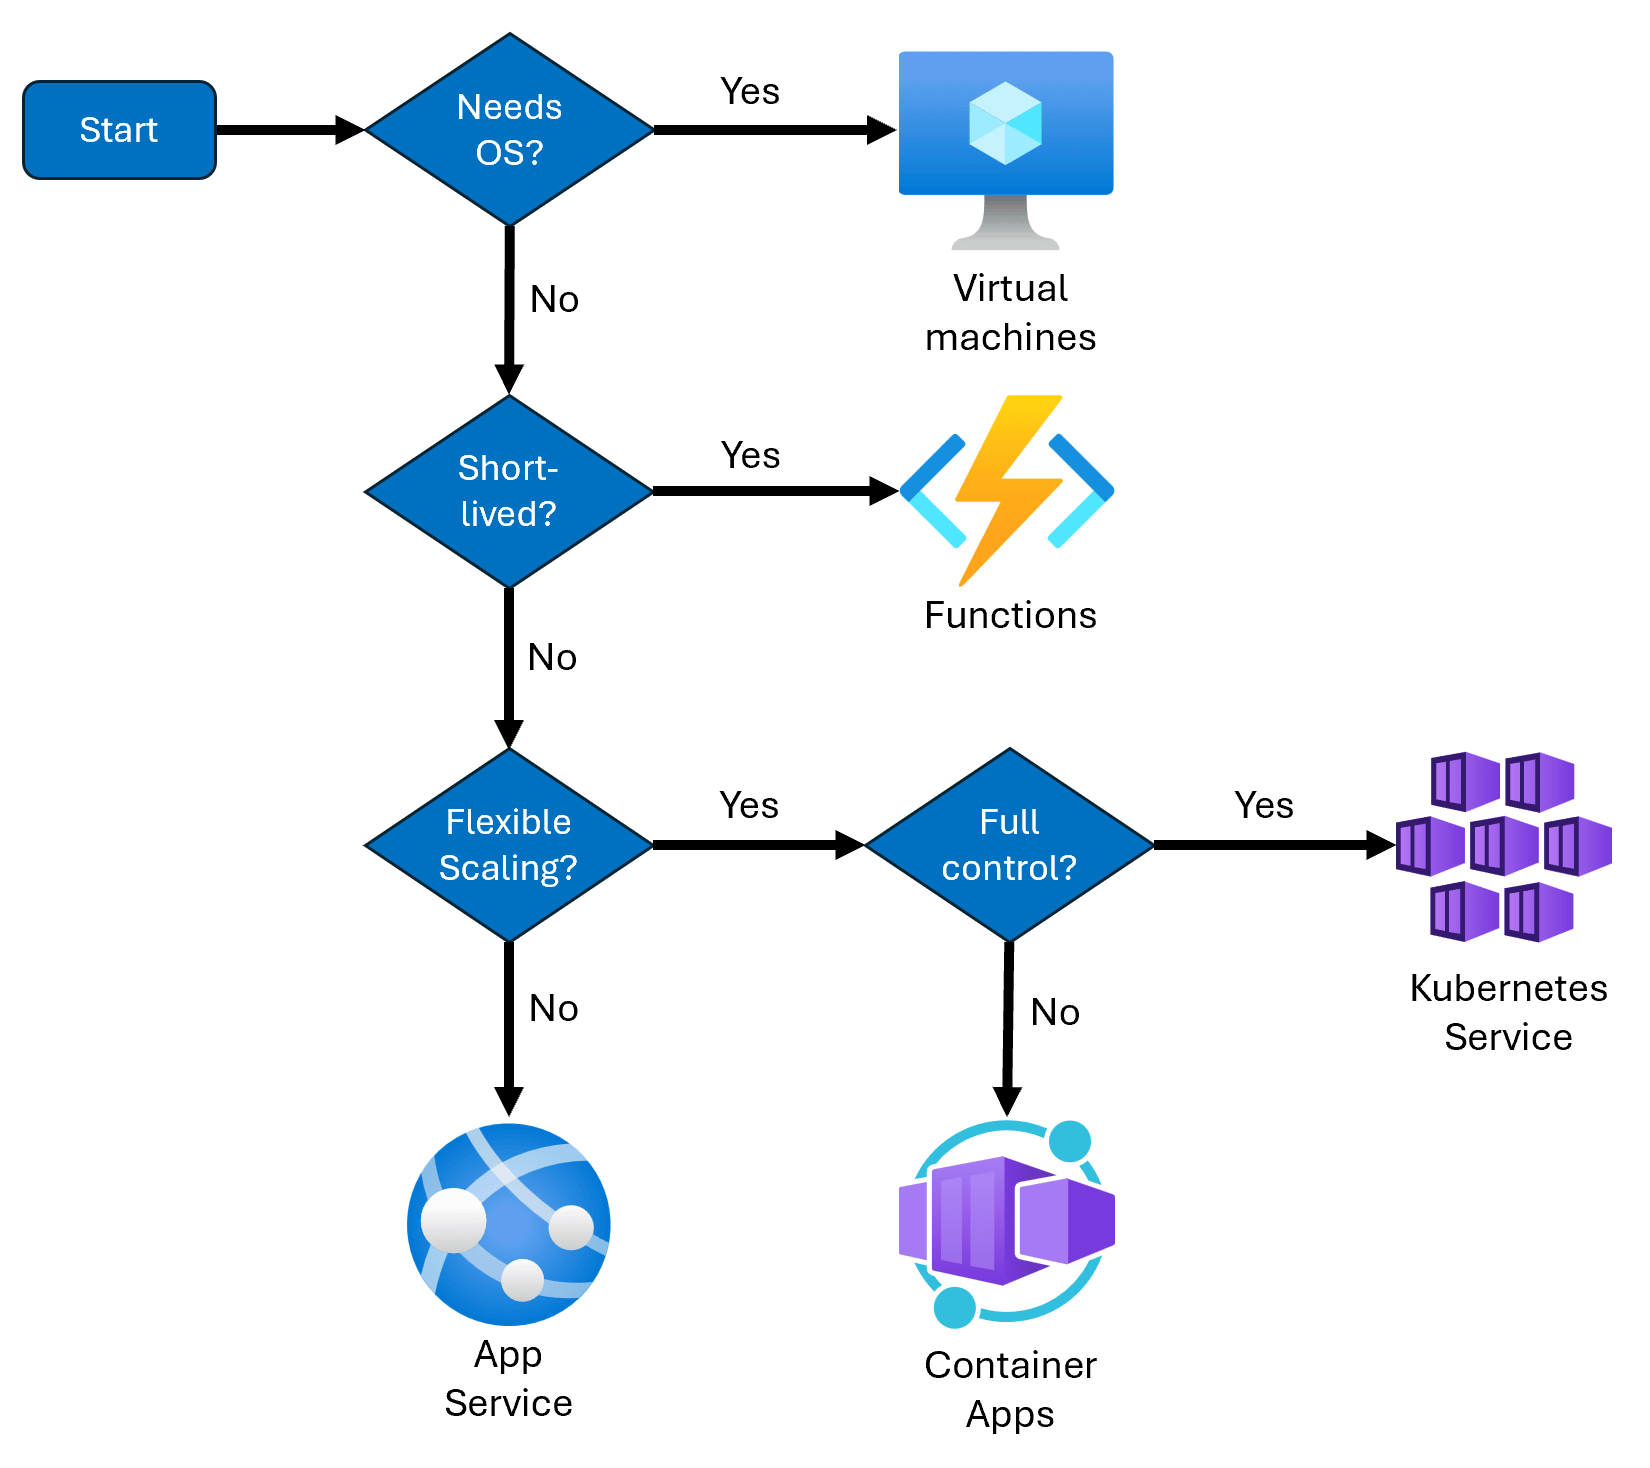
Here’s the reasoning:
Does your app have OS-specific dependencies?
If your app relies on third-party software, needs background Windows services, uses COM, GDI+ or requires configuring IIS manually, then you need full control and a Virtual Machine is your only choice.
Is your app short-lived?
If you have an app that all it does is respond to HTTP triggers, process messages from a queue, or runs on a timer, you have a short-lived, potentially stateless app, and an Azure Function is the best fit.
Does your app need flexible scaling?
If your app is bursty, irregular, or has unpredictable demand, where sometimes you need to scale out massively, where other times you might as well scale to zero, you need to use containers.
The trick here is just how much control you want on the service that orchestrates those containers.
Need full control to fine-tune how those containers run? Go for Azure Kubernetes Service (AKS), but be ready for lots of infra management.
Need containers but want to avoid all the infra management overhead? Go with Azure Container Apps.
Is your app too simple for any of the above?
Then just use Azure App Service. If you’re building a typical web app or API without special scaling needs or OS-level dependencies, or if you need to get something out quickly, this is a rock-solid choice.
It’s stable, easy to deploy, and lets you go from your box to the cloud in minutes without having to dive into additional infrastructure or container-related concerns.
Let’s go through this last option step by step.
Prefer to watch instead? Here’s a full walkthrough:
Deploying to Azure App Service
Let’s deploy a simple ASP.NET Core Web API to Azure App Service using Visual Studio Code.
I’ll assume you already have access to an Azure Subscription, but if you don’t, I listed a few ways to get free Azure credits over here.
Also, make sure you install the free Azure App Service extension for VS Code, or even better, the Azure Tools Extension Pack which comes with support for several other Azure services:
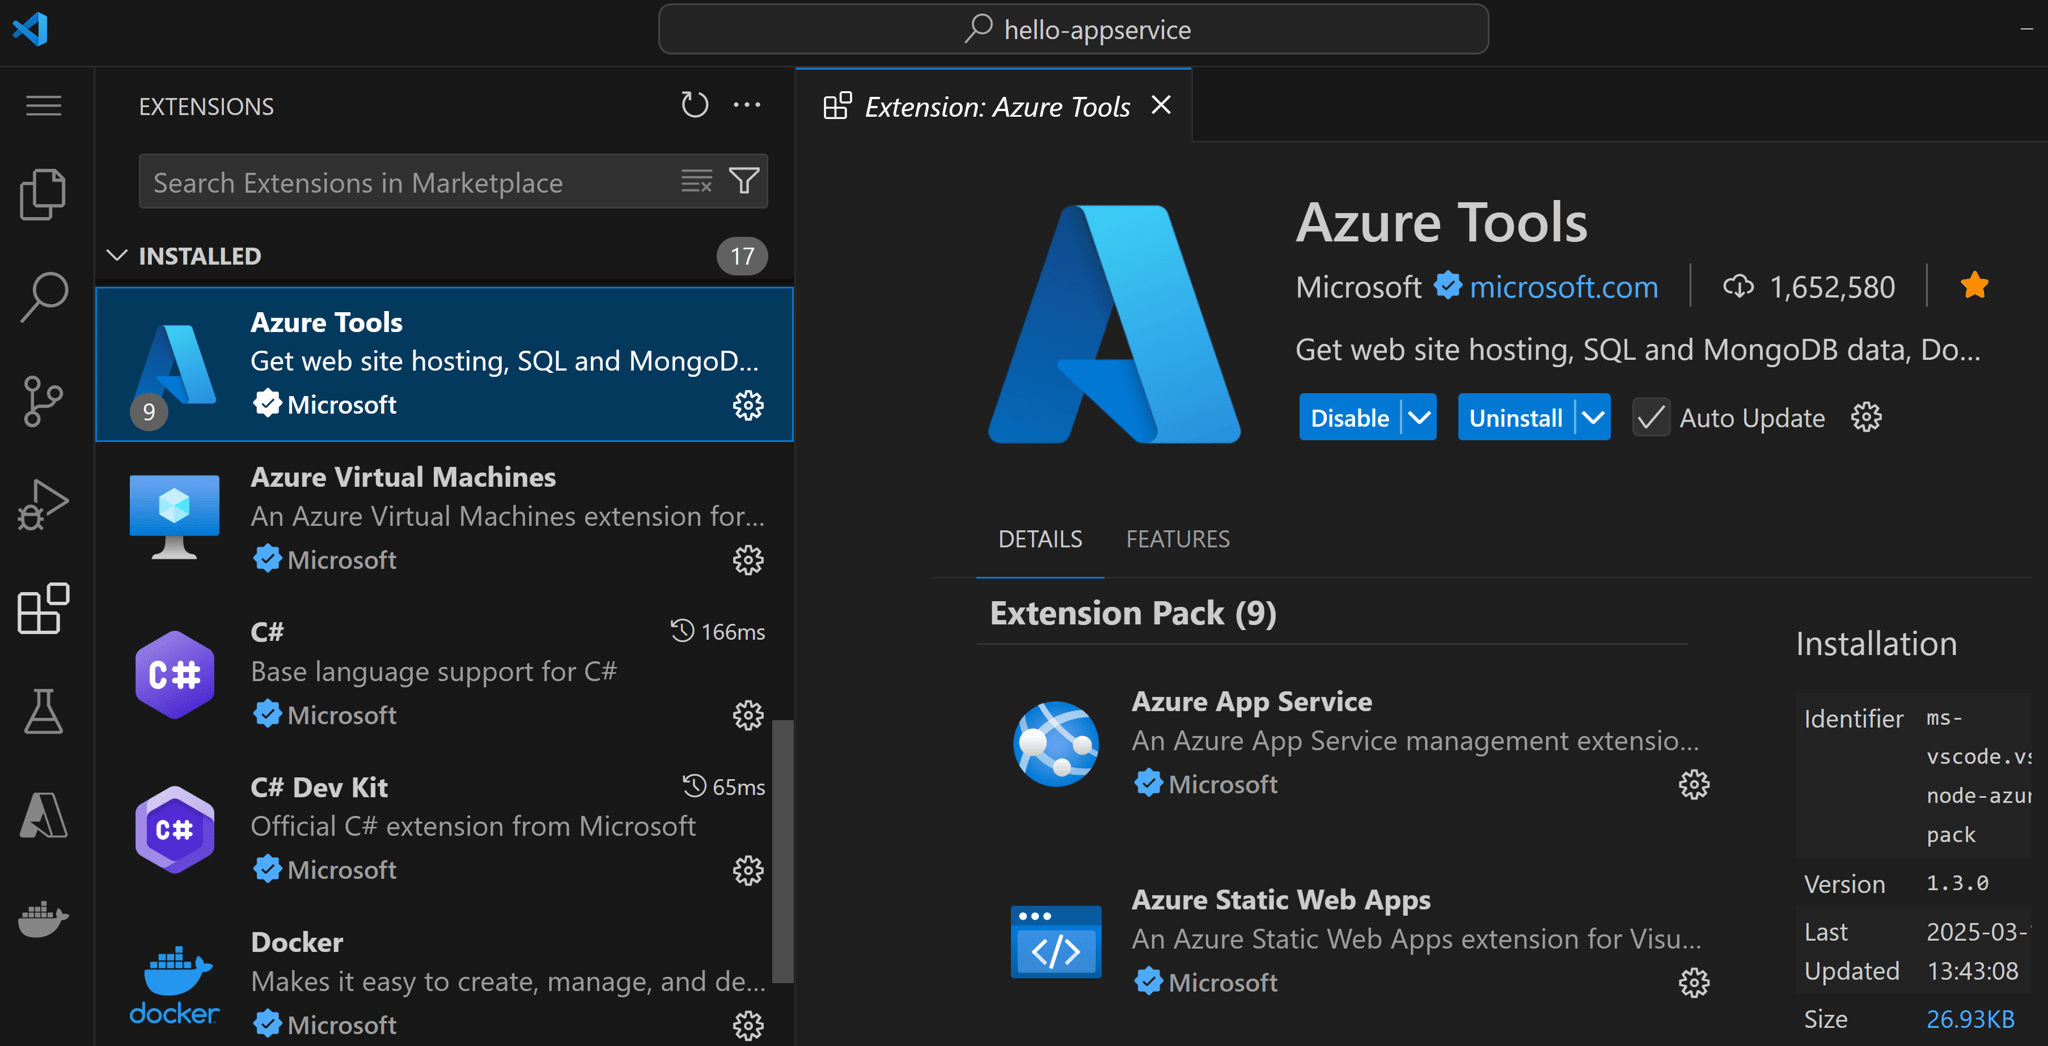
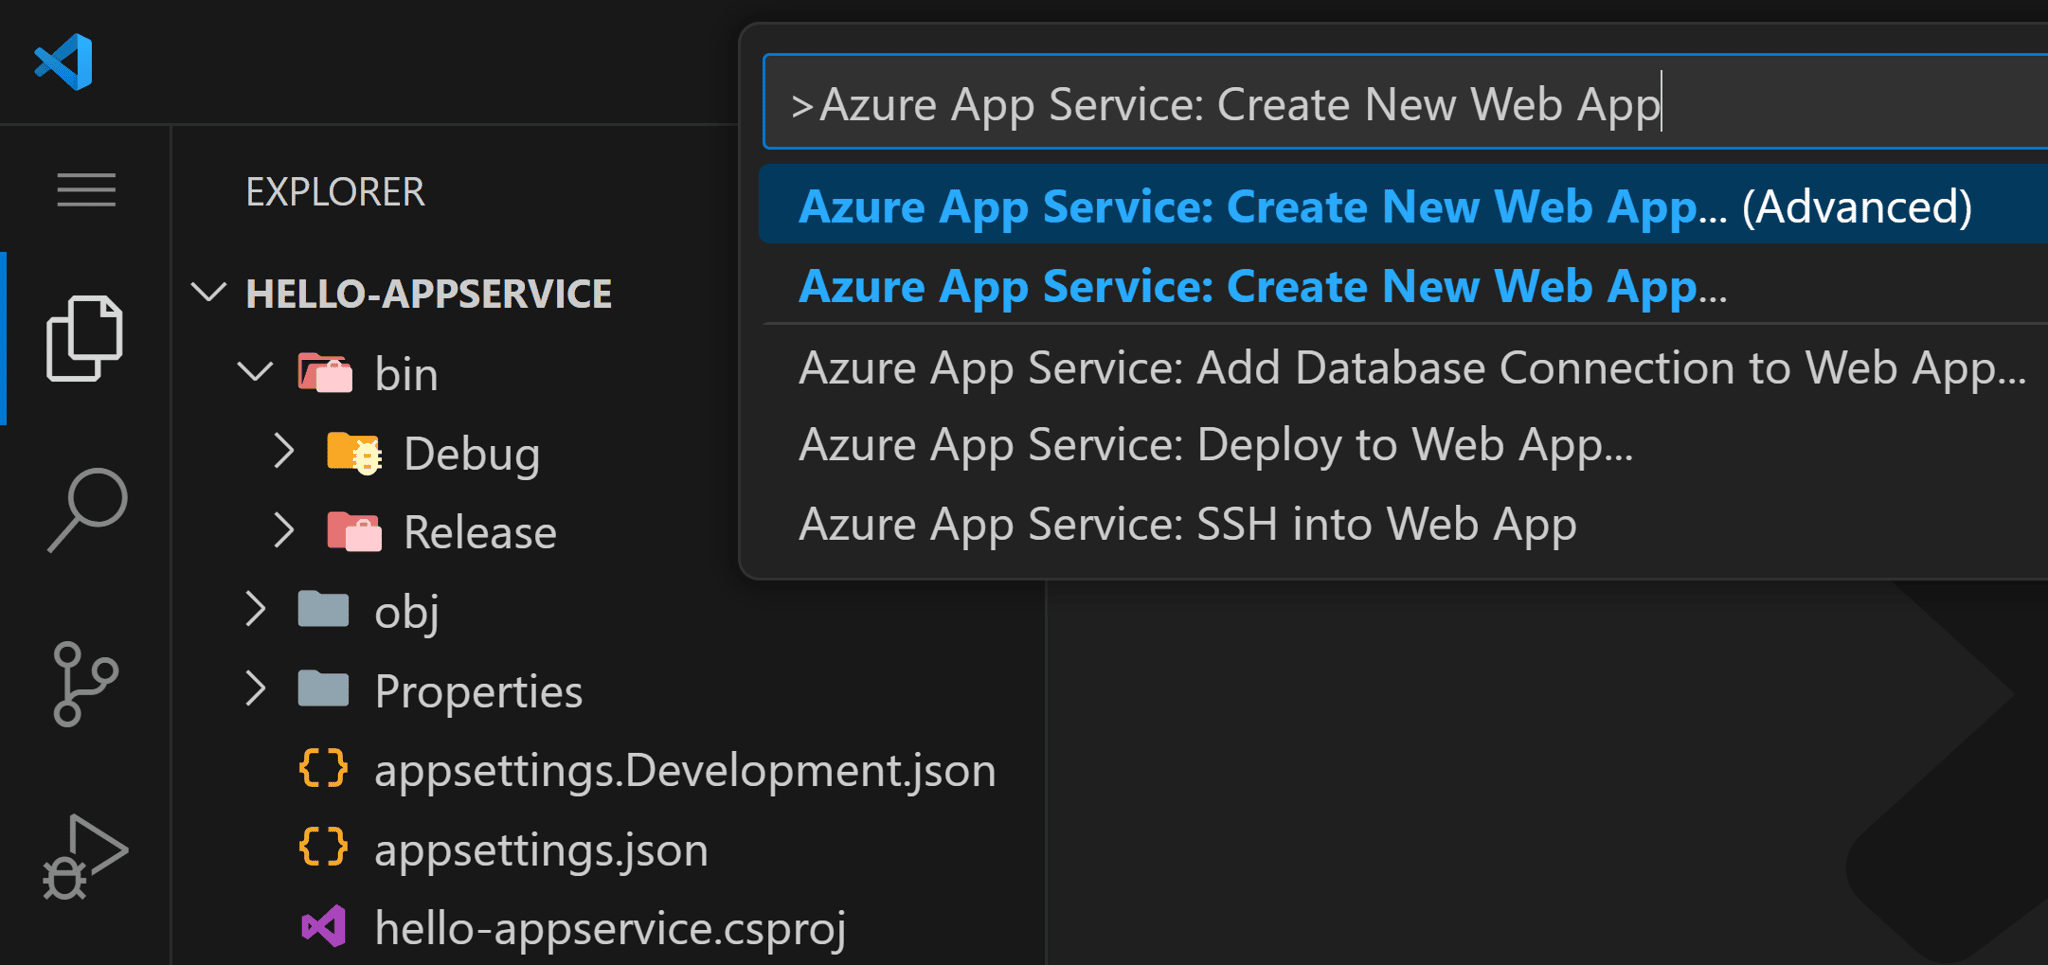
Then open your code base in VS Code and start the App Service Web App creation wizard by typing Azure App Service: Create New Web App… (Advanced) in your Command Palette:
The very first time you do this you will likely need to sign in to your Azure account and select your subscription.
Then, give your Web App a name:

Select or enter the name for your resource group, the logical container for your Web App and any related resources:

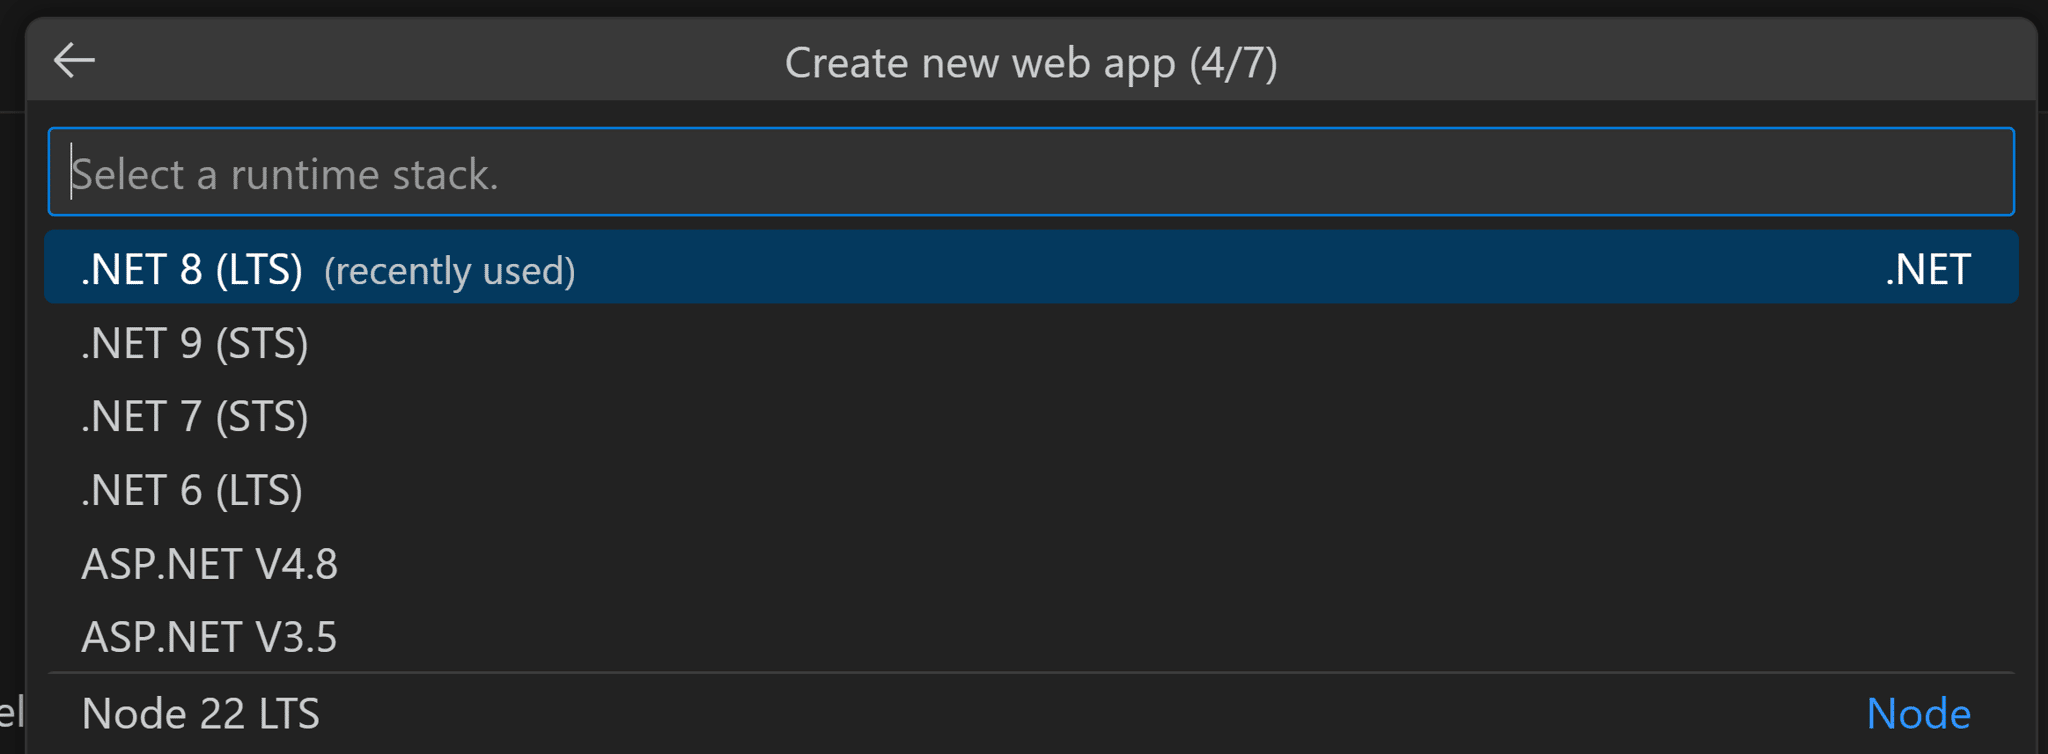
Select your runtime stack, which will ensure you get allocated to a VM where your required .NET version is available:
Pick the OS to host your app. ASP.NET Core apps are cross-platform, so your app will work fine in both Windows and Linux, but in my experience, App Service works best on Windows:

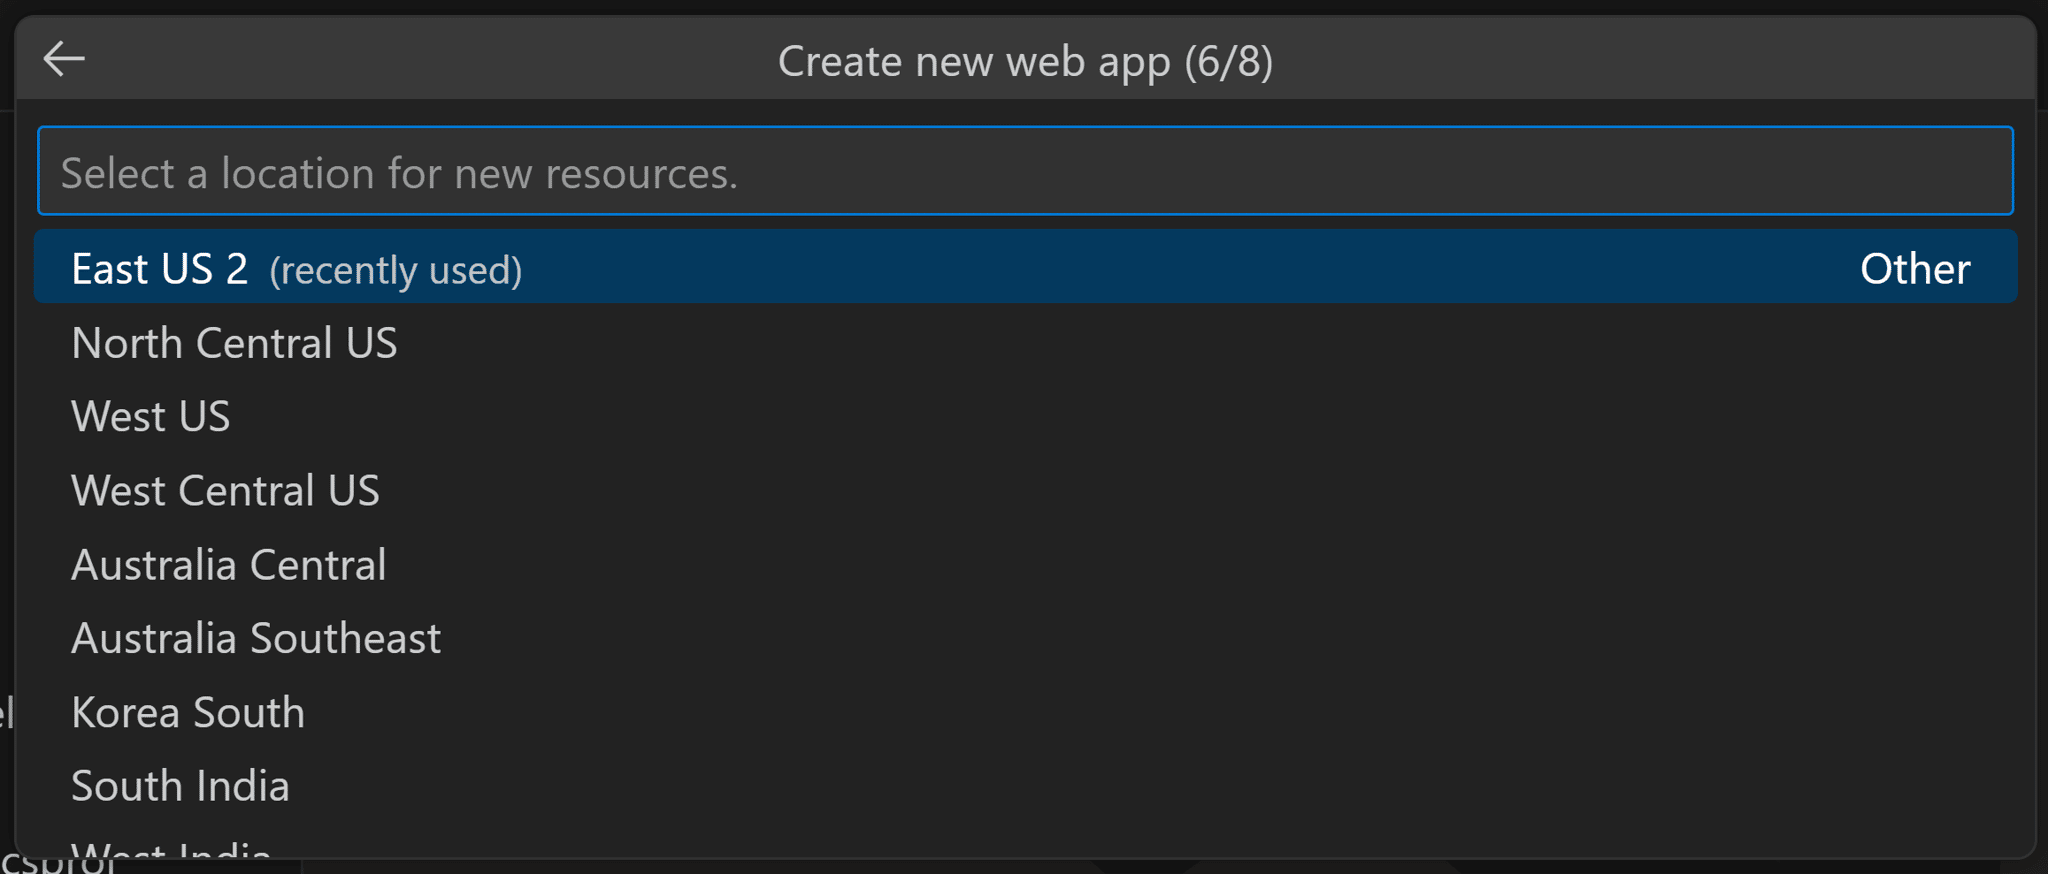
Pick the region closest to you or to your customers, which is where your app will physically live:
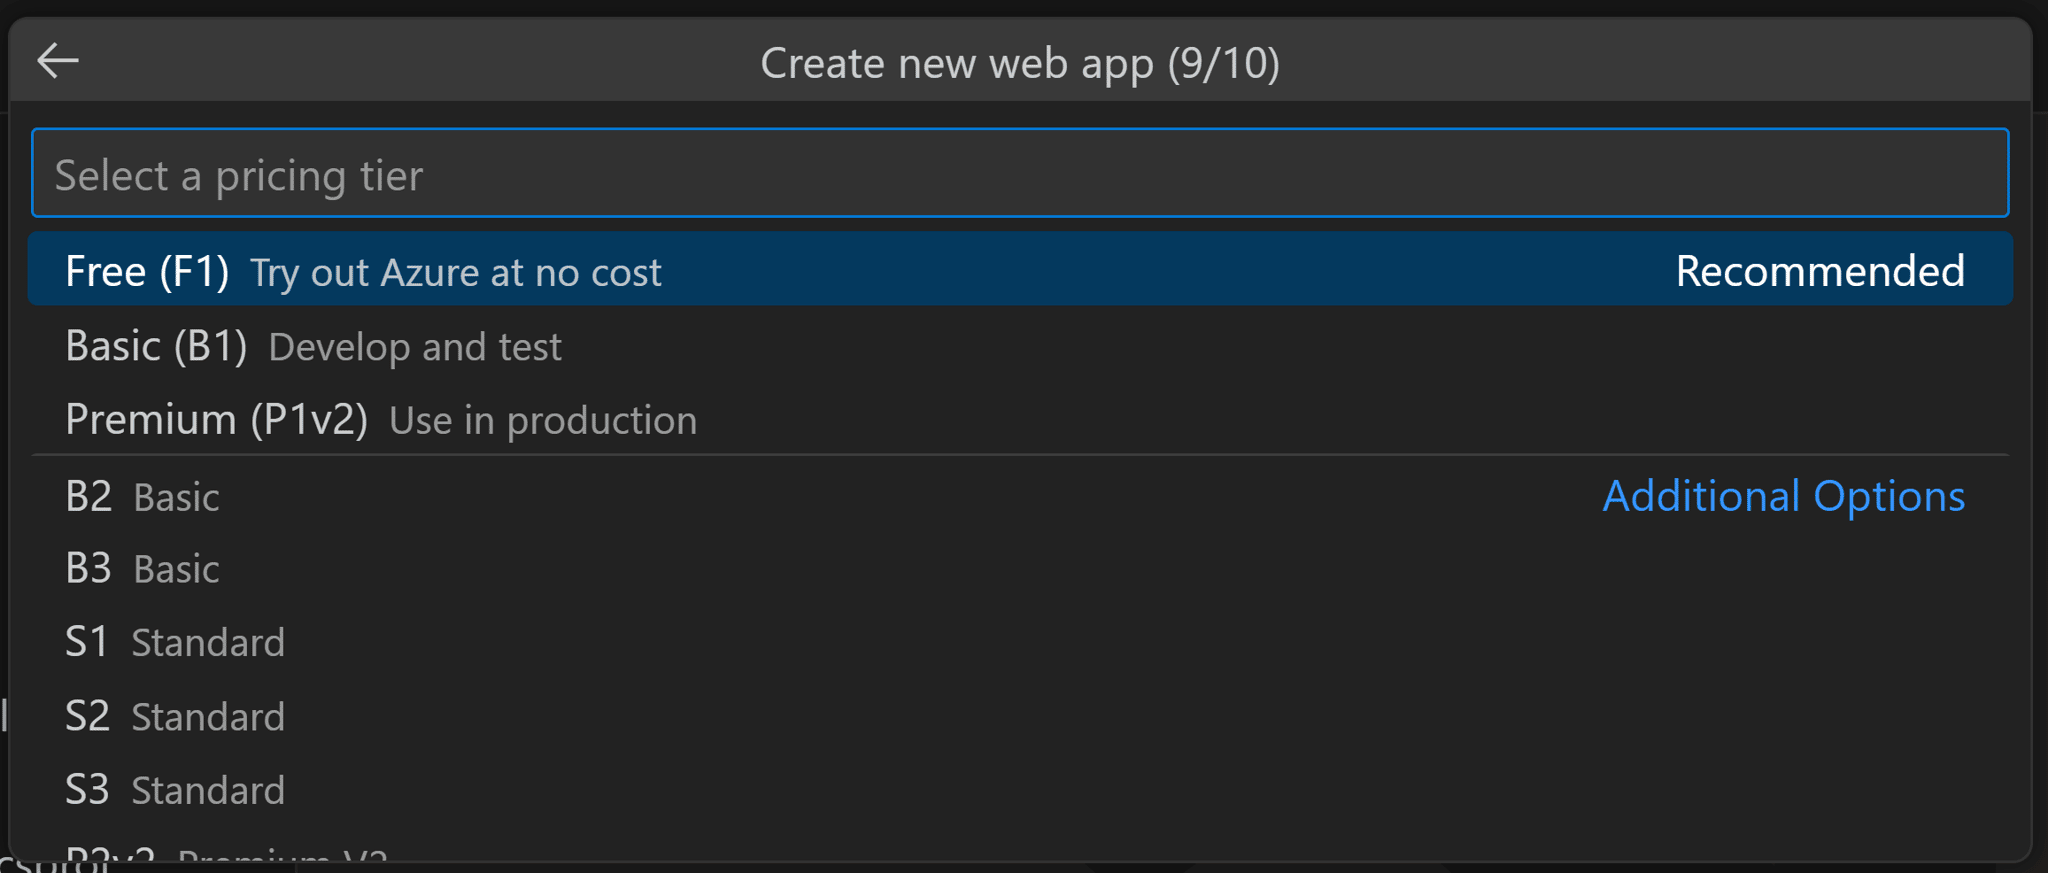
Select or create an App Service Plan, which defines how much CPU, RAM, and Disk space will be allocated to your app:

Of course, this also defines how much you will pay for hosting your app in Azure. For learning purposes, pick Free (F1), but keep in mind that you will be sharing your VM with other customers:
Add Application Insights if you want to enable metrics that you can use to monitor your app from the Azure Portal (or just skip that):

Now, VS Code will create your App Service Web App and Plan:

And a few seconds later we are ready for deployment:

Click Deploy and then pick your local application folder:

Select Add Config here so that VS Code adds a pre-deployment task where it will first generate a directory with all the files to deploy and then use it for the actual deployment:

A few seconds later, your deployment is complete!

Running your .NET app in Azure
If you now go to your Azure Portal, you will be able to quickly find your new App Service Web App:
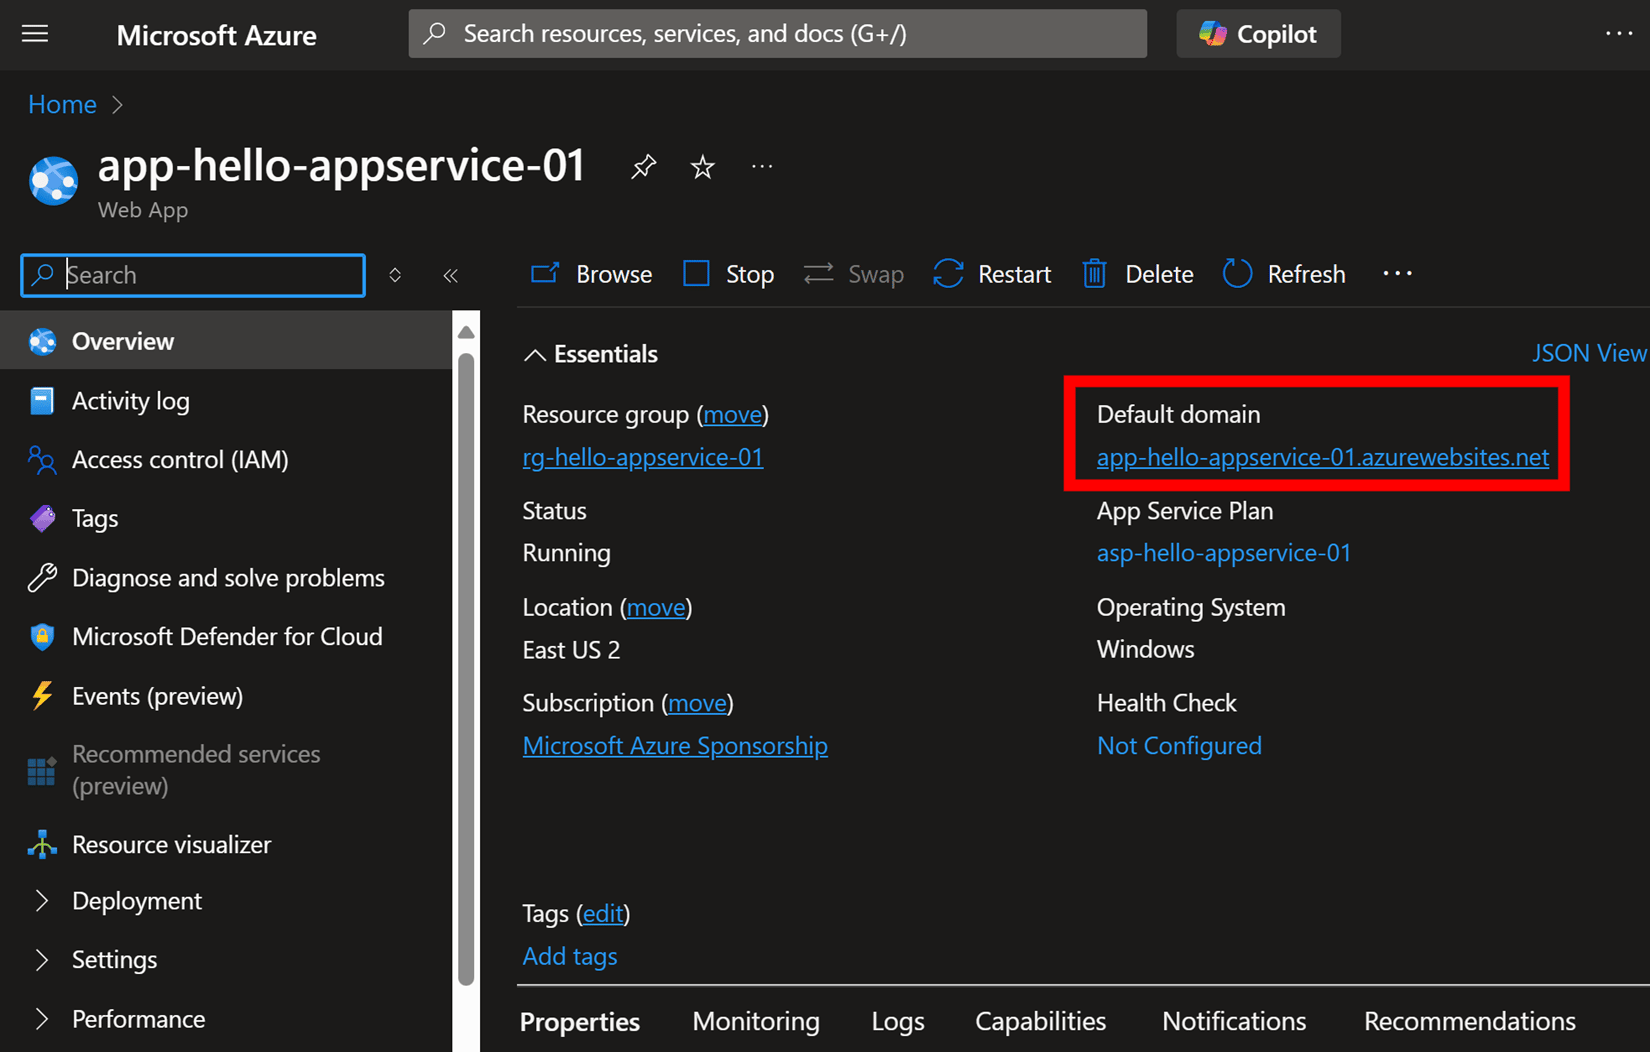
You can now grab your default domain there (which by the way gets a free TLS certificate) and use it to query your Web API in the browser or in your favorite API testing tool:
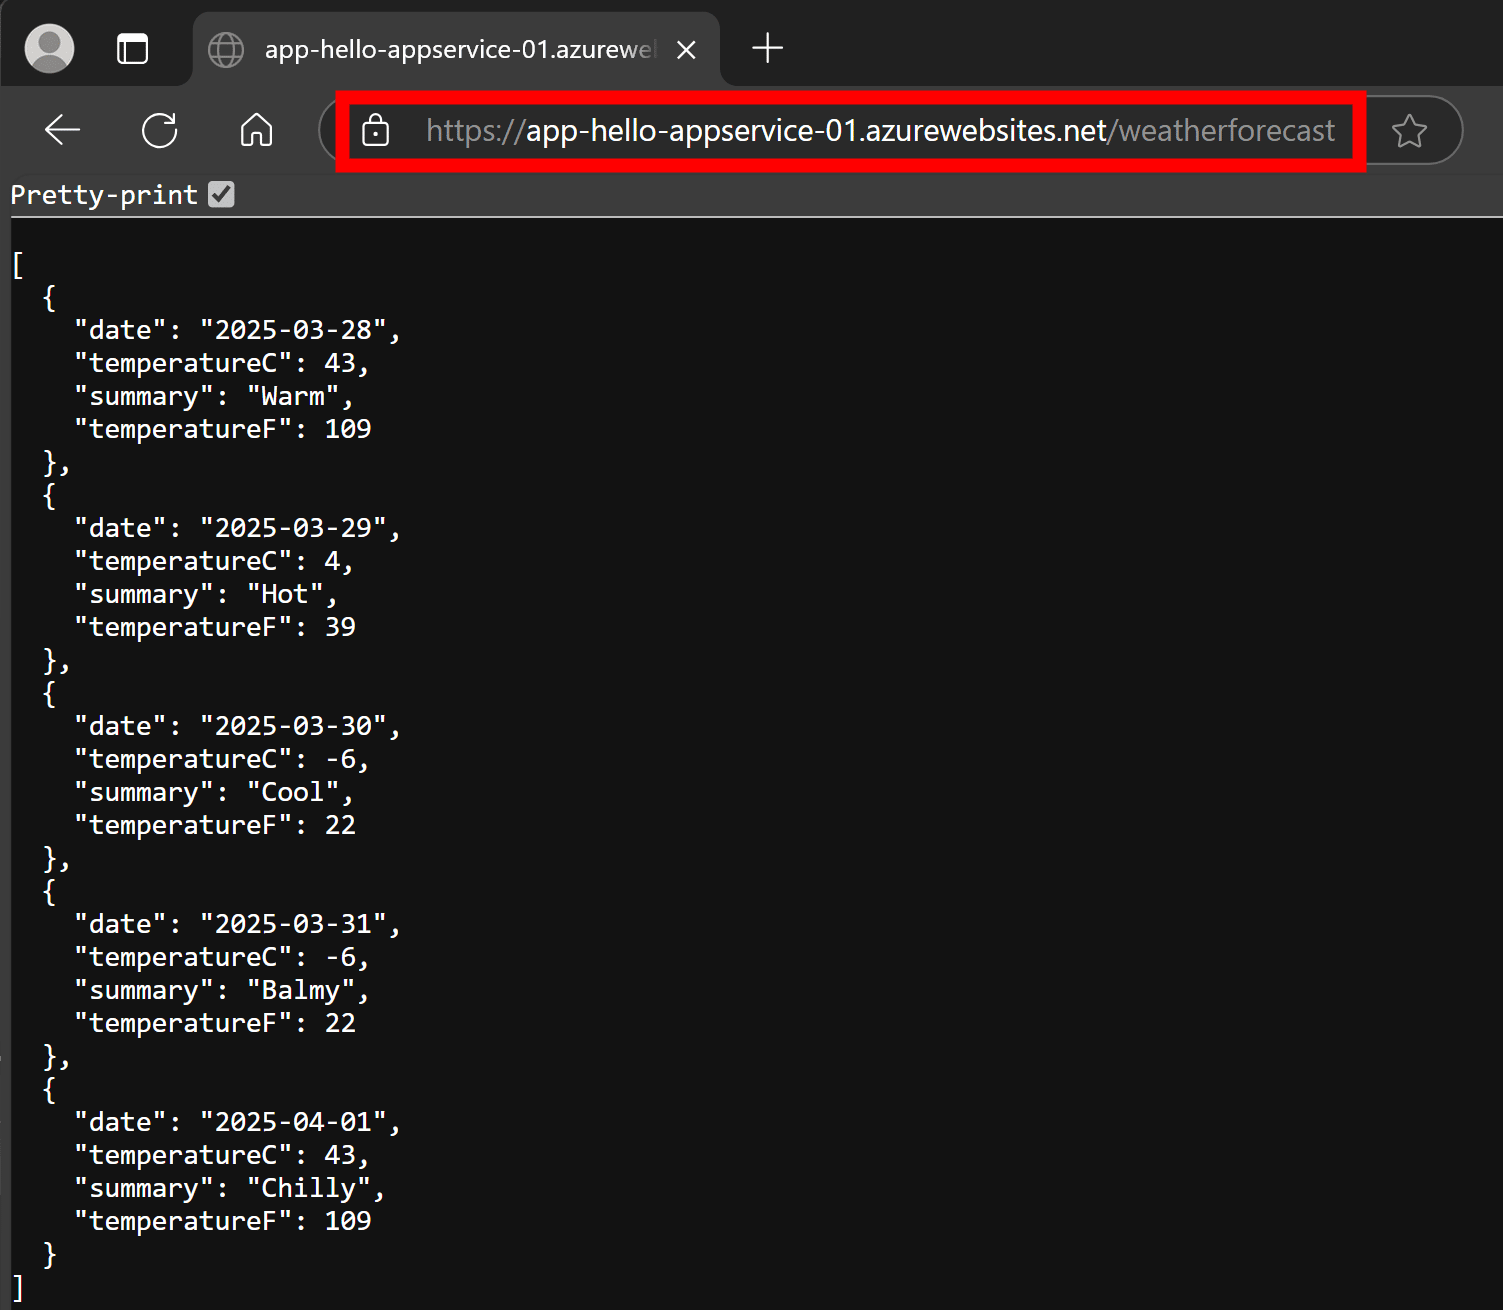
Mission accomplished!
Next Steps
Deploying such a simple Web API to Azure is trivial. But what if you need to:
- Configure environment variables
- Add a production-ready database
- Connect to other cloud services like Azure Storage
- Protect your API via Microsoft Entra, Azure’s identity provider
- Use passwordless authentication to avoid connection strings
I got all that covered in the bootcamp.
Need to build something at scale using containers? I’ll cover Azure Container Apps in the bootcamp too.
Wrapping Up
Azure gives you a dozen ways to deploy your .NET app—but most of them are overkill for getting started.
If you just want your ASP.NET Core app running in the cloud today, Azure App Service is the fastest path with the least friction.
Once you’ve mastered that, you can level up to containers, scaling, and all the fancy stuff.
But don’t start complicated. Start simple. Deploy. Then grow.
Until next week!
Whenever you’re ready, there are 3 ways I can help you:
-
.NET Backend Developer Bootcamp: A complete path from ASP.NET Core fundamentals to building, containerizing, and deploying production-ready, cloud-native apps on Azure.
-
Building Microservices With .NET: Transform the way you build .NET systems at scale.
-
Get the full source code: Download the working project from this article, grab exclusive course discounts, and join a private .NET community.
