Read time: 7 minutes
If you’ve ever felt overwhelmed by the endless layers and abstractions in a typical .NET backend, you’re not alone.
Most of us have spent hours tracing a single feature across controllers, services, repositories, and DTOs—just to make a simple change.
It’s easy to lose sight of what really matters: delivering features that solve real problems, fast.
That’s why today I want to share a practical approach that’s made my own projects (and my students’ projects) dramatically simpler and more maintainable: Vertical Slice Architecture.
In this article, I’ll break down what vertical slices are, why they beat the old “N-Tier” way of structuring code, and how you can start applying this mindset in your own .NET projects—without extra frameworks or over-engineering.
I’ll show you how to group code by feature, not by technical layer, so you and your team can move faster and keep your sanity.
Let’s dive in.
What is Vertical Slice Architecture?
Essentially it is a way of grouping your code around features, as opposed to technical layers. Those technical layers would traditionally look like this:
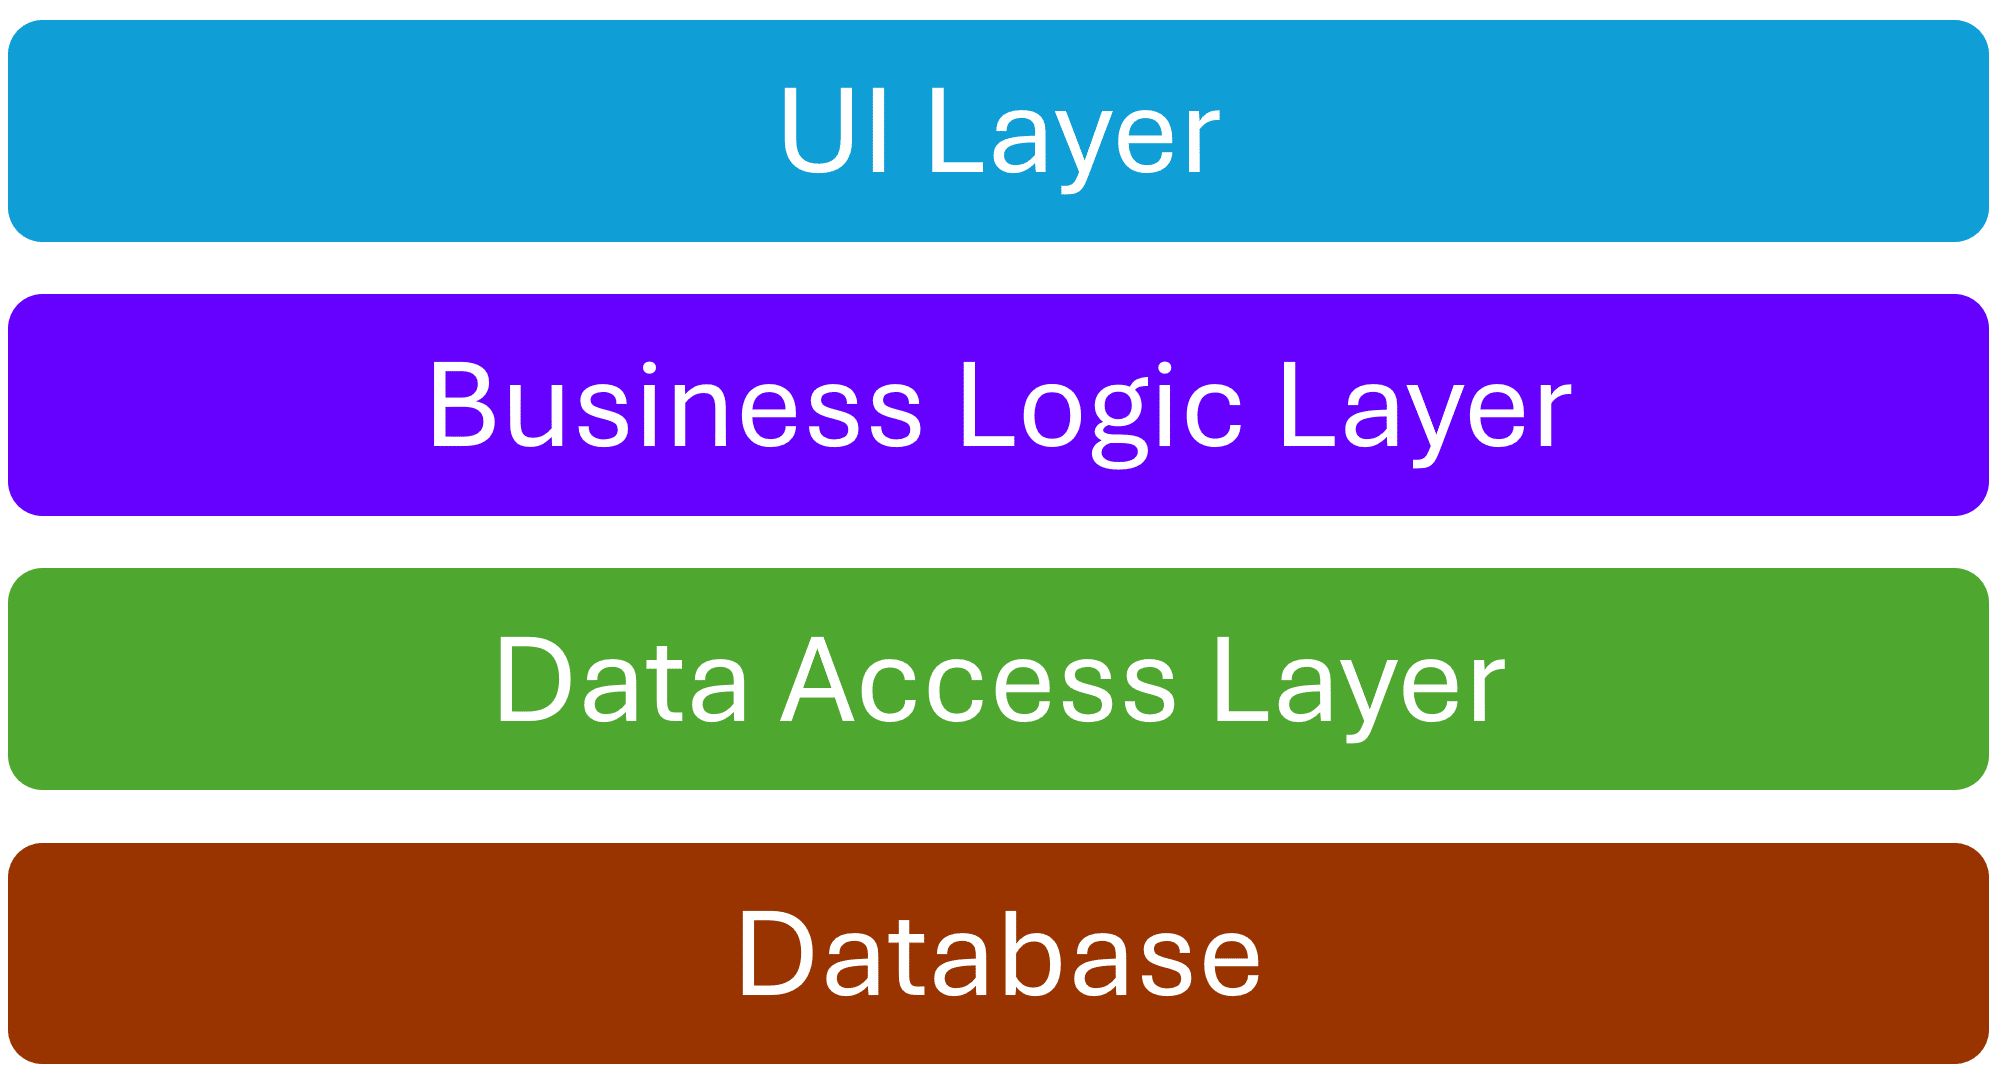
That would be an N-Tier architecture, which is how we were building systems 20 years ago, and I bet many organizations still follow that structure to this day.
What’s the problem with that? Well, it’s just that when you need to implement a feature or fix a bug you end up needing to change files across multiple projects in your code base. For instance, to implement the “Create Game” feature, you would write code across these:
- Game (entity)
- CreateGameDto
- GameDto (response)
- GamesController
- GamesService
- GamesRepository
The acrobatics of doing this hit new team members the hardest, since it’s not easy to find stuff across a new code base when you are expected to modify so many files to implement what is otherwise a simple feature.
Instead of all that, Jimmy Bogard proposed several years ago that you can cut a slice across all those layers and structure your code following that slice (aka feature):
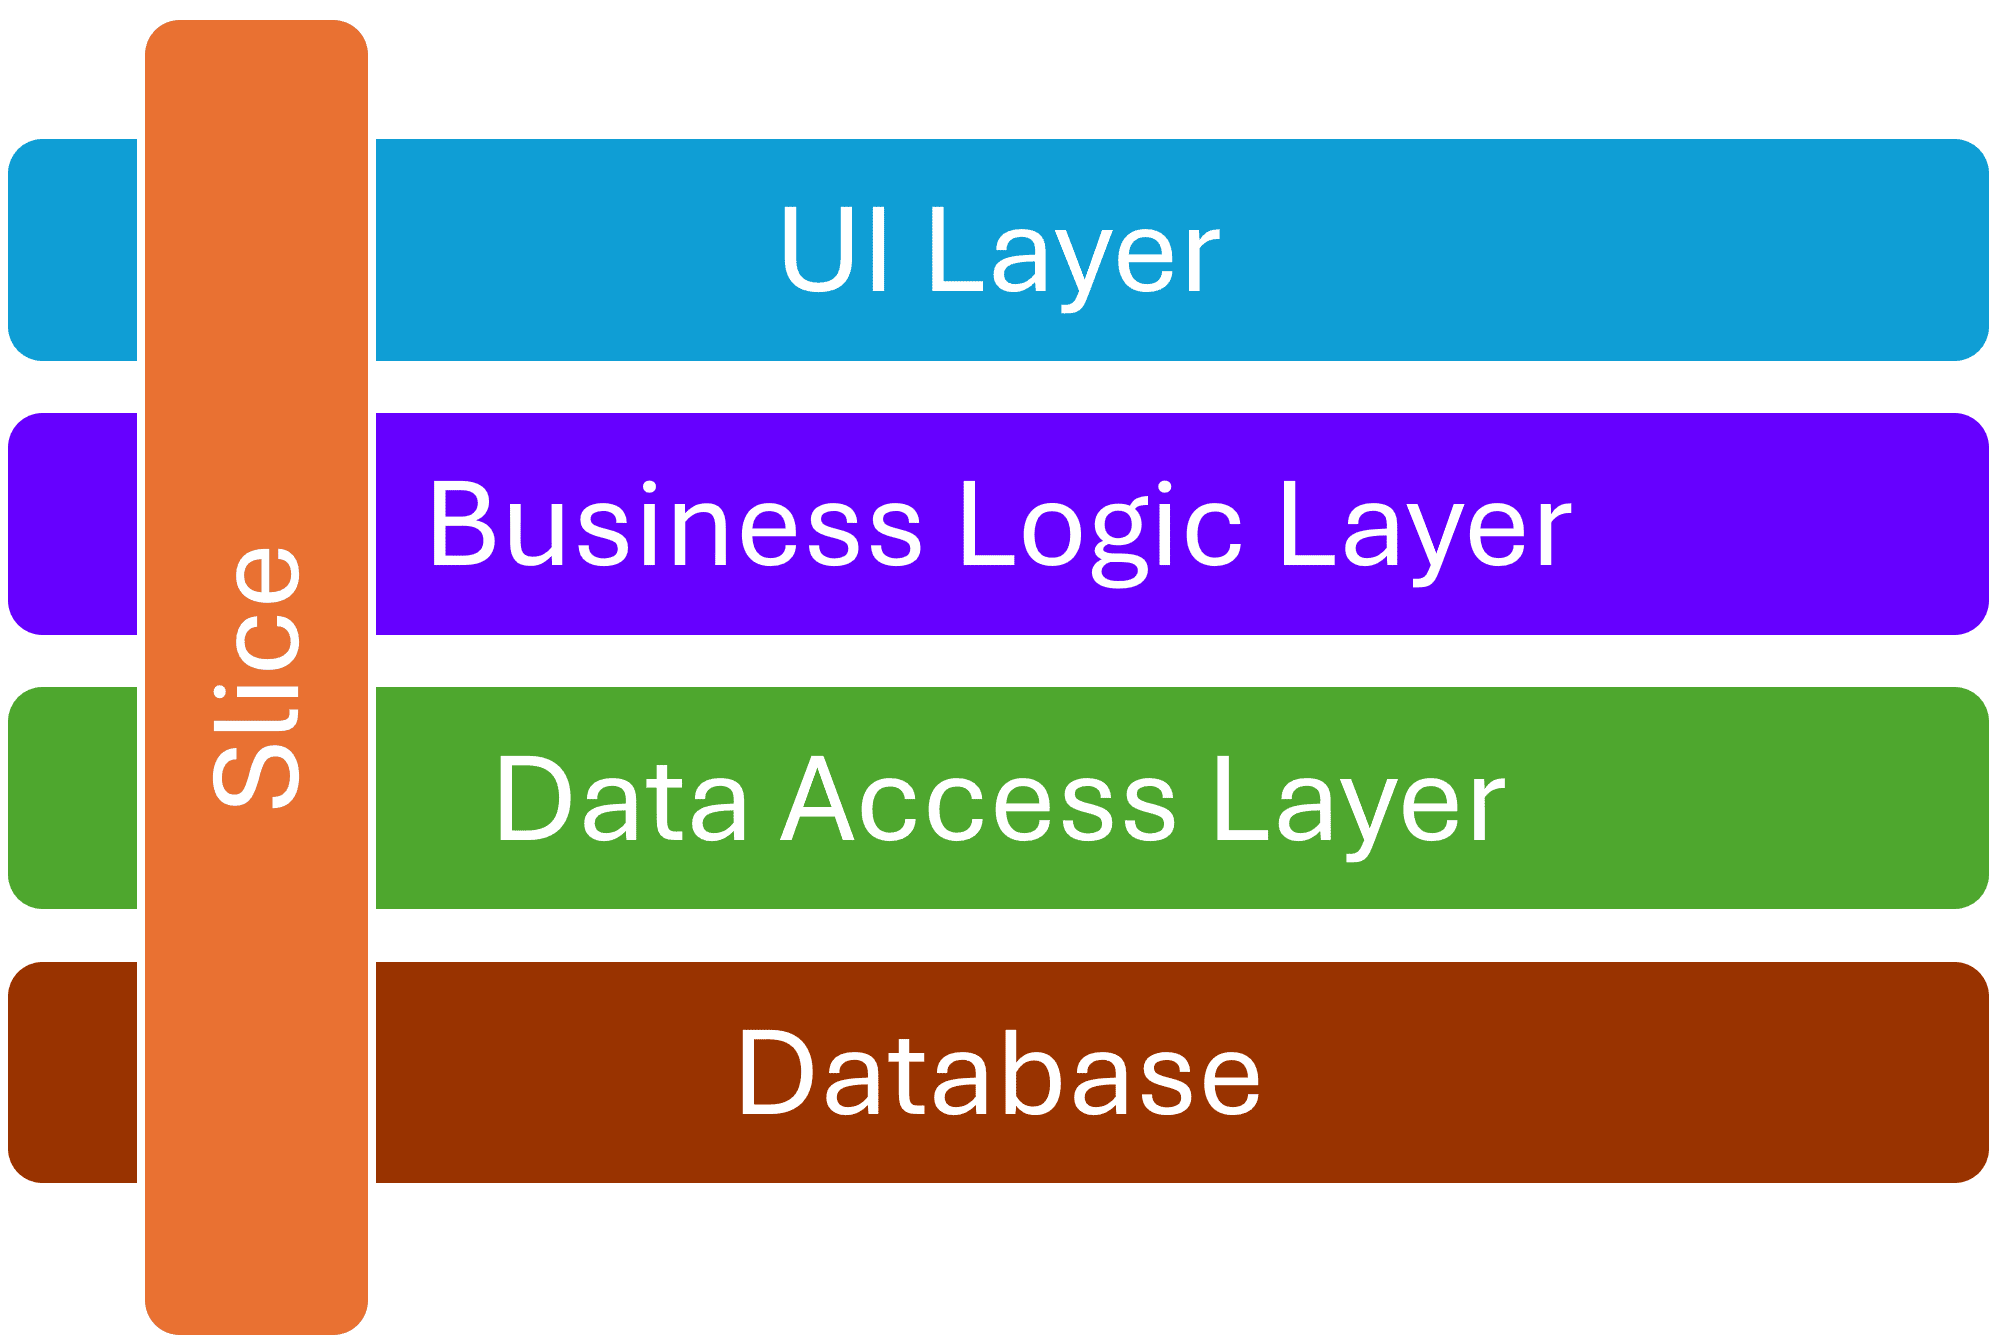
The idea is to shift your thinking into a model where you don’t work that much around layers, but instead focus on the slice/feature to implement. In that sense, you can think of that feature in these simple terms:

So, in terms of your backend, and keeping the entities on the side, there’s some sort of input (your request DTO), a handler class where you do all the work (replacing controller + service + repository) and then some sort of output (your response DTO).
Let’s see how that looks like in actual code.
The Create Game feature
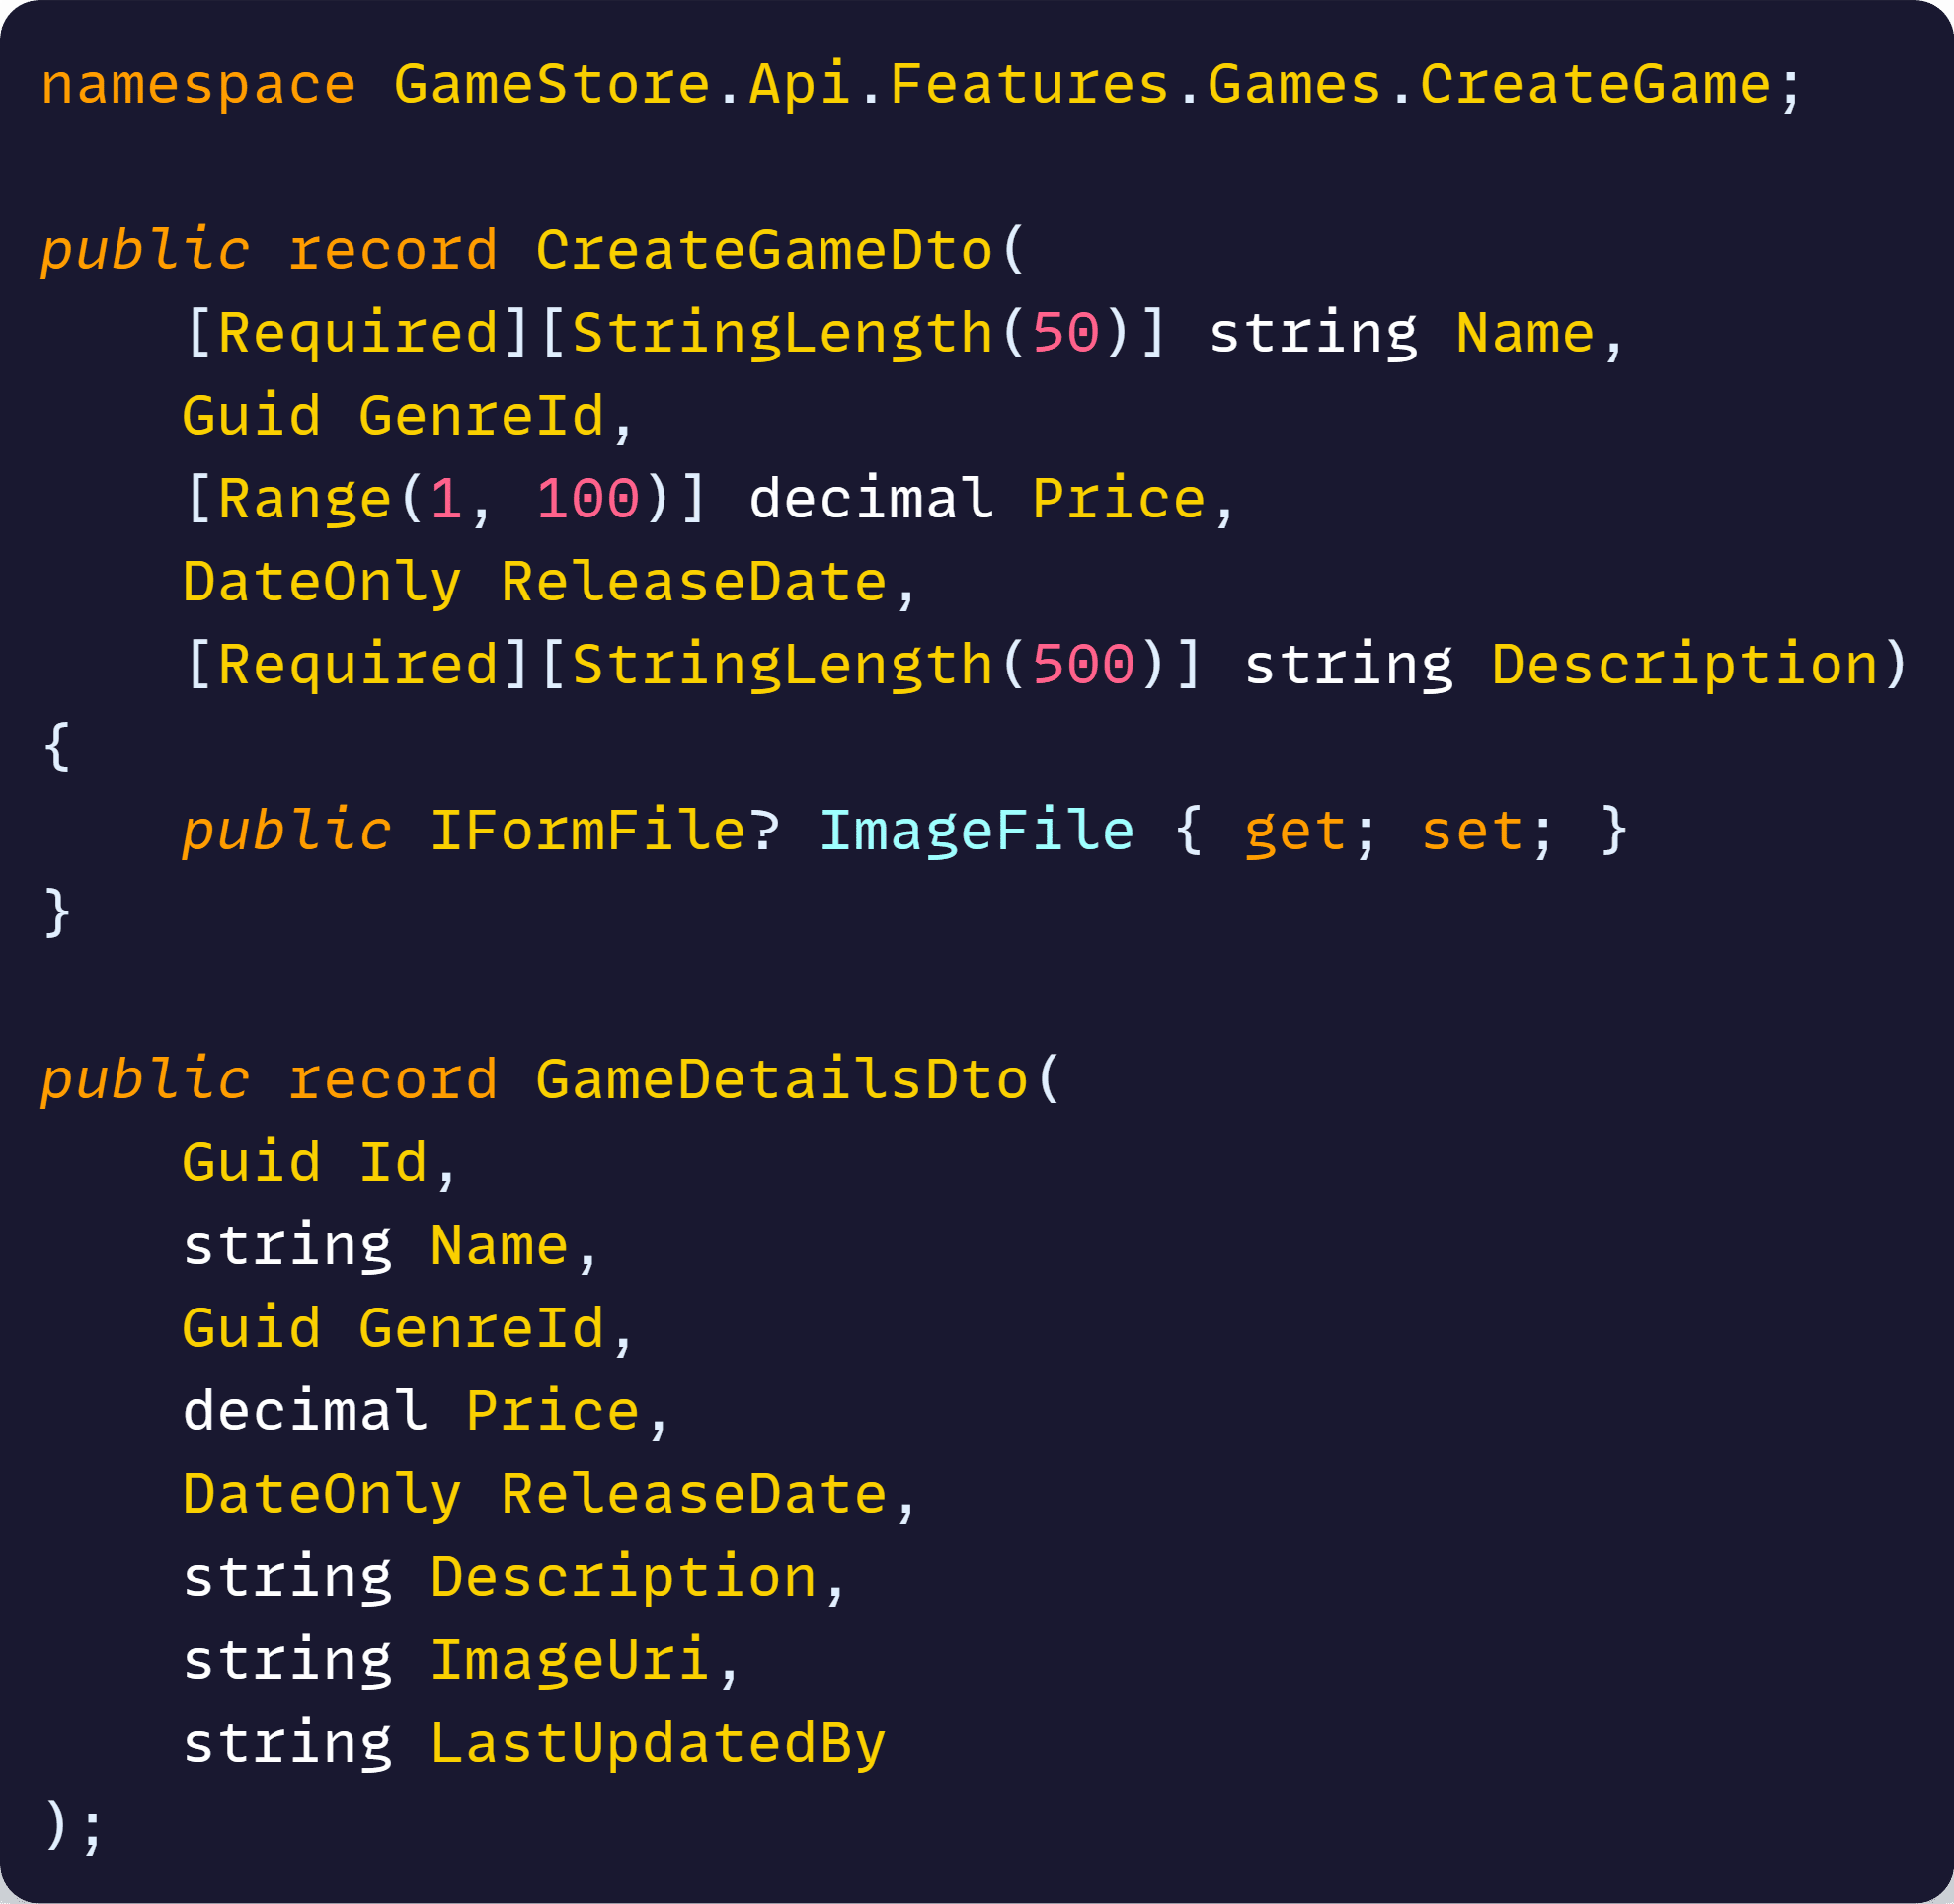
To create a game in the Game Store application, you will need both a CreateGameDto, which includes the name, price and other input details, and a GameDetailsDto, to return to the client when the work is done.
You can either create a C# file for each of those, or place them in a single file I called CreateGameDtos.cs:
That takes care of the input and output. In terms of the handler, you can create a simple class, that I call the Endpoint, which handles the specific request path via a minimal API endpoint:
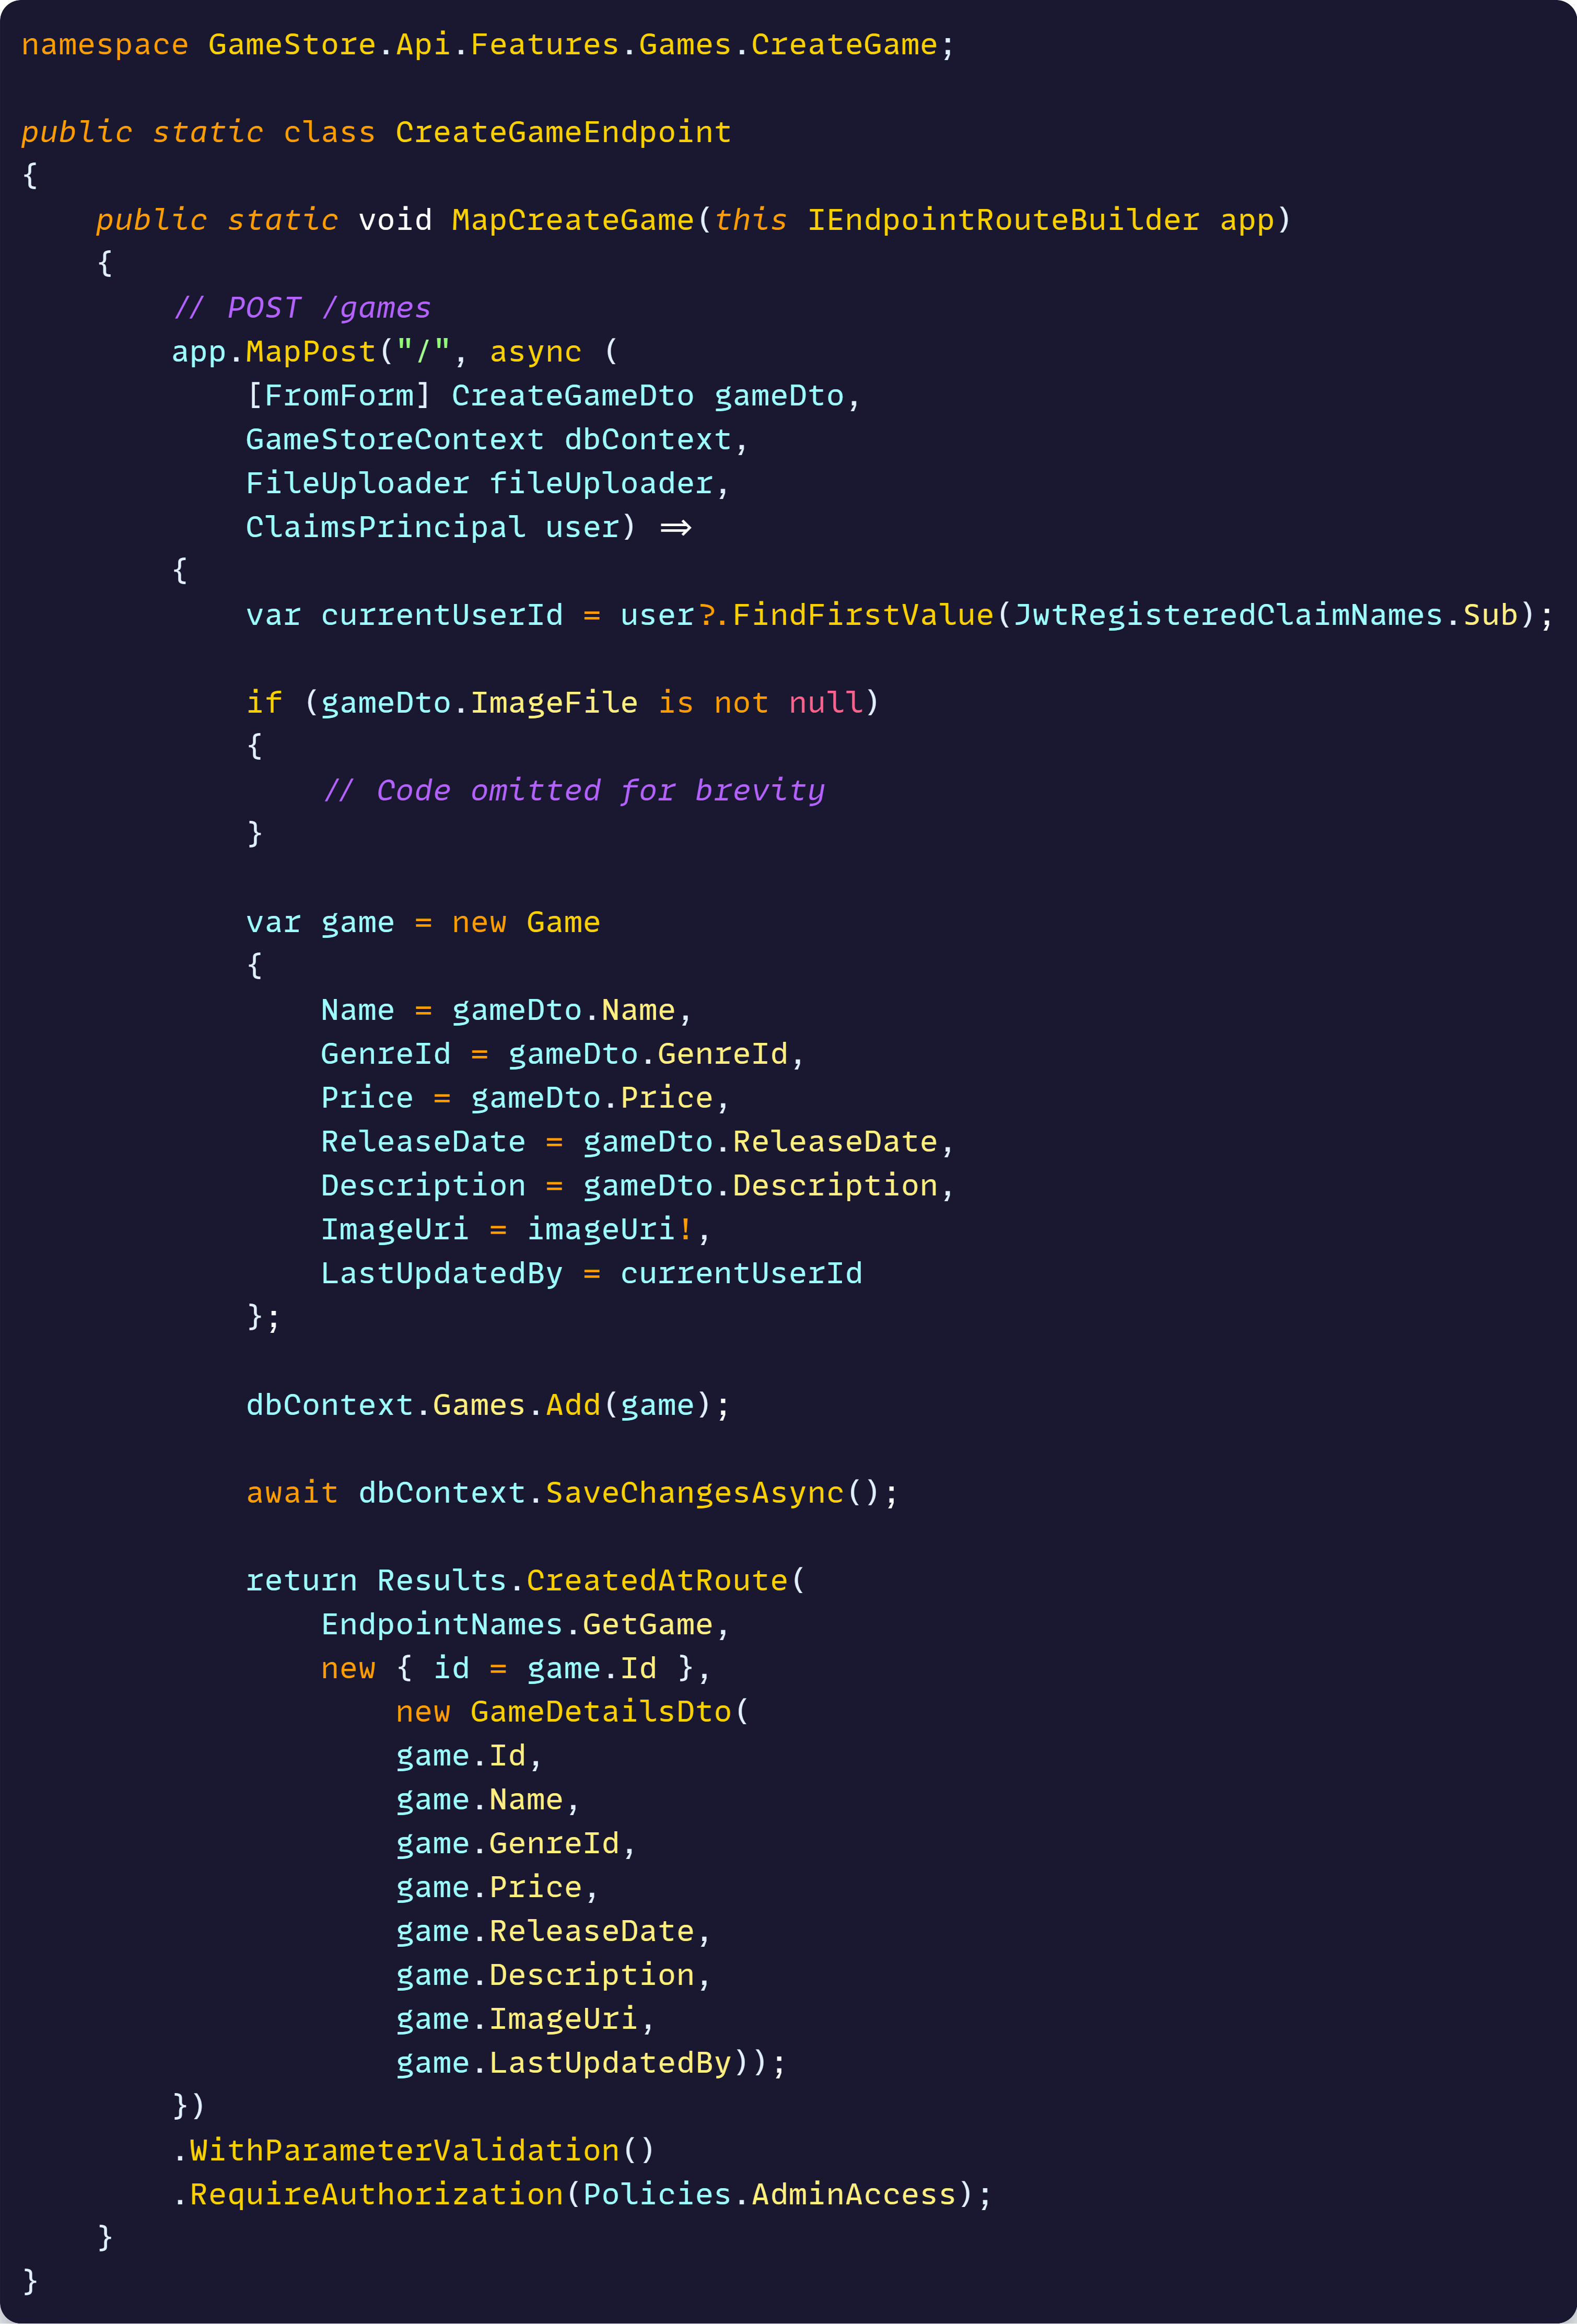
The endpoint receives the CreateGameDto (input) along with other services, uploads the game image to storage, saves the game in the DB and lastly returns a GameDetailsDto.
That’s it. That’s all you need to do to implement the feature. Just 2 files, 3 if you want to put each DTO in a separate file.
But where in the repo would you place those files?
Structuring code around vertical slices
For this, what works well is to have a Features directory at your project root, and then one directory for each major feature area (bounded context for DDD fans). And in each feature area you create one directory per feature.
Something like this:

Then you can add an extensions class per feature area (GamesEndpoints.cs) that takes care of mapping all your endpoints in a single place. Like this:
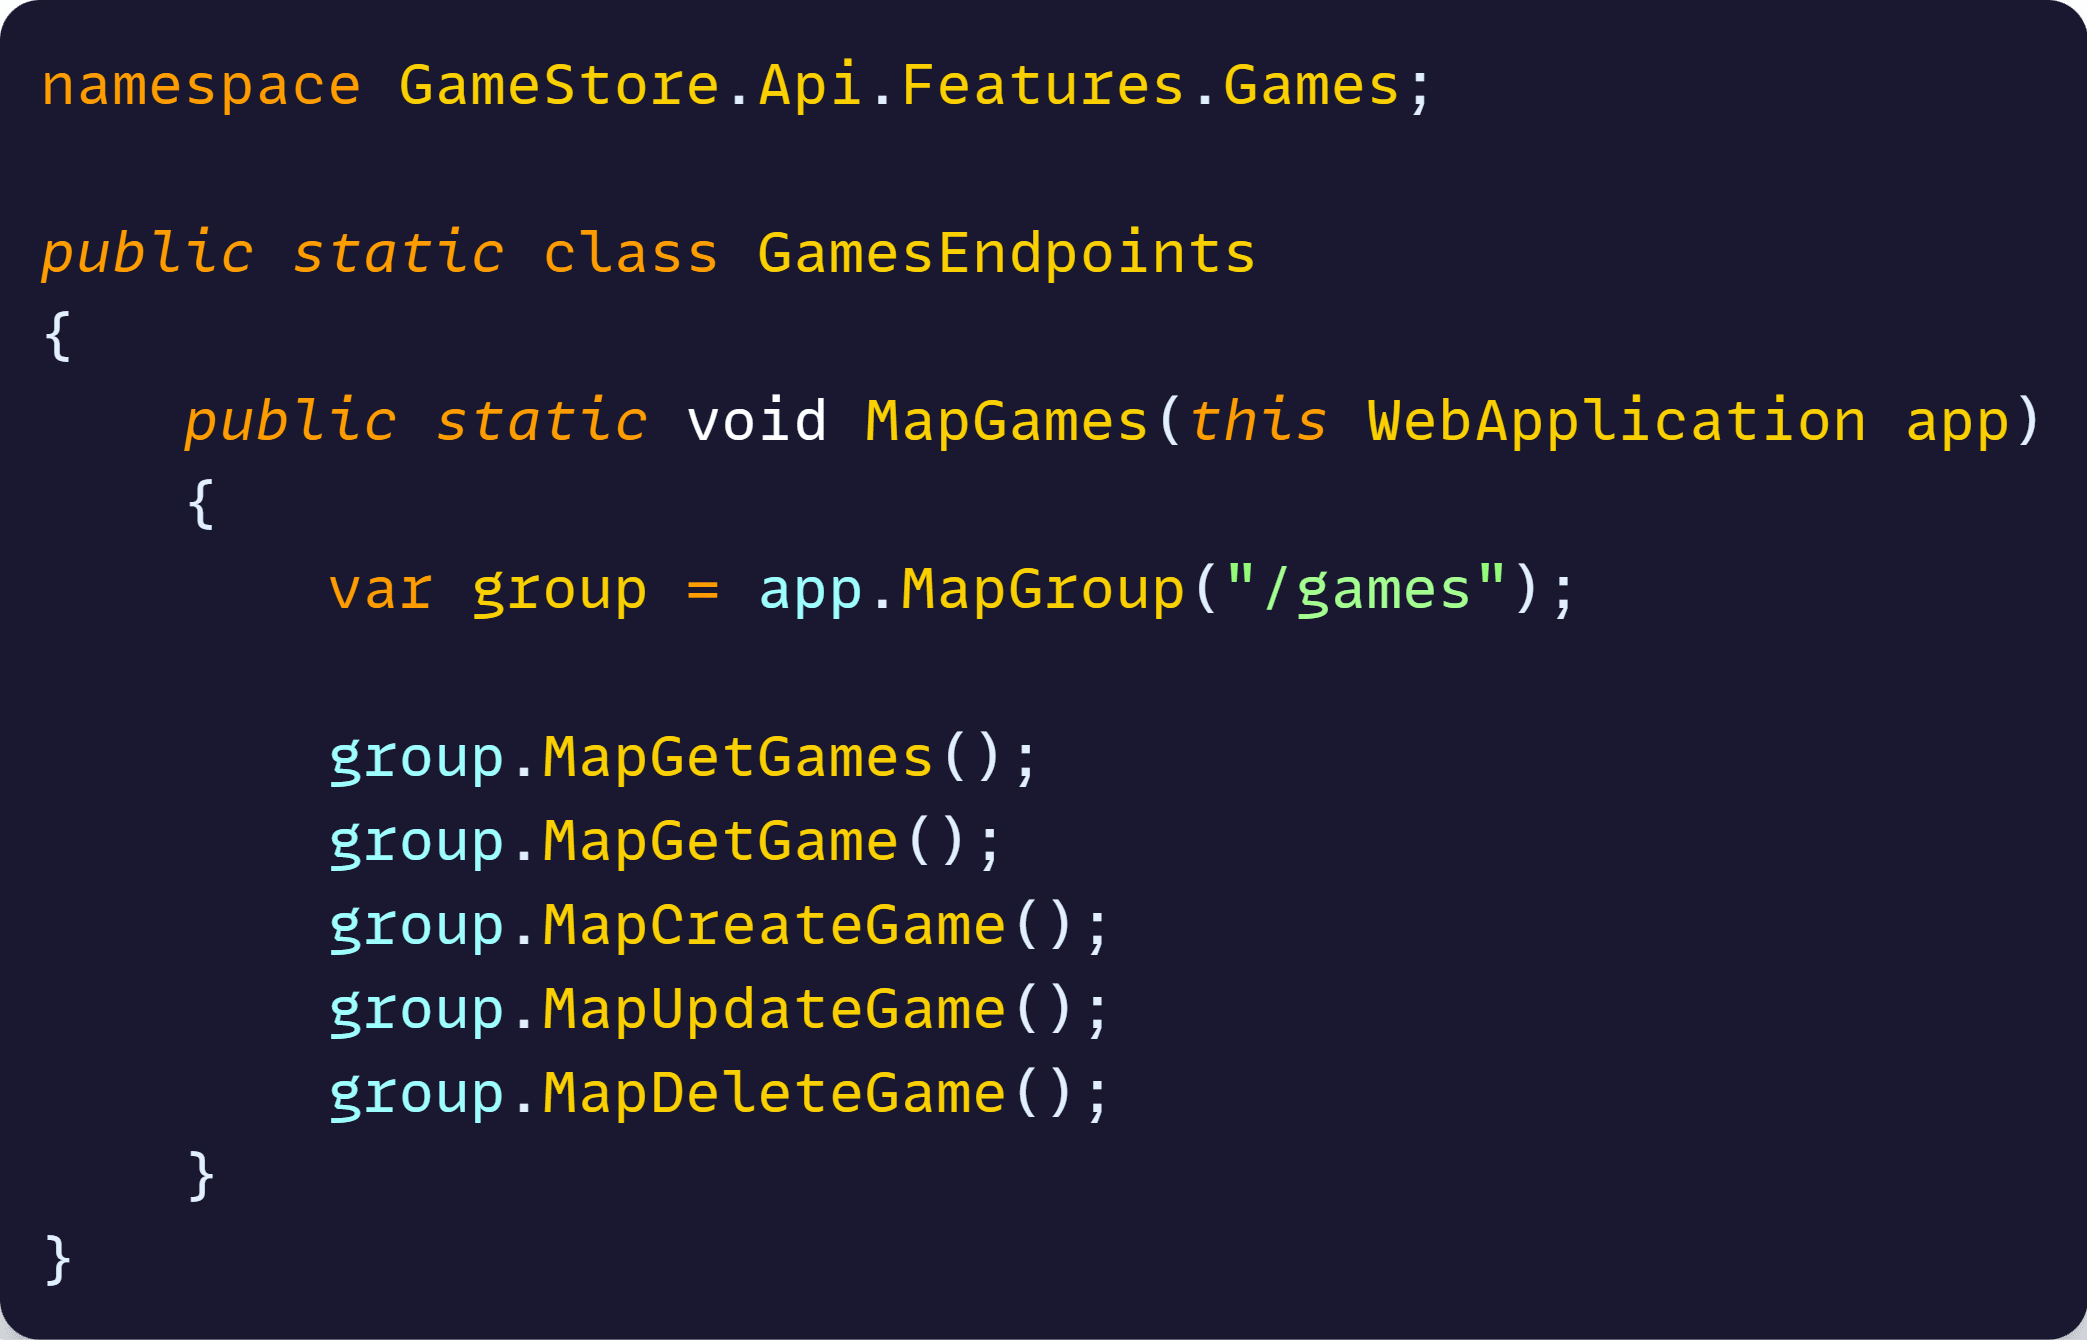
You can call MapGames from Program.cs and your endpoints are all ready to start receiving requests.
And, when a new team member is asked to fix a bug with Create Game, all she has to do is open that CreateGame directory and find all the code in that single place. Easy!
Notice you don’t need flashy frameworks, abstractions nor extra architectural pieces for this. No MediatR, no interfaces, no CQRS, no AutoMapper, not even Clean Architecture. It’s simple and there’s no need to complicate it.
Wrapping up
This feature-based development is the approach I personally used on the last system I implemented at Microsoft. It helped a lot with code organization and kept PRs very easy to follow.
I must admit I should have not also introduced Clean Architecture there (so much over engineering), which I used “just in case” we needed to change the DB, use different infra libraries, keep the code as abstract as possible, and a lot of other nonsense. But that’s a story for another time.
Now, back to scripting and then to create a bunch of cool slide decks.
Until next week!
Julio
Whenever you’re ready, here’s how I can help:
The .NET Developer Bootcamp: A complete path from ASP.NET Core fundamentals to building, containerizing, and deploying production-ready, cloud-native apps on Azure.
