Read time: 8 minutes
Vibe coding is an AI programming technique in which you describe a problem in natural language to an AI assistant (a large language model), and it builds the software for you.
It’s a revolutionary approach that not only allows anyone to build applications with minimal or no coding knowledge but also dramatically simplifies your job as a software developer.
This year we saw the appearance of a few tools specifically designed for this, with Cursor and Bolt being some of the most popular.
However, at the time of writing this article, vibe coding has also landed in VS Code Insiders, and I’ve been using it for the last few weeks with amazing results.
So today I’ll show you how to use the new VS Code Agent mode to create a React + .NET full-stack application writing zero manual code.
Let’s dive in.
Getting ready for Agent mode
To get started today all you need is VS Code Insiders, the version of VS Code that includes the latest, bleeding-edge features that are still being tested by early adopters.
After installing it, open either a new or existing workspace, then open up the Copilot pane, switch to the COPILOT EDITS tab, and switch to Agent mode:
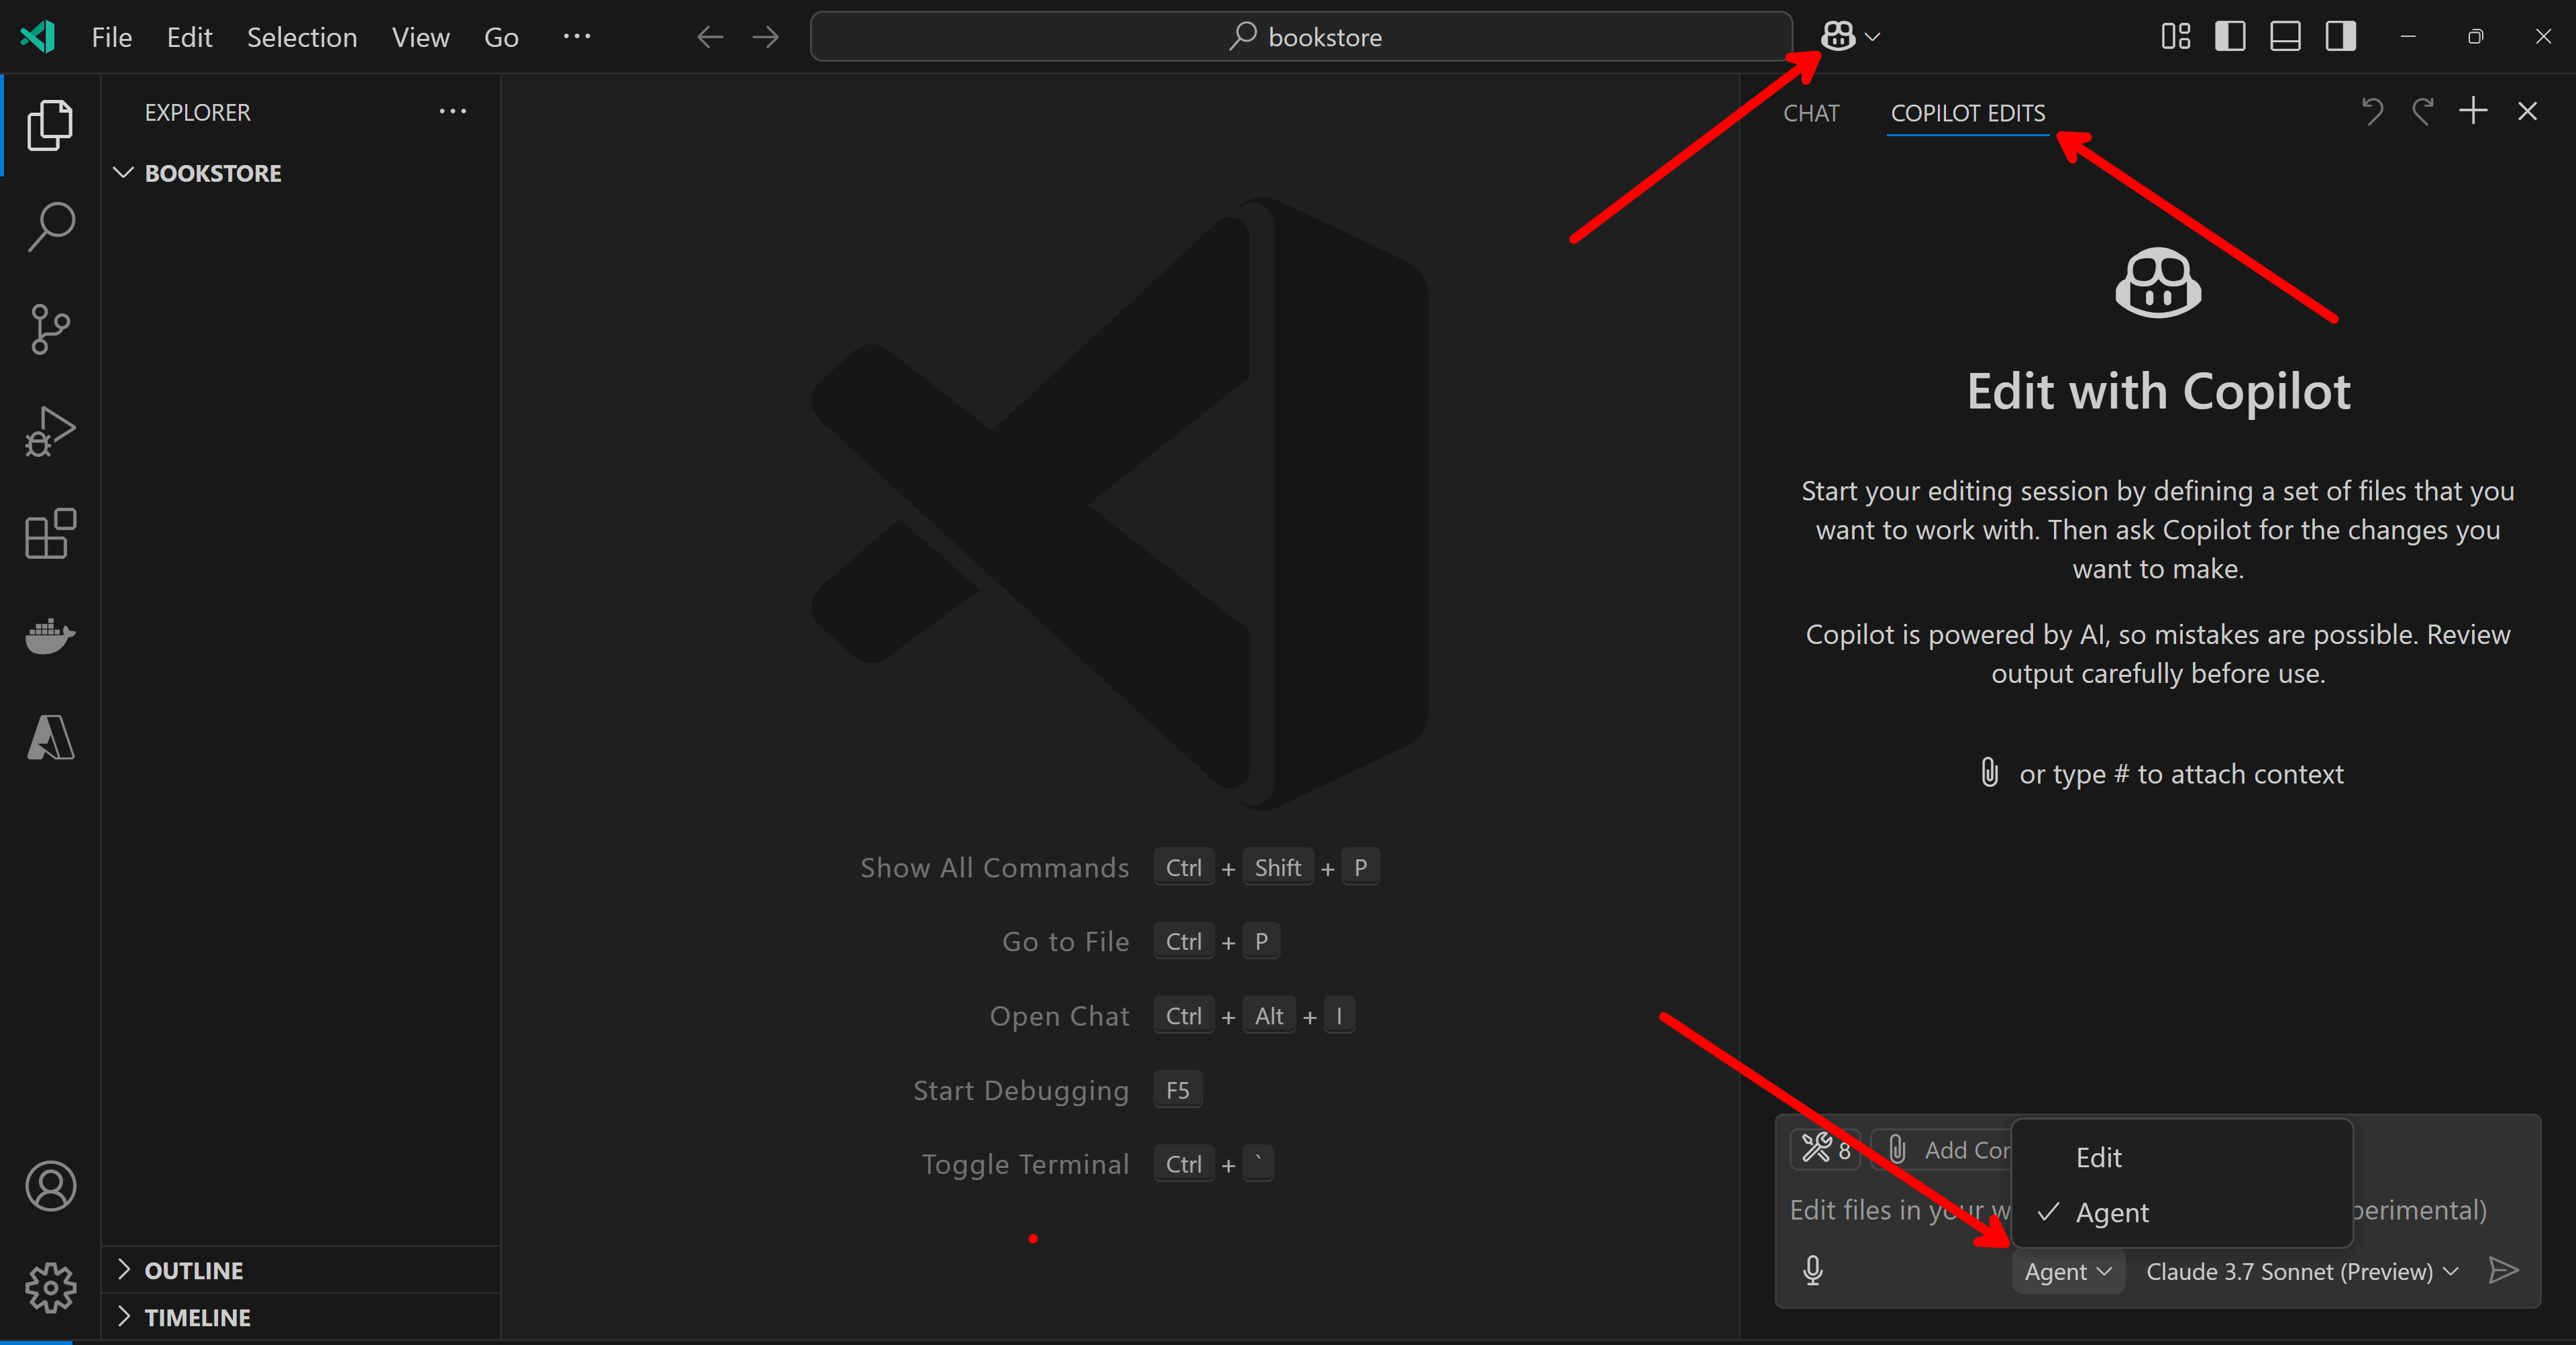
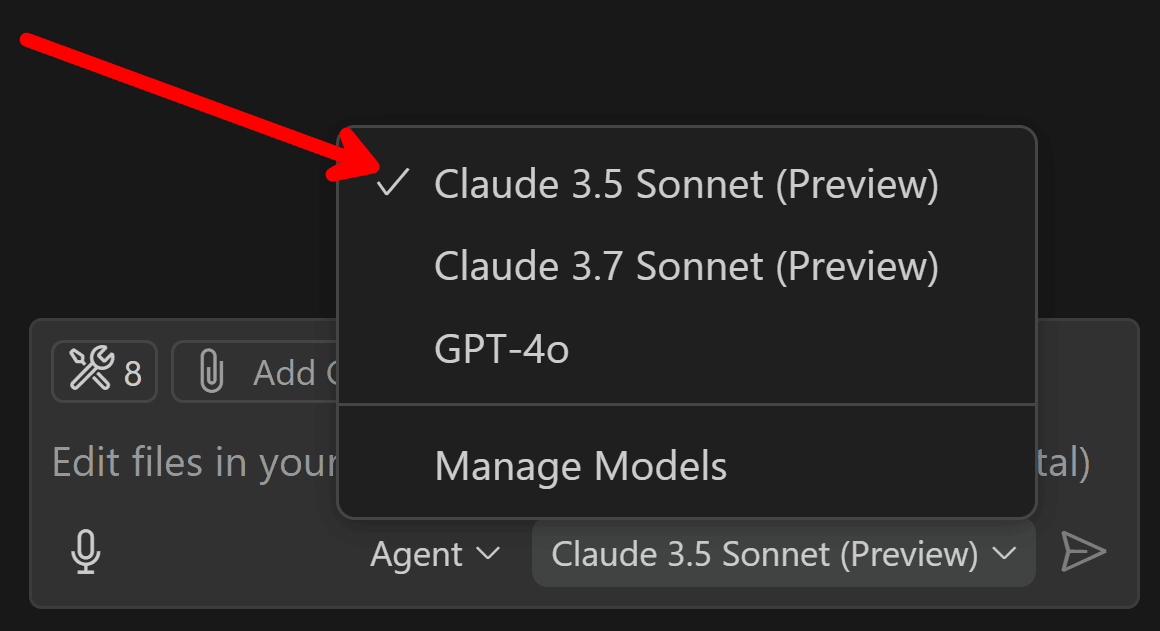
You can also pick your preferred LLM. Claude 3.7 Sonnet is one of the most popular, but I’ll go with Claude 3.5 since I hit rate limits with 3.7 in the past:
And, with that, we are good to get started. So let’s work on our specifications.
The specifications
My family and I keep finding expired food in the kitchen from time to time, so maybe we can build a small website that can keep track of this, and perhaps notify us when something is about to expire.
Here are my specifications:
Let’s implement a website where I can track the expiration of the food in my house.
The user goes to the website and can see all previously entered food items
On the home page there is also an option to enter a new food item with its name and expiration date.
We should not allow duplicate items.
Once an item is 1 week near expiration, an email should be sent to the configured email addresses.
Your Tech Stack:
- Front-end: React, Typescript and Bootstrap
- Back-end: ASP.NET Core minimal APIs
- DB: PostgreSQL
Also:
- Use Vite for anything related to the frontend
- I’m planning to deploy this to Azure
- All the code should go into my d:/repos/food-tracker folder, with top-level folders for the backend and frontend
Let’s give all that to the Copilot Agent and hit send:

Let’s see what it does.
The Agent gets to work
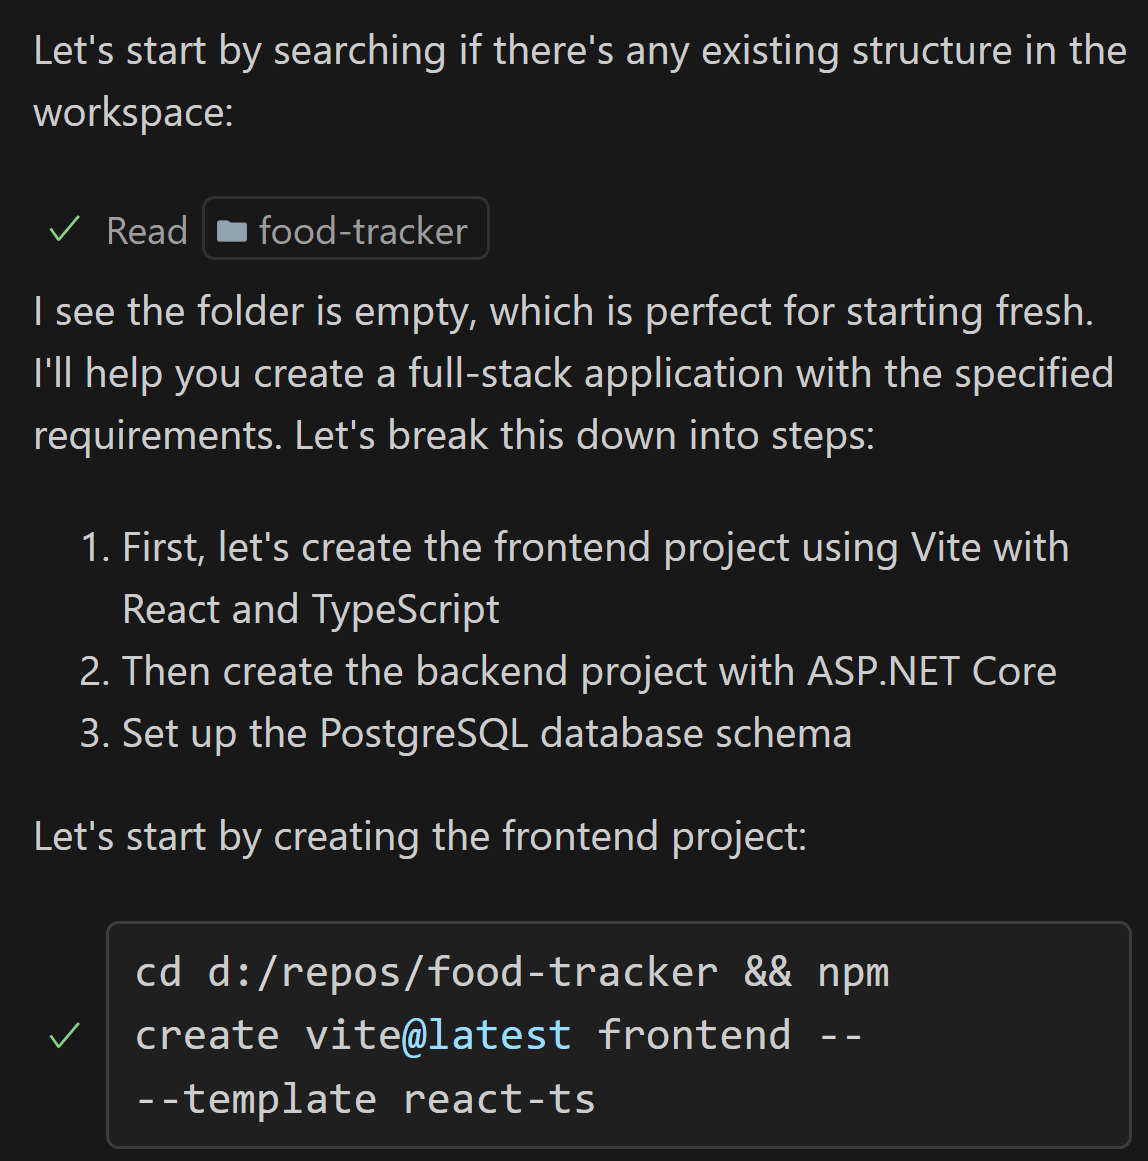
Like a good developer, it starts by coming up with a plan and then starts implementation:
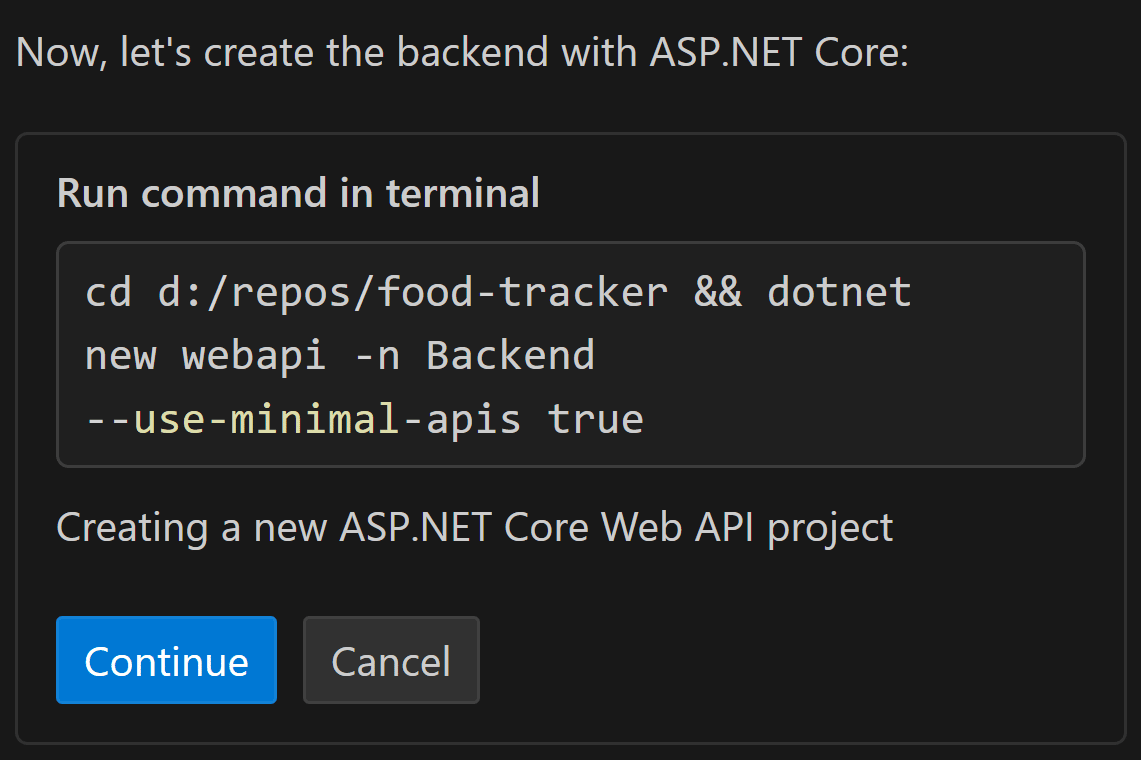
It may need your input when setting up the initial projects and dependencies and you will need to confirm any command that involves the use of your terminal:
But after that, it mostly goes on cruise control for several minutes until the whole thing is fully implemented:
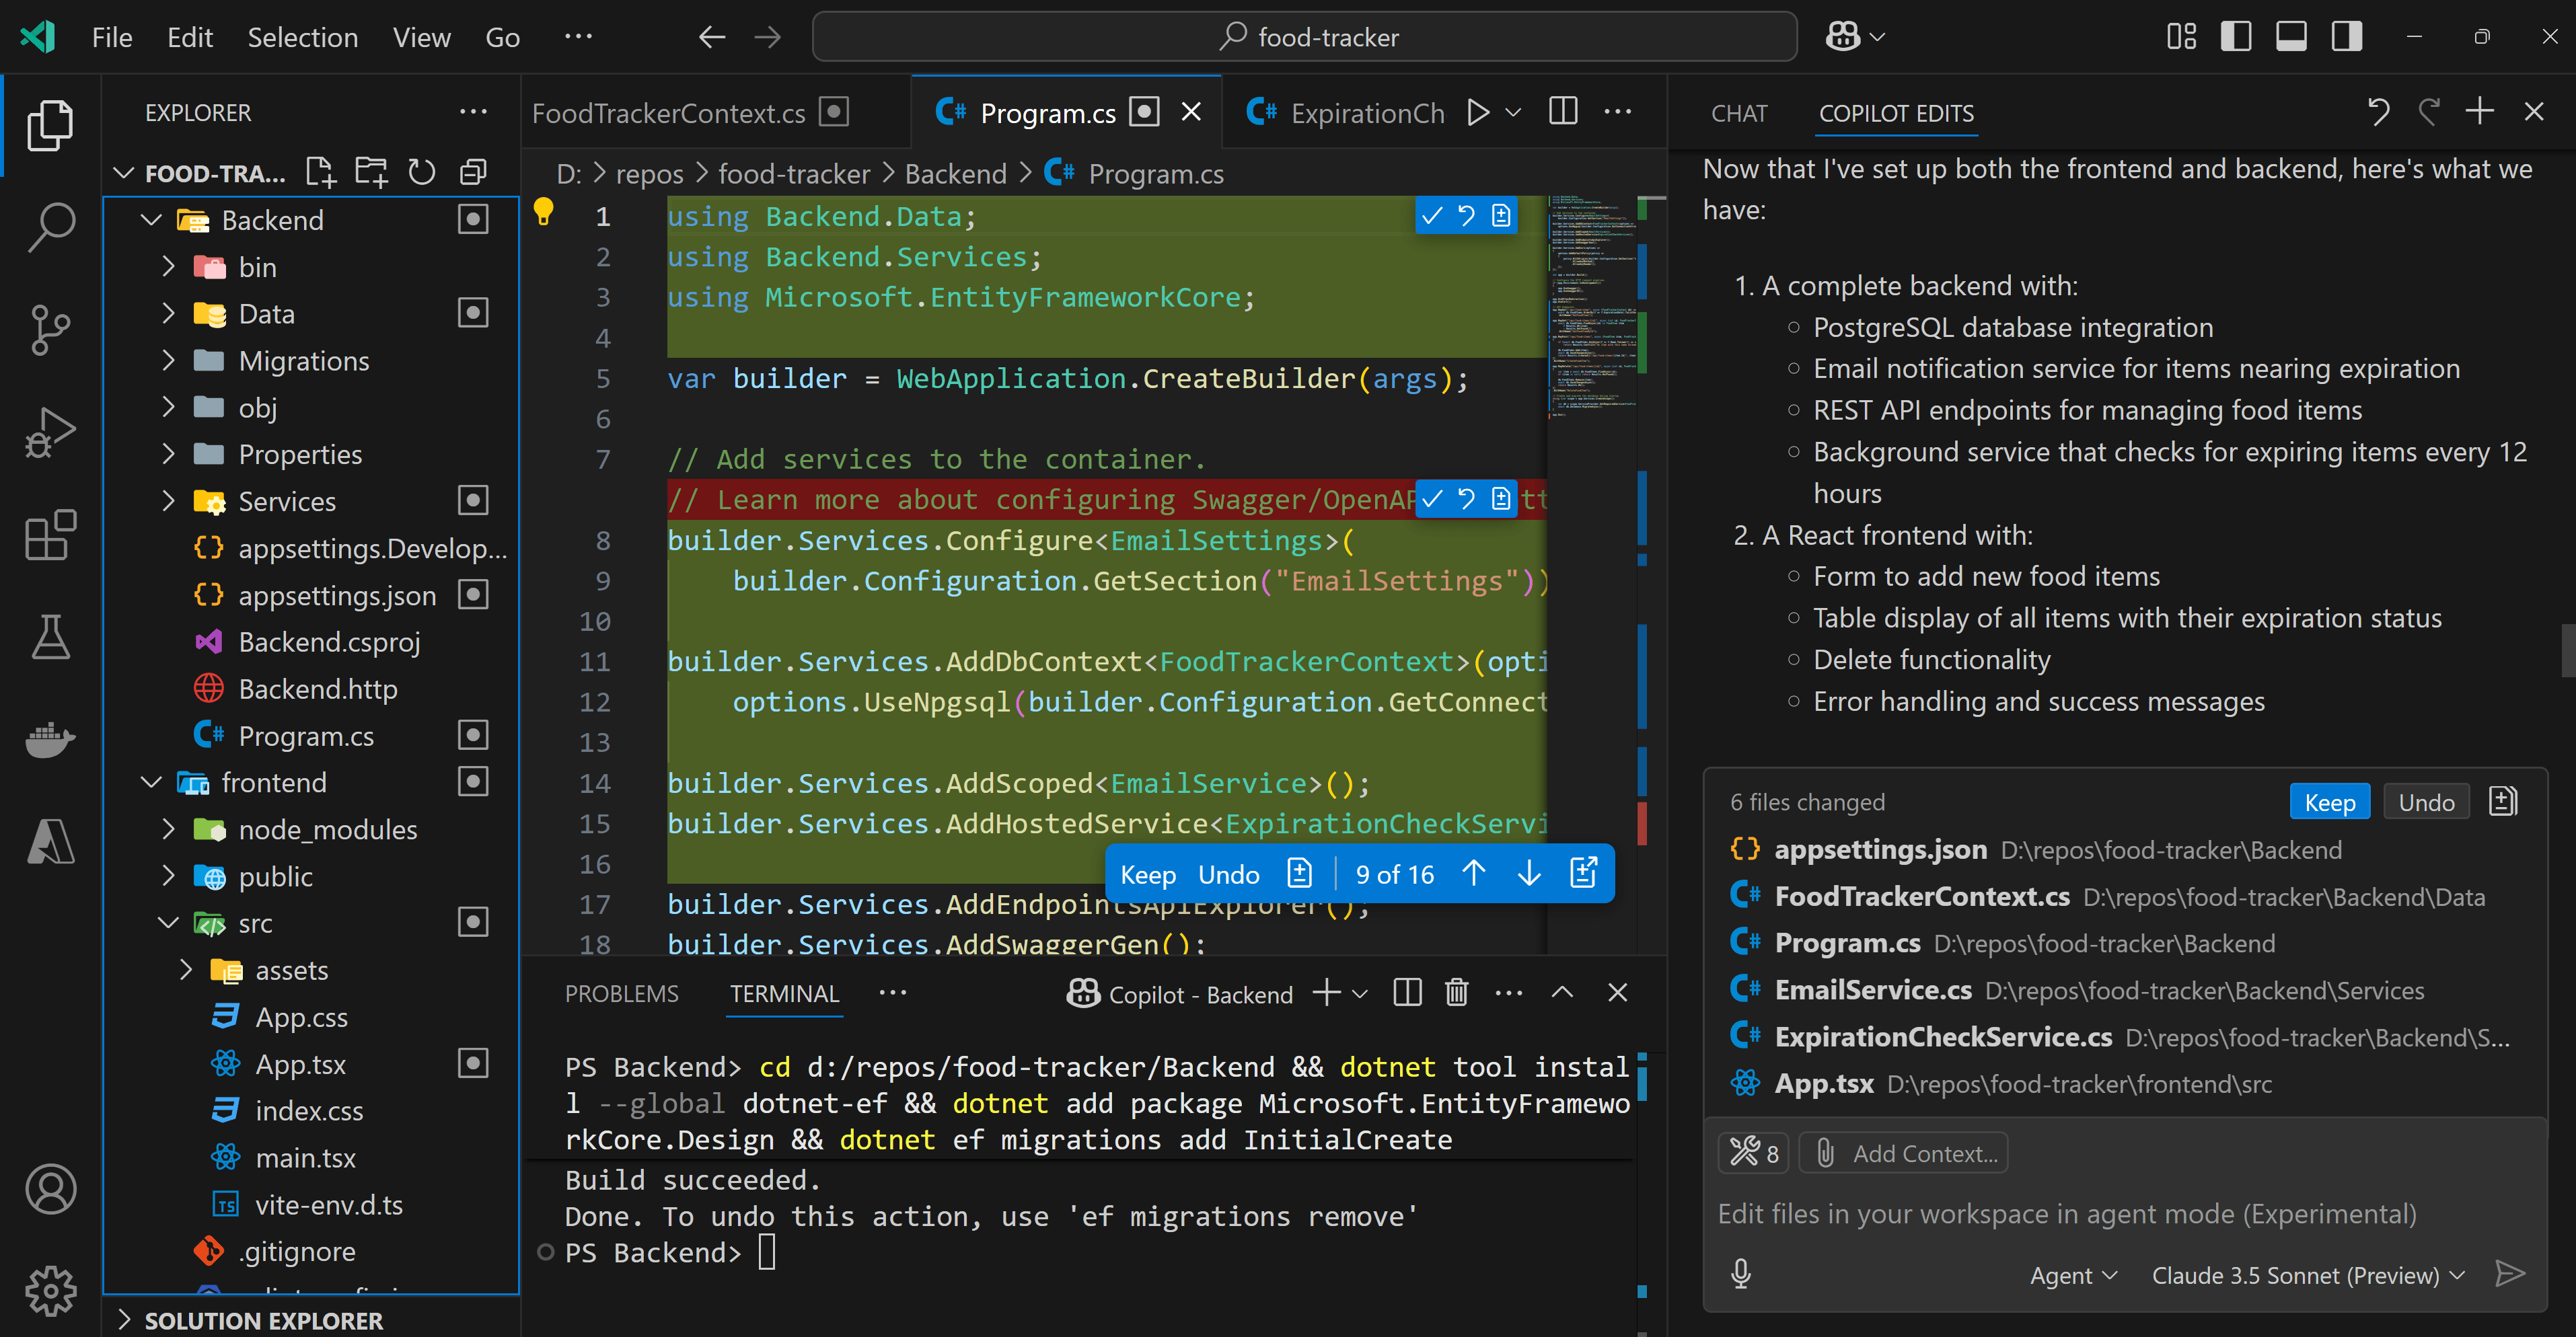
And ends with instructions on how to start the app:

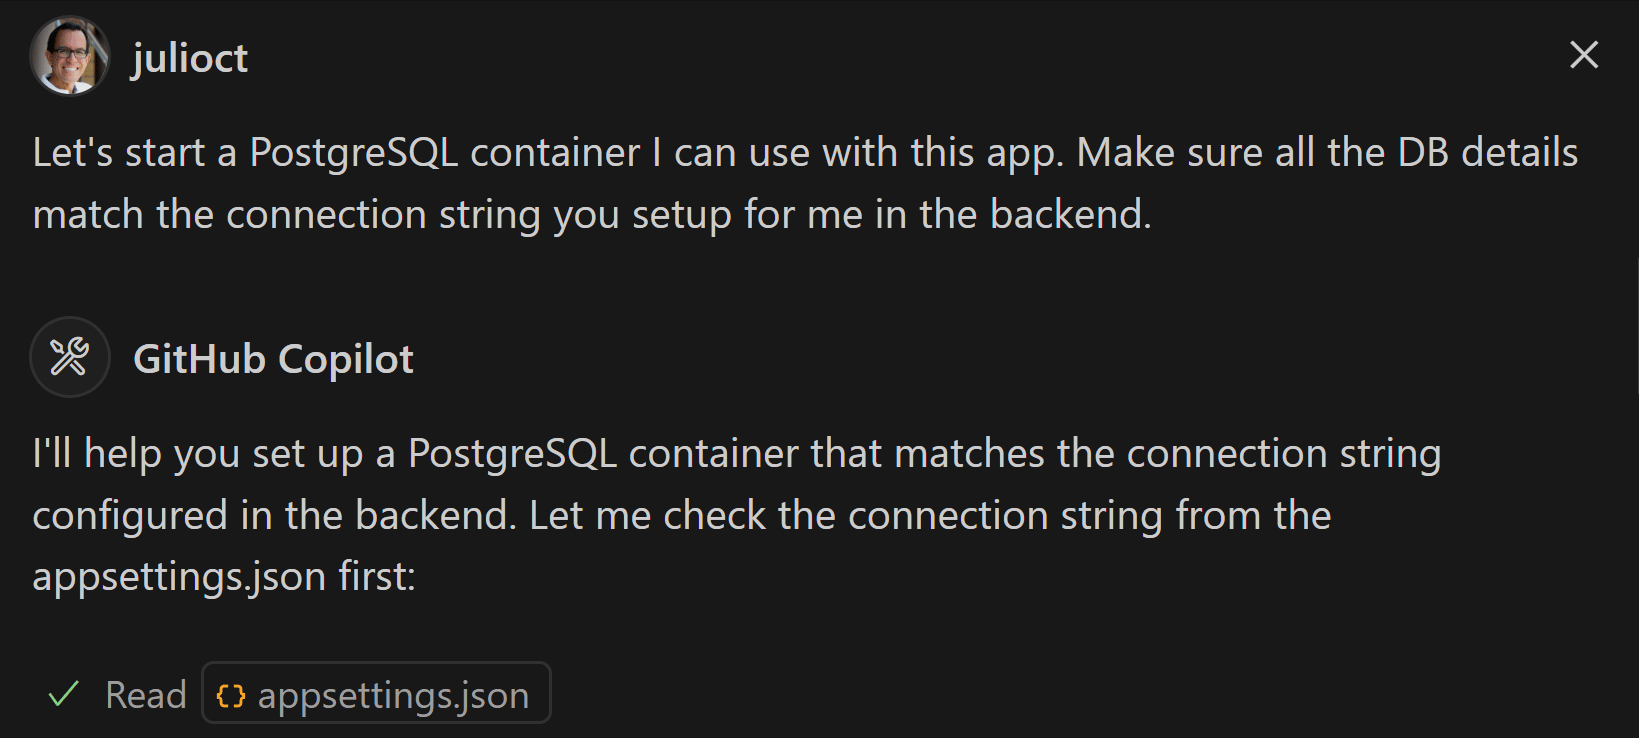
However, we are missing the actual database server, so let’s stop there and ask it for a PostgreSQL Docker container:
It did give me the docker run command to start that container, but then I thought I might as well just use Docker Compose:
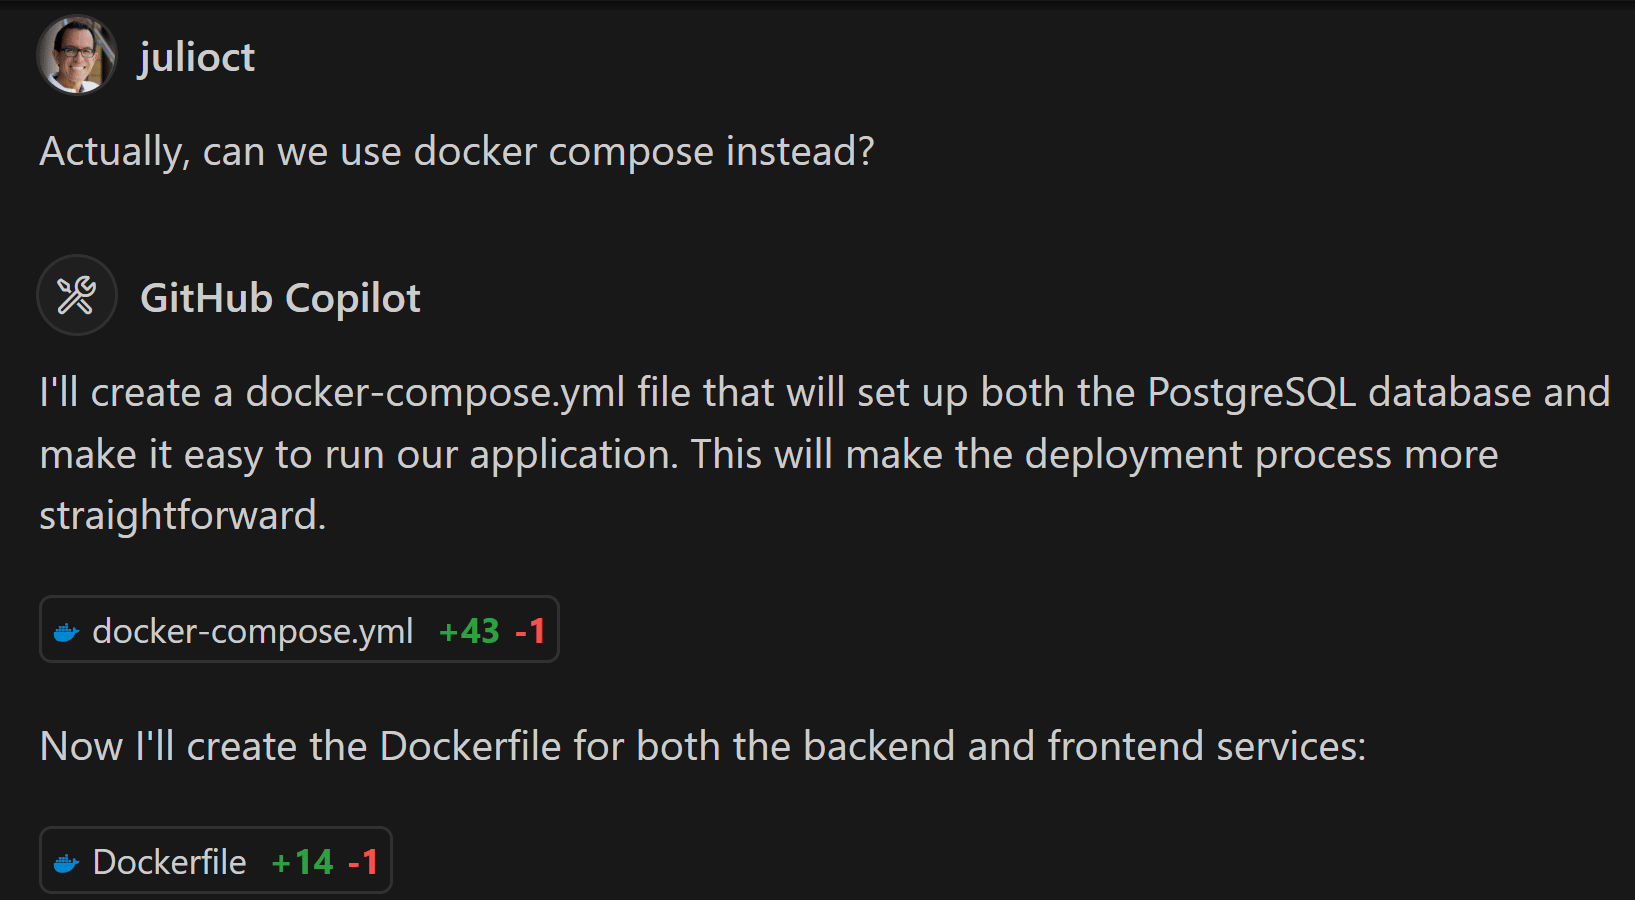
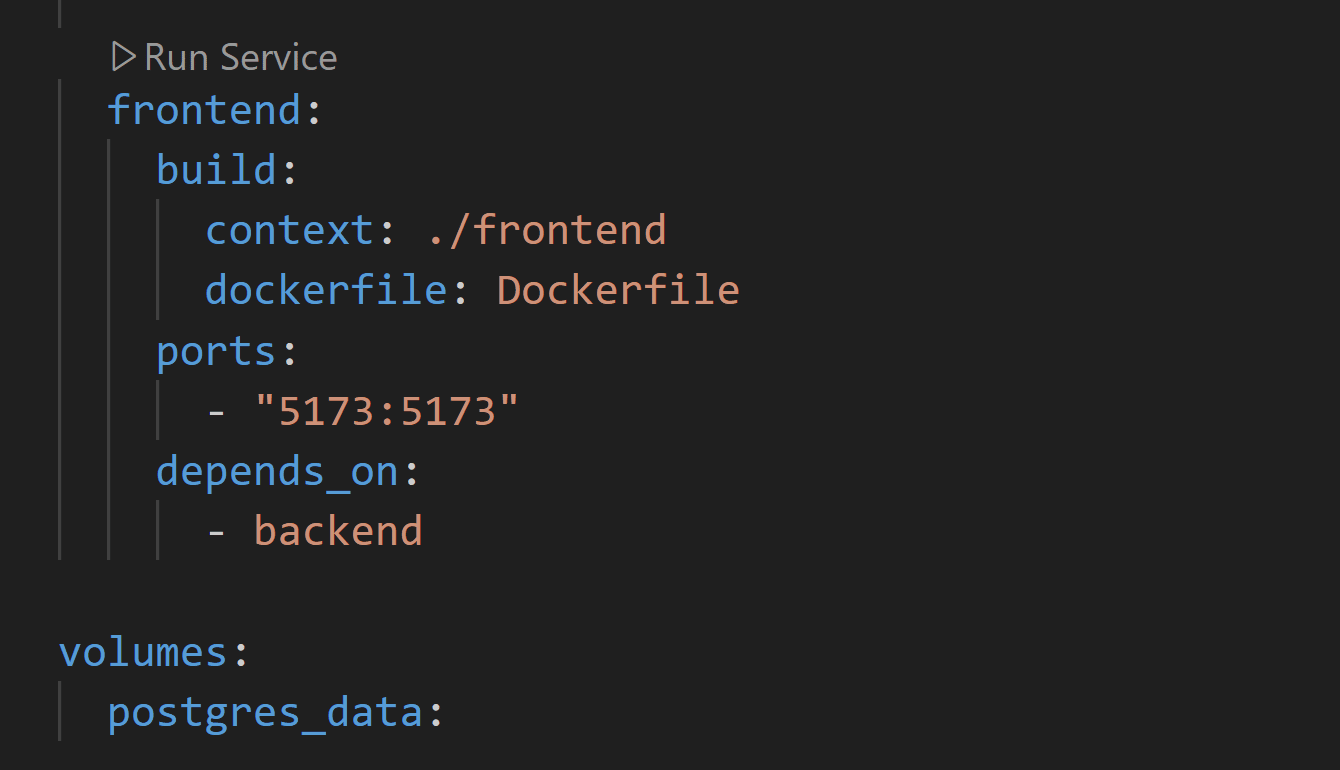
I thought I would be a docker-compose.yml with just PostgreSQL, but it actually added the backend and frontend there too, with their respective docker files:
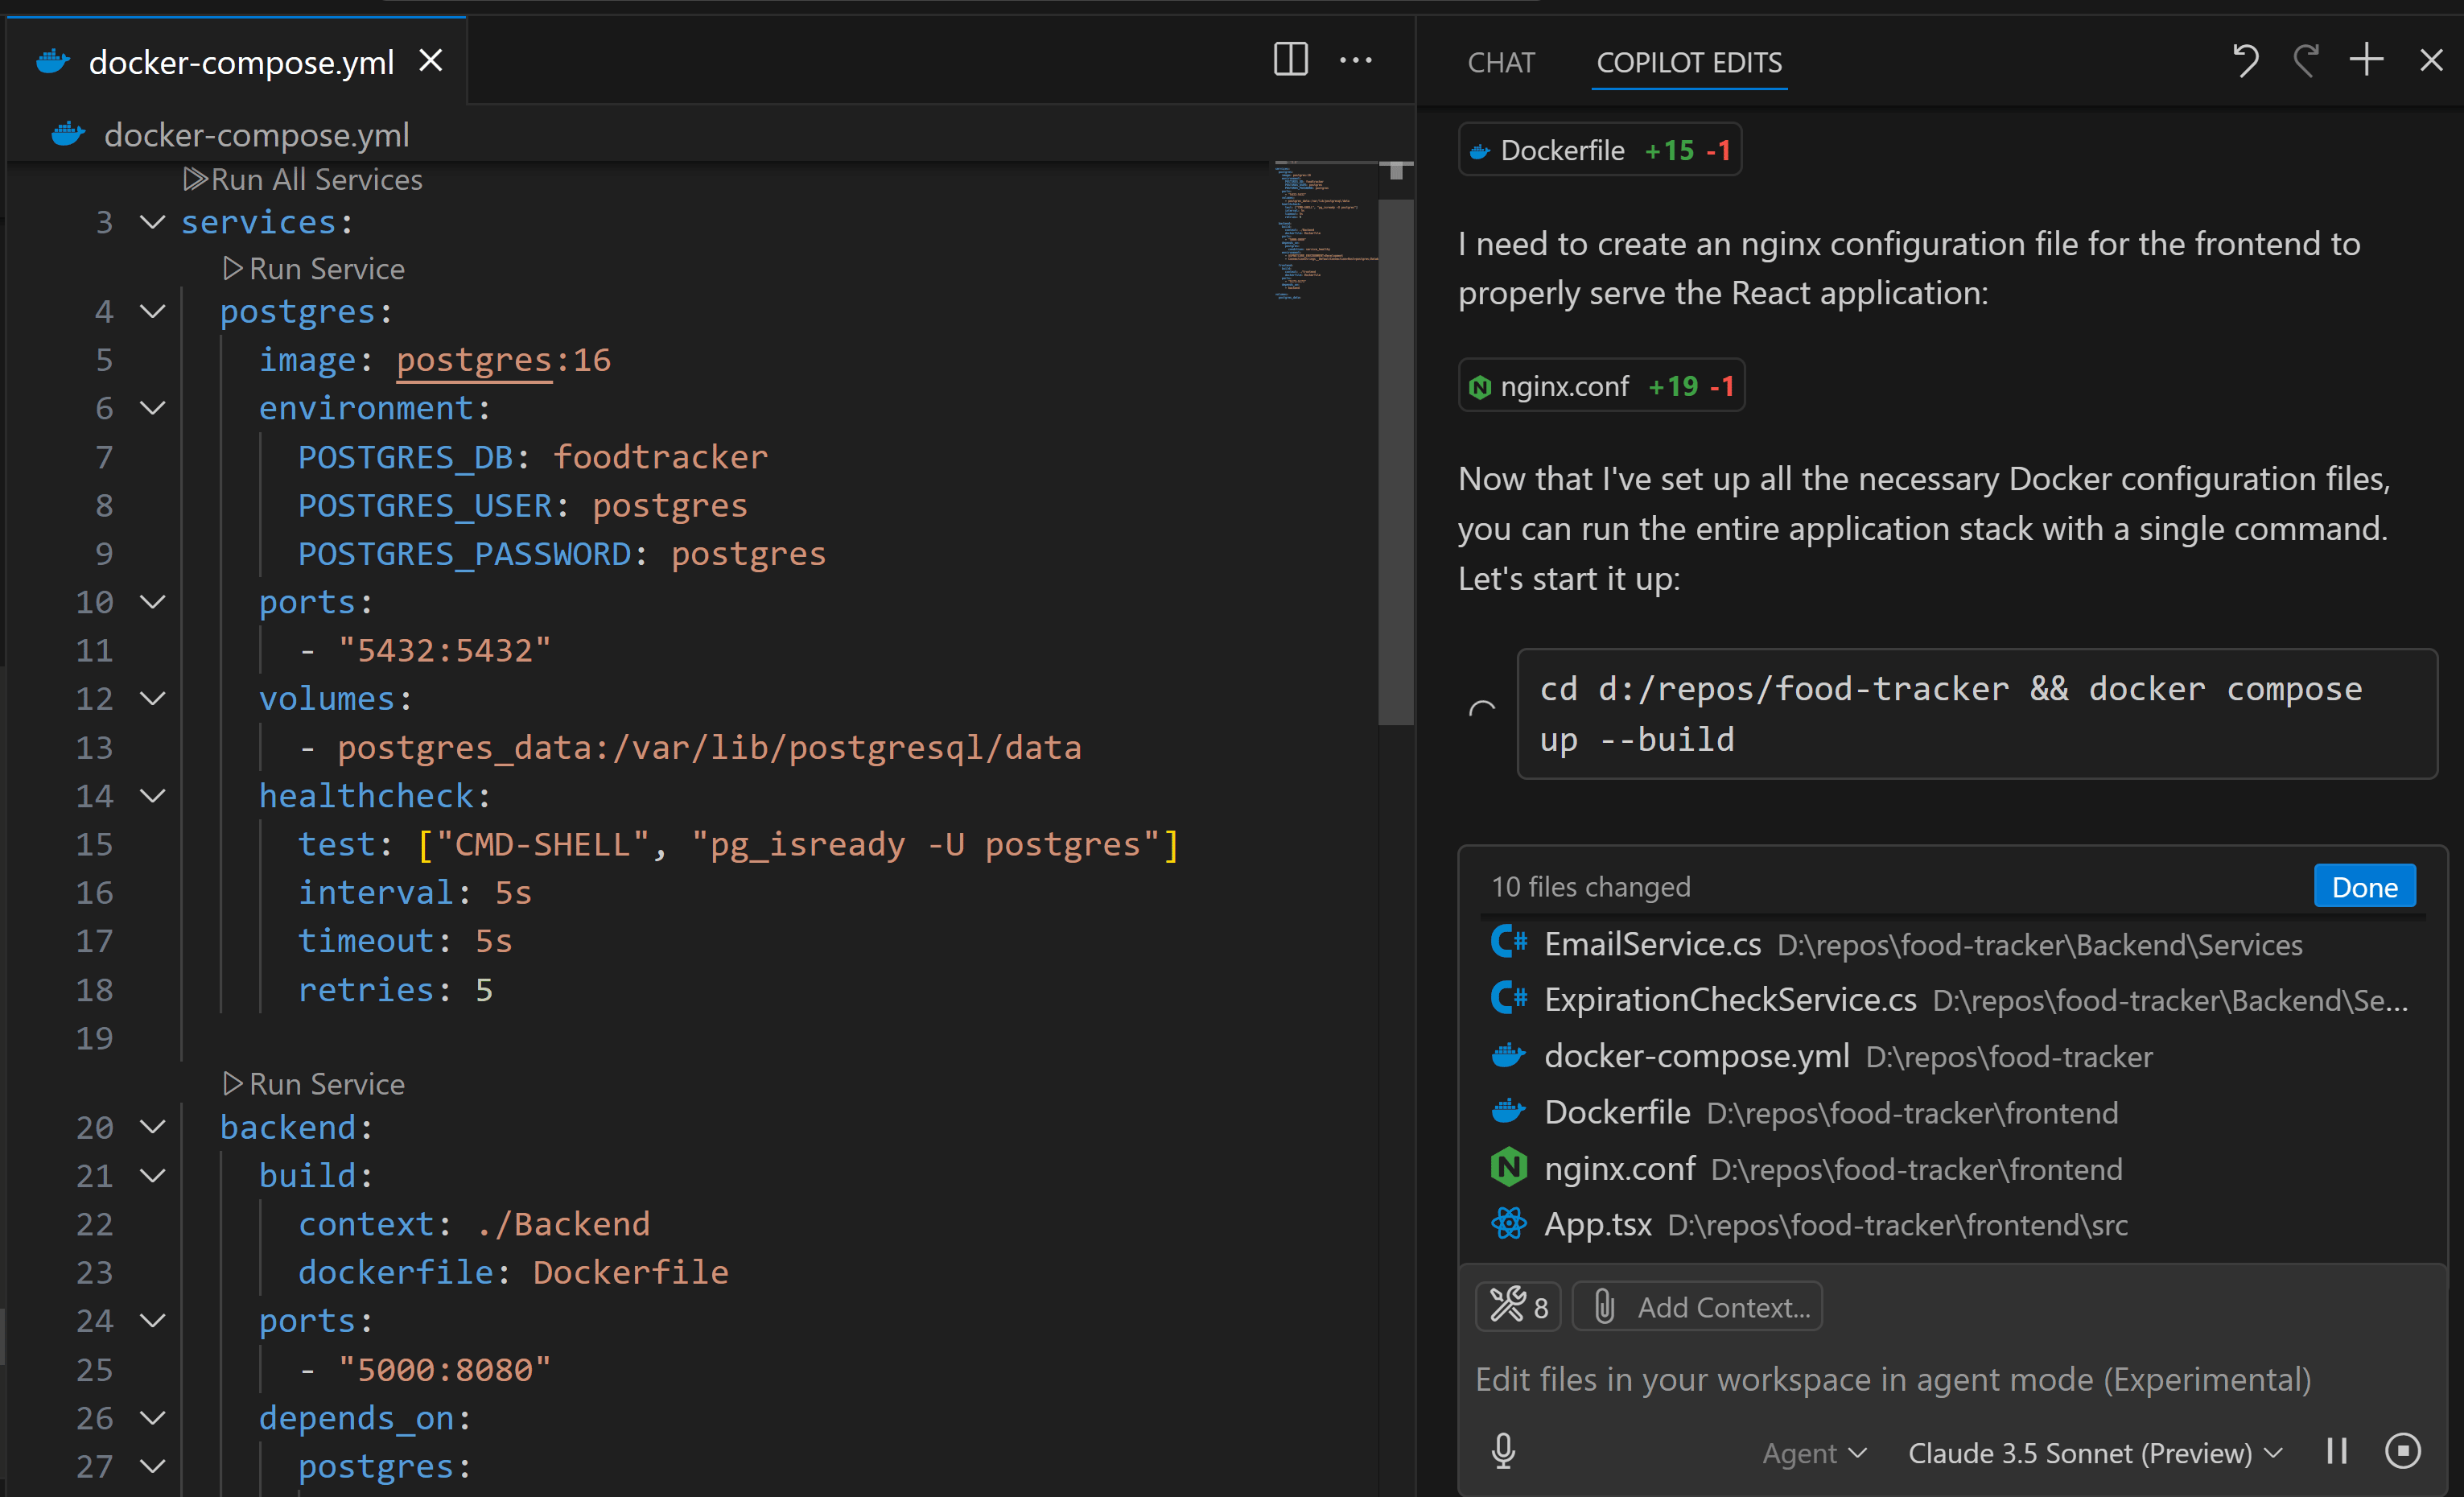
So we are now not just ready to run this locally, but potentially ready to deploy the entire thing to any container-based cloud service.
But let’s start with the local box.
Running the app
So let’s run the command it suggested but in detached mode:
docker compose up –build -d
Then, according to the docker-compose.yml file, we should be able to find our front-end at port 5173:
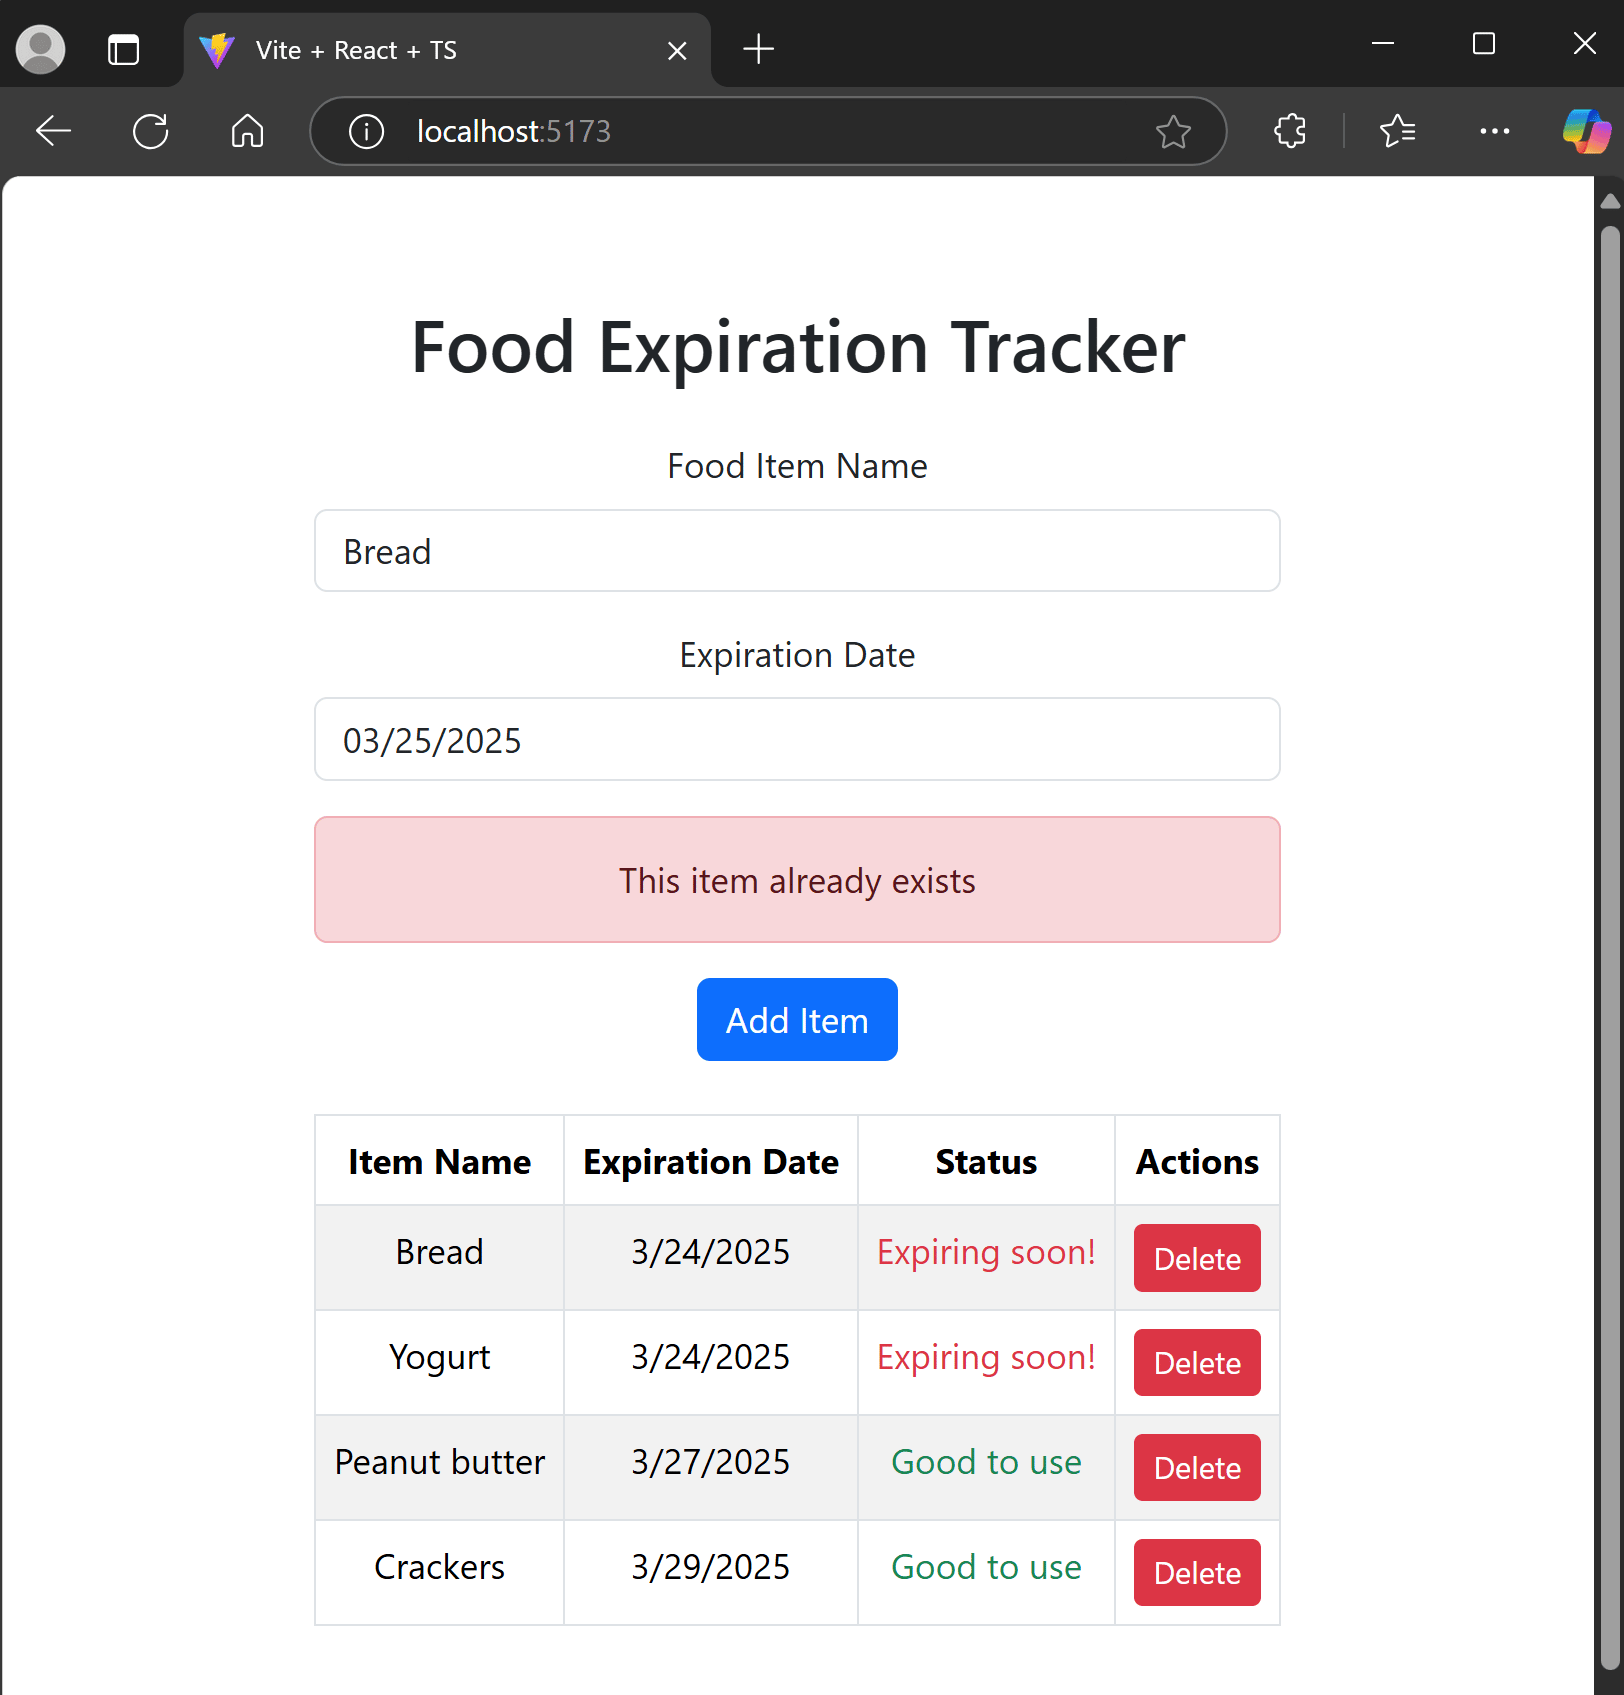
So let’s browse there:
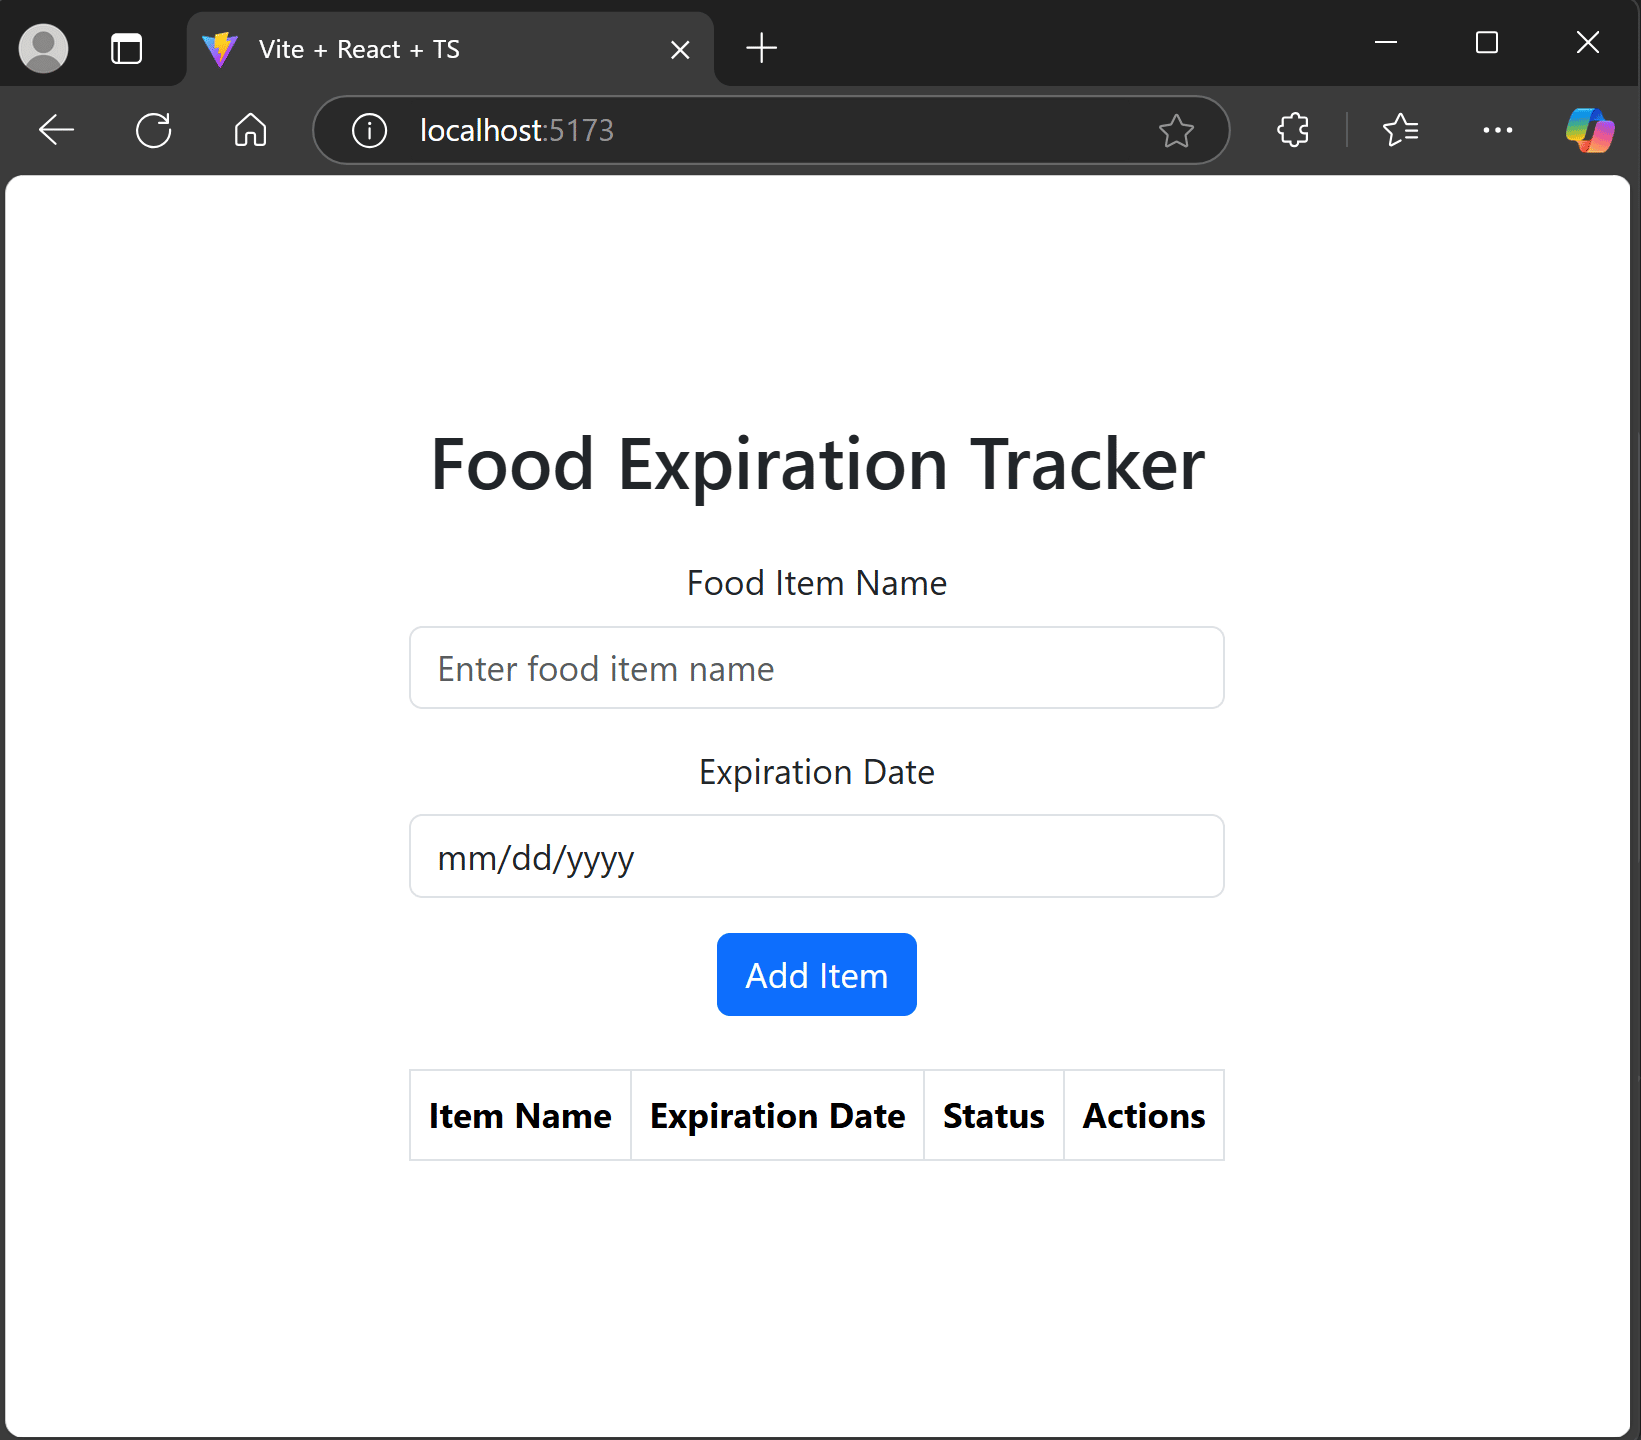
Great! But, does it work?
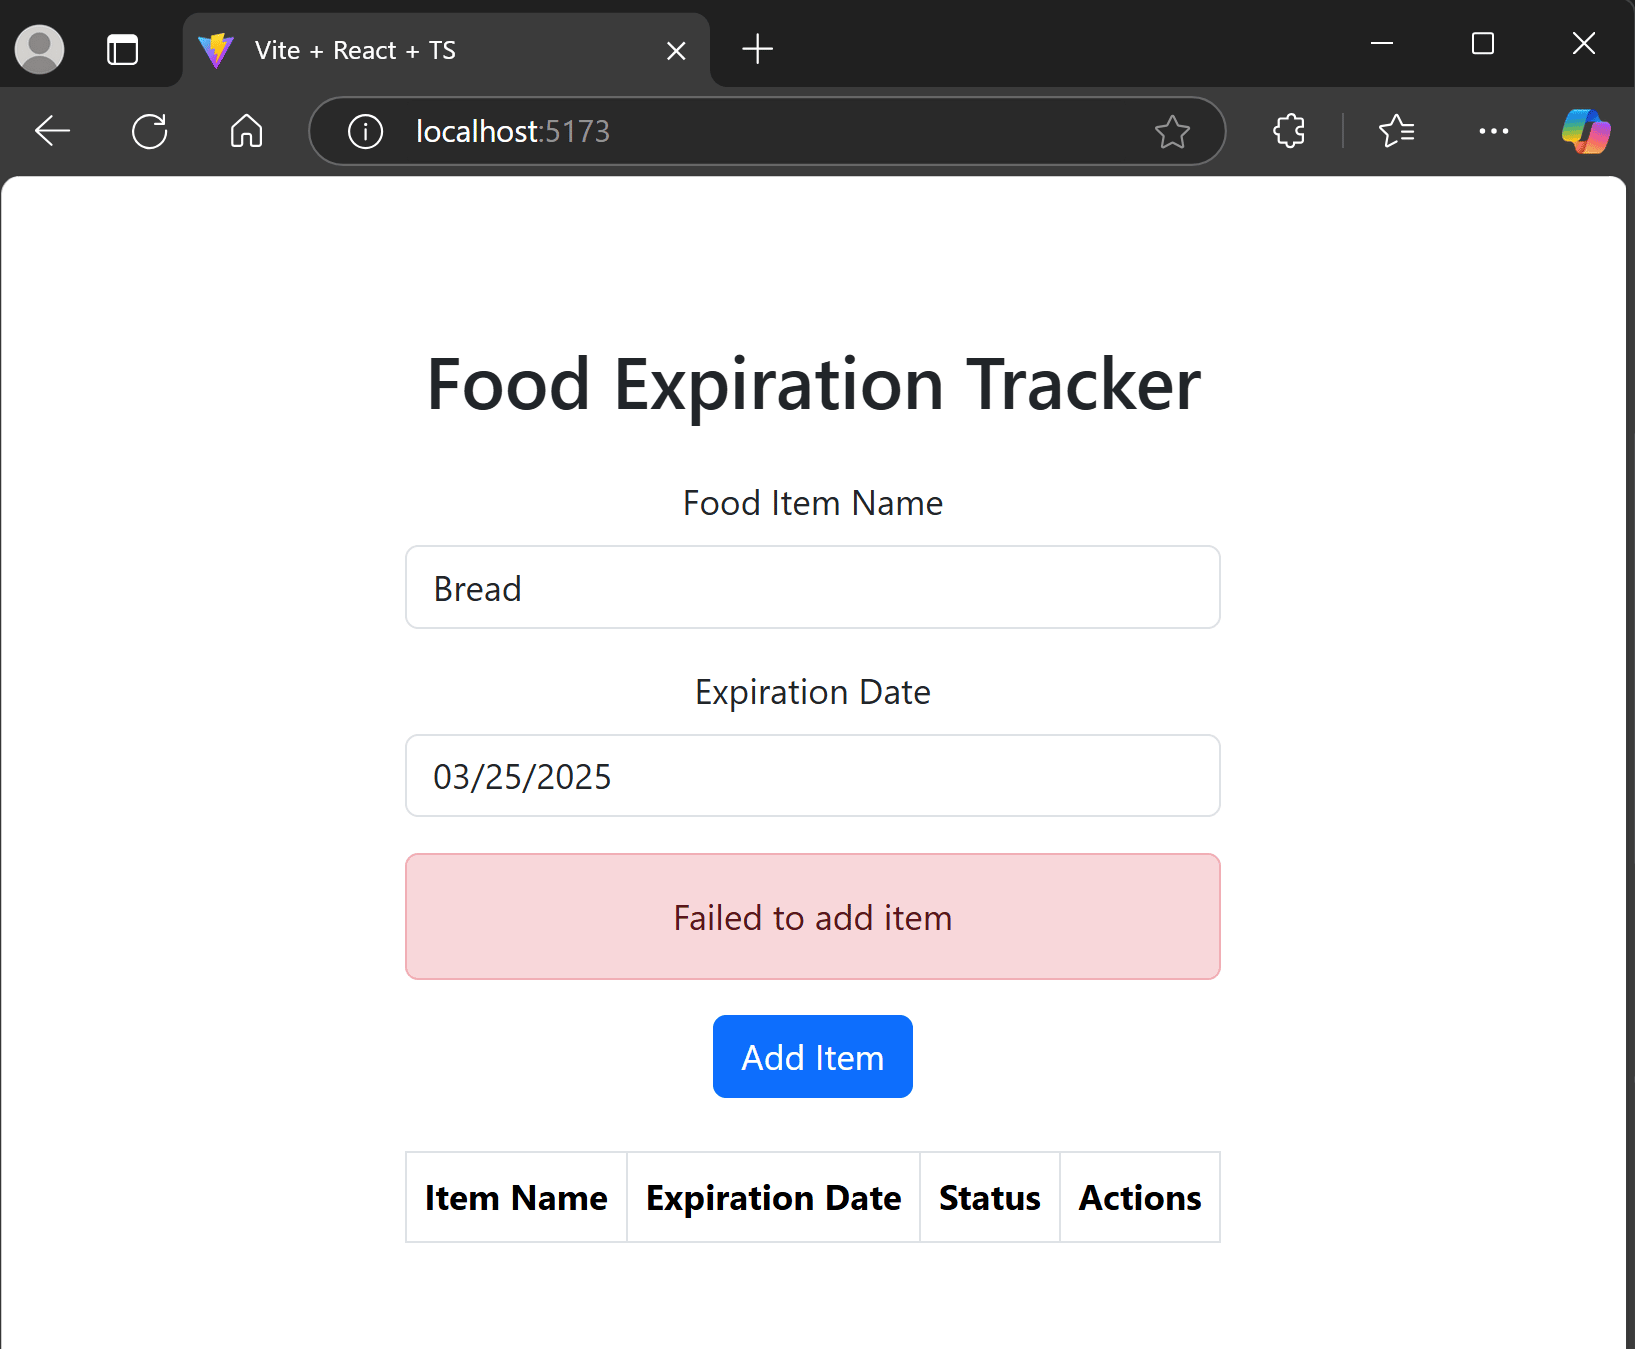
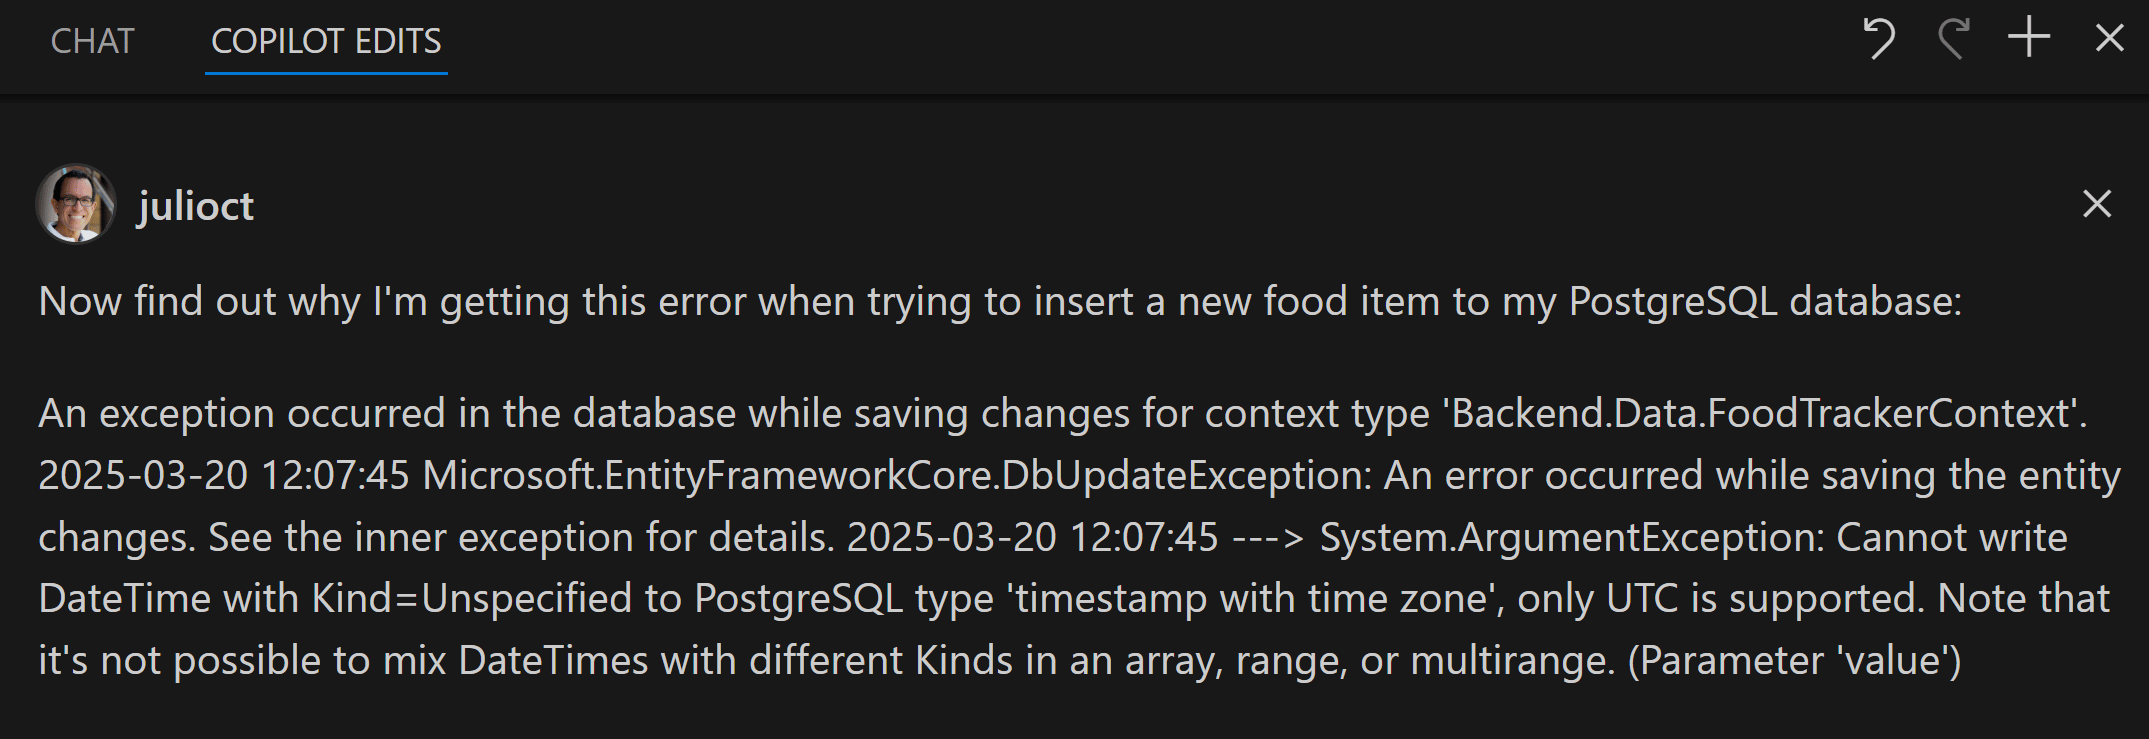
Sadly no. And, looking at the backend logs in Docker Desktop, seems to be related to our data model:
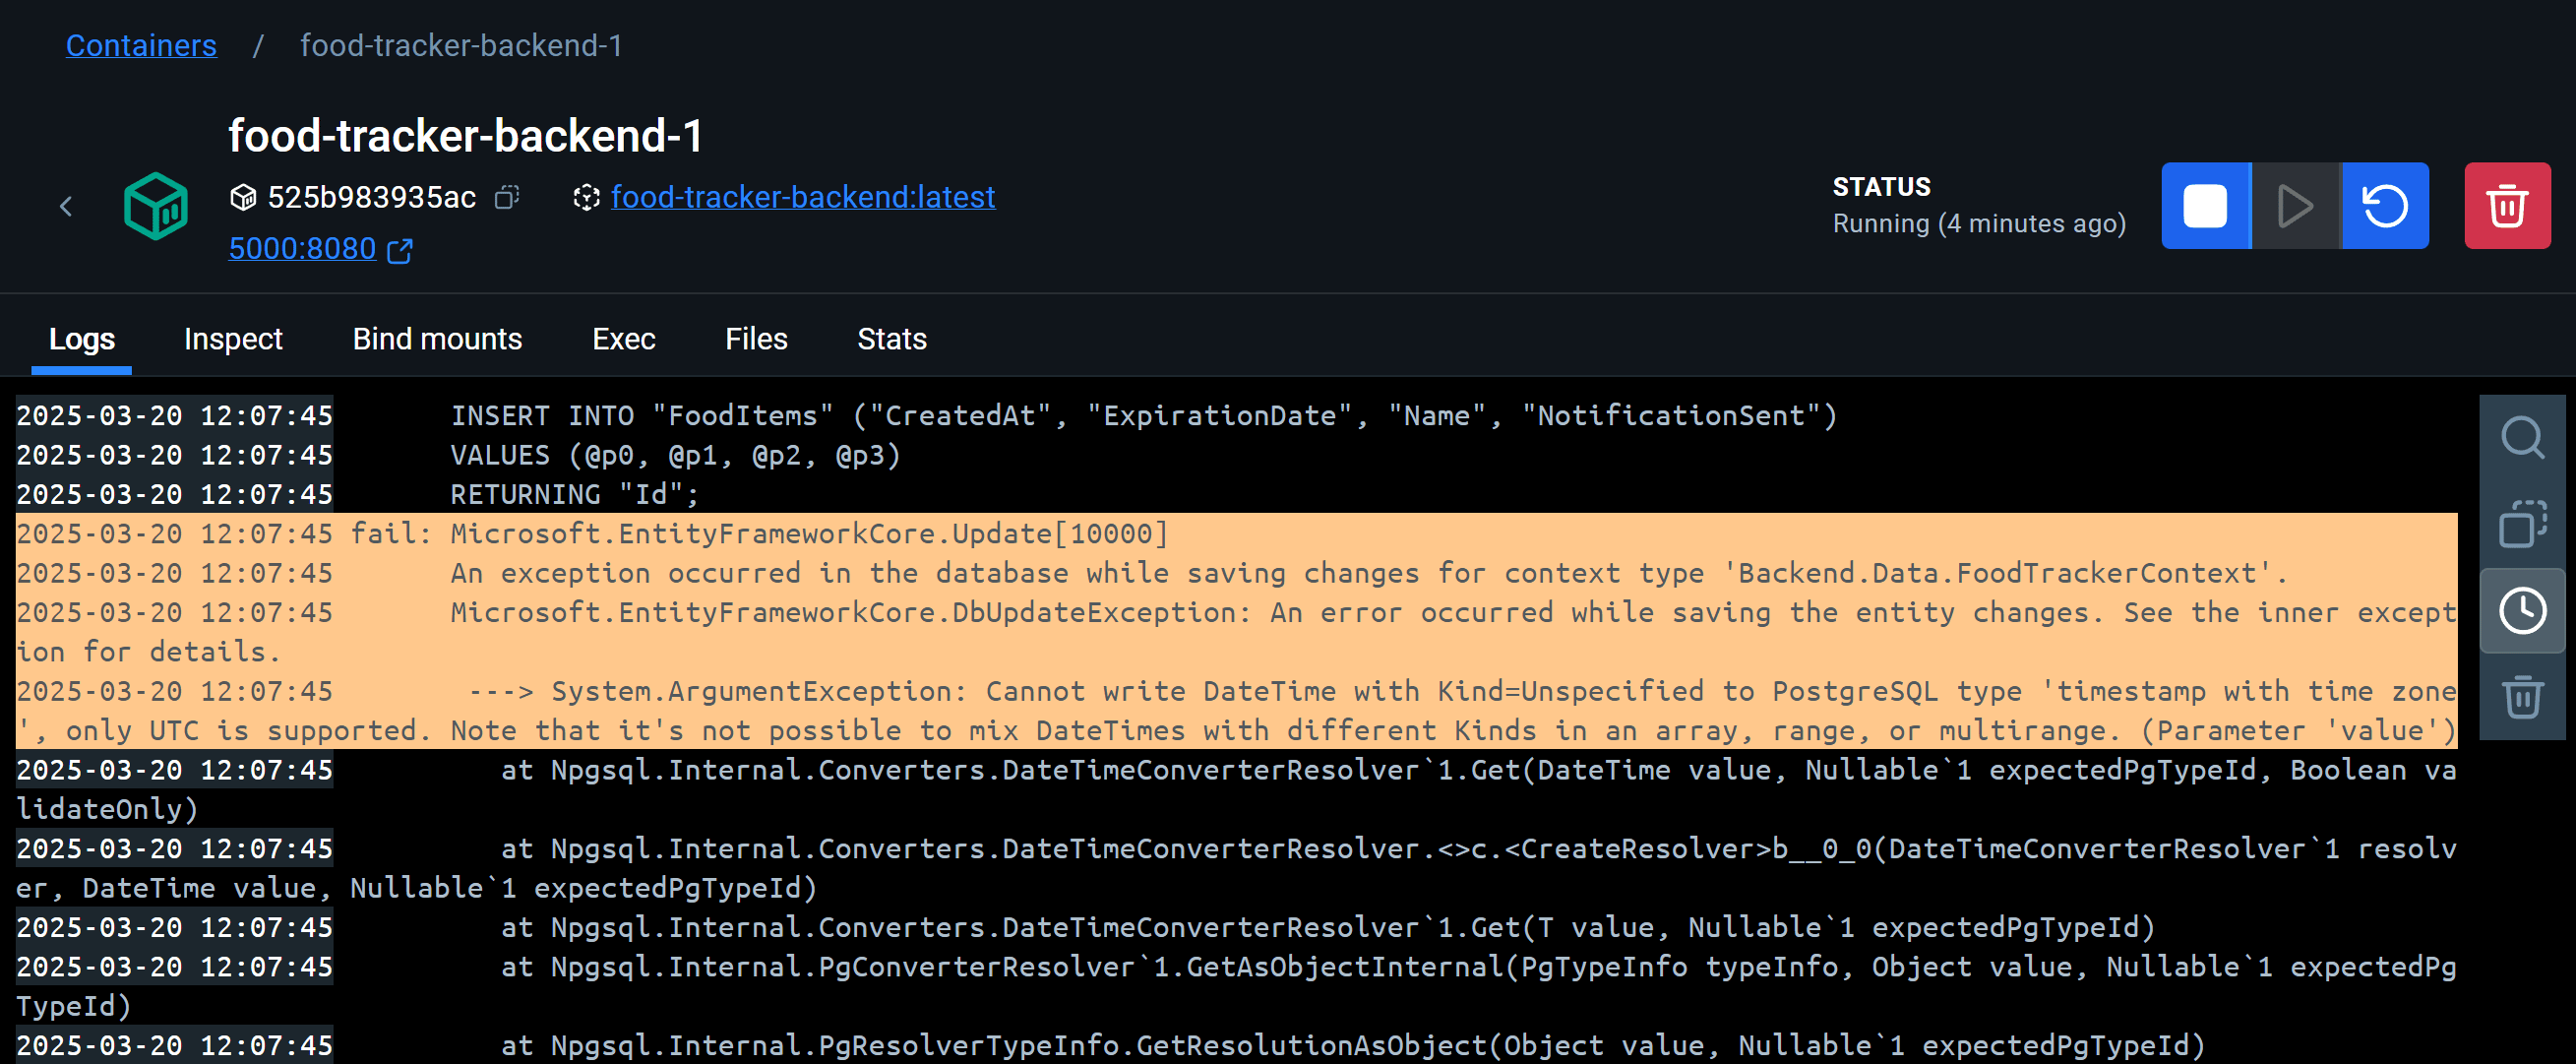
Fixing the backend
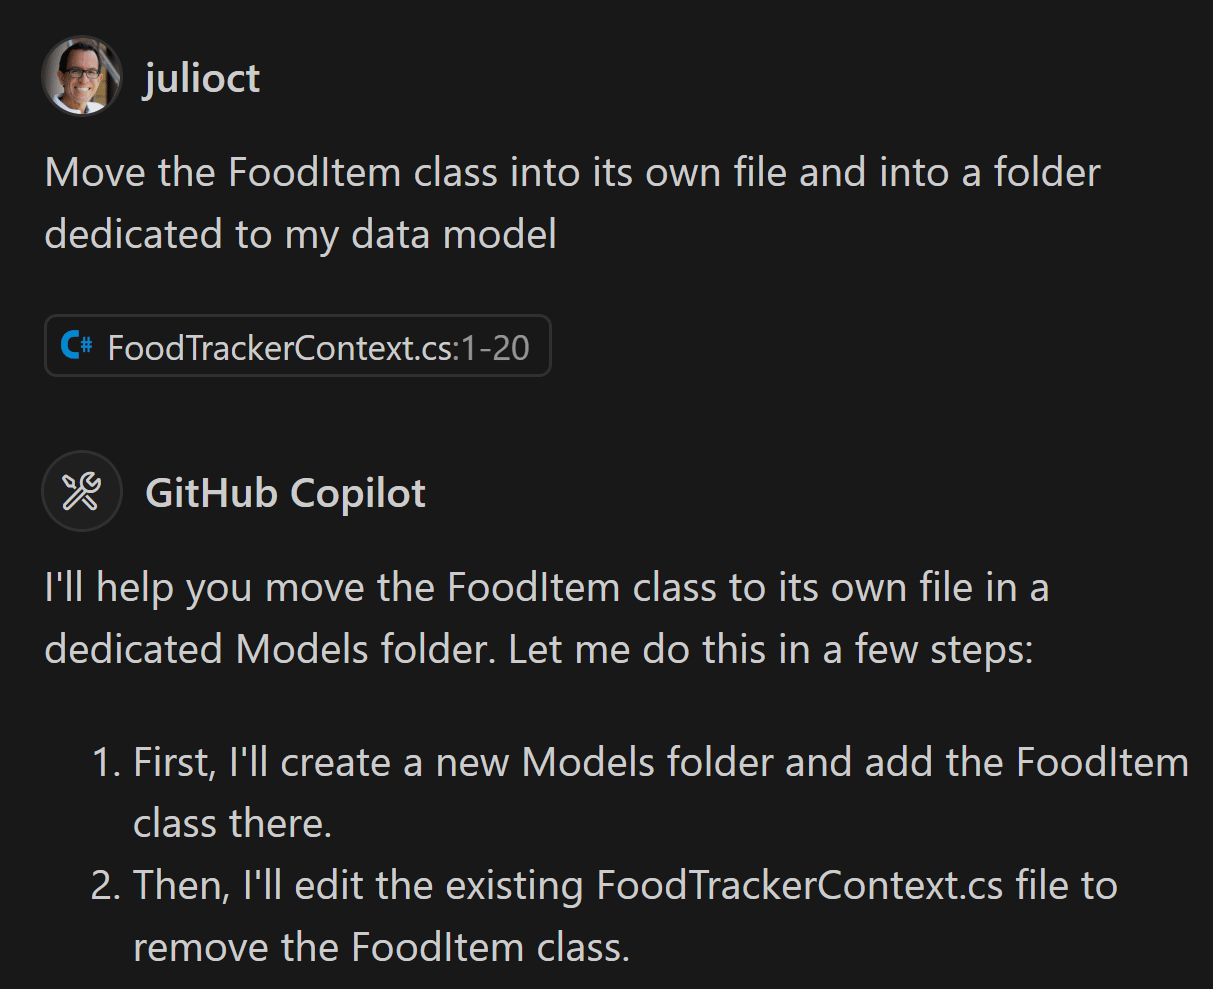
I went to look at my DBContext and noticed my agent had added the FoodItem entity straight into the DBContext class file:

Which doesn’t look great. Let’s fix that first:
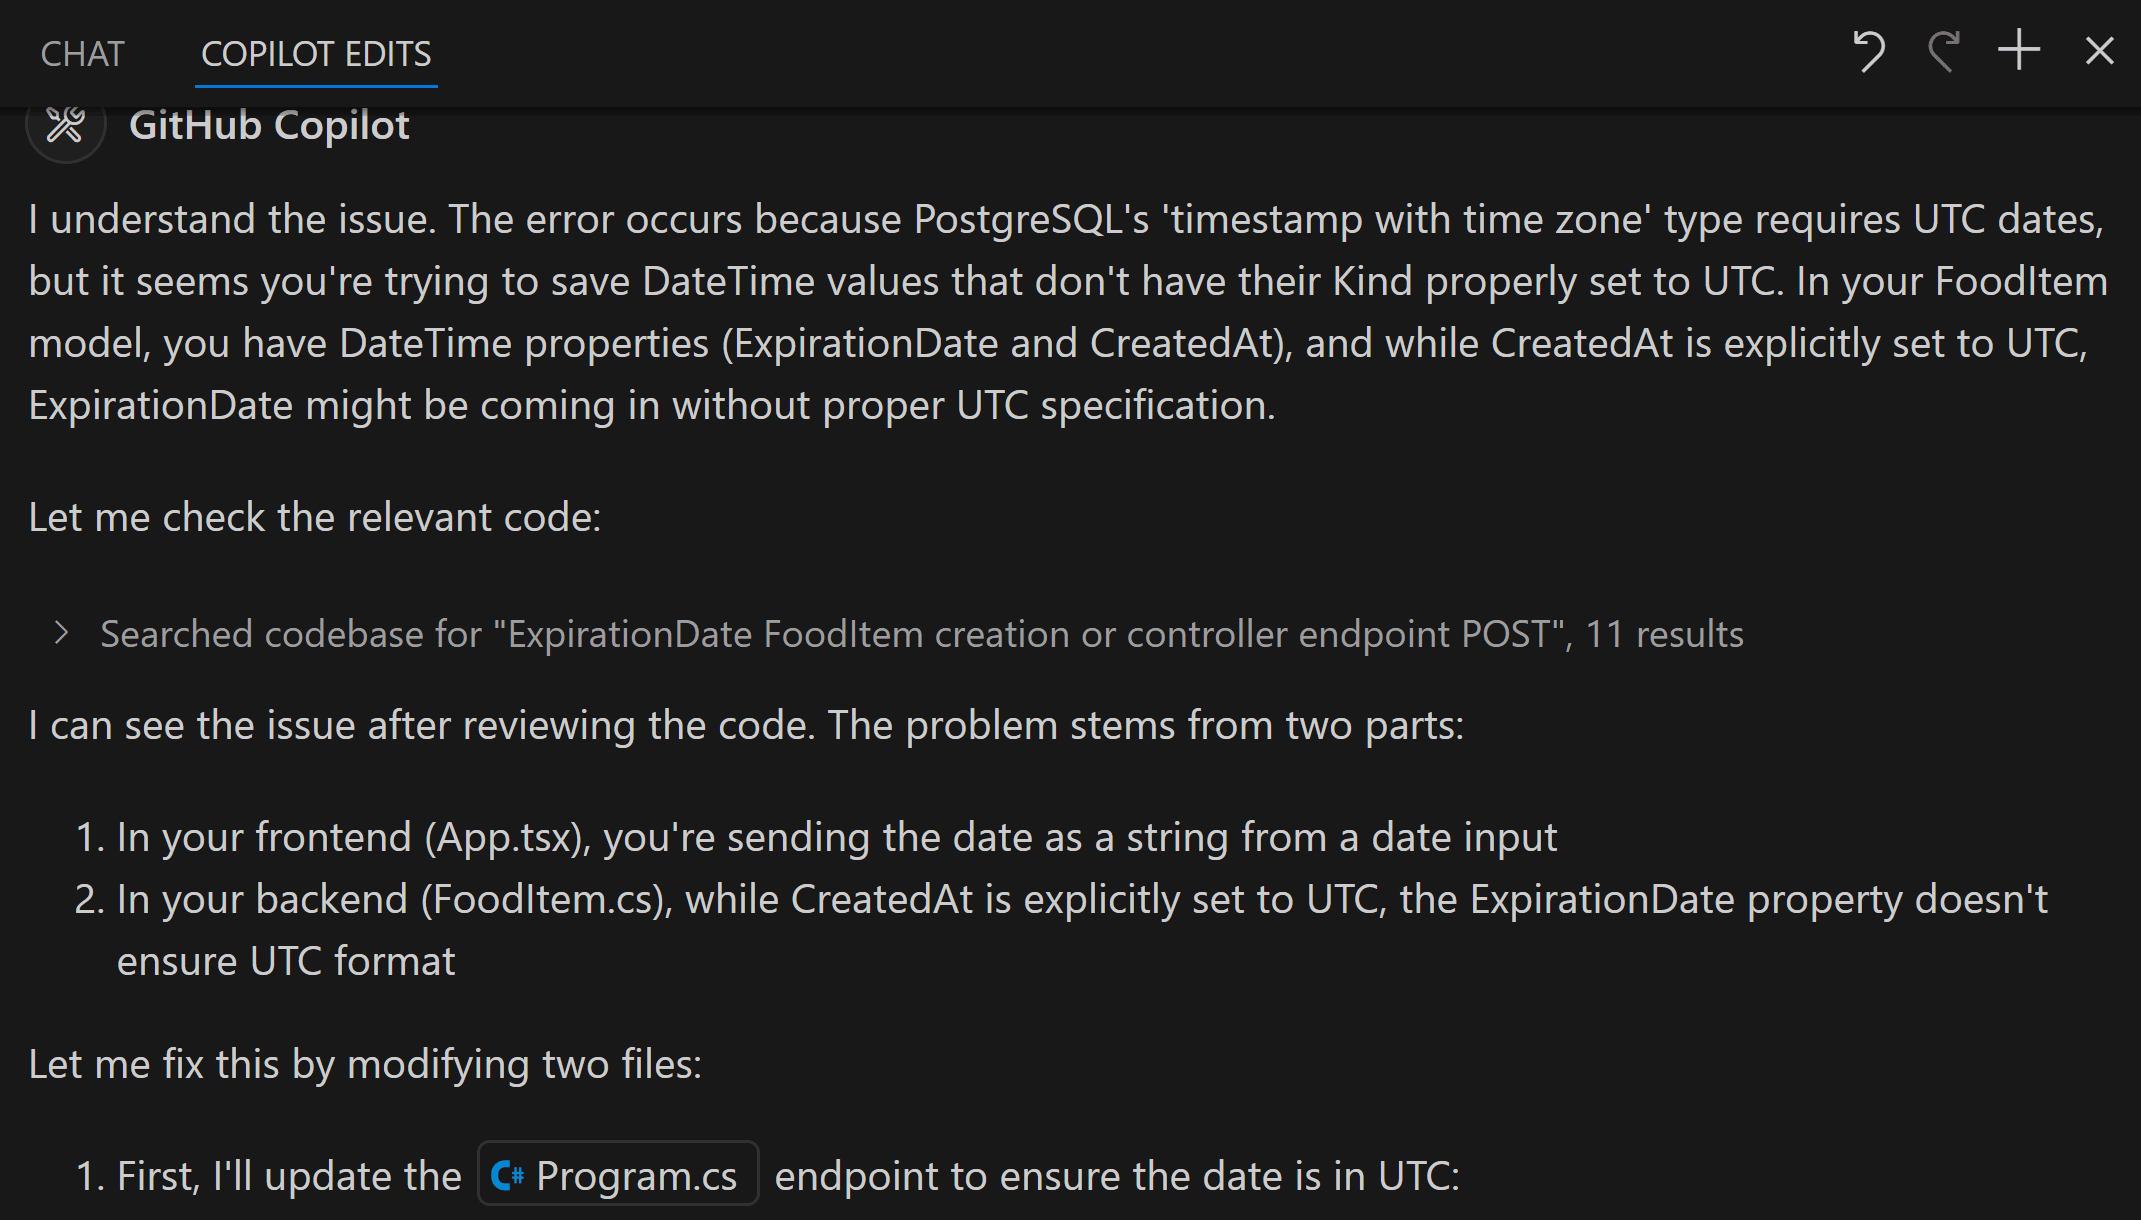
Great, it did that, and then I asked it to figure out and fix the actual issue:
And it did it:
Once it completed the changes, I restarted my docker compose session and tried the front-end again:
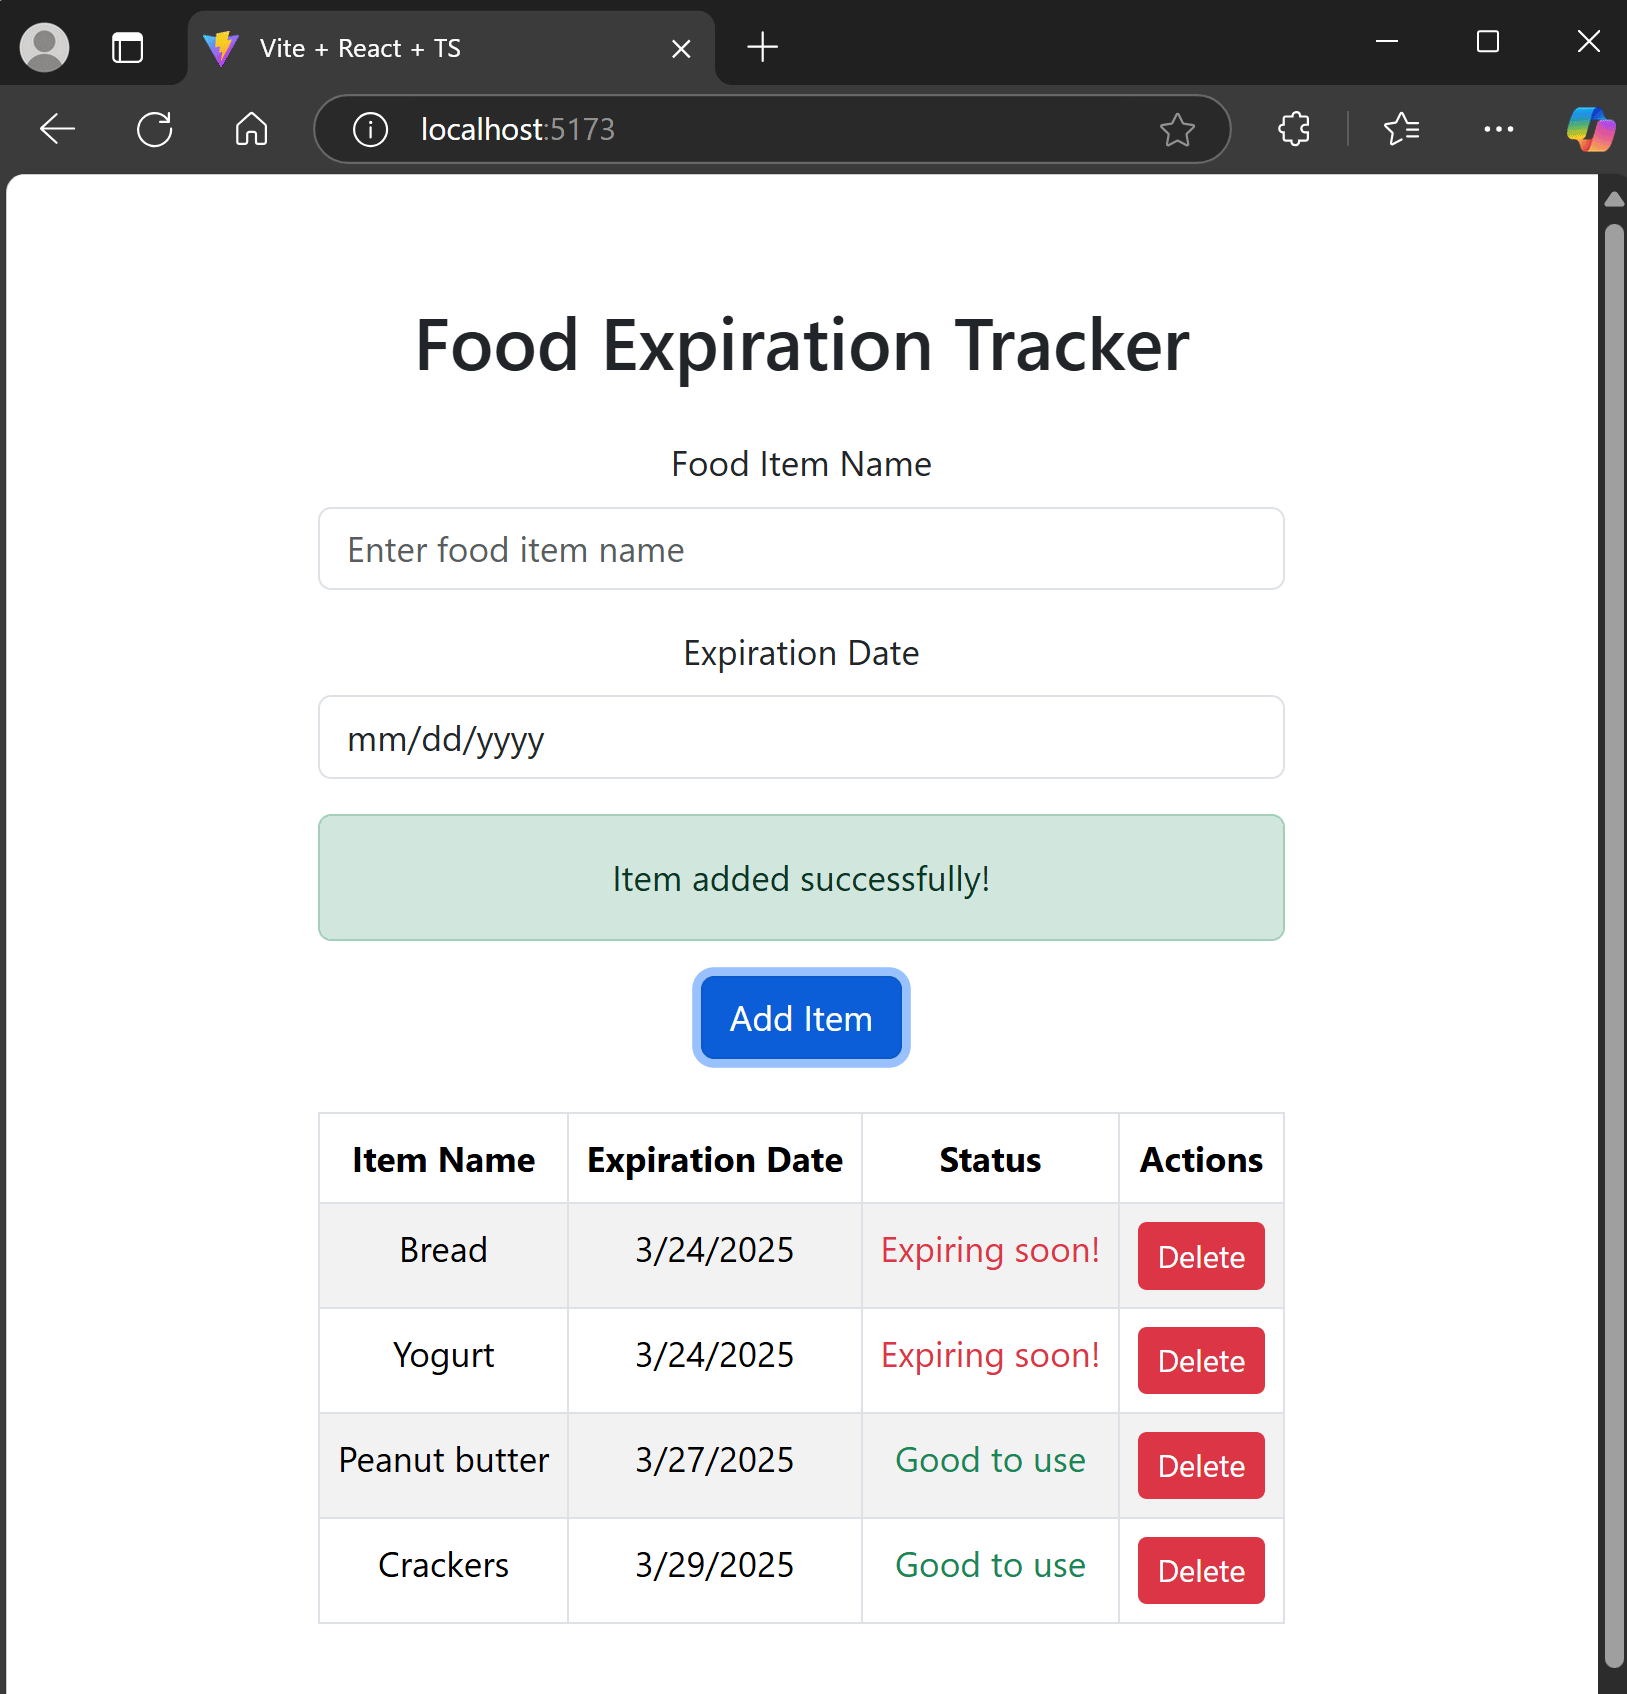
Works! And even the validations seem to be working properly:
The background service that sends the expiration notifications is also hooked up, but I would need to figure out a few configuration details before having it work properly:
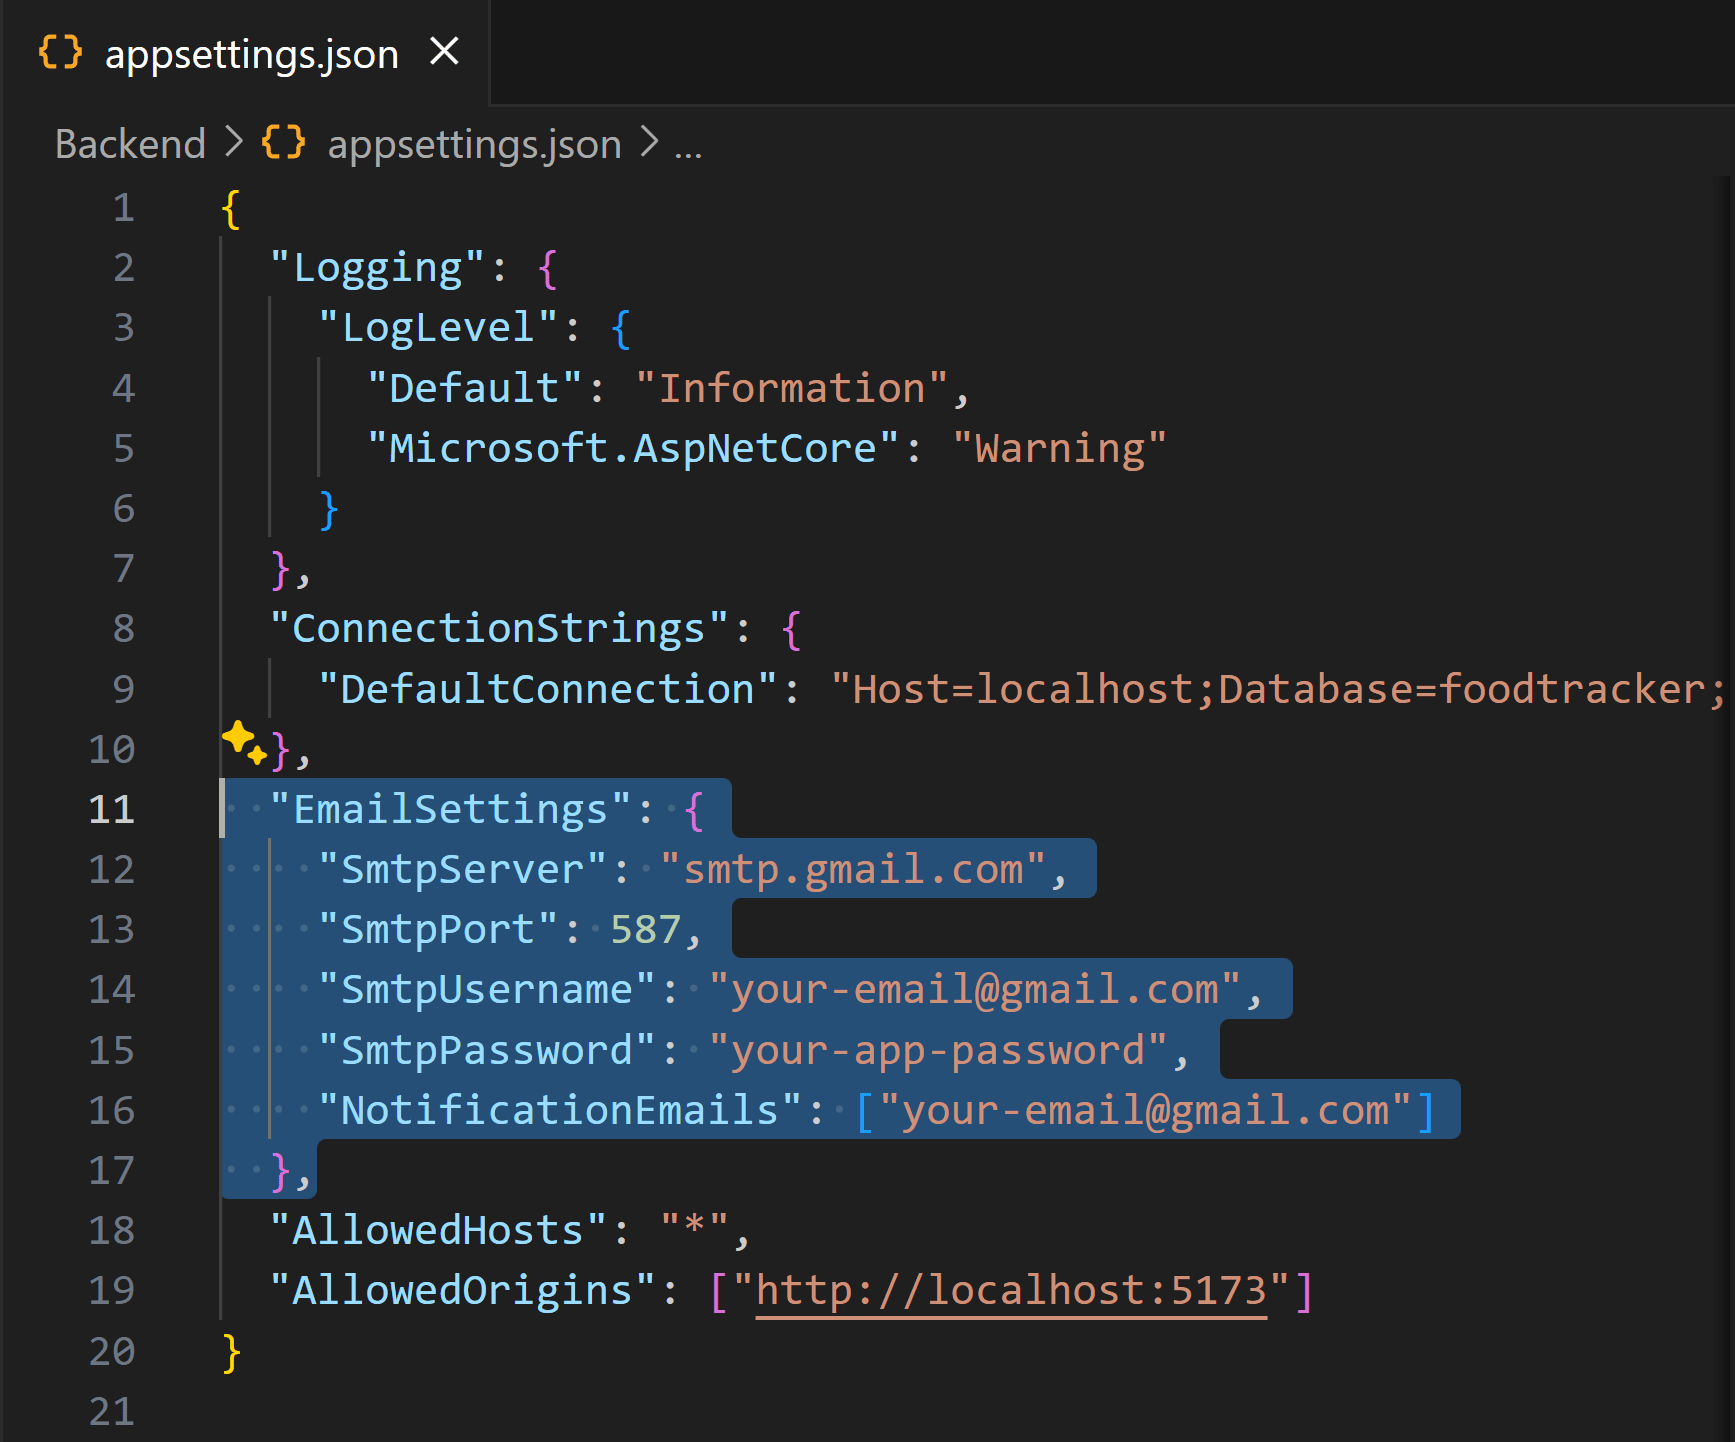
I’ll get back to that at some point.
Now I’d like to do something about the UI.
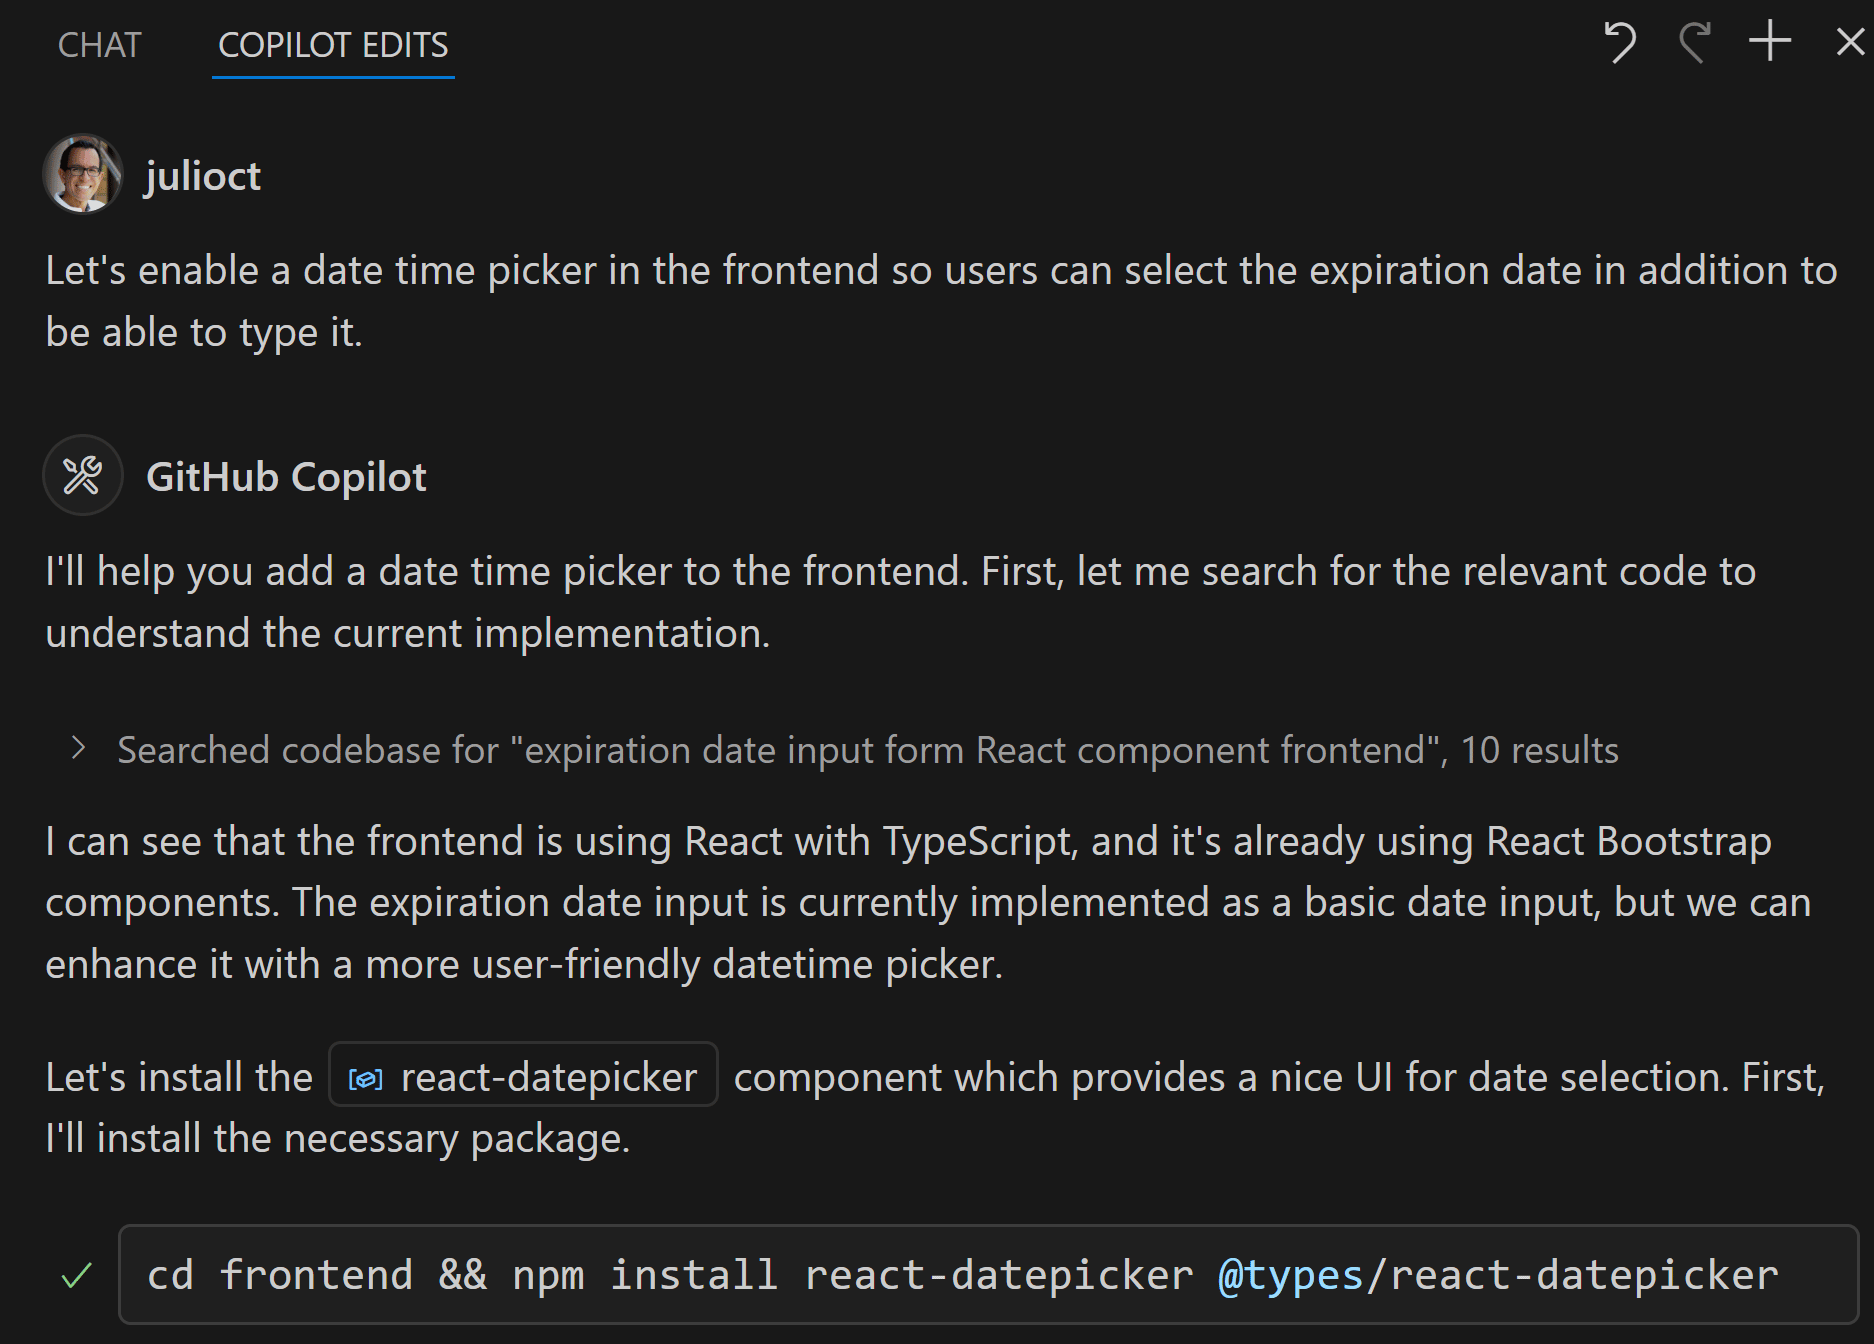
Fixing the front-end
Typing the expiration date in the UI is ok, but perhaps we can also enable a date time picker to make it more user-friendly?
And here’s the end result:
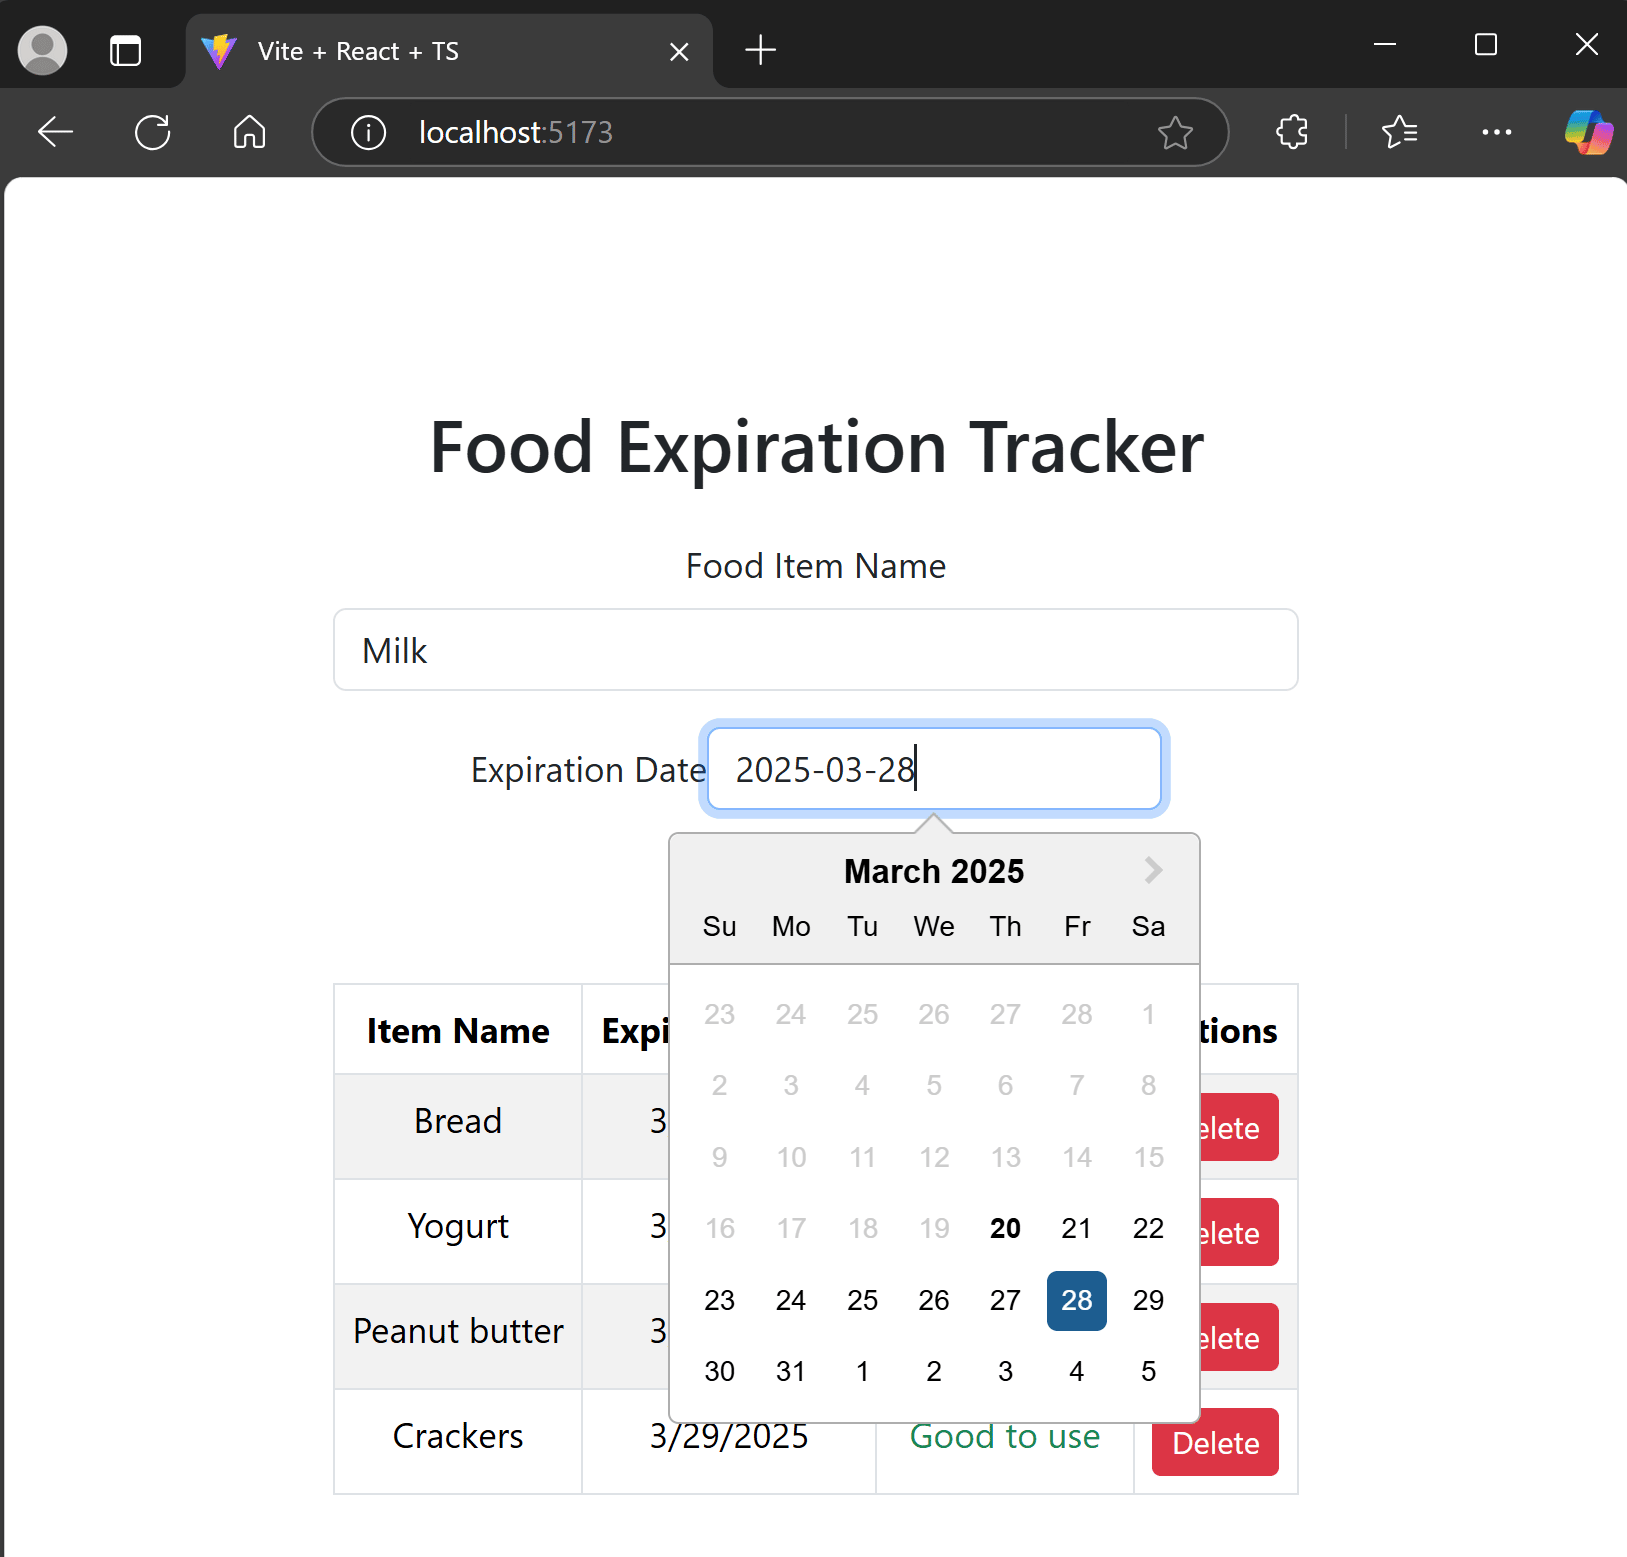
Amazing!
What’s next?
Even if I still need to sort out the email configuration details, and how to do the Azure deployment, this app is 95% ready to go, which is pretty impressive for spending just about an hour or two on this.
It’s not perfect, but it’s clearly the start of a revolutionary new way to build apps with most of the code being AI-generated.
A few things I already used this for in the last few days, in both cases without me writing a single line of code:
- Created a tool to easily restructure the content I’m preparing for my upcoming course
- Modified my React front-end to support Entra ID, in addition to the existing Keycloak support.
A few things I’m planning to use this for this year:
- Upgrade my old UWP app to WinUI and/or .NET MAUI
- Build an entire online course platform to stop paying another company every month to do the same
The possibilities are endless!
Bootcamp update
This last week I’ve been hard at work recording the first few modules of Azure for .NET Developers, my new course for .NET developers deploying to the Azure cloud, which will soon join the bootcamp.
However, one thing I realized as I was working on this is how big the course had become, quickly approaching 20 modules total, which is double the length of the other bootcamp courses.
Such a long course would be overwhelming and would take me more time than expected to get it done. So I decided to split it into two courses:
- Azure for .NET Developers: From Azure Fundamentals to a full-stack app deployed to the cloud and connected to the most popular Azure services.
- Containers & Cloud Native: From containerizing .NET apps to cloud-native development with .NET Aspire and Infrastructure as Code.
The updated bootcamp roadmap:
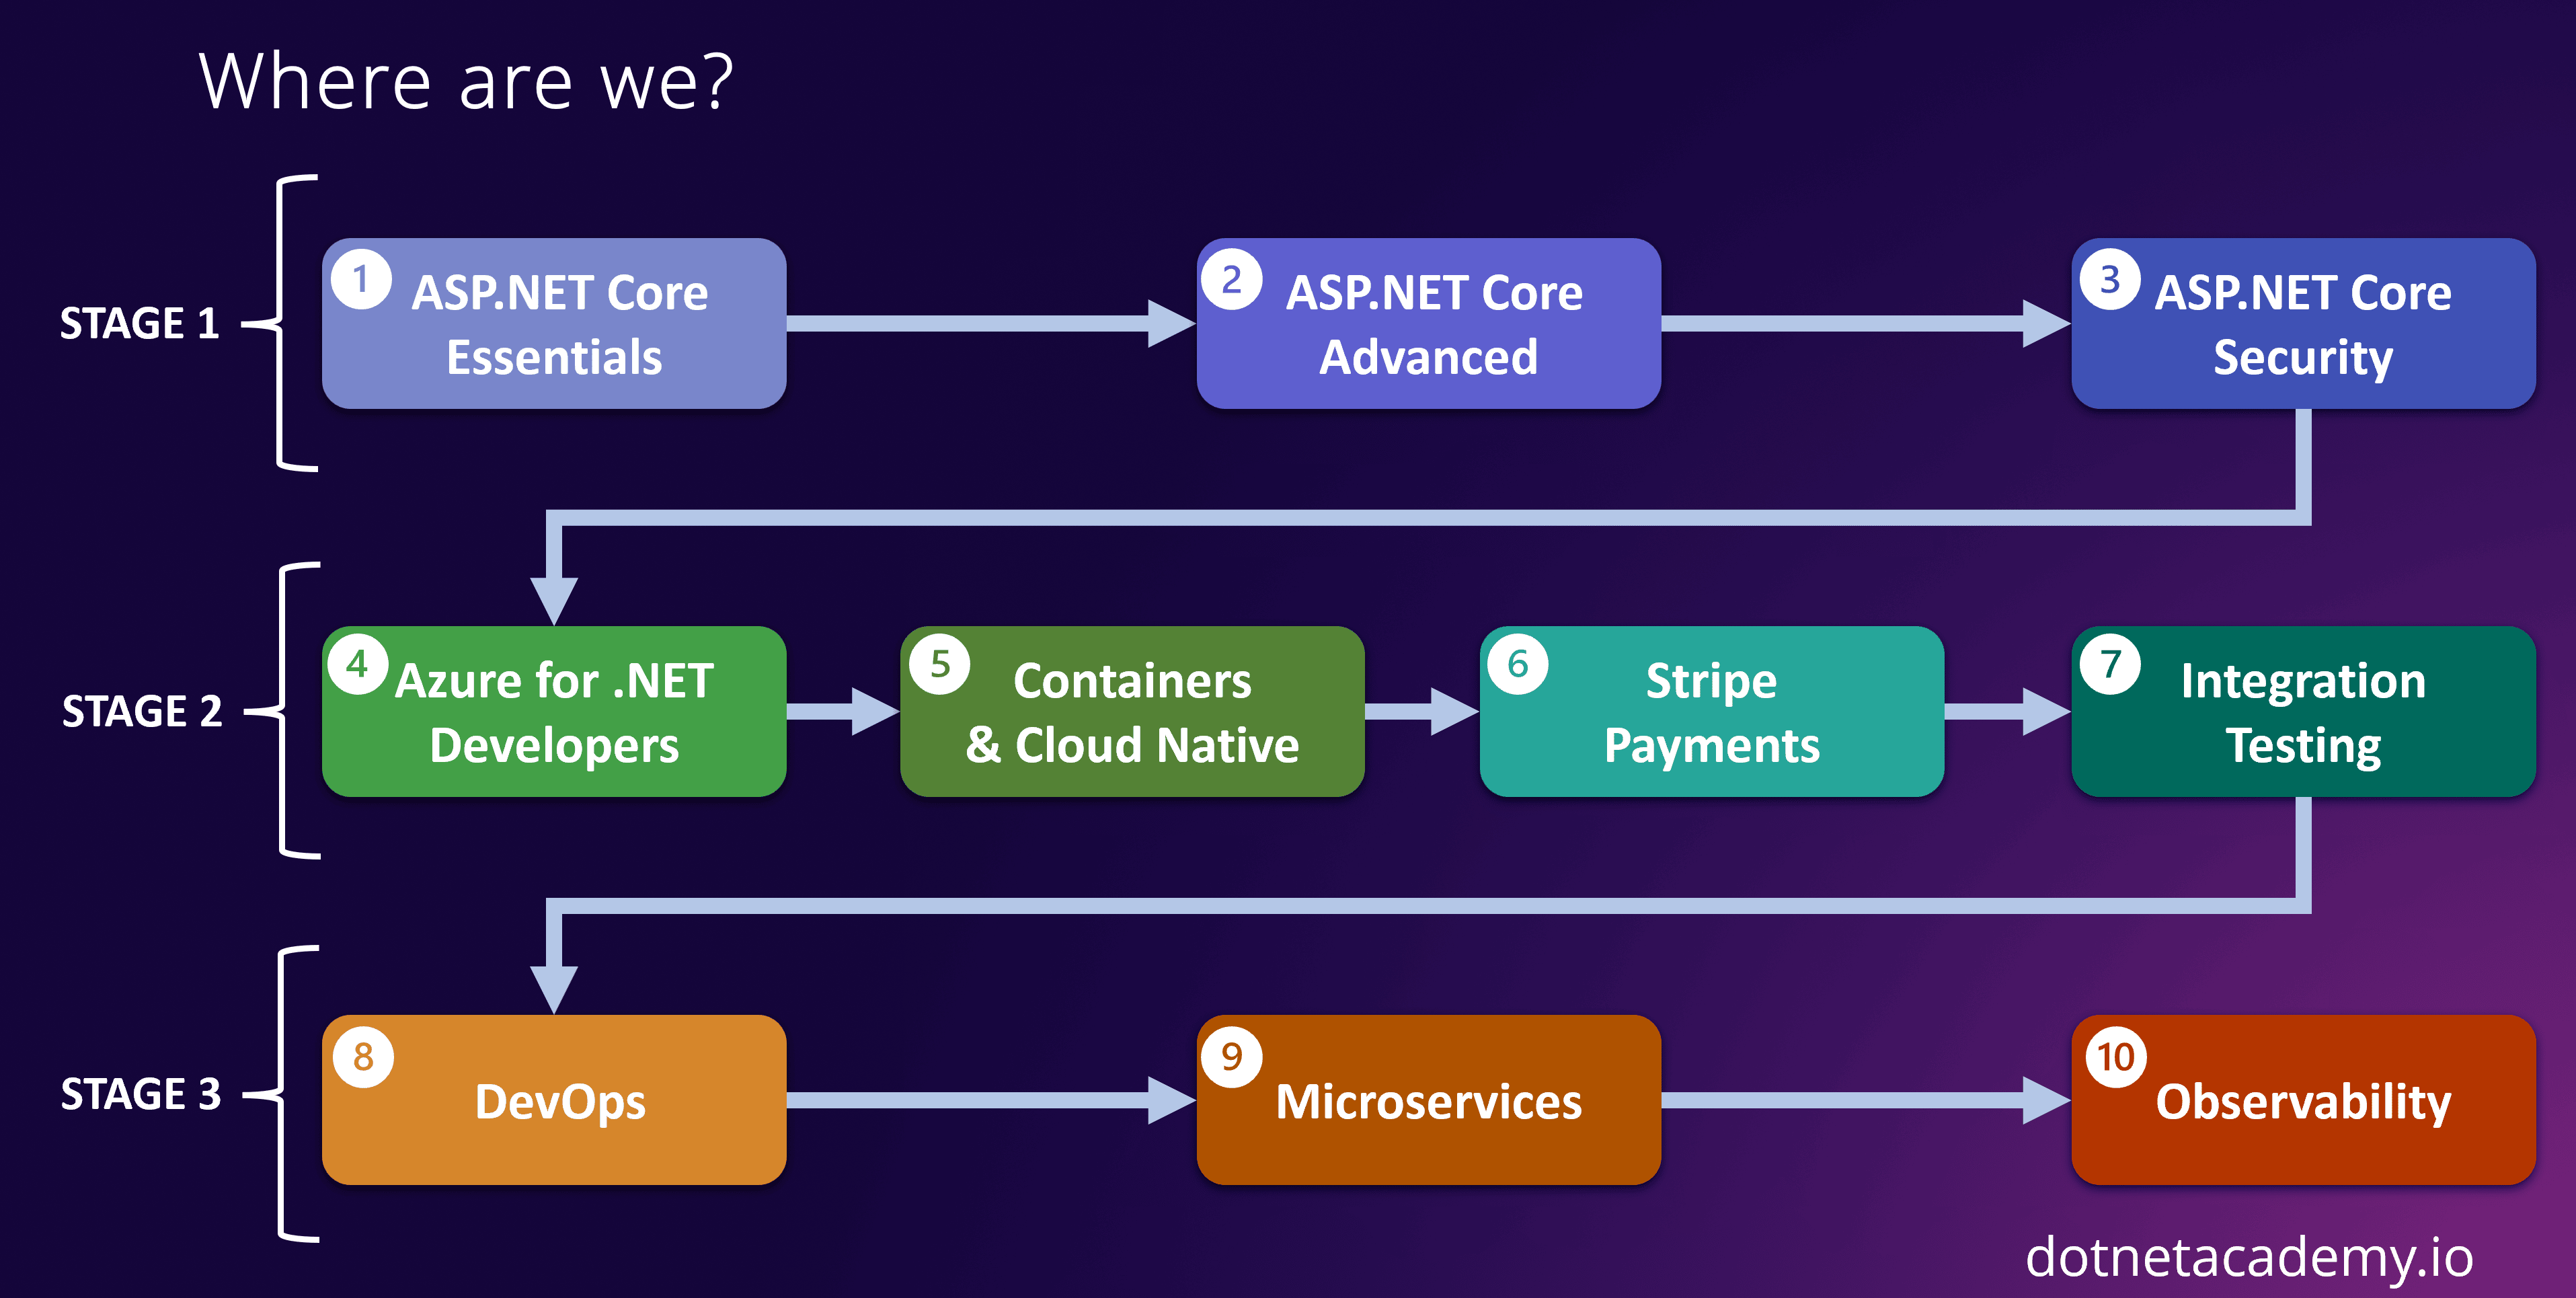
In terms of the planned bootcamp content, nothing changes, it’s just that those planned 20 modules that deal with the cloud and containers will now be delivered across two courses instead of one.
Here is the new diagram that describes what the upcoming Azure for .NET Developers course covers:
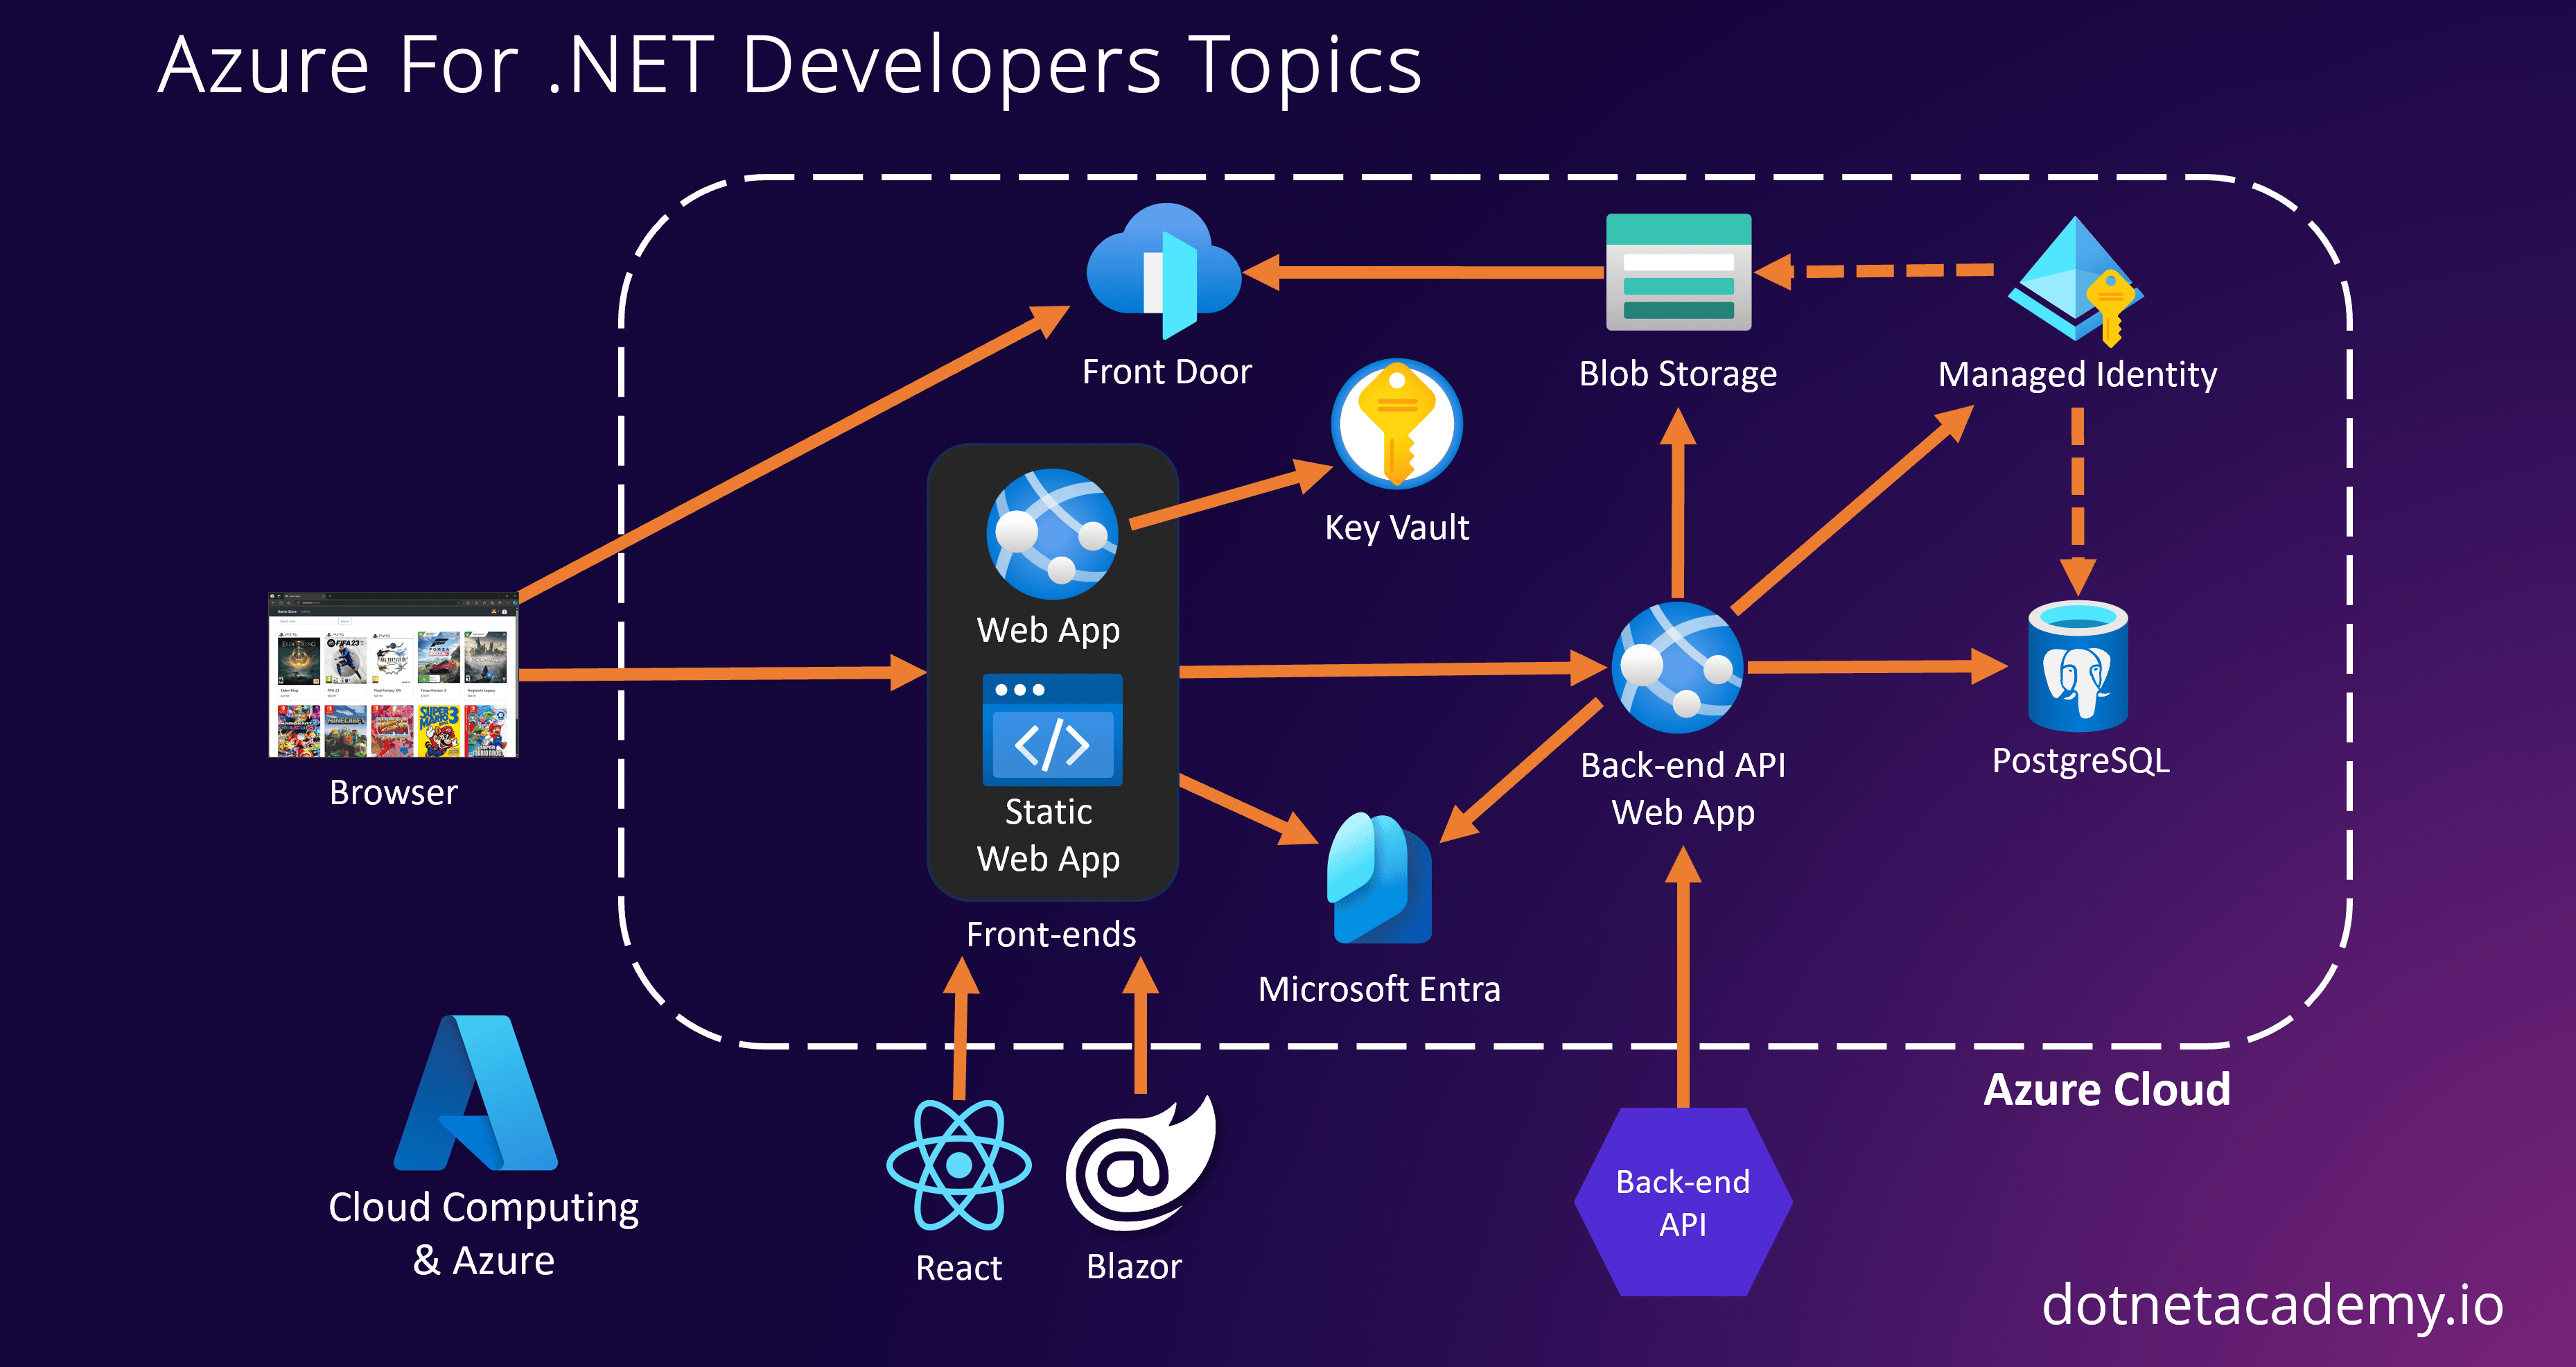
The new course split also gave me enough room to introduce Azure Key Vault and the deployment of not just the .NET back-end API and the Blazor front-end, but also the full React front-end.
So lots of great stuff coming.
Stay tuned!
Julio
Whenever you’re ready, here’s how I can help:
The .NET Developer Bootcamp: A complete path from ASP.NET Core fundamentals to building, containerizing, and deploying production-ready, cloud-native apps on Azure.
