Read time: 7 minutes
Thank you to our sponsors who keep this newsletter free to the reader:
UpCloud - Global, reliable, and modern cloud infrastructure that beats the competition. Sign up now and test with €50 free credits.
Today I want to show you how to build a CI/CD pipeline with GitHub Actions.
A CI/CD pipeline is a must-have for any software development project, as it allows you to automate the building, testing, and deployment of your code, making your development process more efficient and reliable.
In the past, setting up such a pipeline involved preparing entire servers and writing lots of scripts, which was a time-consuming and error-prone process.
But with GitHub Actions, you can focus on your pipeline logic and let GitHub take care of the rest.
Let’s dive in.
What Is GitHub Actions?
I won’t go into the details of what is a CI/CD pipeline or why you need it, since I already covered that in this previous article, where I showed you how to build one with Azure DevOps.
GitHub Actions is another popular CI/CD tool that allows you to automate your software development workflows.
It’s similar to Azure DevOps, but the difference is that it’s built into GitHub, so you can easily build, test, and deploy your code right from your GitHub repository.
Let me show you how to build a CI/CD pipeline for a .NET microservice that deploys to Azure Kubernetes Service (AKS), step by step.
Step 1: Create your workflow
Assuming you already have your code pushed to a GitHub repository, you can get started by going to the Actions tab.

GitHub will detect the language of your project and suggest a few preconfigured workflow templates.
If you are just getting started, the .NET template is a good option for a .NET microservice.
However, here I’ll choose set up a workflow yourself to show you how to build a pipeline from scratch.

You will land on a page where you can start defining your new workflow using YAML syntax:
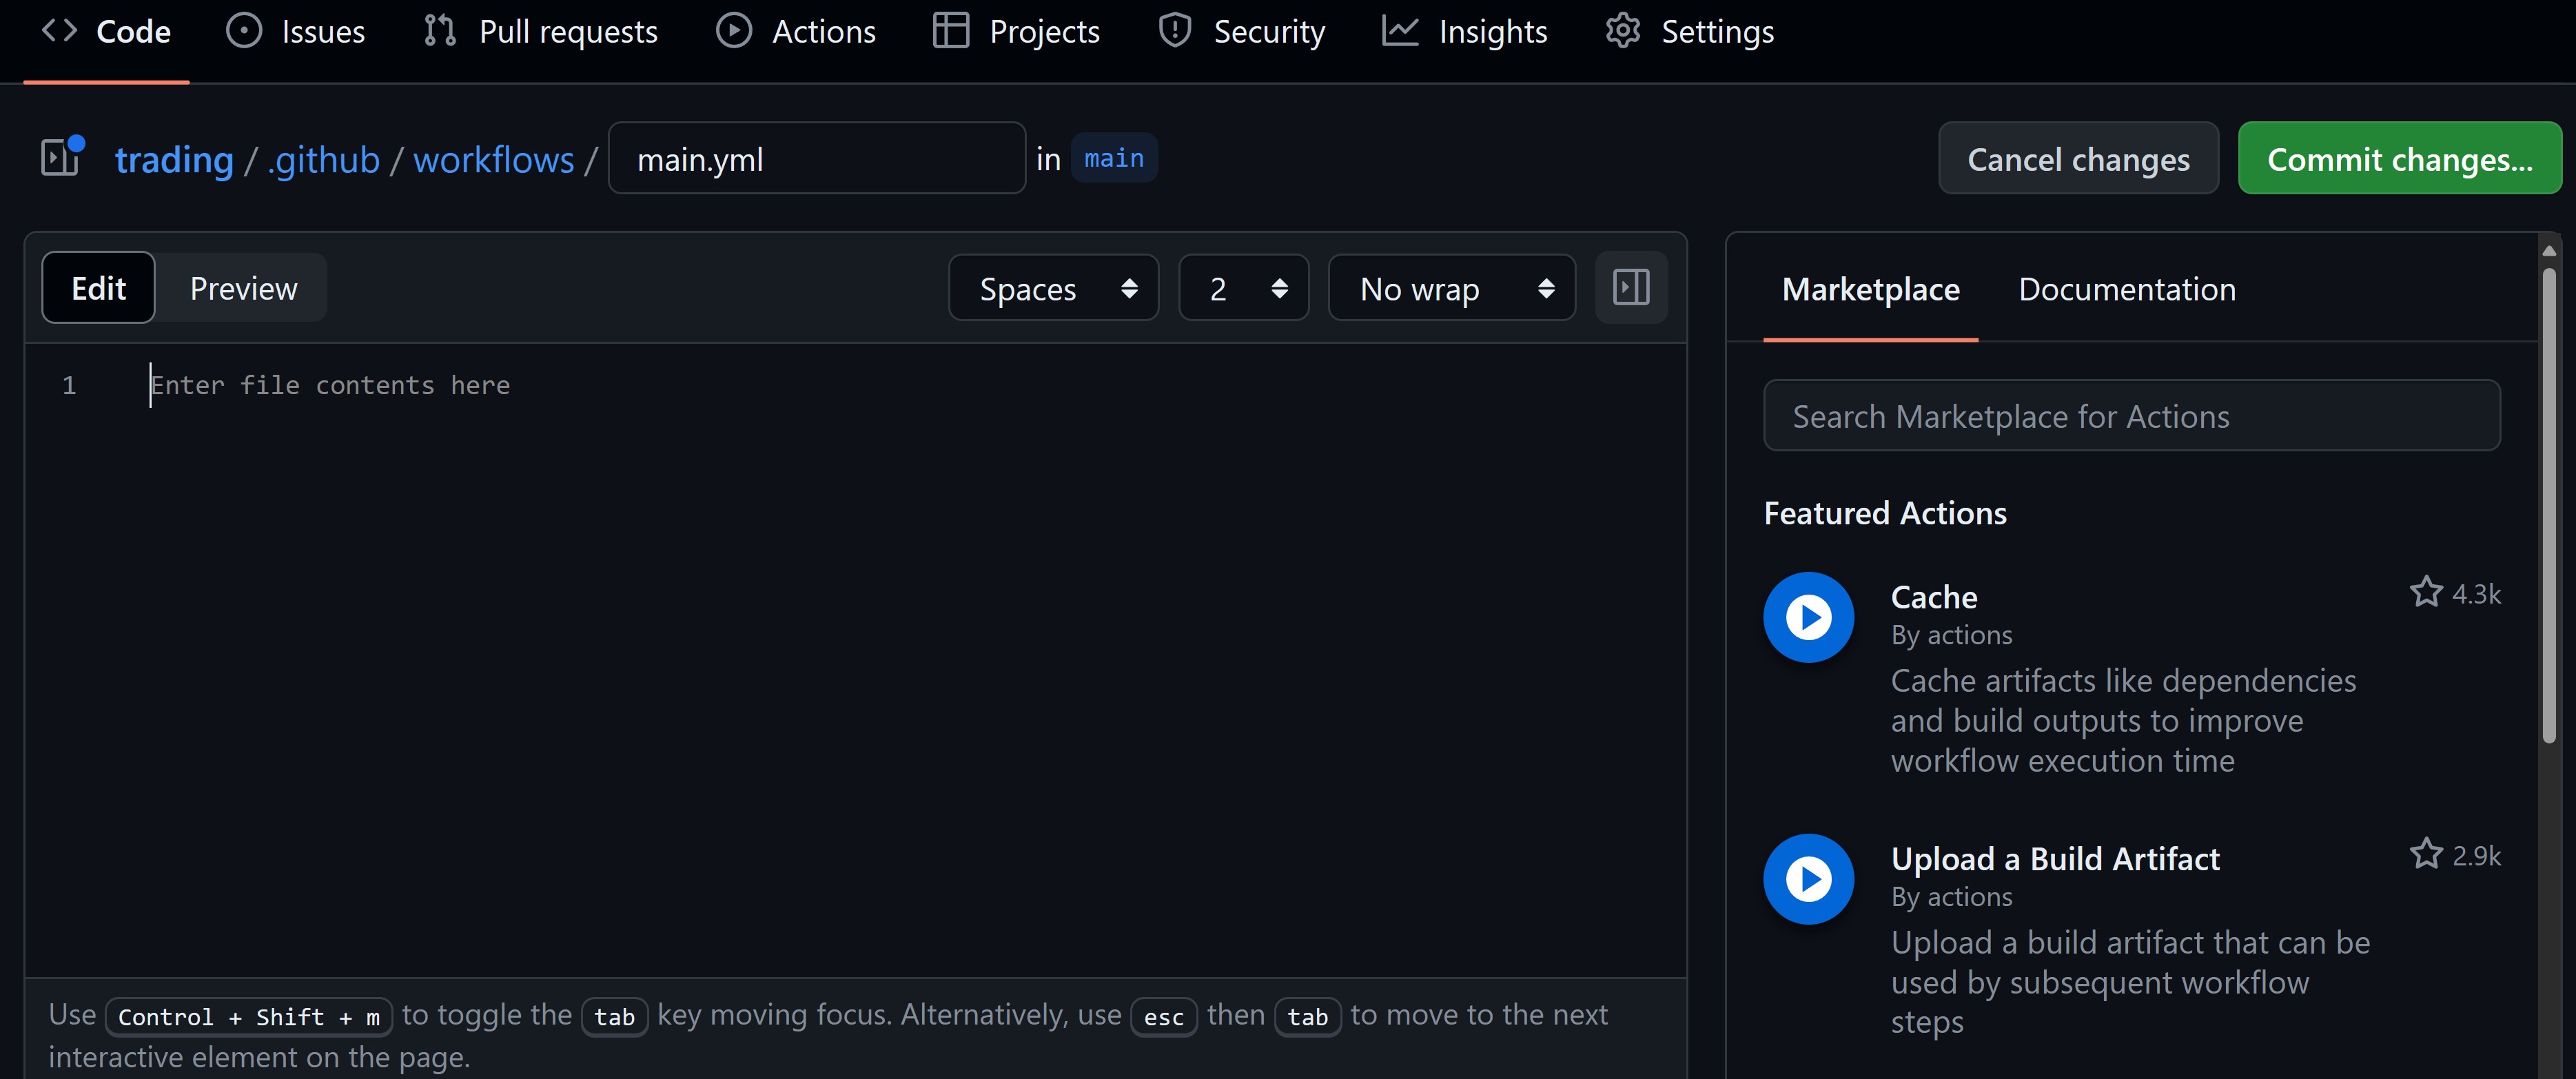
Now let’s see how to start defining our new workflow.
Step 2: Define the workflow trigger
Since we are creating a CI/CD pipeline, we want our workflow to trigger on every change to our codebase.
So let’s start with this piece of YAML:
name: CICD

on:
  push:
    branches: [main]
There, besides defining the name of our workflow, we are also specifying that every time any code is pushed to the main branch, our workflow will trigger.
You could assign any other branch there, or you could also trigger the workflow on pull requests, if you are using those.
I also like to enable my workflow to be triggered on demand, which you can do by adding a workflow_dispatch trigger:
on:
  push:
    branches: [main]
  workflow_dispatch:
Now let’s move to the next step, where we’ll define the first job of our pipeline.
Step 3: Generate the container version
We will deploy our .NET microservice via a Docker image, but first we need to come up with a version for that image, which we will use as the image tag.
For this, first, we’ll define a new job:
jobs:
  generate-version:
    runs-on: ubuntu-latest

    permissions:
      contents: write
Here we are defining a job called generate-version that will run on a Linux box that will use the ubuntu-latest image.
Where that box comes from and how it is provisioned is abstracted away by GitHub, so you don’t need to worry about it (beautiful!).
The permissions section is necessary because, in the steps that follow, we will be creating a new tag in our repository, and without this permission, GitHub Actions won’t be able to do that.
Next, let’s define the steps for this job:
    steps:
      - uses: actions/checkout@v4

      - name: Github Tag Bump
        id: tab_bump
        uses: anothrNick/github-tag-action@v1
        env:
          GITHUB_TOKEN: ${{ secrets.GITHUB_TOKEN }}
          INITIAL_VERSION: 1.0.2
          DEFAULT_BUMP: patch
Here we use the actions/checkout action to pull our repository code into the box where our job is running.
Then we use the anothrNick/github-tag-action action to bump the version represented as a Git tag in our repository based on the last existing tag, or it will use the INITIAL_VERSION that you specify.
Also notice the use of the GITHUB_TOKEN secret, which is a token that GitHub provides to your workflow to interact with your repository. It will authenticate the action to create new tags in your repo.
Notice how I did not have to create these actions myself. I just used the ones that are already available in the public GitHub Marketplace, also available on the right side of the workflow editor:
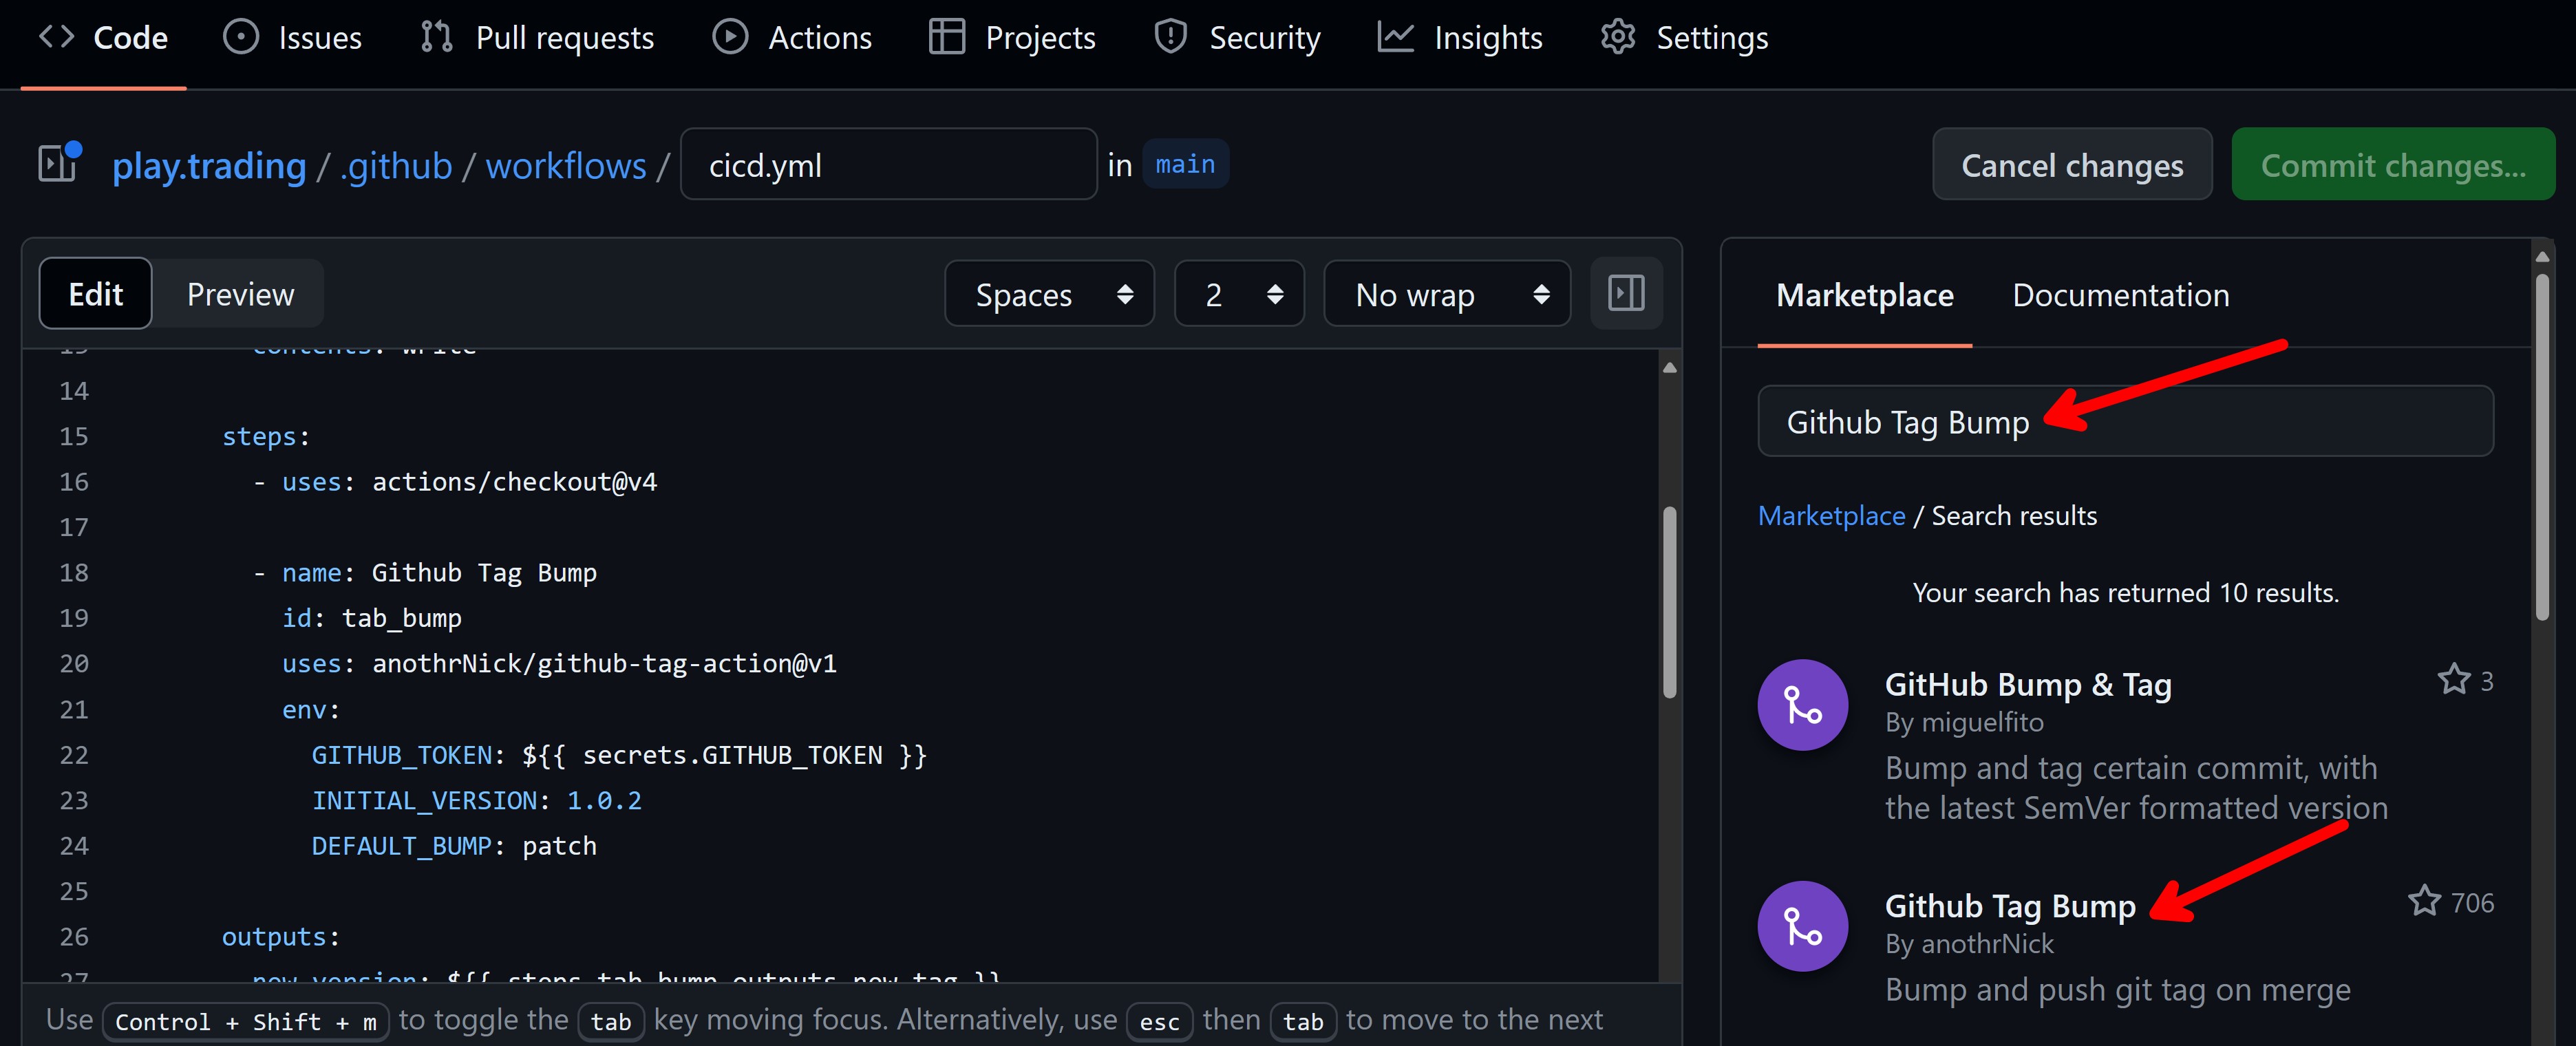
The last thing to do here is to output the new version that was generated:
outputs:
  new_version: ${{ steps.tab_bump.outputs.new_tag }}
That way, we can use this new version in the next jobs of our workflow.
Step 4: Build and push the Docker image
Since we already have a Dockerfile in our repository that defines how to build the microservice Docker image, we can easily tell GitHub Actions to build and push that image to a container registry.
First, let’s define a new job:
  build-and-deploy-service:
    runs-on: ubuntu-latest
    needs: generate-version

    env:
      APP_NAME: playeconomy
      SERVICE_NAME: trading
      HELM_CHART_VERSION: 0.1.4

    permissions:
      id-token: write
      contents: read
This job also runs on a Linux box, but notice the needs attribute, which tells GitHub Actions that this job depends on the generate-version job.
This way, GitHub will make sure that the version job runs before this one.
We also define some environment variables that we will use in the steps that follow. In particular, HELM_CHART_VERSION is the version of the Helm chart that I had already prepared and that we will use to deploy our microservice to AKS (more on this in Step 5).
We also need permissions to both read the contents of our repository and to request an id-token to be able to authenticate with Azure resources via OIDC.
Now, let’s add the initial job steps:
steps:
  - uses: actions/checkout@v4

  - name: Azure Login
    uses: Azure/login@v2
    with:
      client-id: ${{ secrets.AZURE_CLIENT_ID }}
      tenant-id: ${{ secrets.AZURE_TENANT_ID }}
      subscription-id: ${{ secrets.AZURE_SUBSCRIPTION_ID }}

  - name: Login to container registry
    run: az acr login --name ${{ env.APP_NAME }}

  - name: Build and push Docker image
    uses: docker/build-push-action@v5
    with:
      tags: ${{env.APP_NAME}}.azurecr.io/trading:${{needs.generate-version.outputs.new_version}}
      push: true
Let’s briefly explain what each step does:
-
Azure Login: This step authenticates with Azure using the service principal credentials that I grabbed from my Azure Portal and have stored as GitHub secrets. To make this work you’ll also need to configure a federated identity credential for your Azure service principal as described here.
-
Login to container registry: This step uses the Azure CLI to log in to the Azure Container Registry where we will push our Docker image.
-
Build and push Docker image: This step builds the Docker image and pushes it to my Azure Container Registry. Notice how we are using the new version that was generated in the previous job as the tag for the image.
Next, let’s add the steps to deploy our microservice.
Step 5: Deploy to Azure Kubernetes Service
To deploy our microservice to AKS, we will use a Helm chart that I had already prepared and stored in my ACR.
If you are not familiar with Helm, it is basically a package manager for Kubernetes that allows you to define, install, and upgrade Kubernetes applications.
What I did is to create a Helm chart that defines how to deploy any of my microservices to Kubernetes and then I stored it in my ACR.
So first let’s add a step to get access to the AKS cluster (we can do this because we already authenticated with Azure in the previous job):
- name: Get AKS Credentials
  run: az aks get-credentials --resource-group ${{ env.APP_NAME }} --name ${{ env.APP_NAME }}
Then, let’s get Helm into the box and log in to the Helm registry in our ACR, so we can pull the Helm chart:
- name: Helm tool installer
  uses: Azure/setup-helm@v4

- name: Login to Helm registry
  run: |
    helmUser="00000000-0000-0000-0000-000000000000"
    helmPassword=$(az acr login --name ${{ env.APP_NAME }} \
    --expose-token --output tsv --query accessToken)
    helm registry login ${{ env.APP_NAME }}.azurecr.io \
    --username $helmUser --password $helmPassword
Notice that for the log in logic, we essentially log in to the ACR and retrieve an access token that we can use to log in to the Helm registry.
Finally, let’s kick off the deployment:
- name: Deploy Helm chart
  run: |
    helm upgrade \
    ${{env.SERVICE_NAME}}-service \
    oci://${{ env.APP_NAME }}.azurecr.io/helm/microservice \
    --version ${{env.HELM_CHART_VERSION}} \
    -f helm/values.yaml \
    -n ${{env.SERVICE_NAME}} \
    --set image.tag=${{needs.generate-version.outputs.new_version}} \
    --install \
    --create-namespace \
    --wait
Now, that looks like a lot, but to break it down:
- We are using the helm upgrade command to deploy our Helm chart to AKS.
- We are specifying the Helm chart that we want to deploy, which is stored in our ACR.
- We are passing a values file that contains the configuration for this very specific microservice.
- We are setting the image tag to the new version that was generated in the first job.
And that’s pretty much it.
Here is the full workflow YAML:
name: CICD

on:
  push:
    branches: [main]
  workflow_dispatch:

jobs:
  generate-version:
    runs-on: ubuntu-latest

    permissions:
      contents: write

    steps:
      - uses: actions/checkout@v4

      - name: Github Tag Bump
        id: tab_bump
        uses: anothrNick/github-tag-action@v1
        env:
          GITHUB_TOKEN: ${{ secrets.GITHUB_TOKEN }}
          INITIAL_VERSION: 1.0.2
          DEFAULT_BUMP: patch

    outputs:
      new_version: ${{ steps.tab_bump.outputs.new_tag }}

  build-and-deploy-service:
    runs-on: ubuntu-latest
    needs: generate-version

    env:
      APP_NAME: playeconomy
      SERVICE_NAME: trading
      HELM_CHART_VERSION: 0.1.4

    permissions:
      id-token: write
      contents: read

    steps:
      - uses: actions/checkout@v4

      - name: Azure Login
        uses: Azure/login@v2
        with:
          client-id: ${{secrets.AZURE_CLIENT_ID}}
          tenant-id: ${{secrets.AZURE_TENANT_ID}}
          subscription-id: ${{secrets.AZURE_SUBSCRIPTION_ID}}

      - name: Login to container registry
        run: az acr login --name ${{ env.APP_NAME }}

      - name: Build and push Docker image
        uses: docker/build-push-action@v5
        with:
          tags: ${{env.APP_NAME}}.azurecr.io/trading:${{ needs.generate-version.outputs.new_version }}
          push: true

      - name: Get AKS Credentials
        run: az aks get-credentials --resource-group ${{ env.APP_NAME }} --name ${{ env.APP_NAME }}

      - name: Helm tool installer
        uses: Azure/setup-helm@v4

      - name: Login to Helm registry
        run: |
            helmUser="00000000-0000-0000-0000-000000000000"
            helmPassword=$(az acr login --name ${{ env.APP_NAME }} \
            --expose-token --output tsv --query accessToken)
            helm registry login ${{ env.APP_NAME }}.azurecr.io \
            --username $helmUser --password $helmPassword

      - name: Deploy Helm chart
        run: |
          helm upgrade \
          ${{env.SERVICE_NAME}}-service \
          oci://${{ env.APP_NAME }}.azurecr.io/helm/microservice \
          --version ${{env.HELM_CHART_VERSION}} \
          -f helm/values.yaml \
          -n ${{env.SERVICE_NAME}} \
          --set image.tag=${{needs.generate-version.outputs.new_version}} \
          --install \
          --create-namespace \
          --wait
Step 6: Commit and run workflow
With the workflow steps ready, you can now commit your changes to your repository:

And, if everything went well, you should see your workflow running:
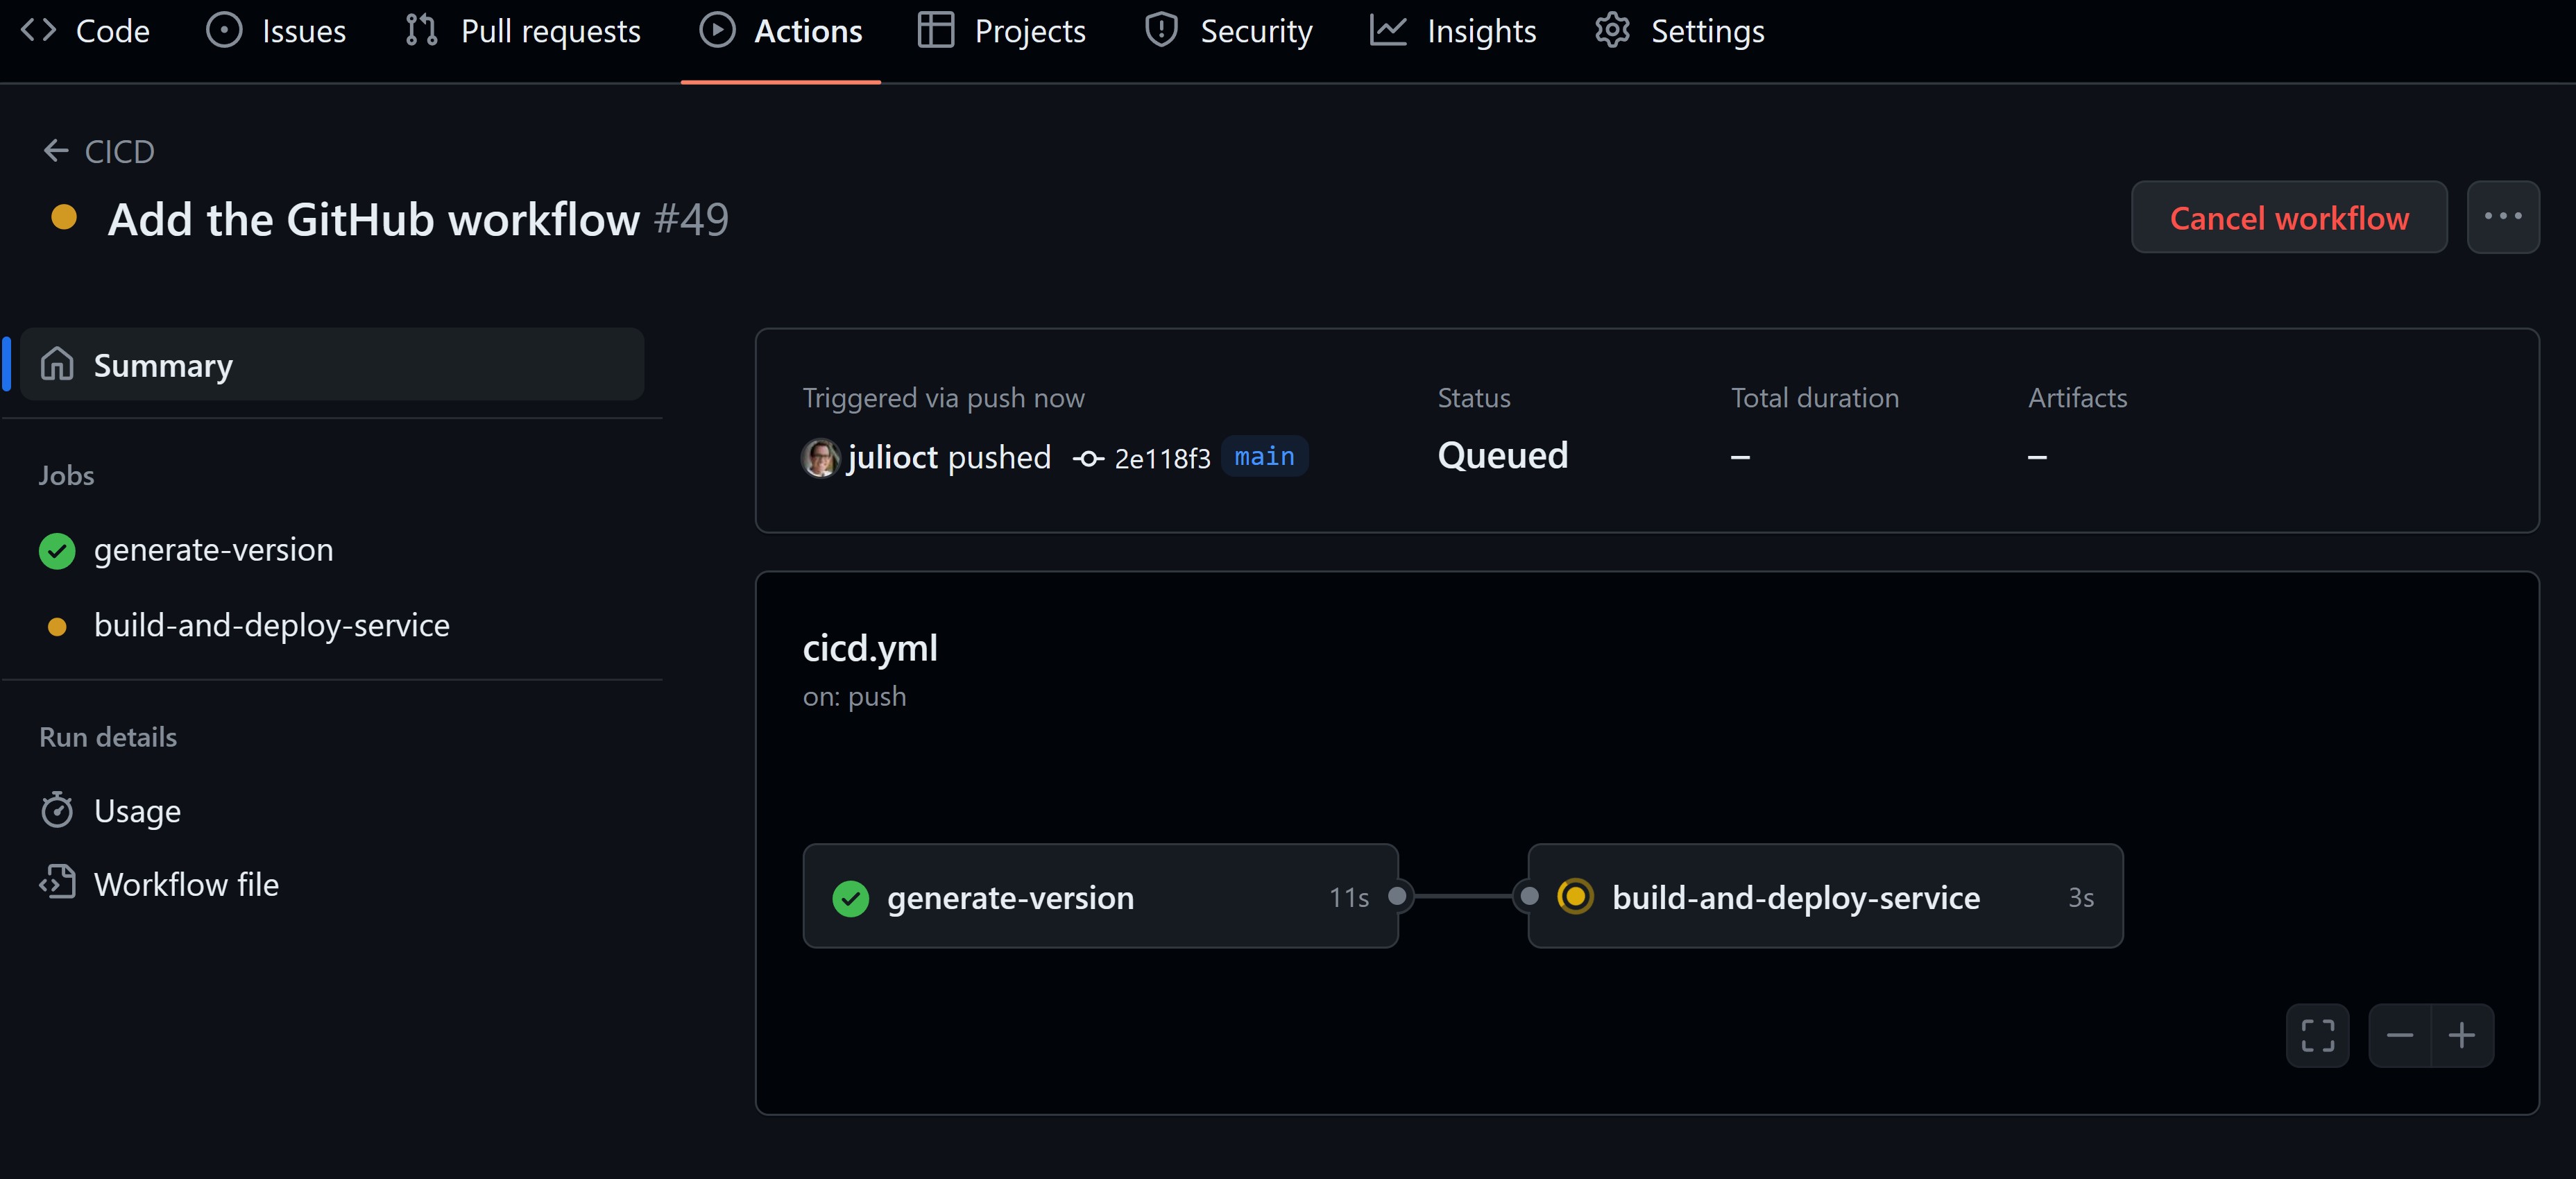
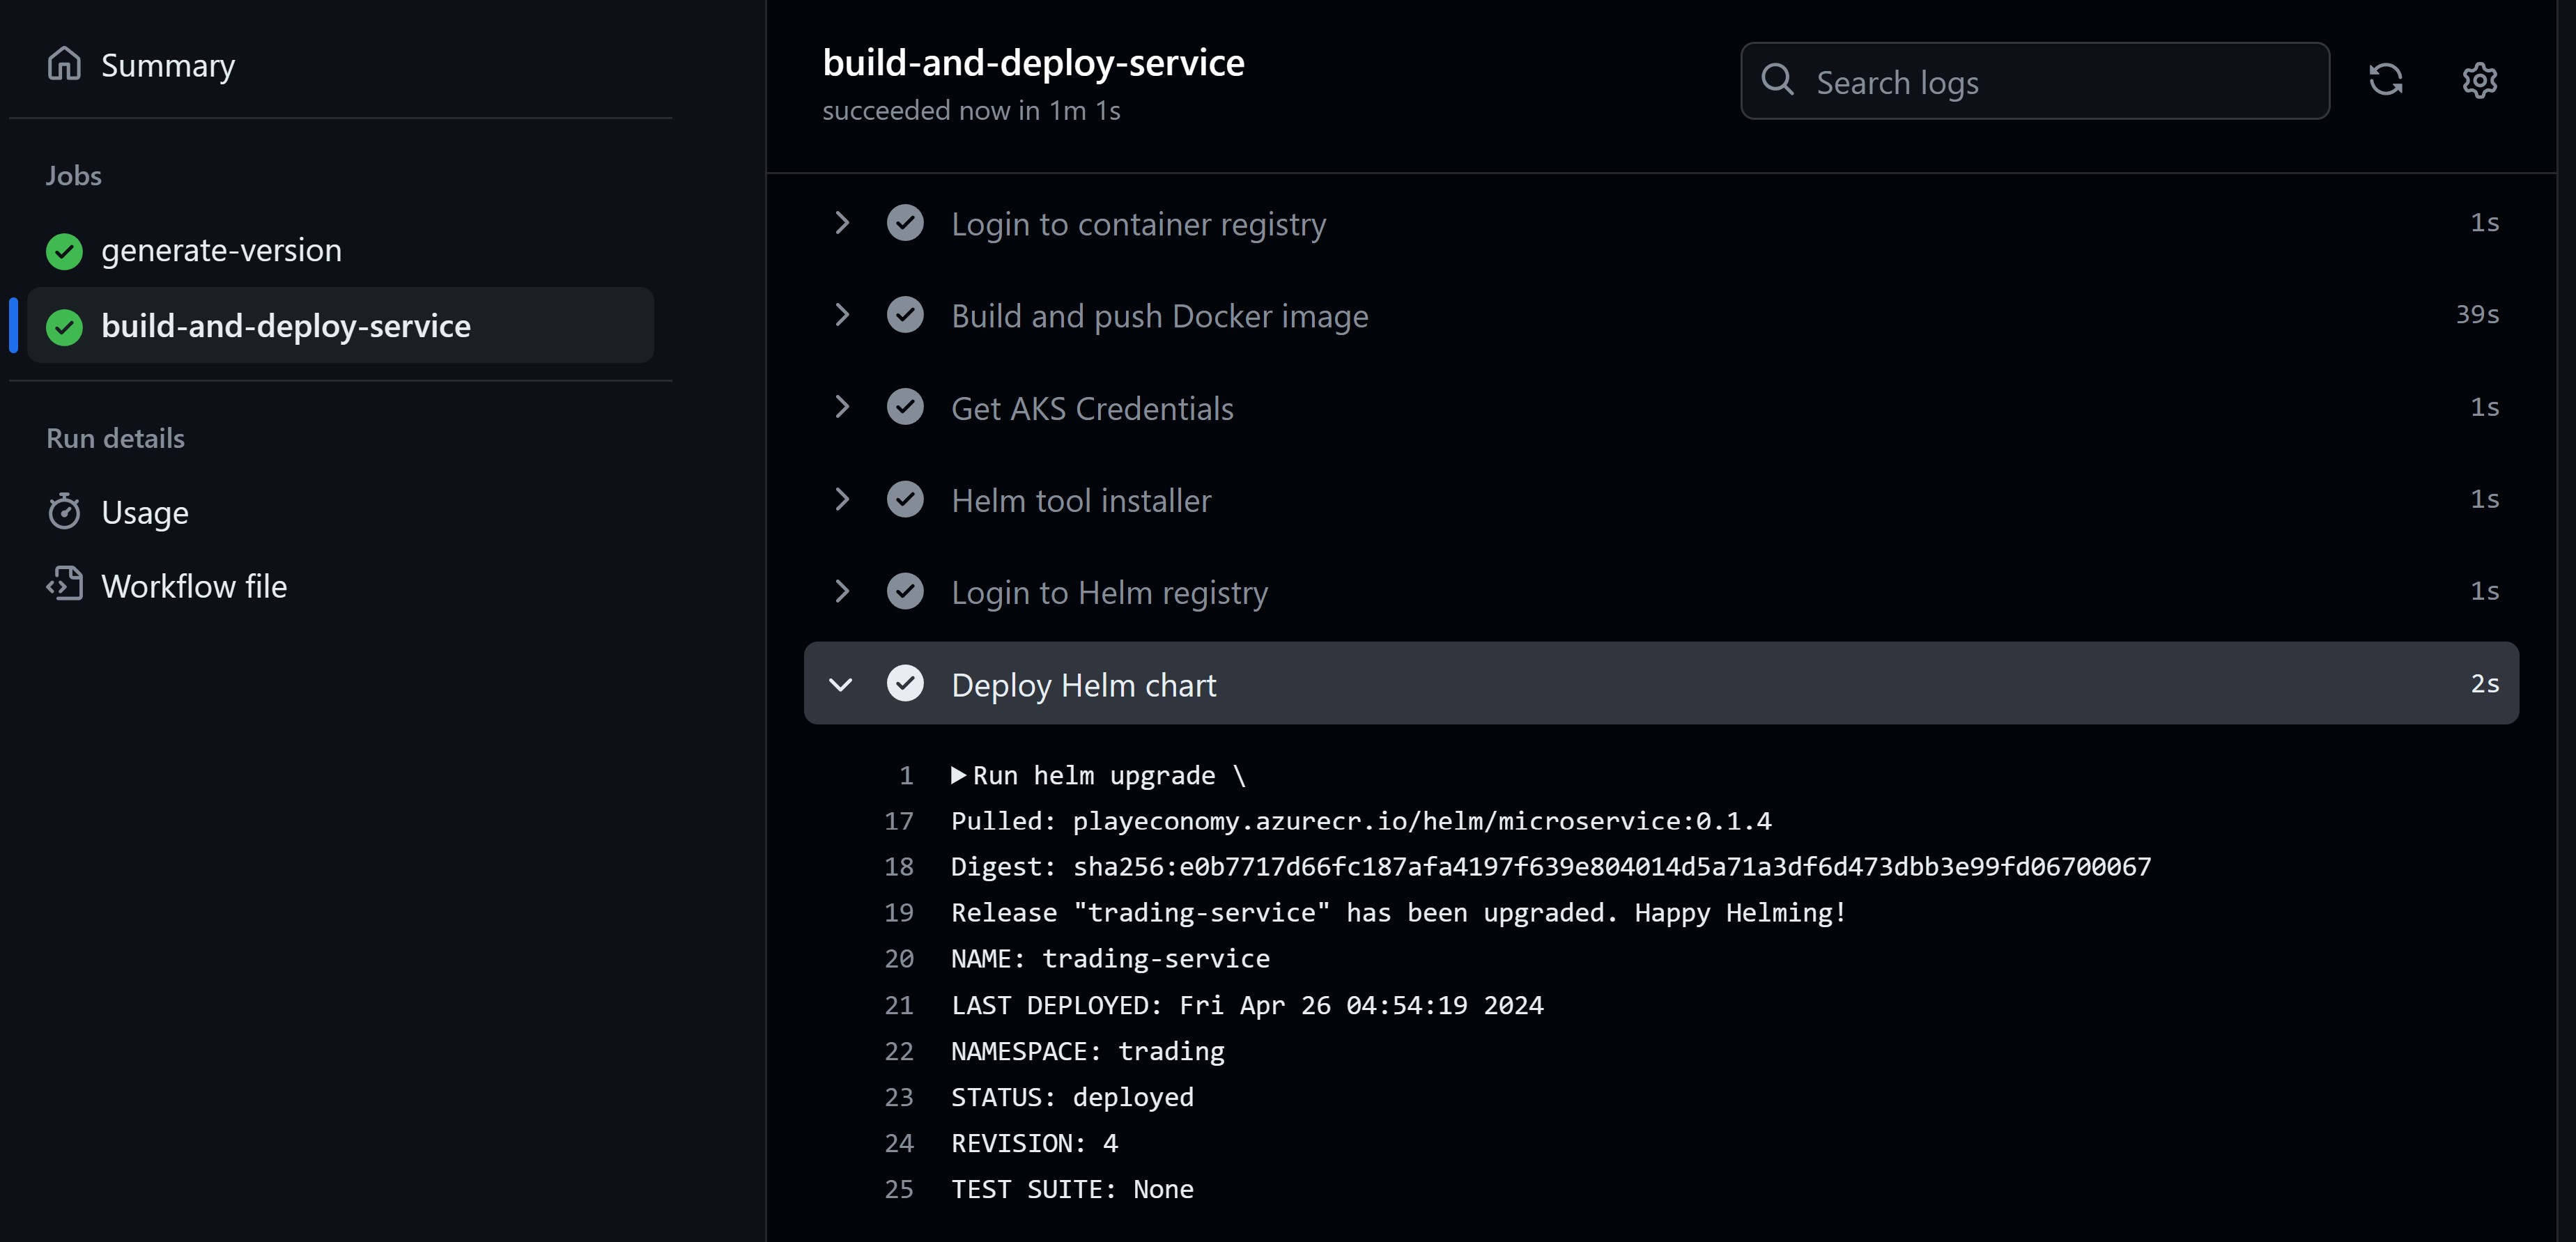
You now have a fully automated CI/CD pipeline that builds your .NET microservice as a Docker image and deploys it to AKS every time you push code to your repository.
Mission accomplished!
Whenever you’re ready, there are 3 ways I can help you:
-
.NET Backend Developer Bootcamp: A complete path from ASP.NET Core fundamentals to building, containerizing, and deploying production-ready, cloud-native apps on Azure.
-
Building Microservices With .NET: Transform the way you build .NET systems at scale.
-
Get the full source code: Download the working project from this article, grab exclusive course discounts, and join a private .NET community.
