Read time: 15 minutes
Controllers are overkill for most APIs.
I see it everywhere: developers creating controller classes, action methods, and all the MVC ceremony—just to return some JSON from a database.
There’s a better way.
Minimal APIs let you build clean, fast APIs without the overhead. No controllers, no action methods, no routing attributes spread across different files.
Just direct, obvious code that does exactly what it says.
Today, I’ll show you how to build a complete Game Store API using Minimal APIs from scratch.
By the end, you’ll see why this approach is perfect for most API scenarios.
Let’s dive in.
What we’re building
We’re creating a simple Game Store API that manages a catalog of games. Each game has:
- A unique ID
- Name and genre
- Price and release date
The API will support full CRUD operations: create, read, update, and delete games.
Nothing fancy, but it covers the patterns you’ll use in 90% of your API endpoints.
Step 1: Create the project
Let’s start with a completely new ASP.NET Core project:

I like the web template (as opposed to the web-api one) because it gives us the absolute minimum—no MVC, no Swagger, just a basic web application.
Open the project in your favorite IDE (I’ll use VS Code) and you’ll get this:
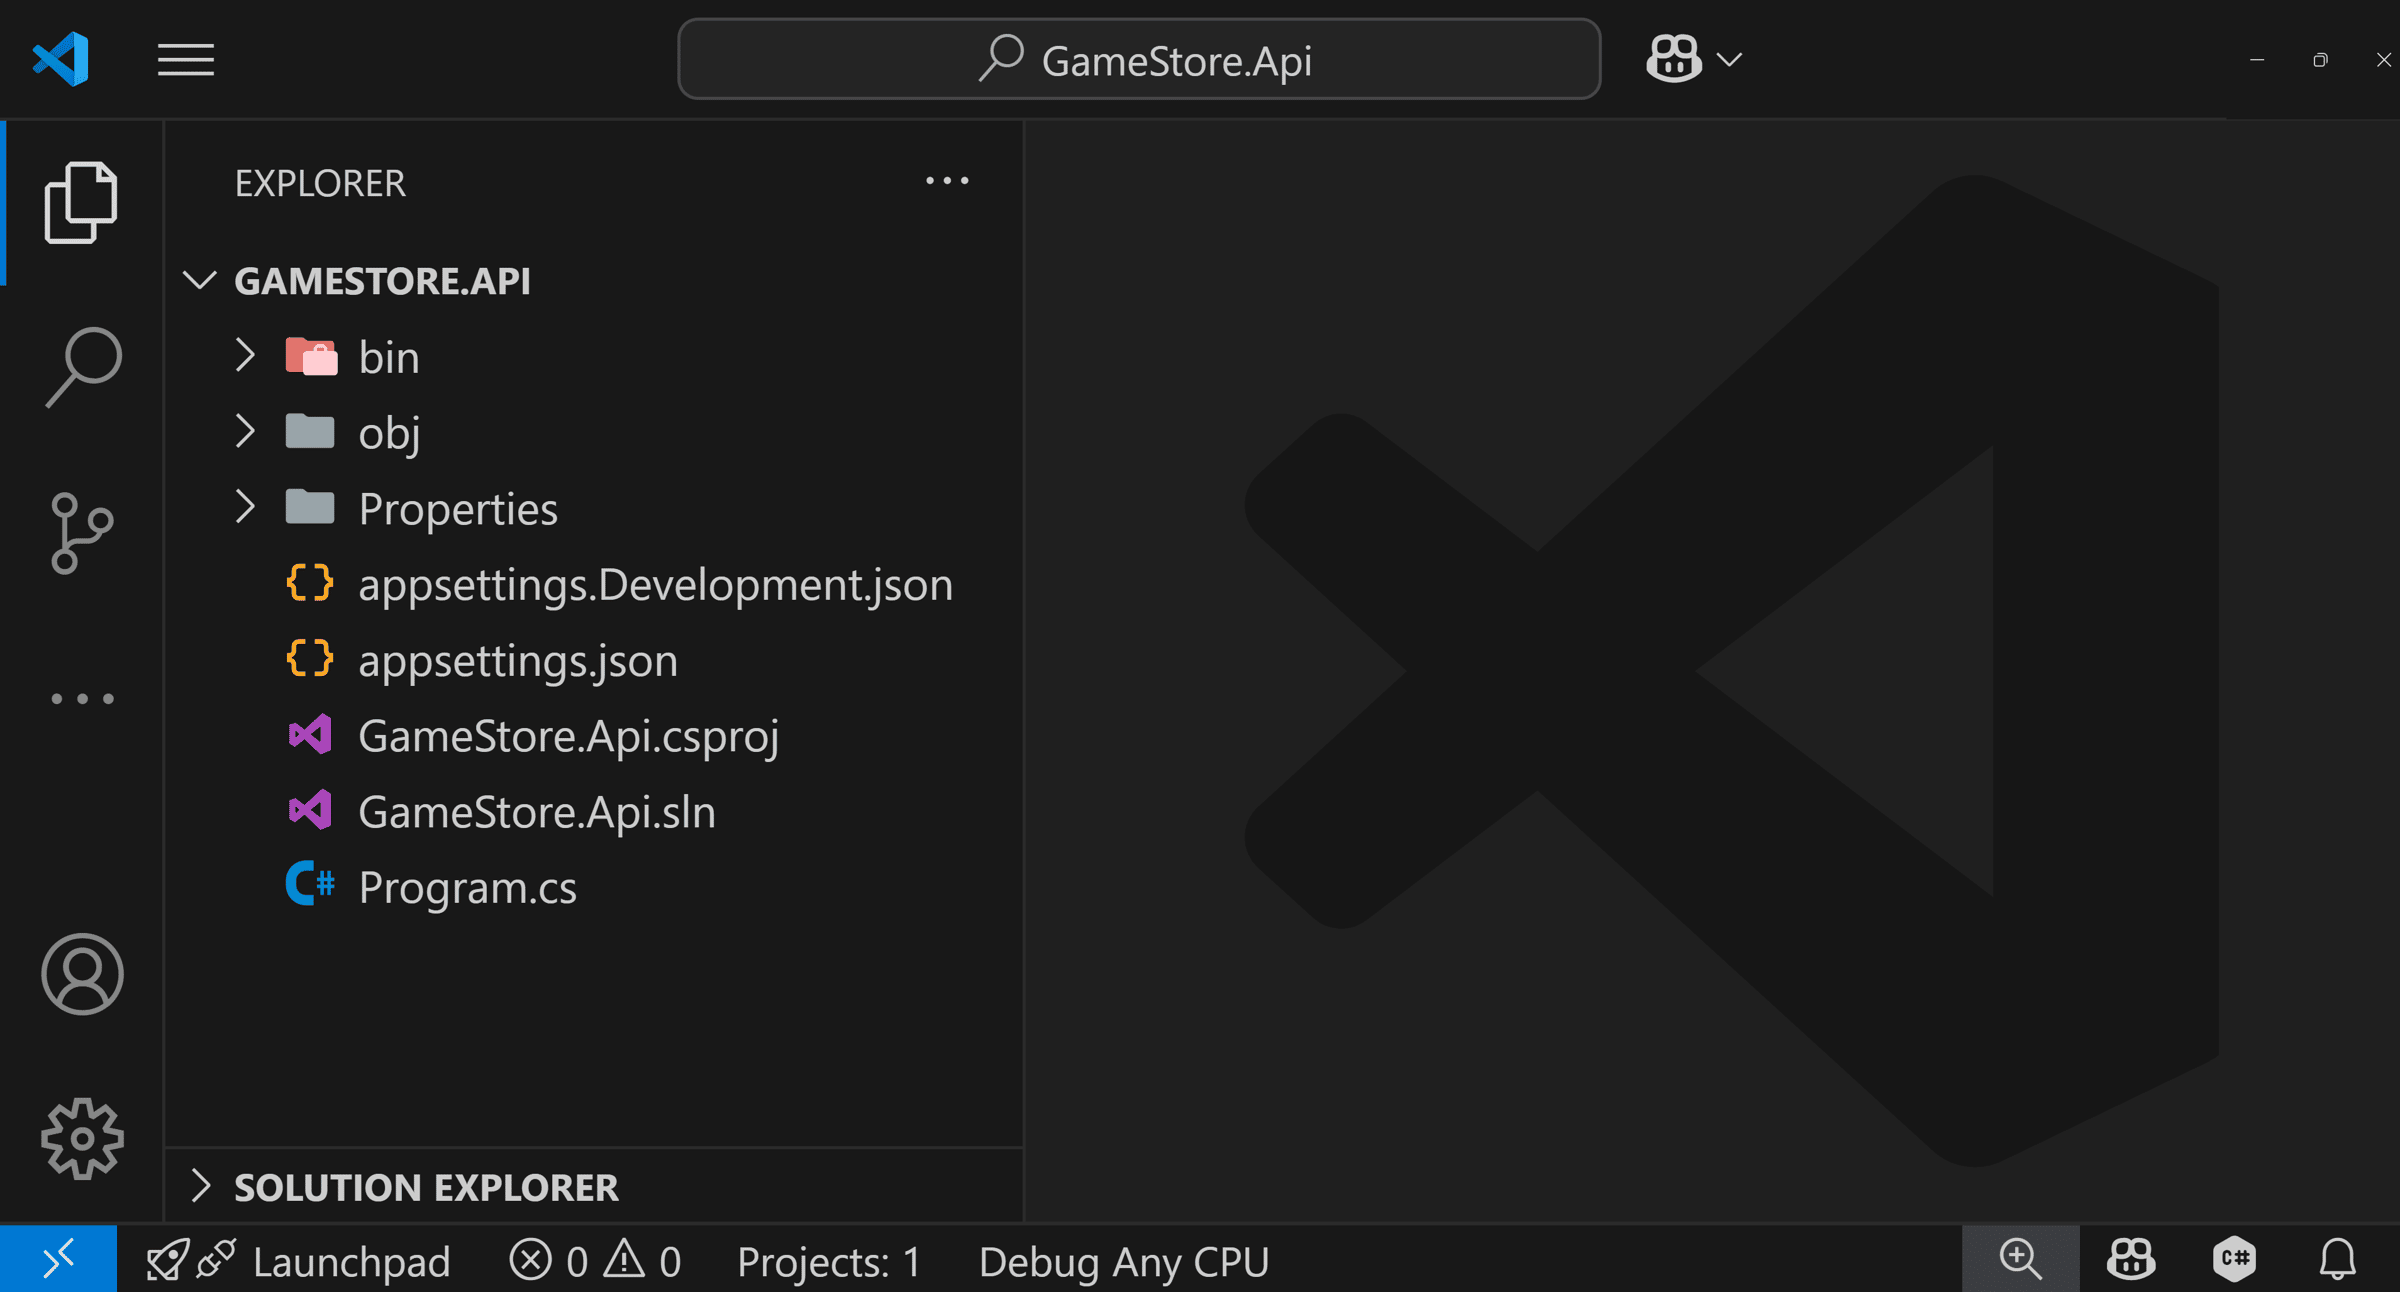
Now let’s also open that Program.cs file to see what we are starting with:
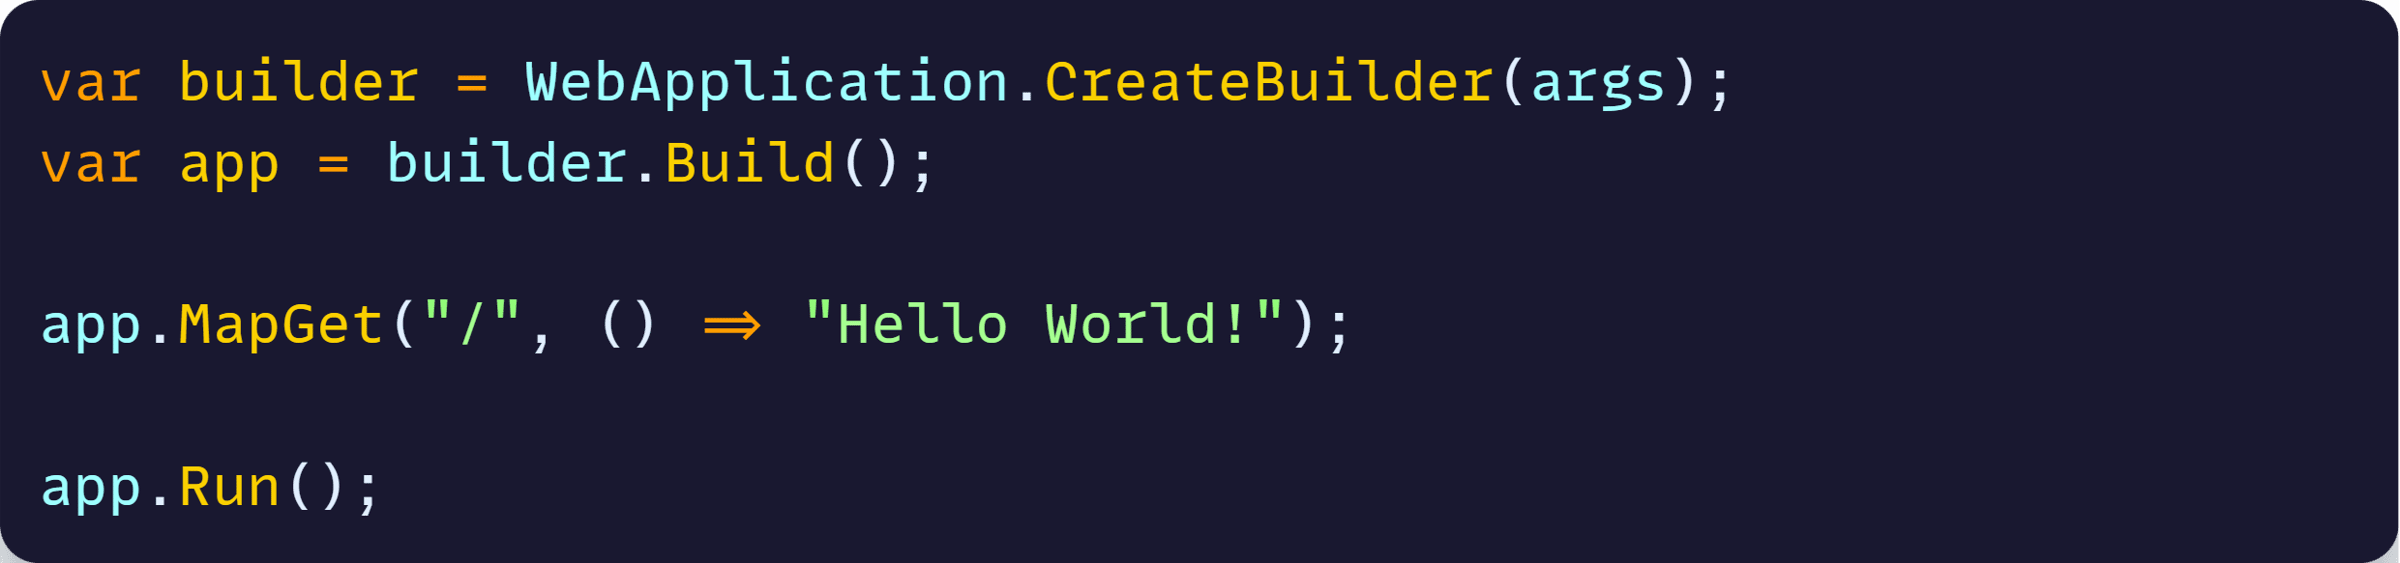
That MapGet line is doing something important. It’s telling ASP.NET Core: “When someone makes a GET request to the root path /, execute this function and return Hello World!”
Unlike MVC where you’d create a controller class with an action method, here you’re directly mapping a route to a function.
The lambda expression ”() => Hello World!” is your entire endpoint implementation.
This is the core concept of minimal APIs: direct mapping of HTTP routes to functions.
Now, let’s work on our data model.
Step 2: Define your data model
Before we dive into our API endpoints, let’s define our data model, which for our small API will be just our Game class.
Create Game.cs under a new Models directory:

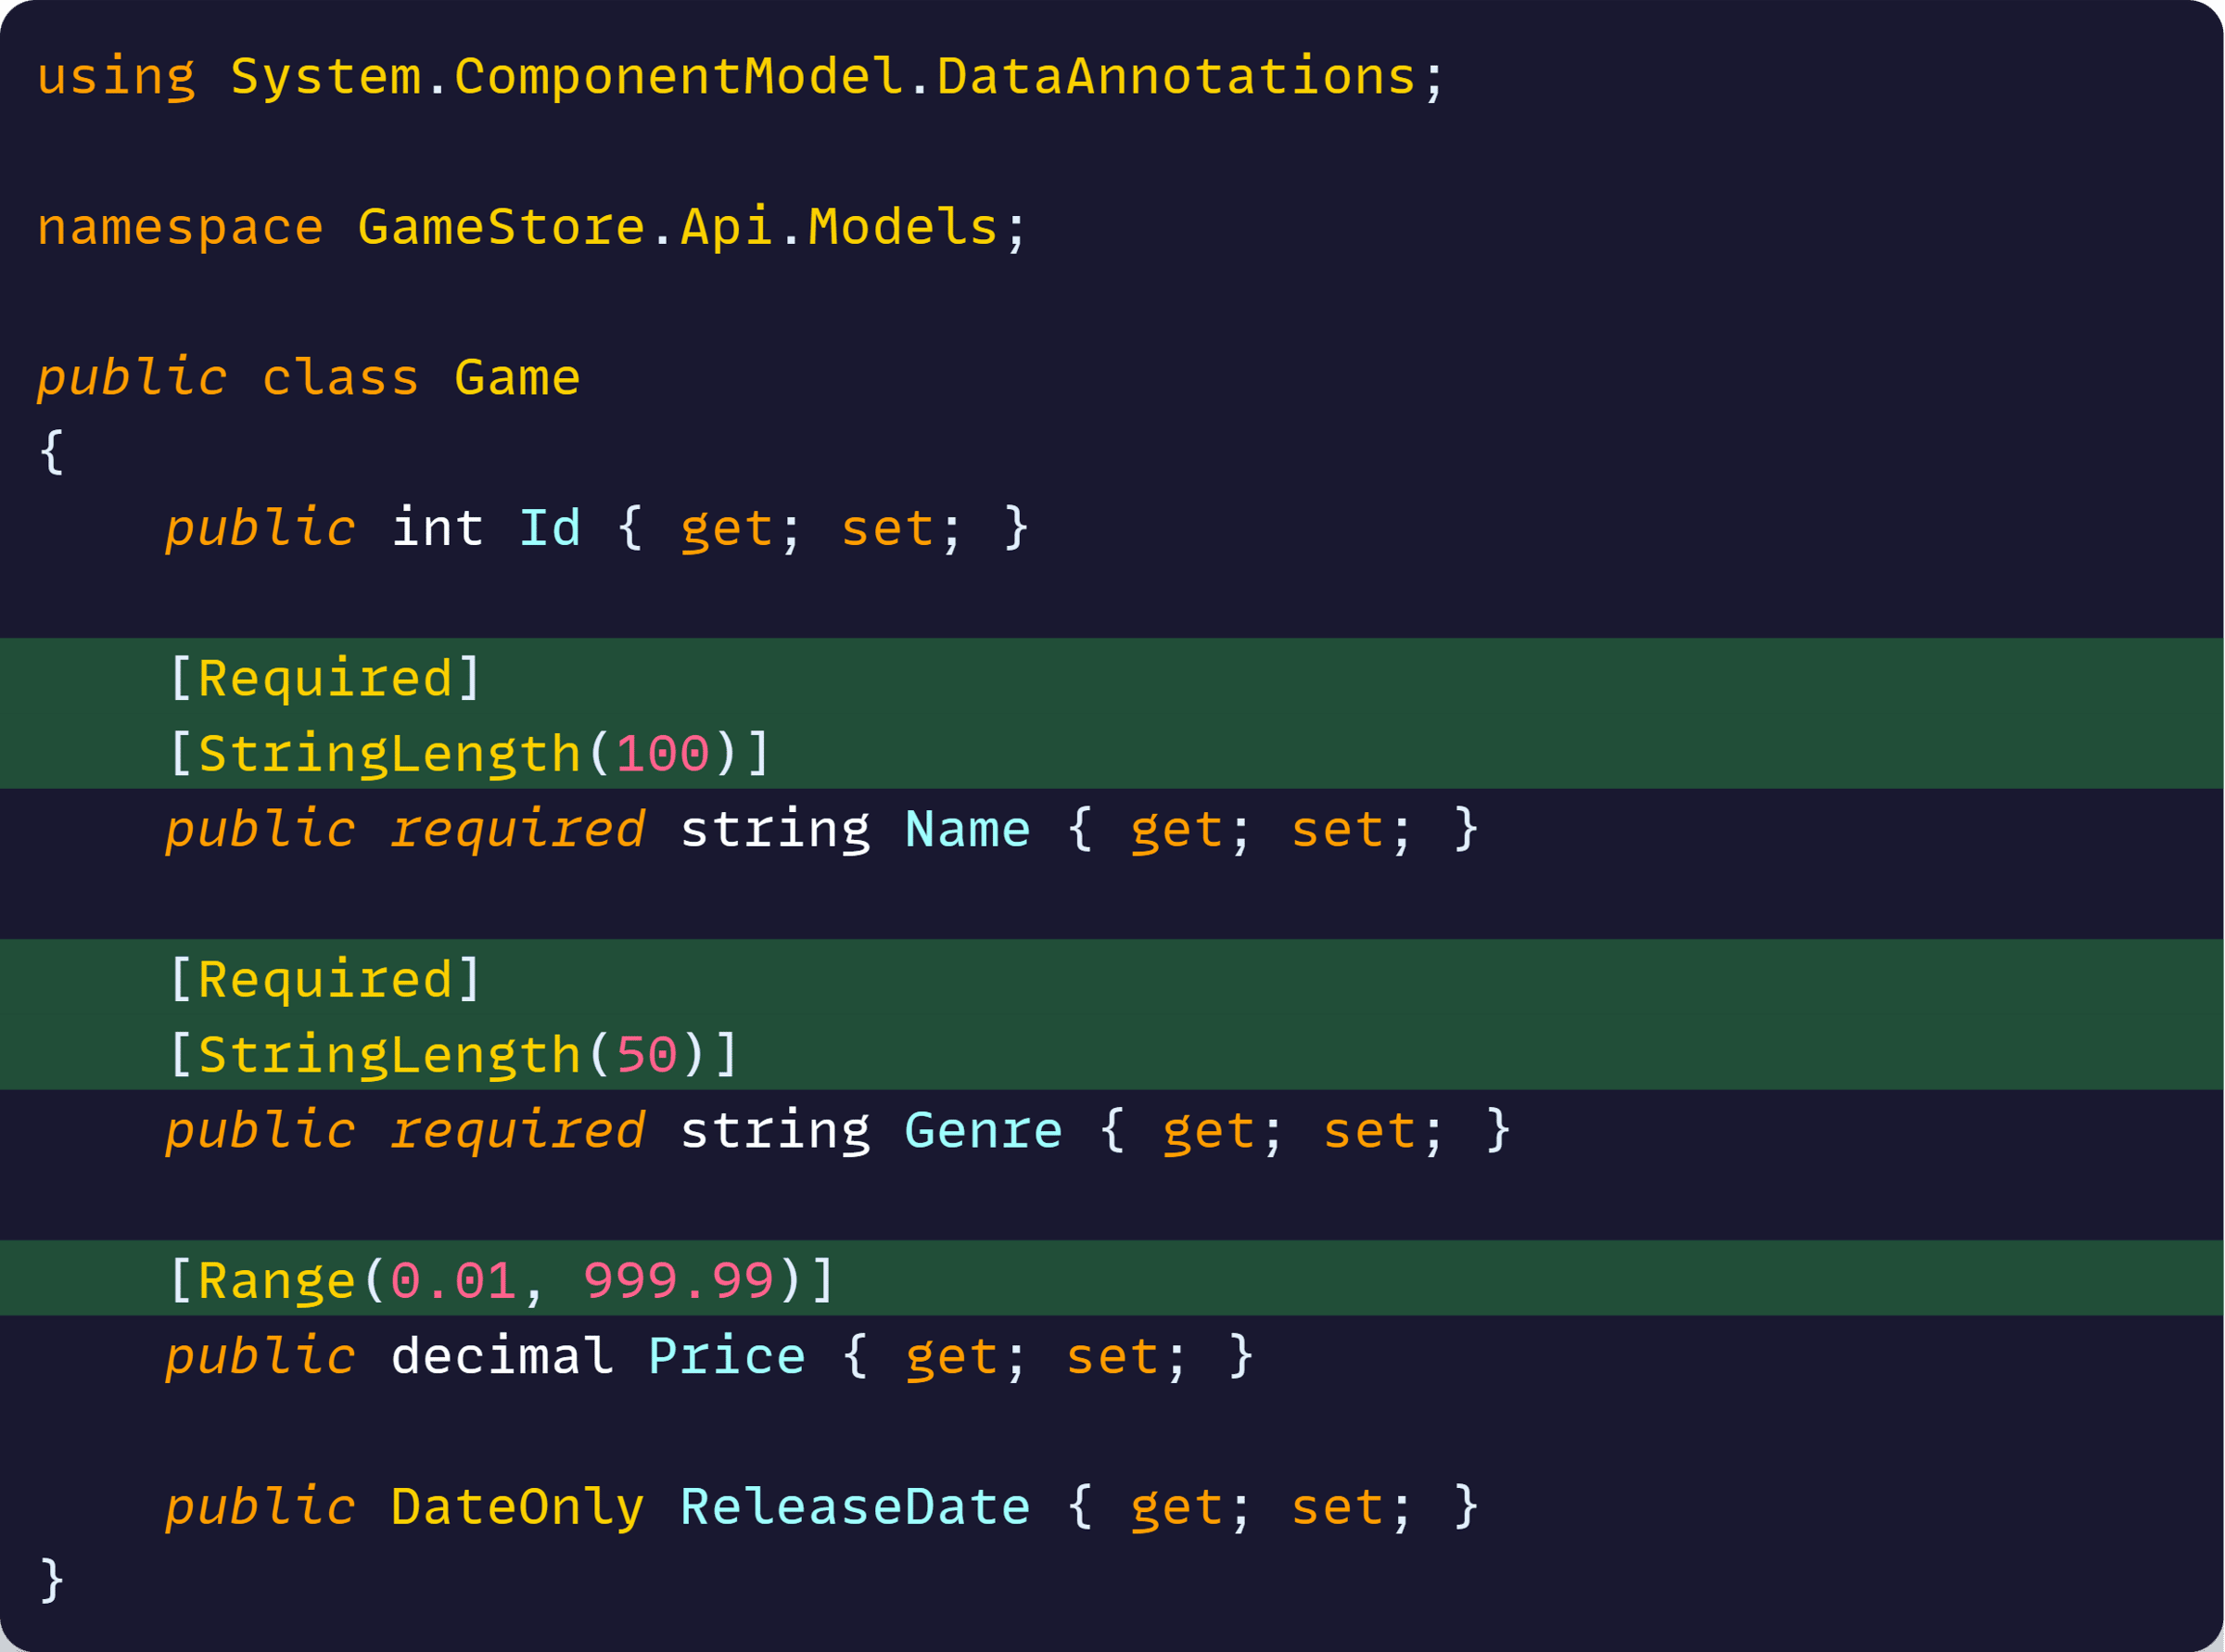
This is your core business model. Notice the required keyword on Name and Genre—this ensures these properties must be set when creating a Game instance.
The DateOnly type is perfect for release dates since we don’t care about the time component.
With our model defined, let’s add the database layer.
Step 3: Add Entity Framework Core
We need somewhere to store our games, and Entity Framework Core (EF Core) is Microsoft’s recommended way to work with databases in .NET.
We’ll use SQLite for this tutorial because it’s lightweight and doesn’t require any setup—perfect for getting started quickly.
In production, you’d likely use SQL Server, PostgreSQL, or another full database.
Install the EF Core packages:

The Sqlite package provides the database provider, while Design gives us tools for creating and managing database migrations.
Now let’s create the database context to connect our model to the database.
Step 4: Set up the DbContext
A DbContext is EF Core’s main class for interacting with your database.
Think of it as your application’s gateway to the database—it handles connections, tracks changes to your entities, and translates your C# code into SQL queries.
Create GameStoreContext.cs under a new Data directory:
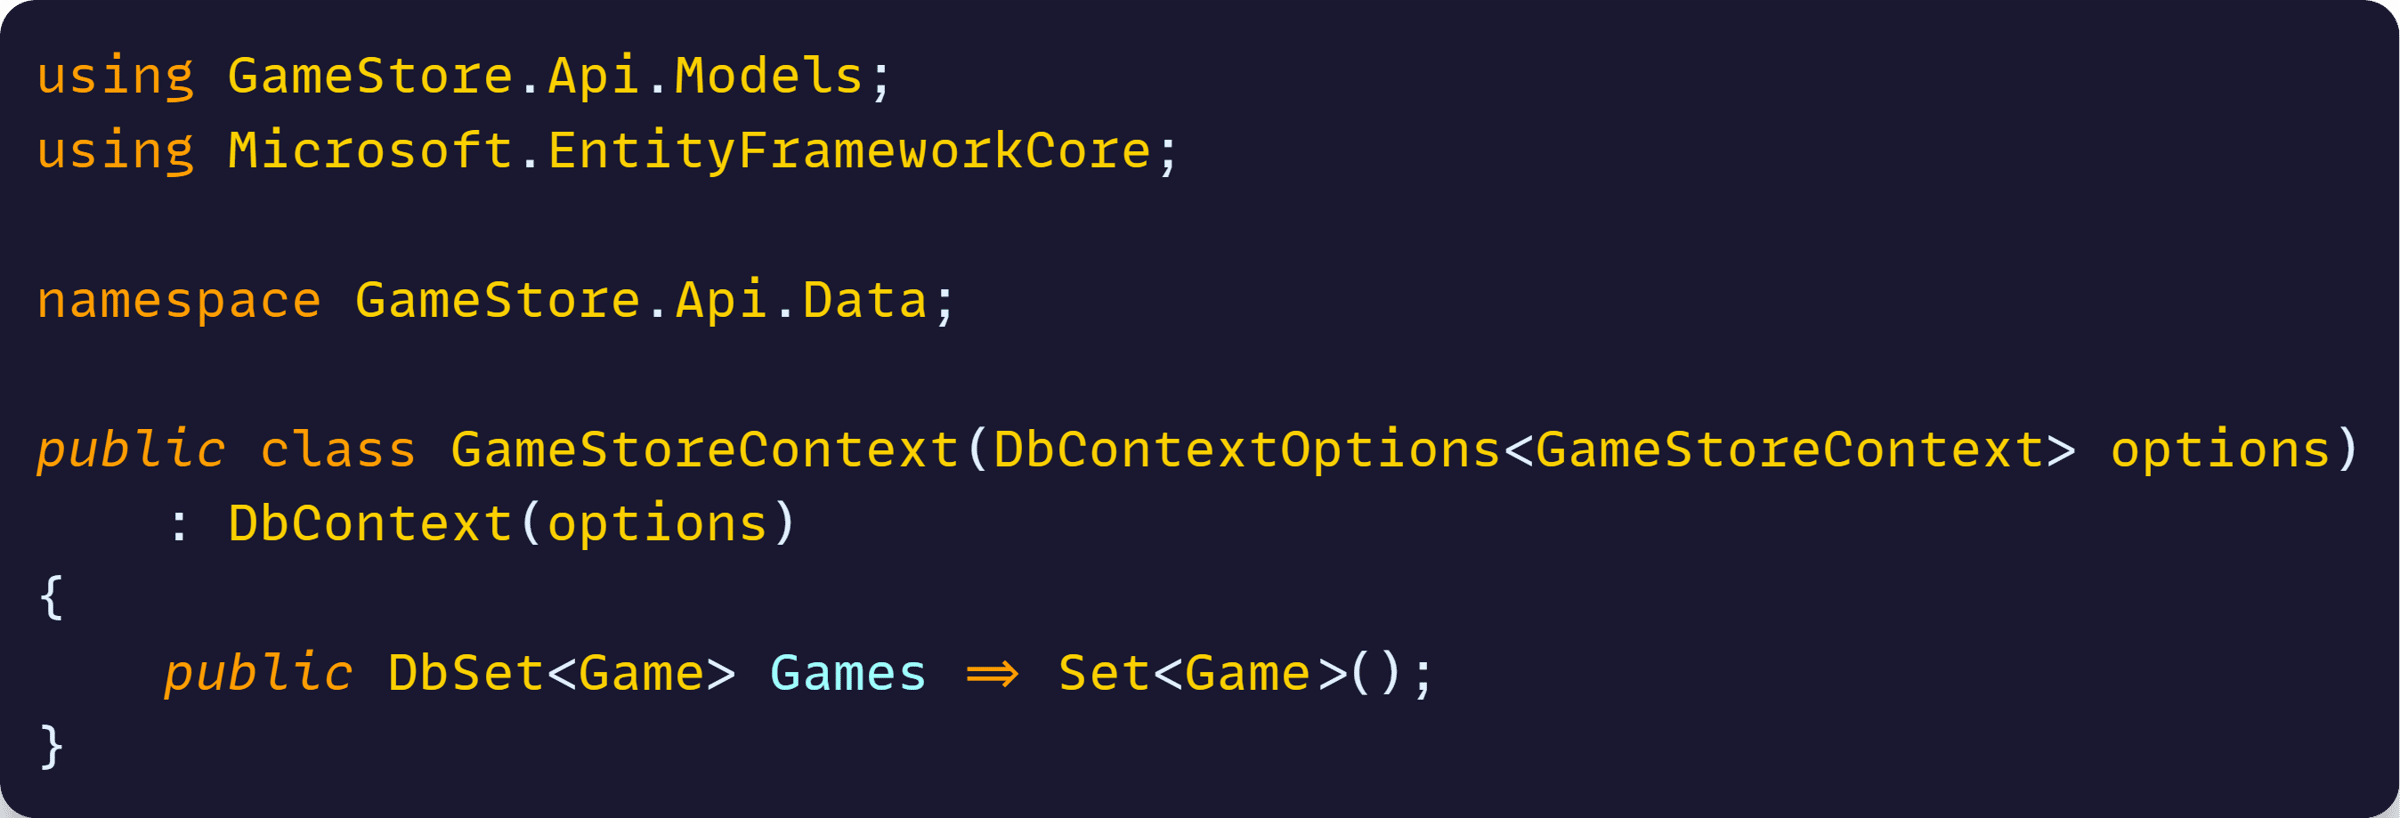
The DbSet property represents the Games table in your database. When you want to query, add, update, or delete games, you’ll go through this property.
This uses C# 12’s primary constructor syntax—much cleaner than the old constructor boilerplate where you’d need to write out the full constructor and assign the options parameter.
Time to wire up our database configuration in the application startup.
Step 5: Configure the database
Now we need to tell ASP.NET Core how to create and inject our GameStoreContext. This involves two parts:
- Defining where the database lives (the connection string)
- Registering the context with the dependency injection container.
Update Program.cs to configure EF Core:
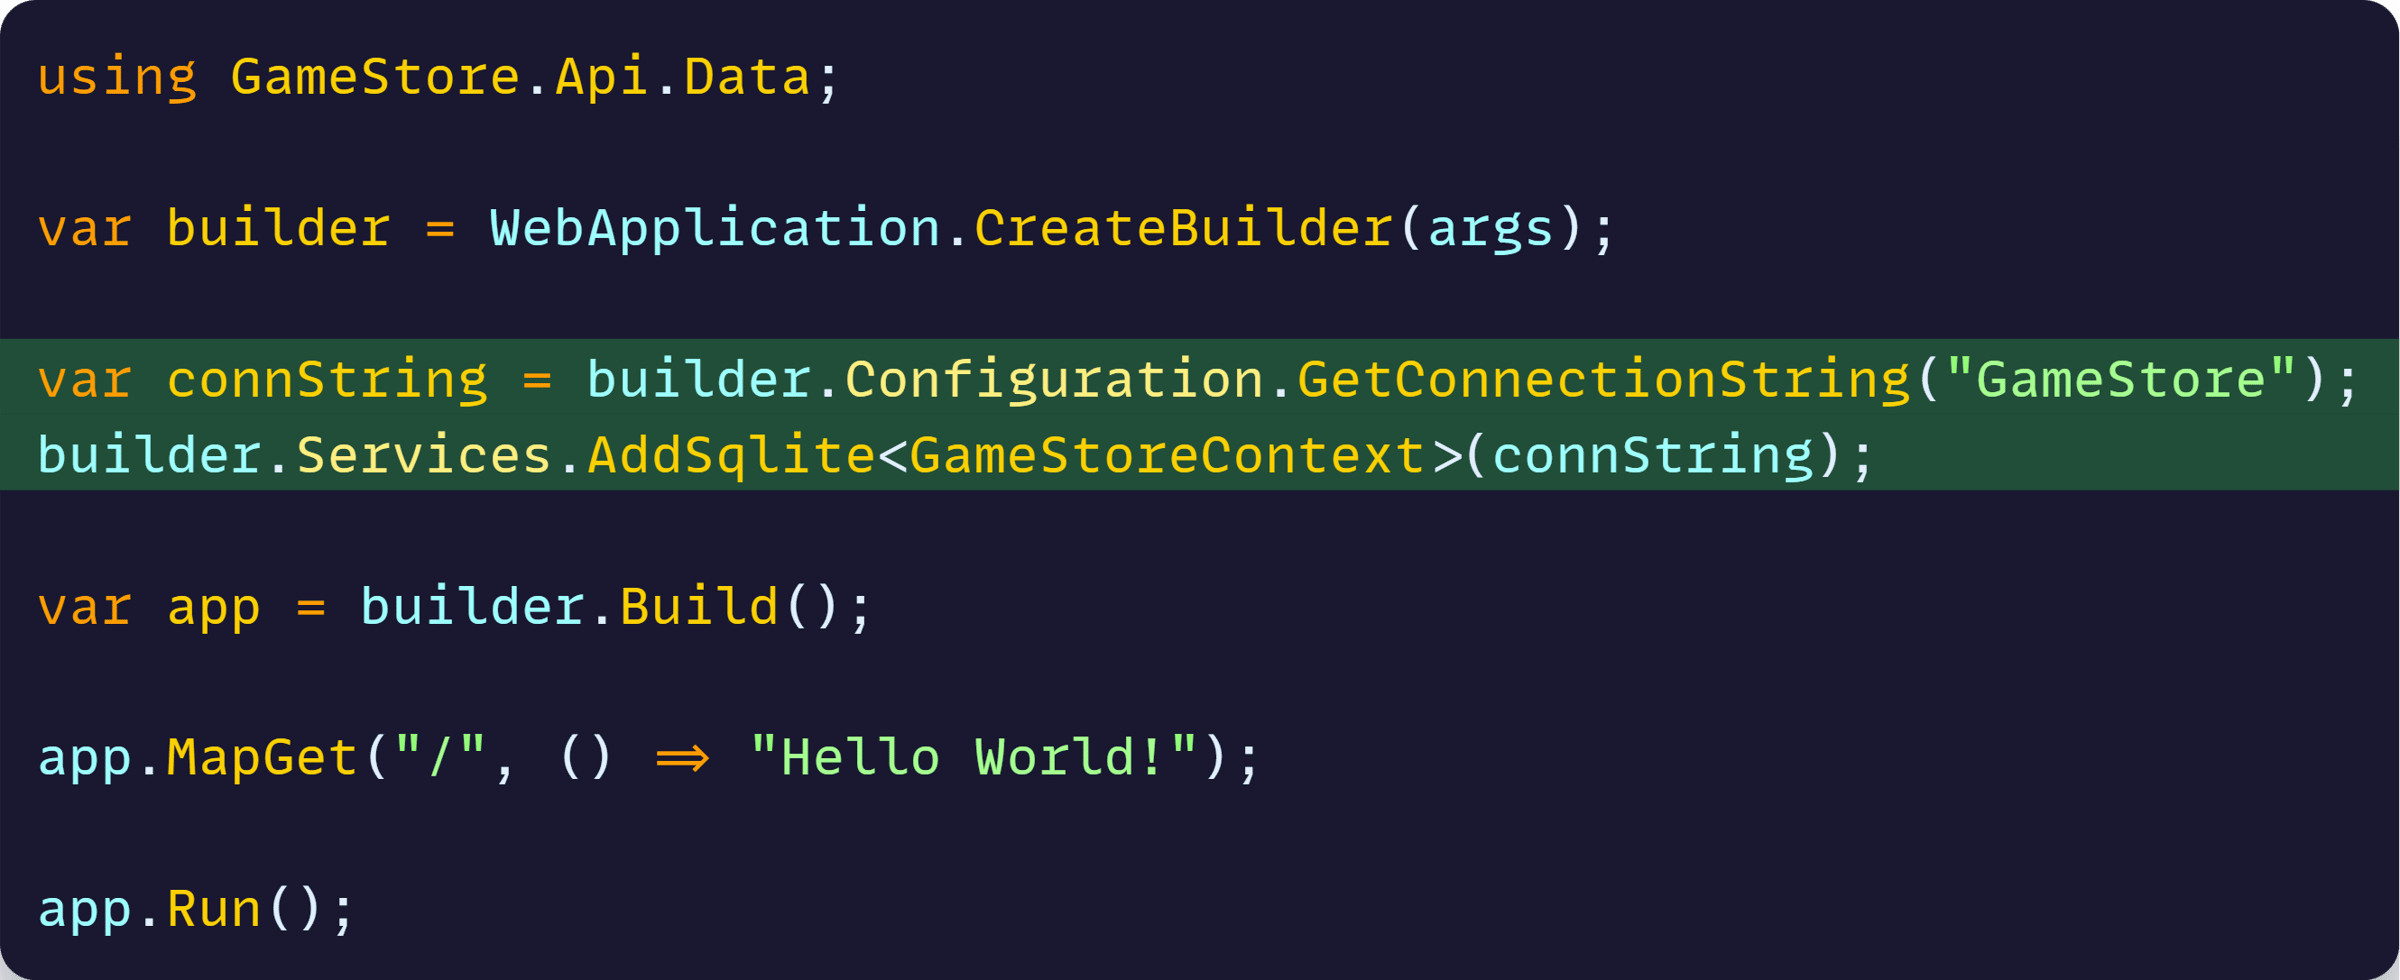
The AddSqlite method registers our GameStoreContext with ASP.NET Core’s dependency injection container and configures it to use SQLite with the specified connection string.
Add the connection string to appsettings.json:
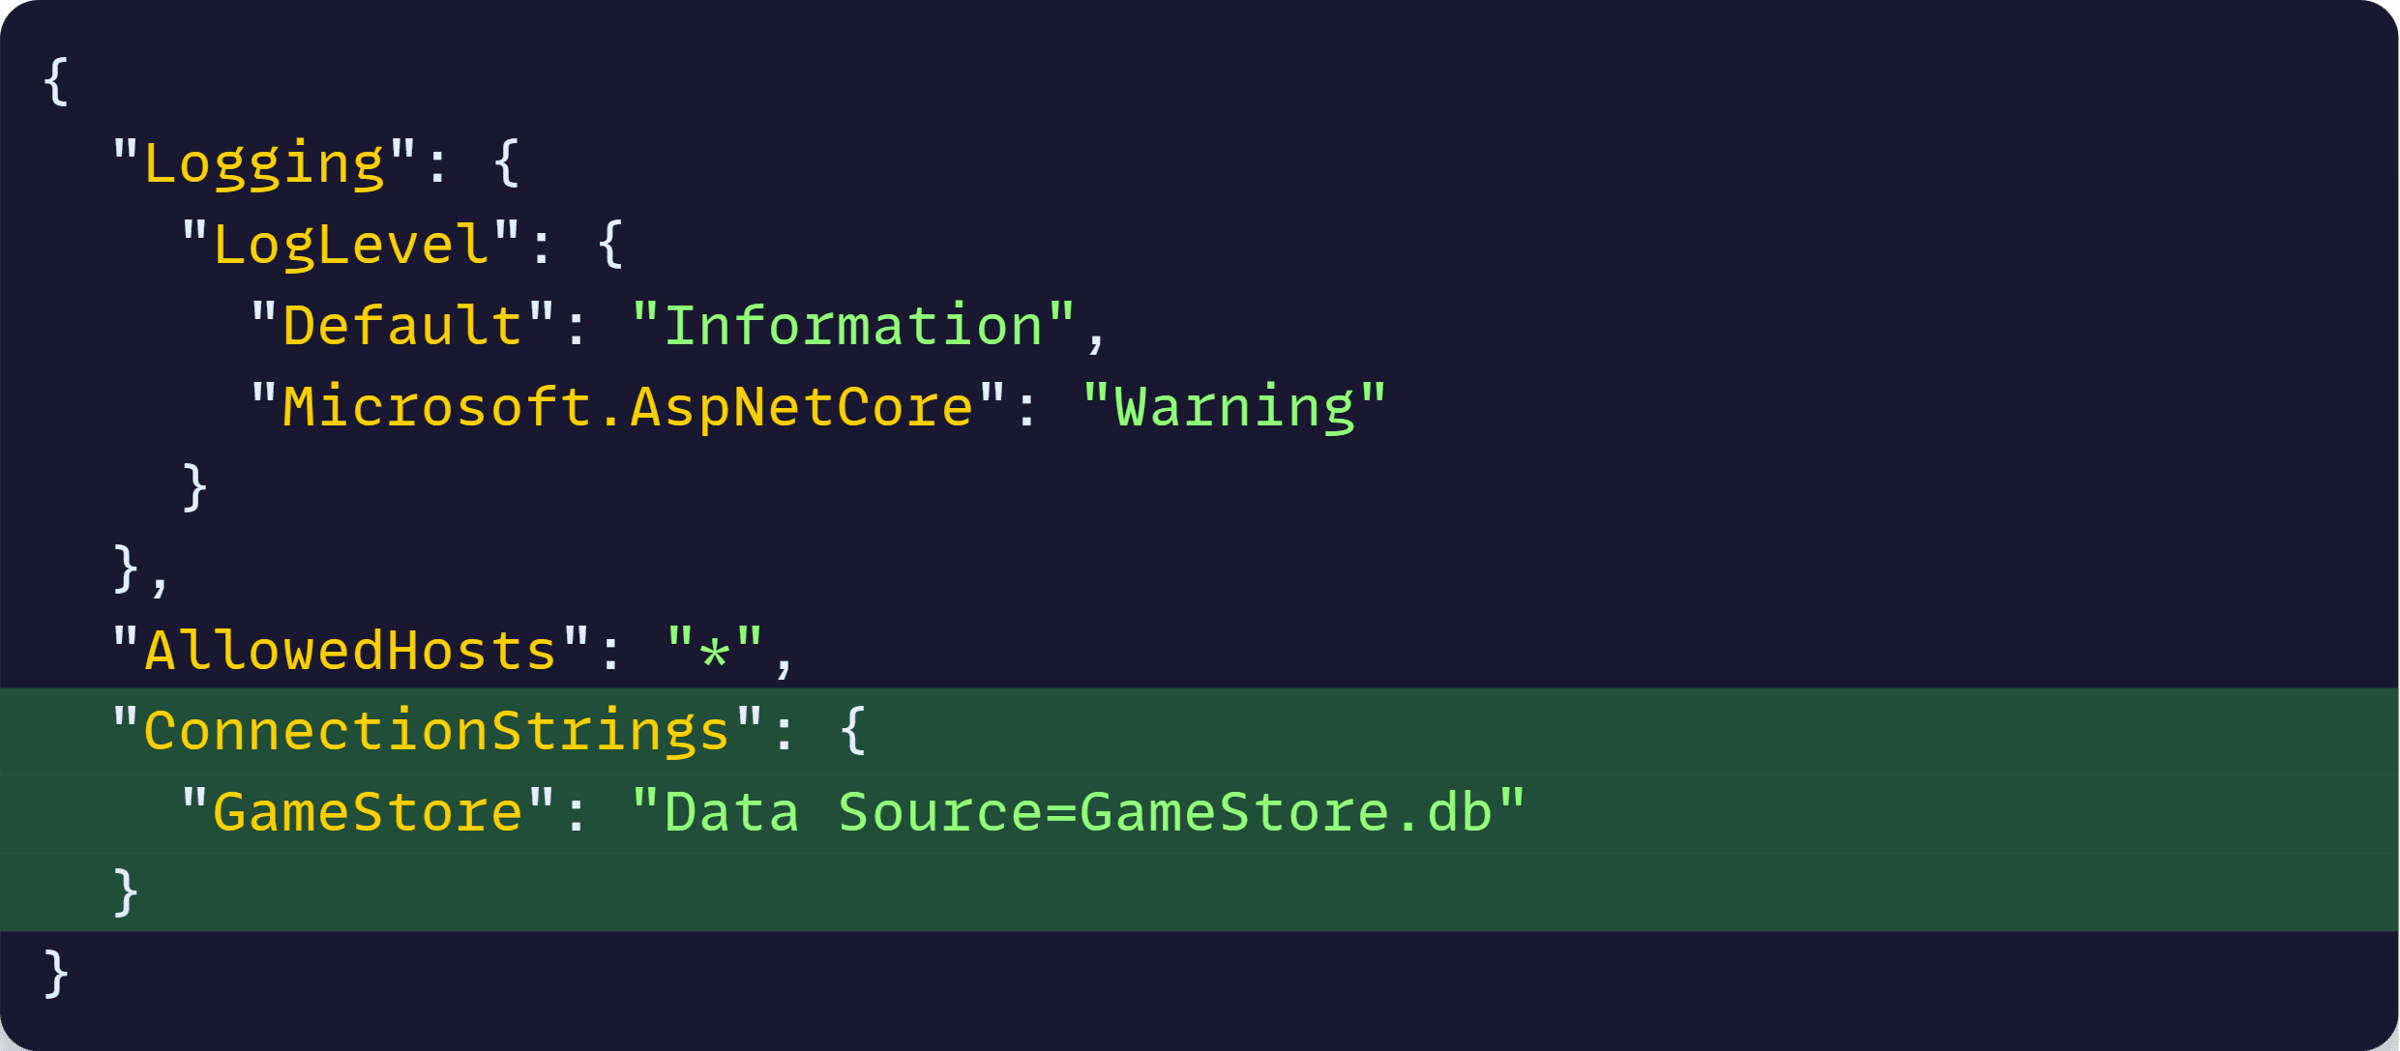
This connection string tells SQLite to create a database file called GameStore.db in your project directory. The GetConnectionString method reads this value from the configuration.
Perfect! Now let’s build our first real API endpoint.
Step 6: Your first real minimal API endpoint
Let’s replace that Hello World with something useful—creating a game:
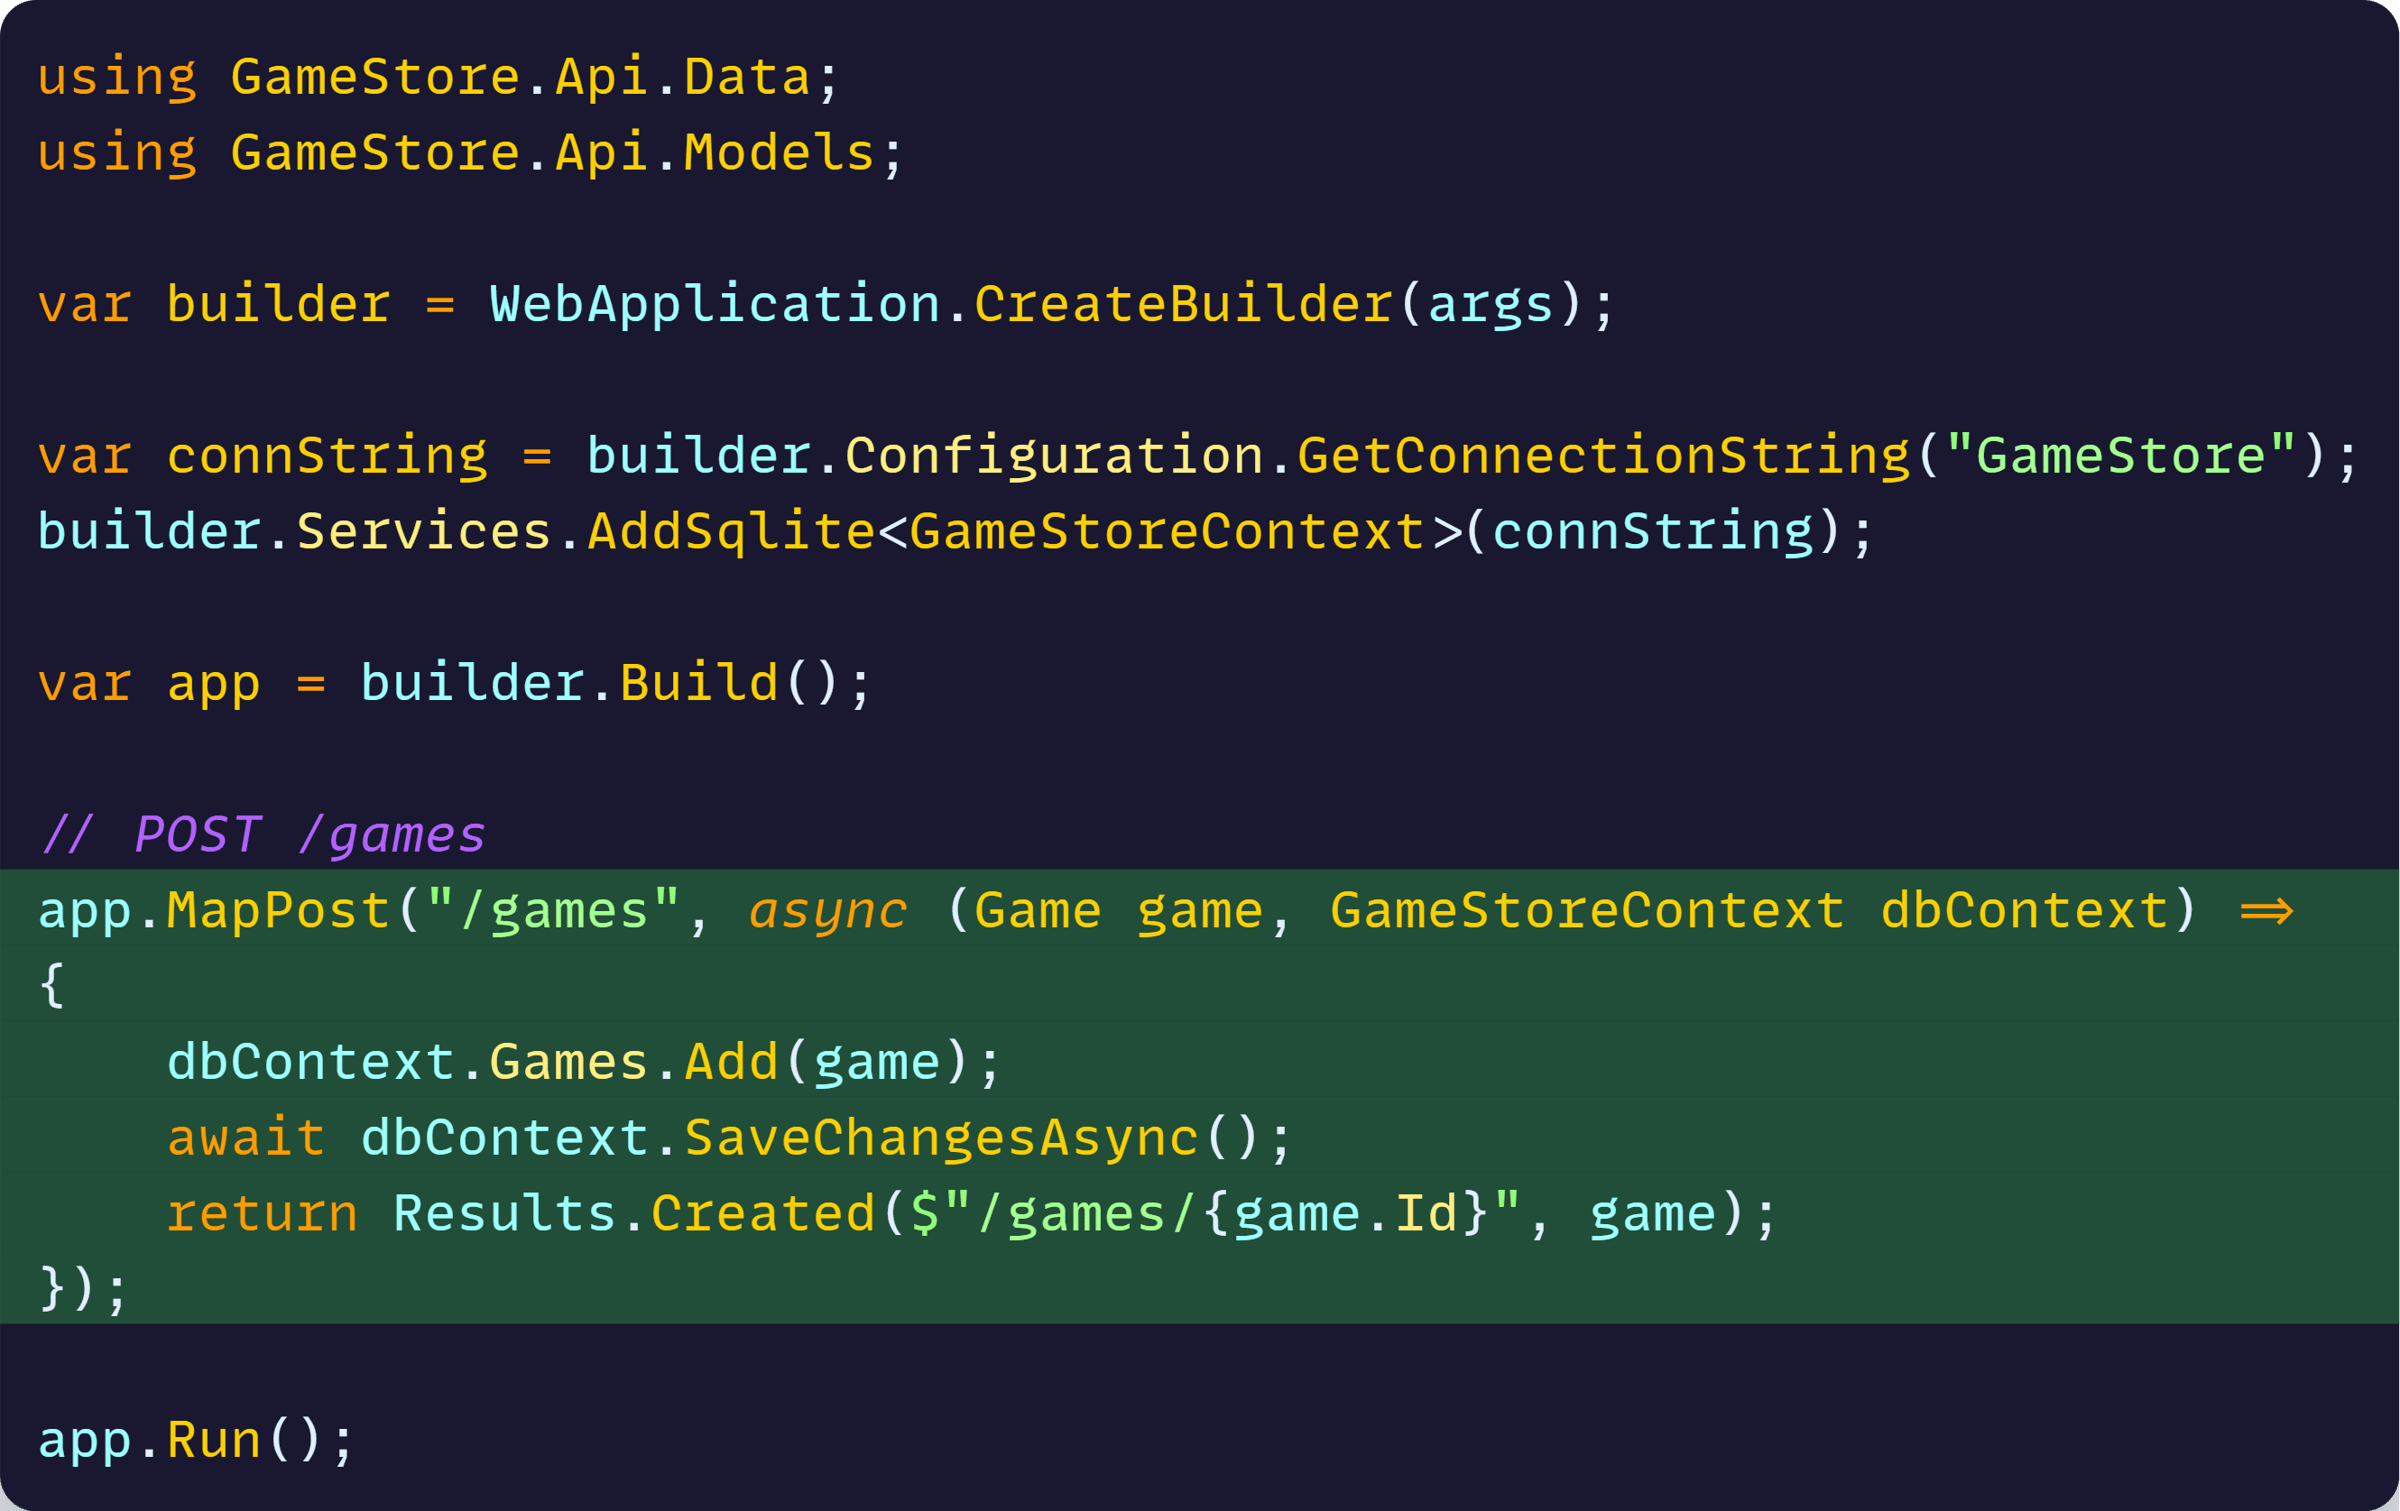
Several important things are happening here:
Route mapping
MapPost(“/games”, …) tells ASP.NET Core to handle POST requests to /games with this function.
Dependency injection
The GameStoreContext dbContext parameter is automatically injected by ASP.NET Core’s DI container.
Because we registered the context in Step 5, ASP.NET Core knows how to create and provide it to our endpoint function. You don’t need constructor injection like you do with controllers.
Model binding
The Game game parameter automatically deserializes the JSON request body into a Game object.
ASP.NET Core looks at the incoming Content-Type: application/json header and automatically converts the JSON into your C# object.
Results helper
Results.Created() returns a proper HTTP 201 status with a Location header pointing to the newly created resource. This follows REST conventions for resource creation.
This is fundamentally different from MVC controllers. Instead of a class with multiple action methods, you have individual functions directly mapped to routes.
But having all endpoints in Program.cs will get messy quickly. Let’s do something about that.
Step 7: Organize endpoints
Program.cs is going to get messy if we put all endpoints there.
Let’s create GamesEndpoints.cs in a new Endpoints directory:
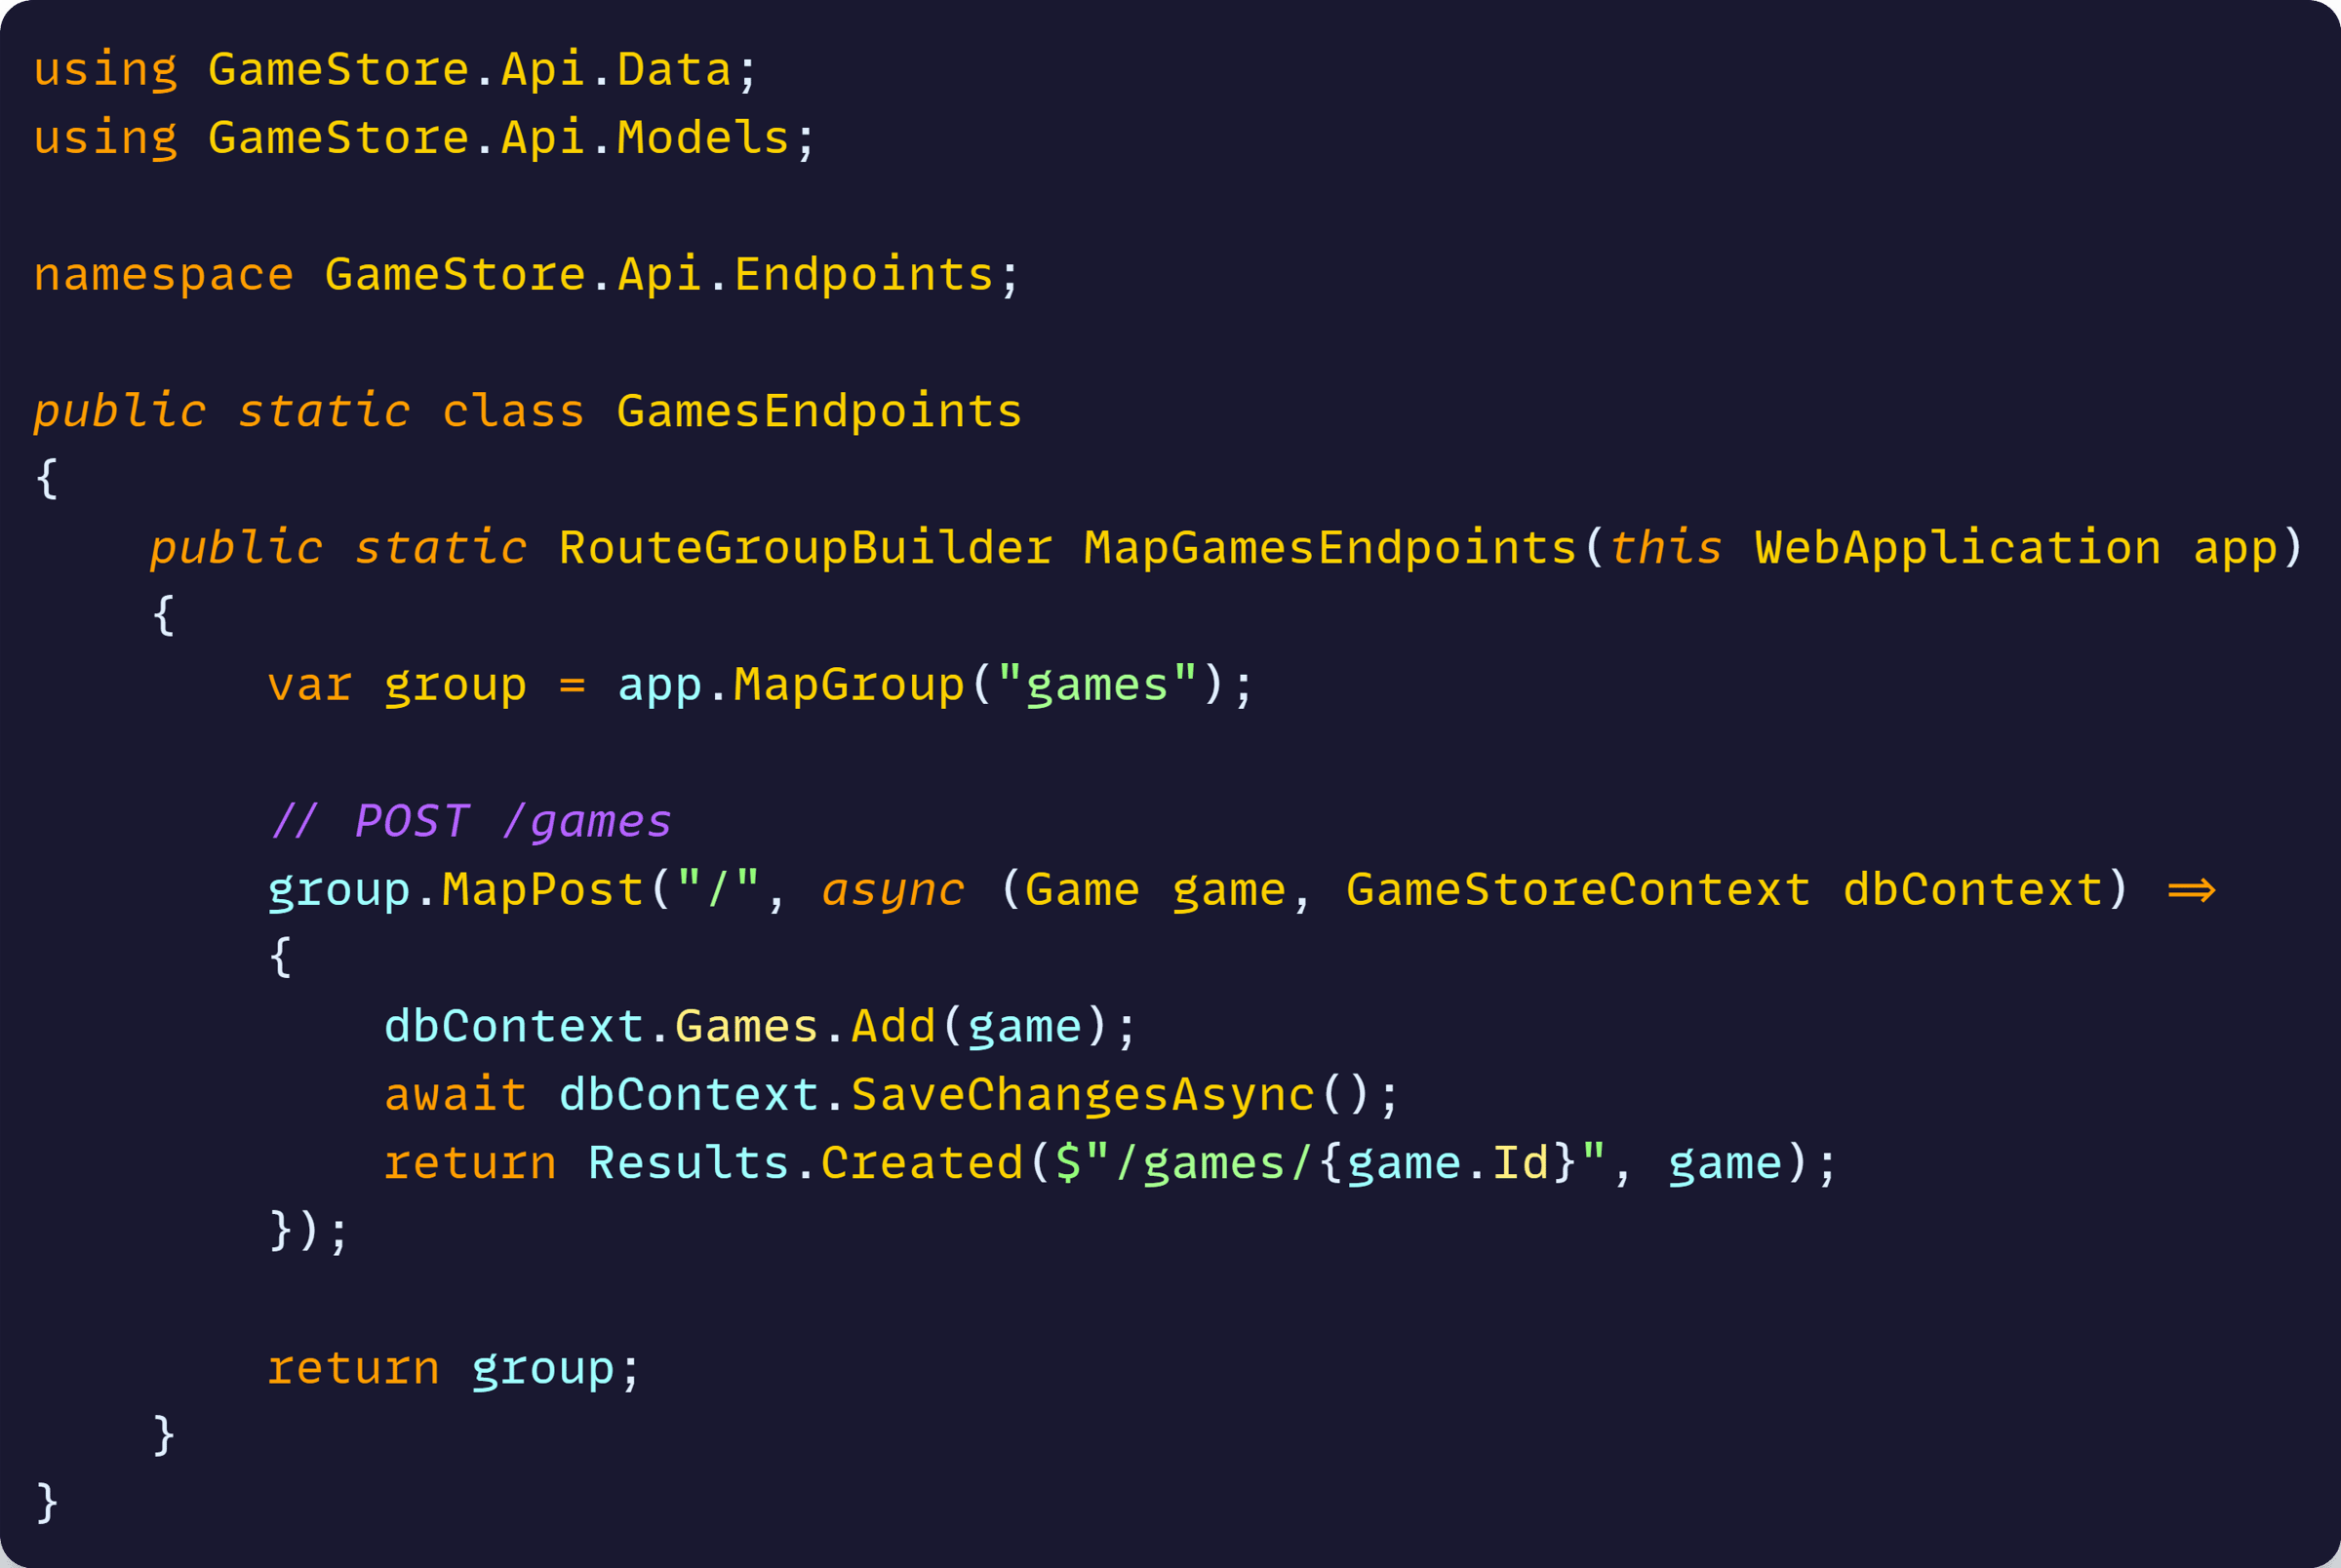
Let’s break this down:
Extension method pattern
This is a static extension method on WebApplication, allowing us to call app.MapGamesEndpoints() in Program.cs.
Extension methods let you add functionality to existing classes without modifying them.
Route groups
app.MapGroup(“games”) creates a route group. All endpoints added to this group automatically get the /games prefix.
So when we call group.MapPost(“/”), the actual route becomes POST /games. This eliminates repetition and makes it easy to apply shared configuration.
Organization
This keeps related endpoints together in one file, similar to how you’d group action methods in an MVC controller, but without the class inheritance overhead.
Route groups also let you apply common configuration (like authentication, rate limiting, or CORS) to multiple endpoints at once—just chain the configuration methods after MapGroup.
Now, let’s take advantage of our new extension method in Program.cs:
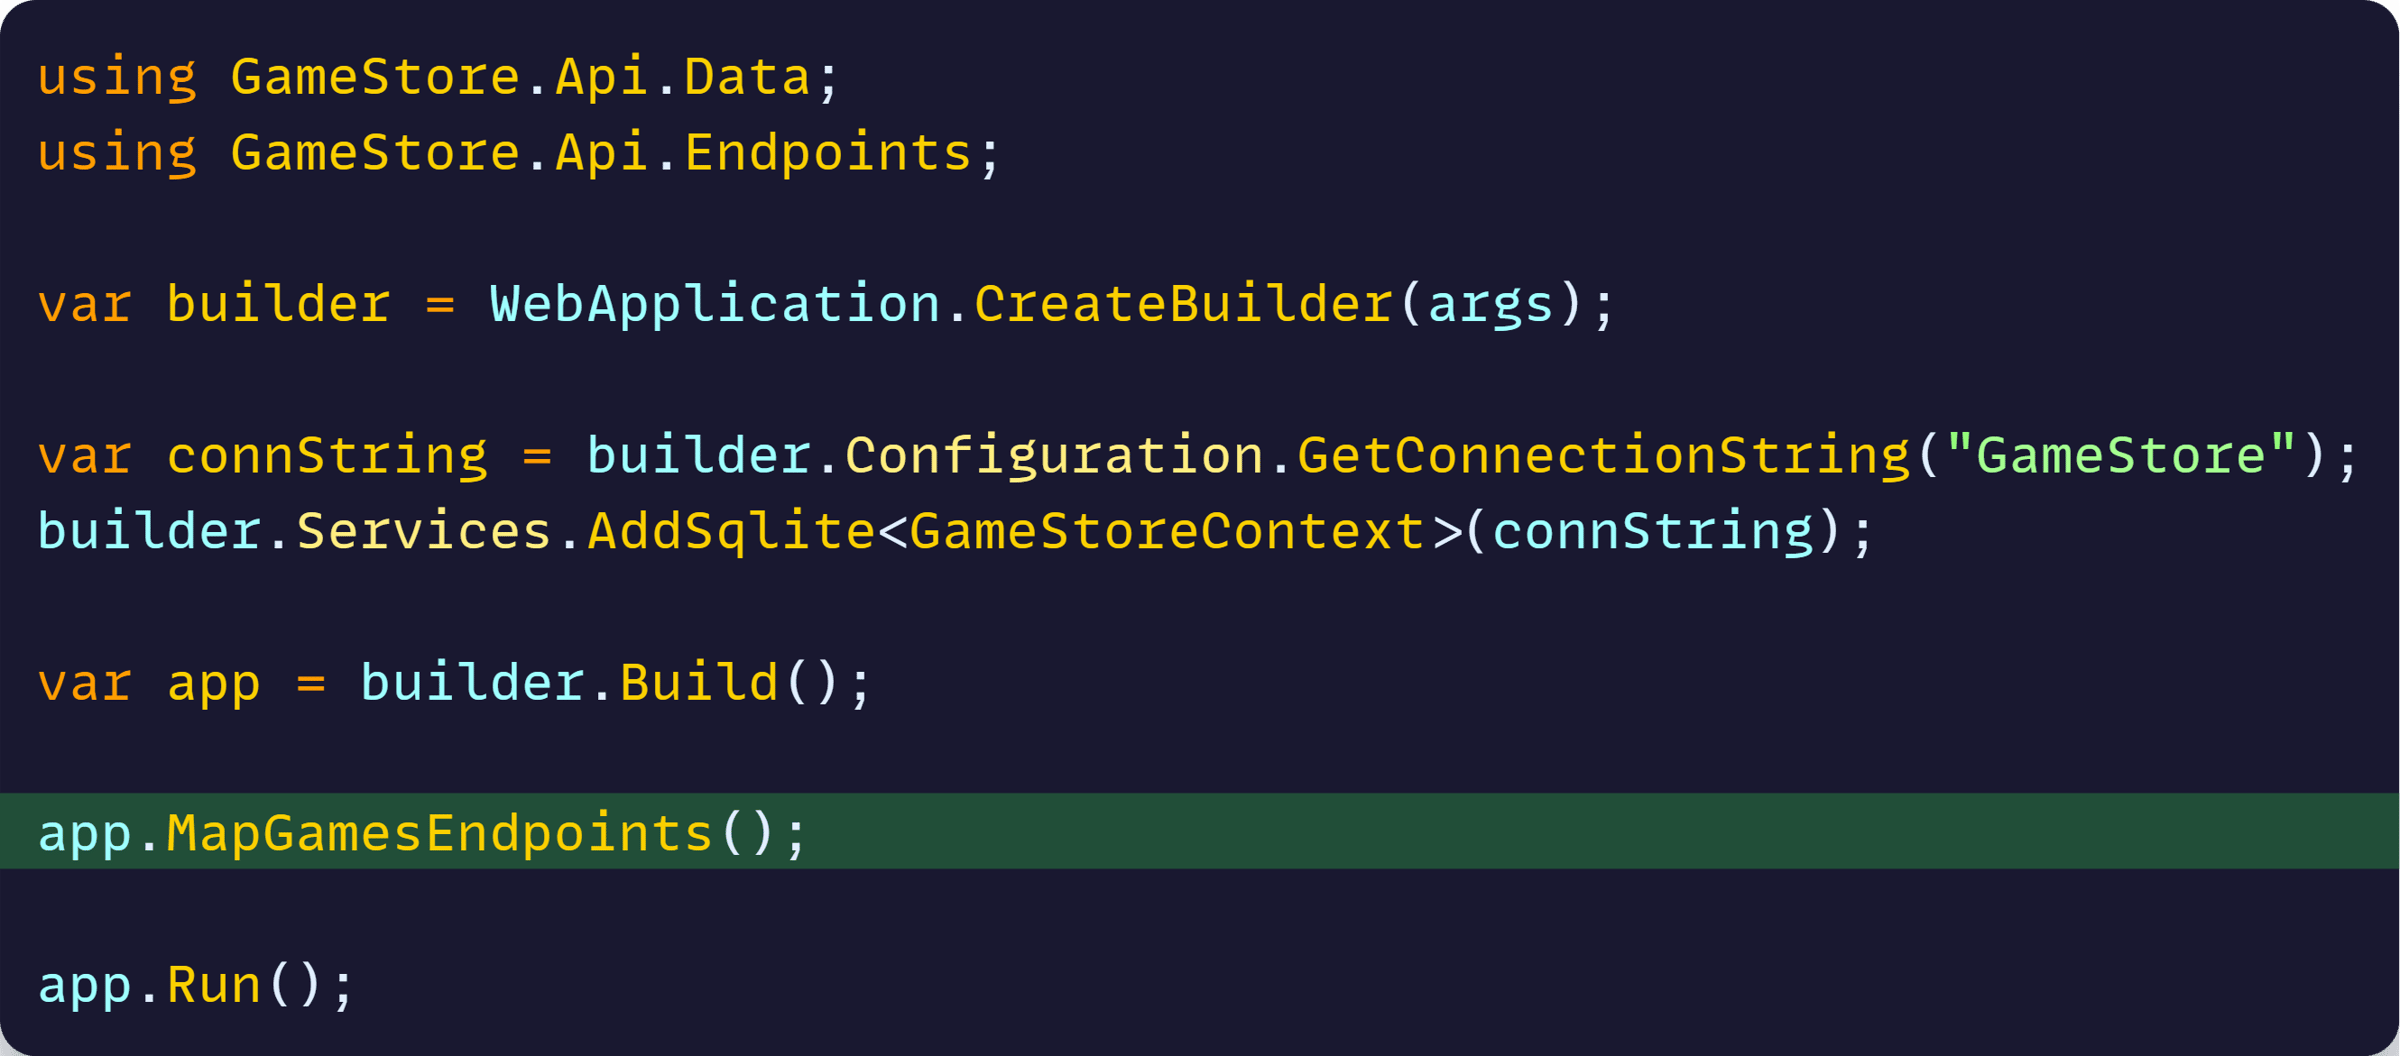
Much cleaner. Now all game-related endpoints live in one focused file.
Time to complete our API with the remaining CRUD operations.
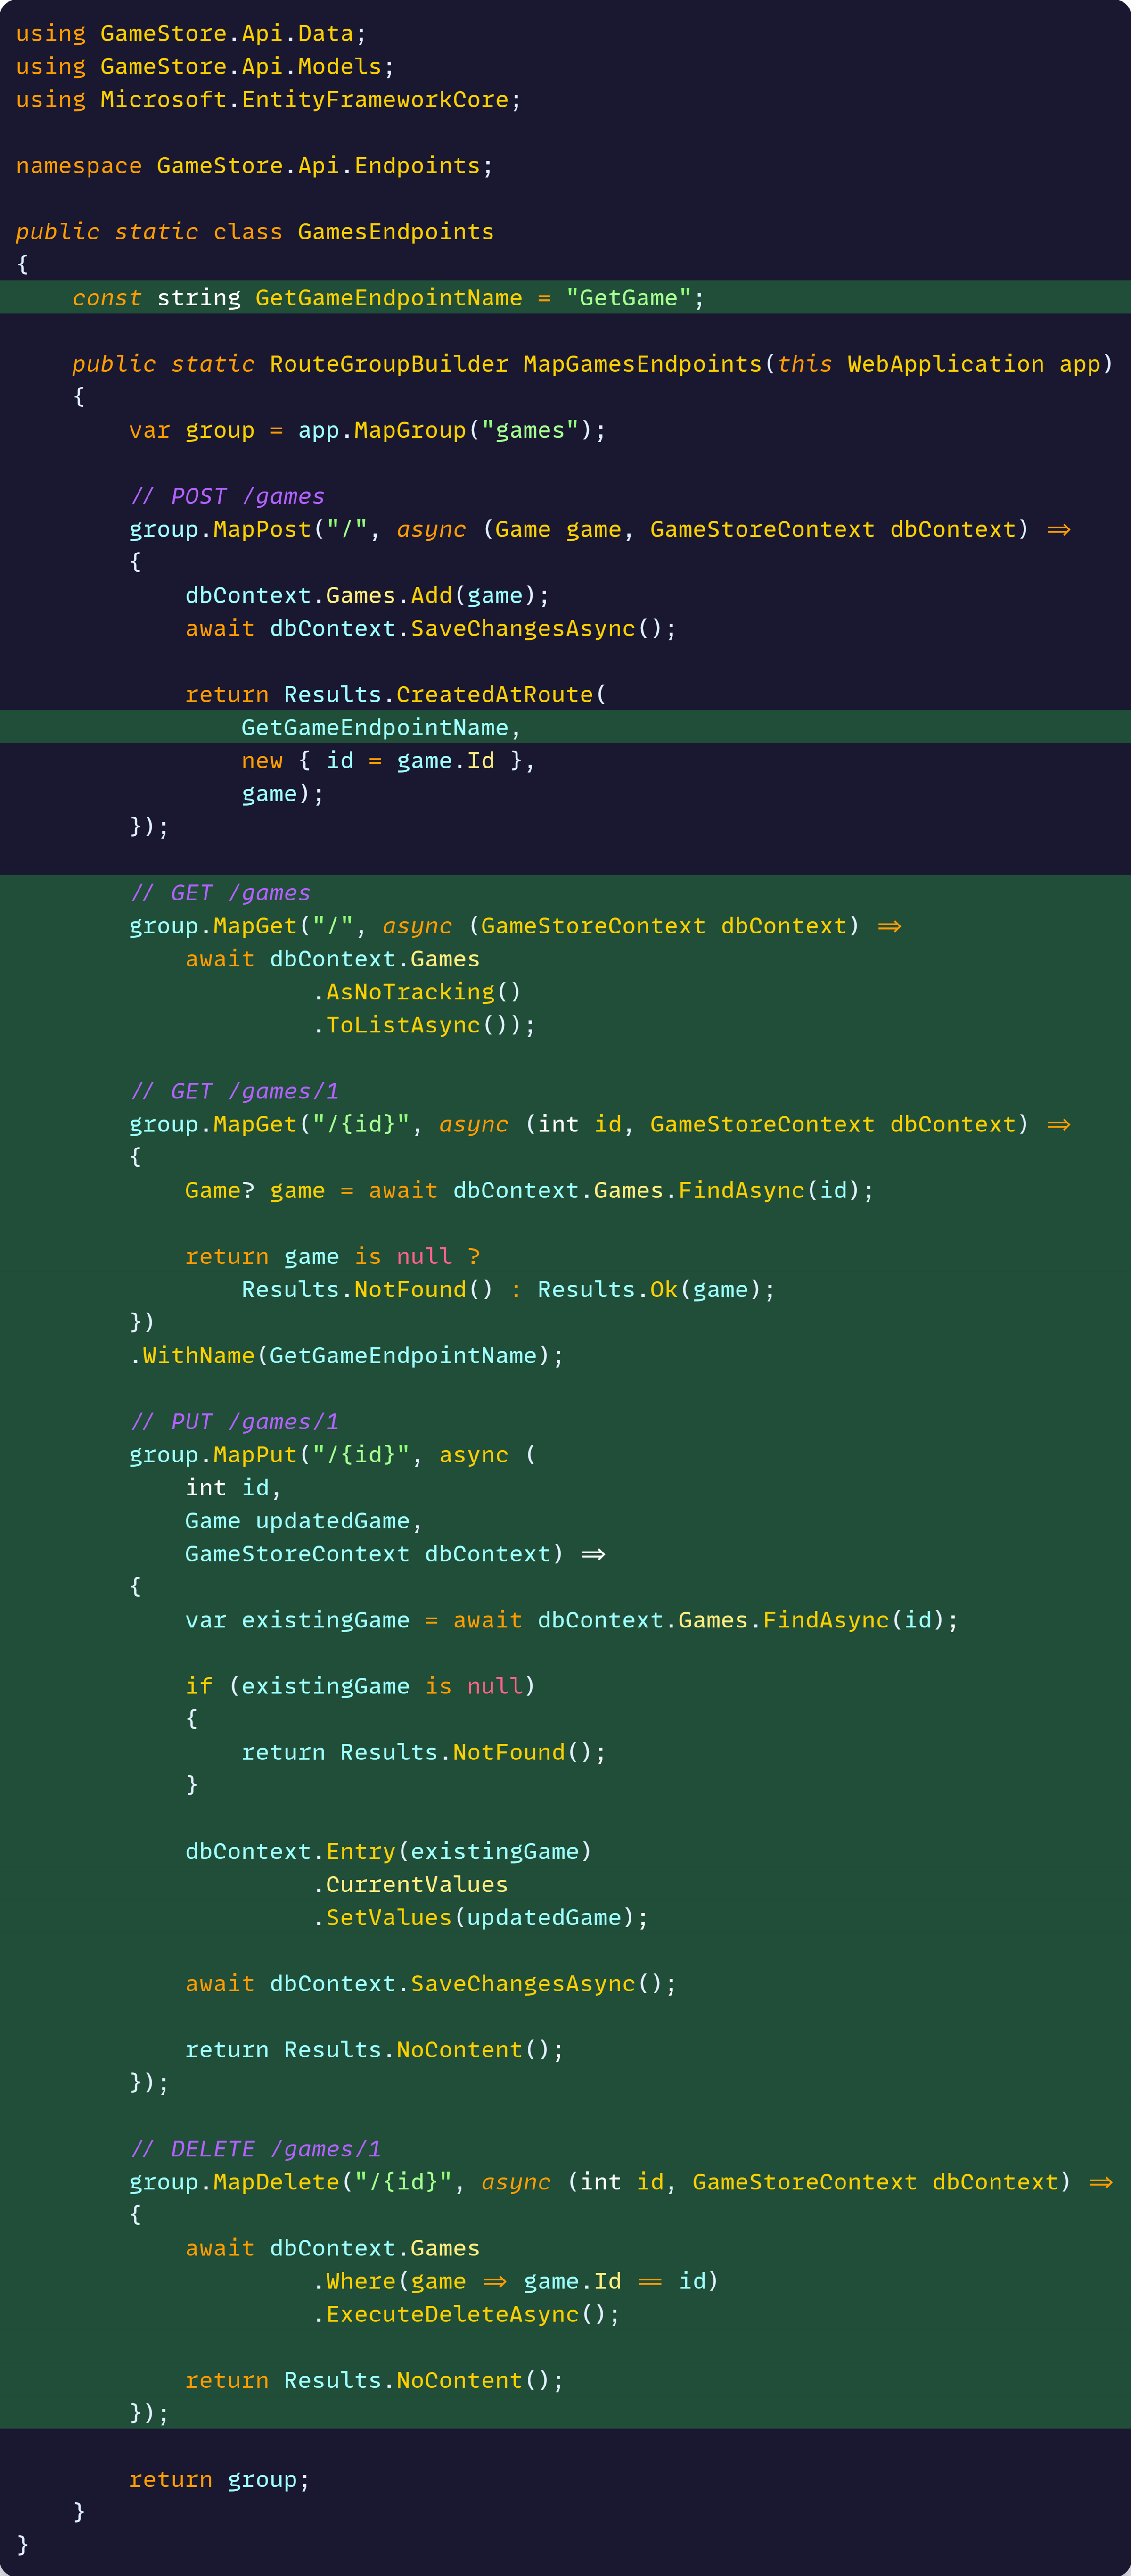
Step 8: Add the remaining CRUD endpoints
Let’s add GET to retrieve games, plus update and delete operations:
Let’s break down the new concepts:
Route parameters
”/{id}” captures the ID from the URL. ASP.NET Core automatically converts it to the int id parameter. When someone calls GET /games/5, the id parameter will contain the value 5.
Named endpoints
.WithName(GetGameEndpointName) gives the endpoint a name so other endpoints can reference it.
This is how Results.CreatedAtRoute() knows where to point the Location header—it generates a URL to the named endpoint.
Results helpers
These are convenience methods that return properly formatted HTTP responses:
- Results.NotFound() returns HTTP 404 when a resource doesn’t exist
- Results.Ok(game) returns HTTP 200 with the game serialized as JSON
- Results.NoContent() returns HTTP 204 for successful operations that don’t return data (like updates and deletes)
EF Core optimizations
- AsNoTracking() tells EF Core we’re just reading data, not modifying it. This improves performance because EF Core doesn’t need to track changes to the entities.
- ExecuteDeleteAsync() deletes directly in the database without loading the entity into memory first. Much more efficient than finding the entity and then calling Remove().
Entity updates
Instead of manually setting each property (existingGame.Name = updatedGame.Name, etc.), SetValues(updatedGame) copies all properties from the incoming object to the existing entity in one operation.
Our API is complete! Let’s create the database and test it out.
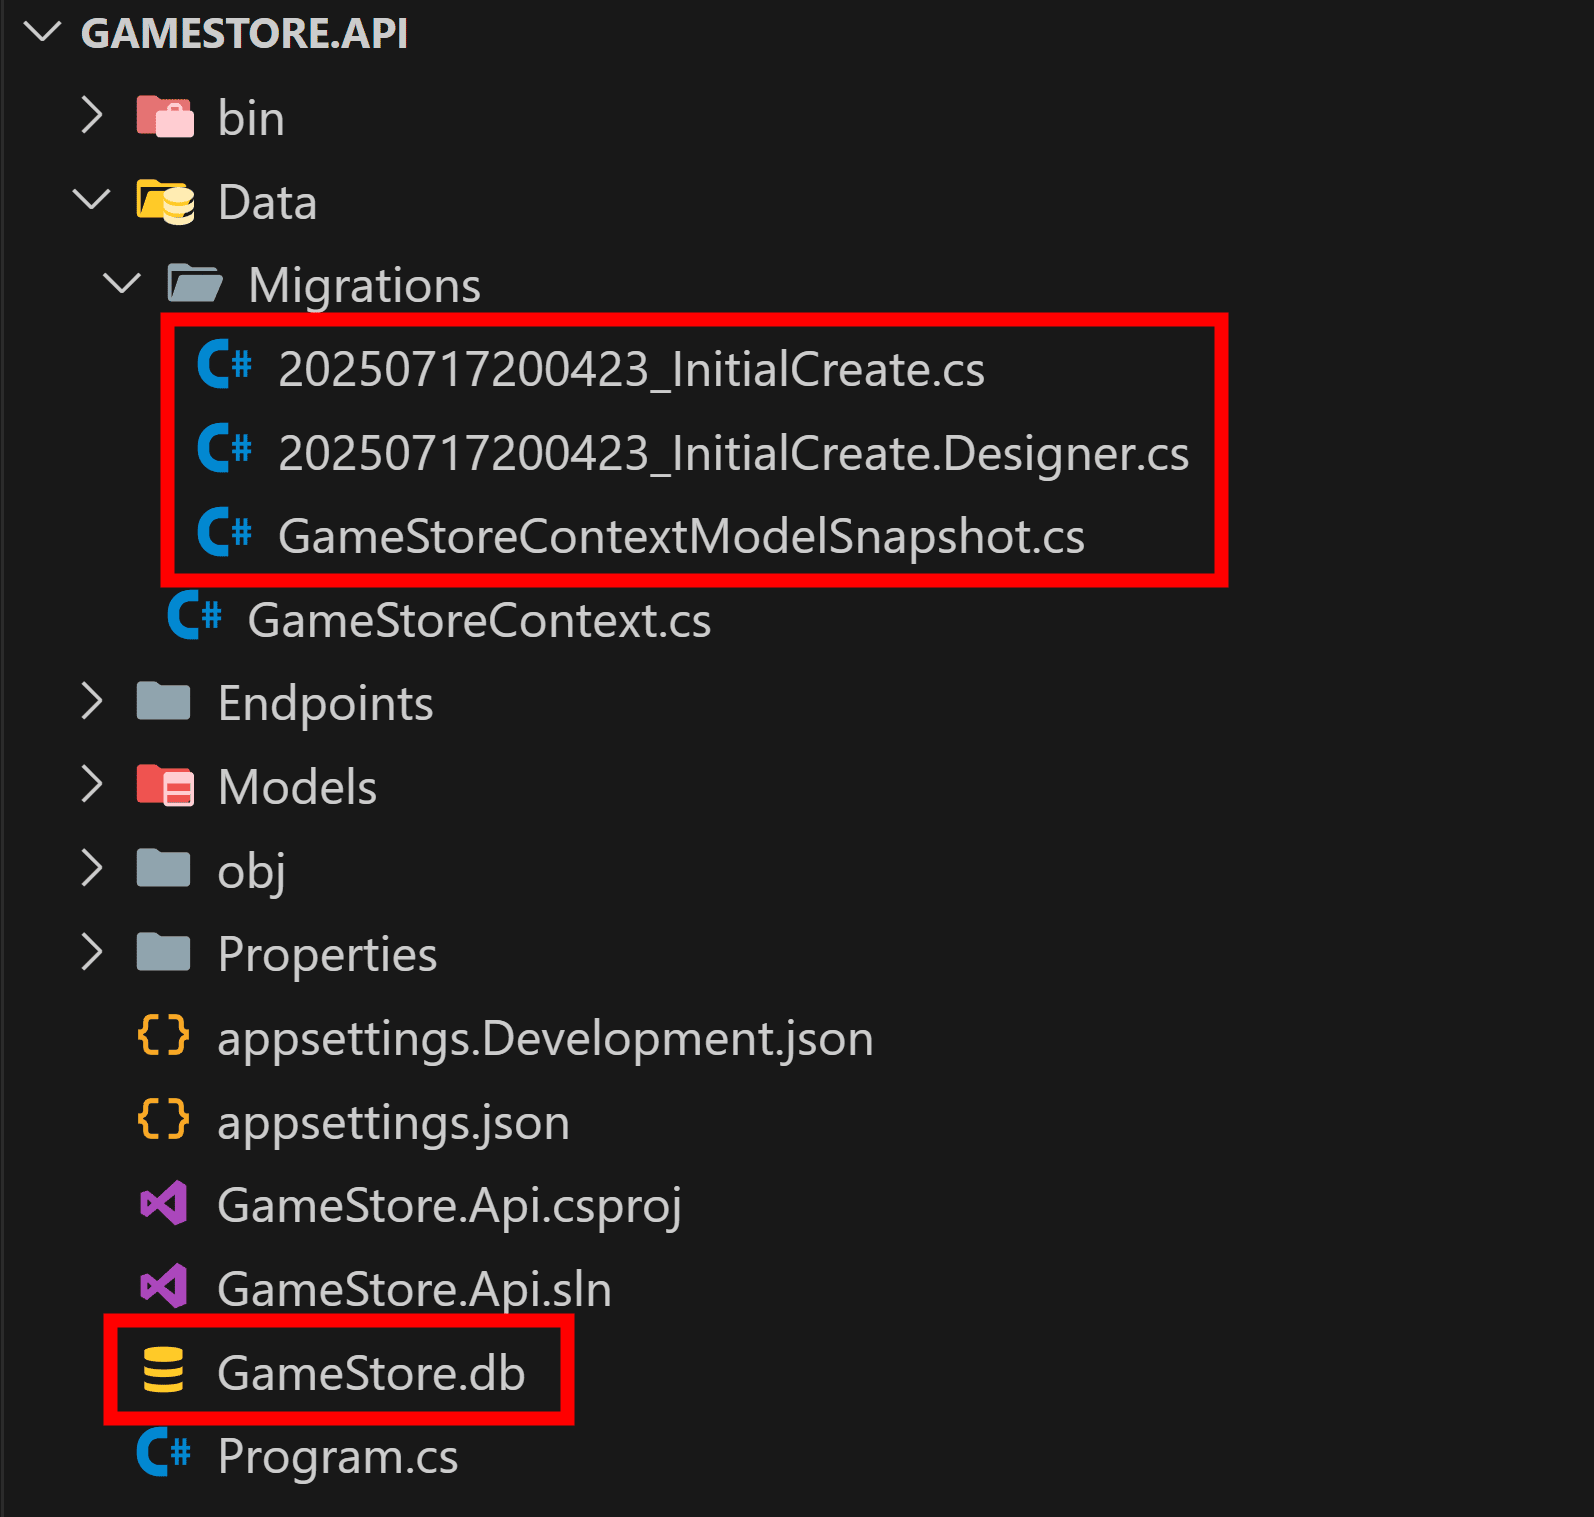
Step 9: Create the database
Before we can store games, we need to create the actual database tables. EF Core uses migrations to manage database schema changes.
A migration is essentially a set of instructions that tells the database how to create or modify tables.
Run these commands in your terminal to create a migration and update the database:

The first command generates a migration file that contains the SQL needed to create your Games table.
The second command actually executes that migration against your database, creating the GameStore.db file and the Games table.
Now, let’s test our brand new API.
Step 10: Run and test the API
Let’s open the terminal and run the application:

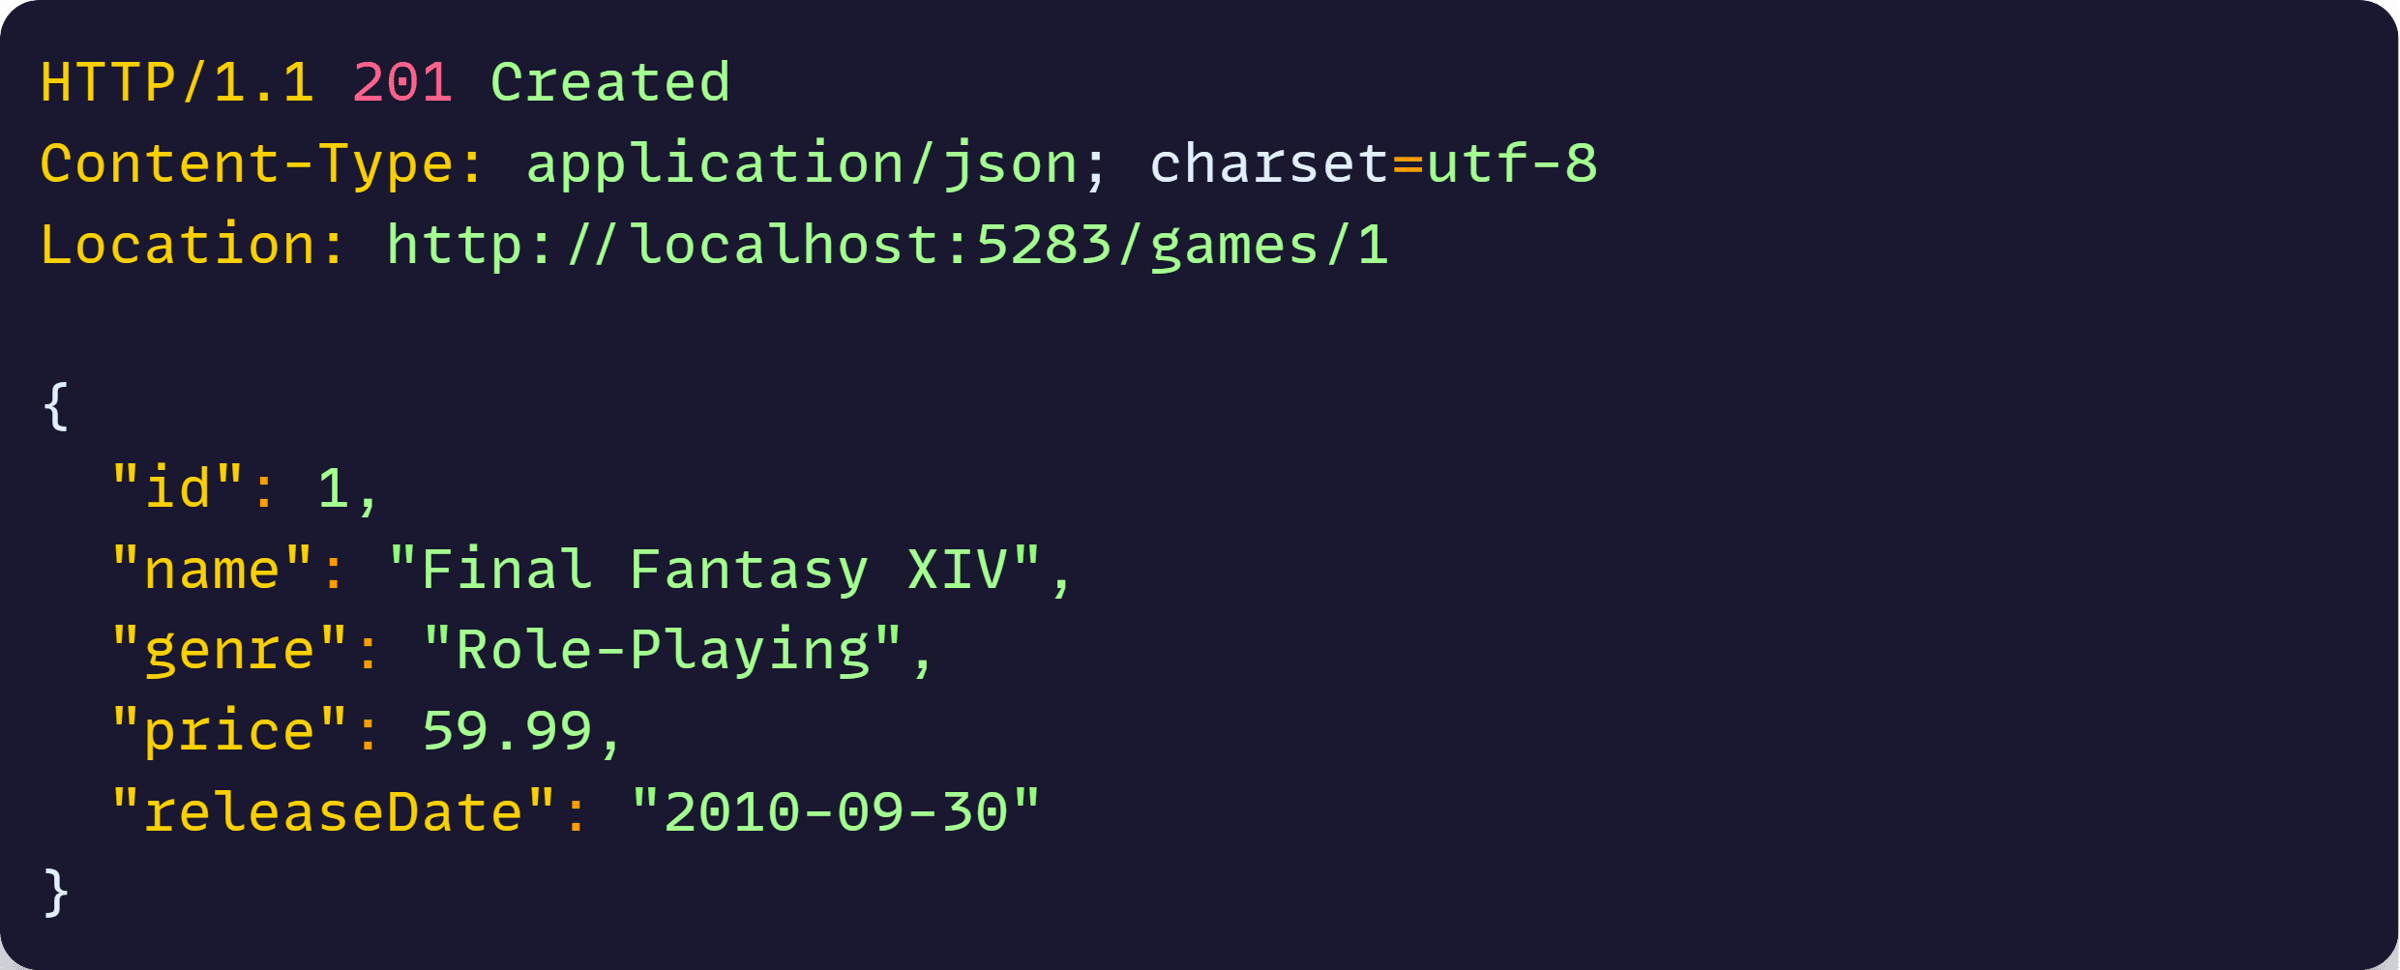
Then test the API with curl or your favorite HTTP client, starting with our POST endpoint:

Which will respond with something like this:
Let’s try our GET endpoint too:

Responds with:
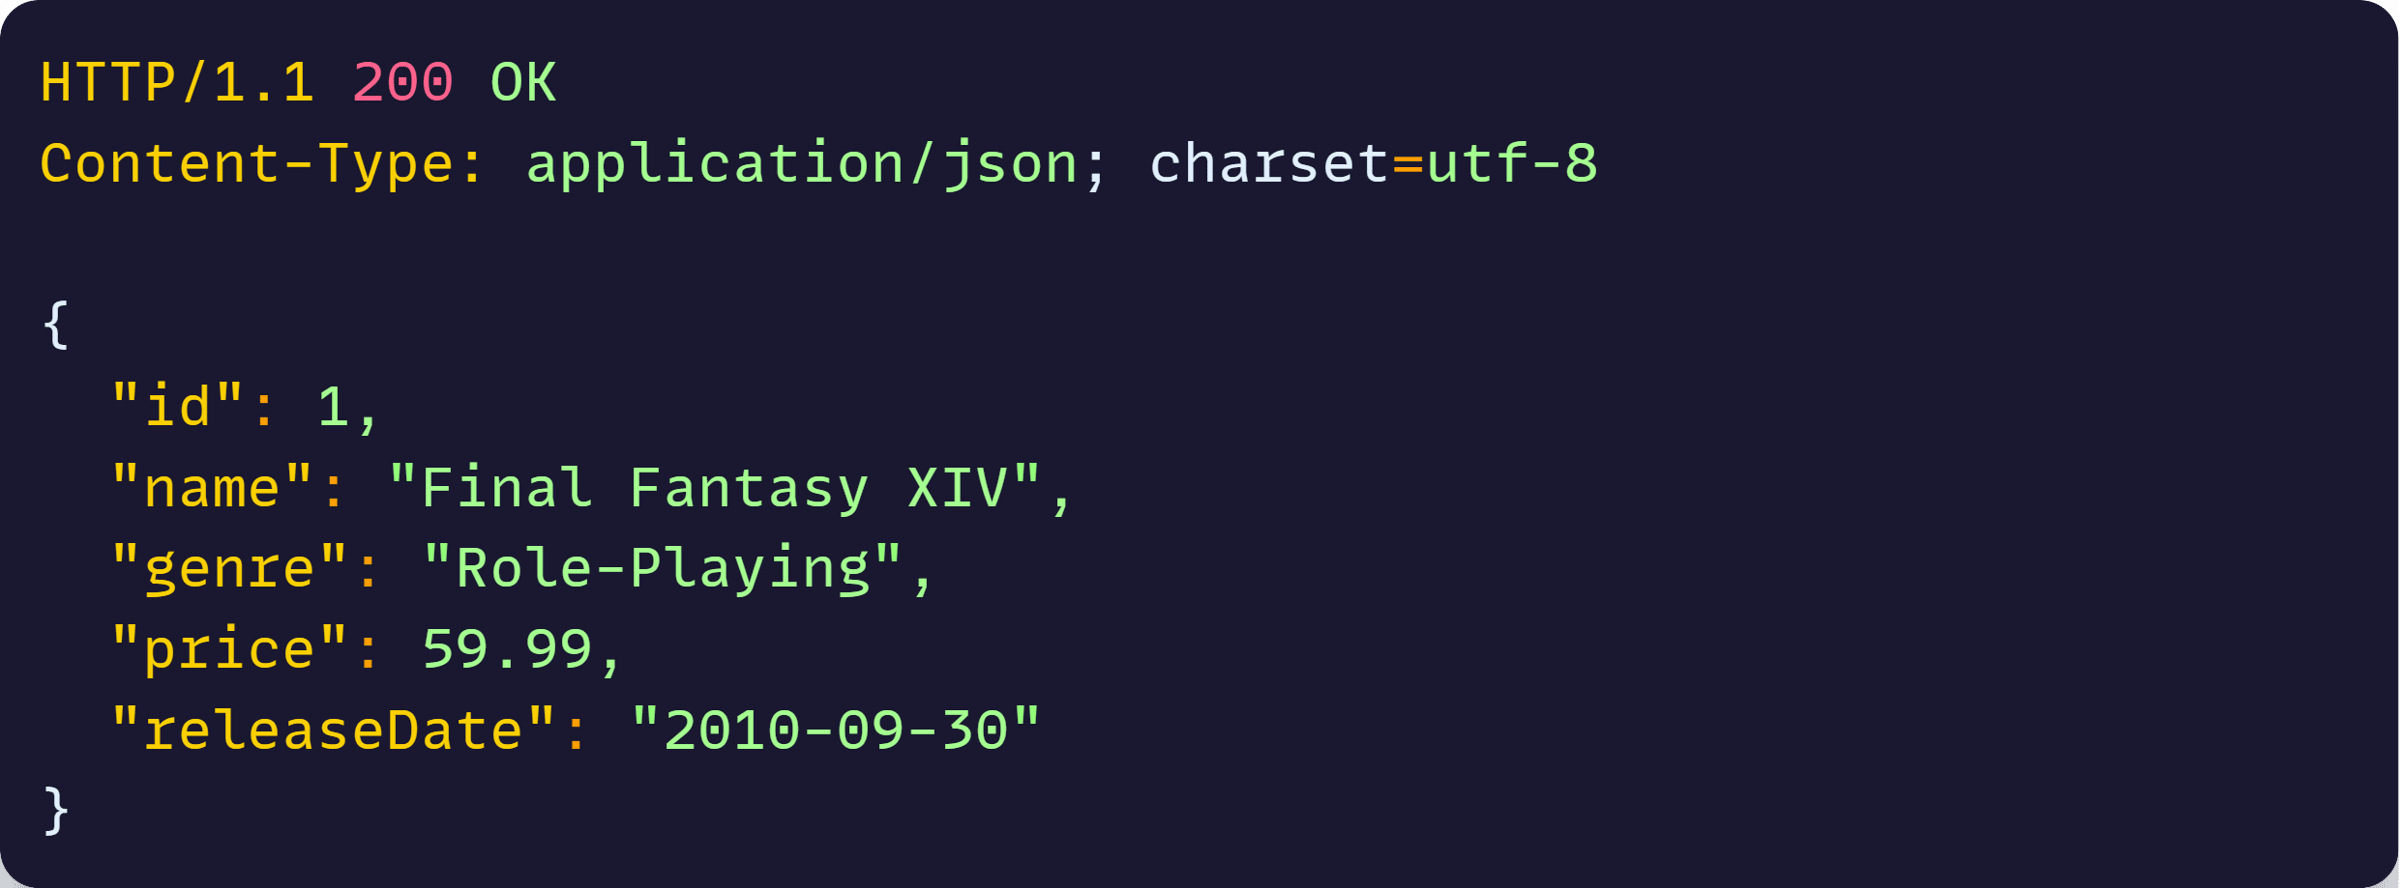
Great!
But how does this all compare to the MVC approach you’re used to?
Key differences from MVC controllers
If you’re coming from MVC controllers, here are the fundamental differences:
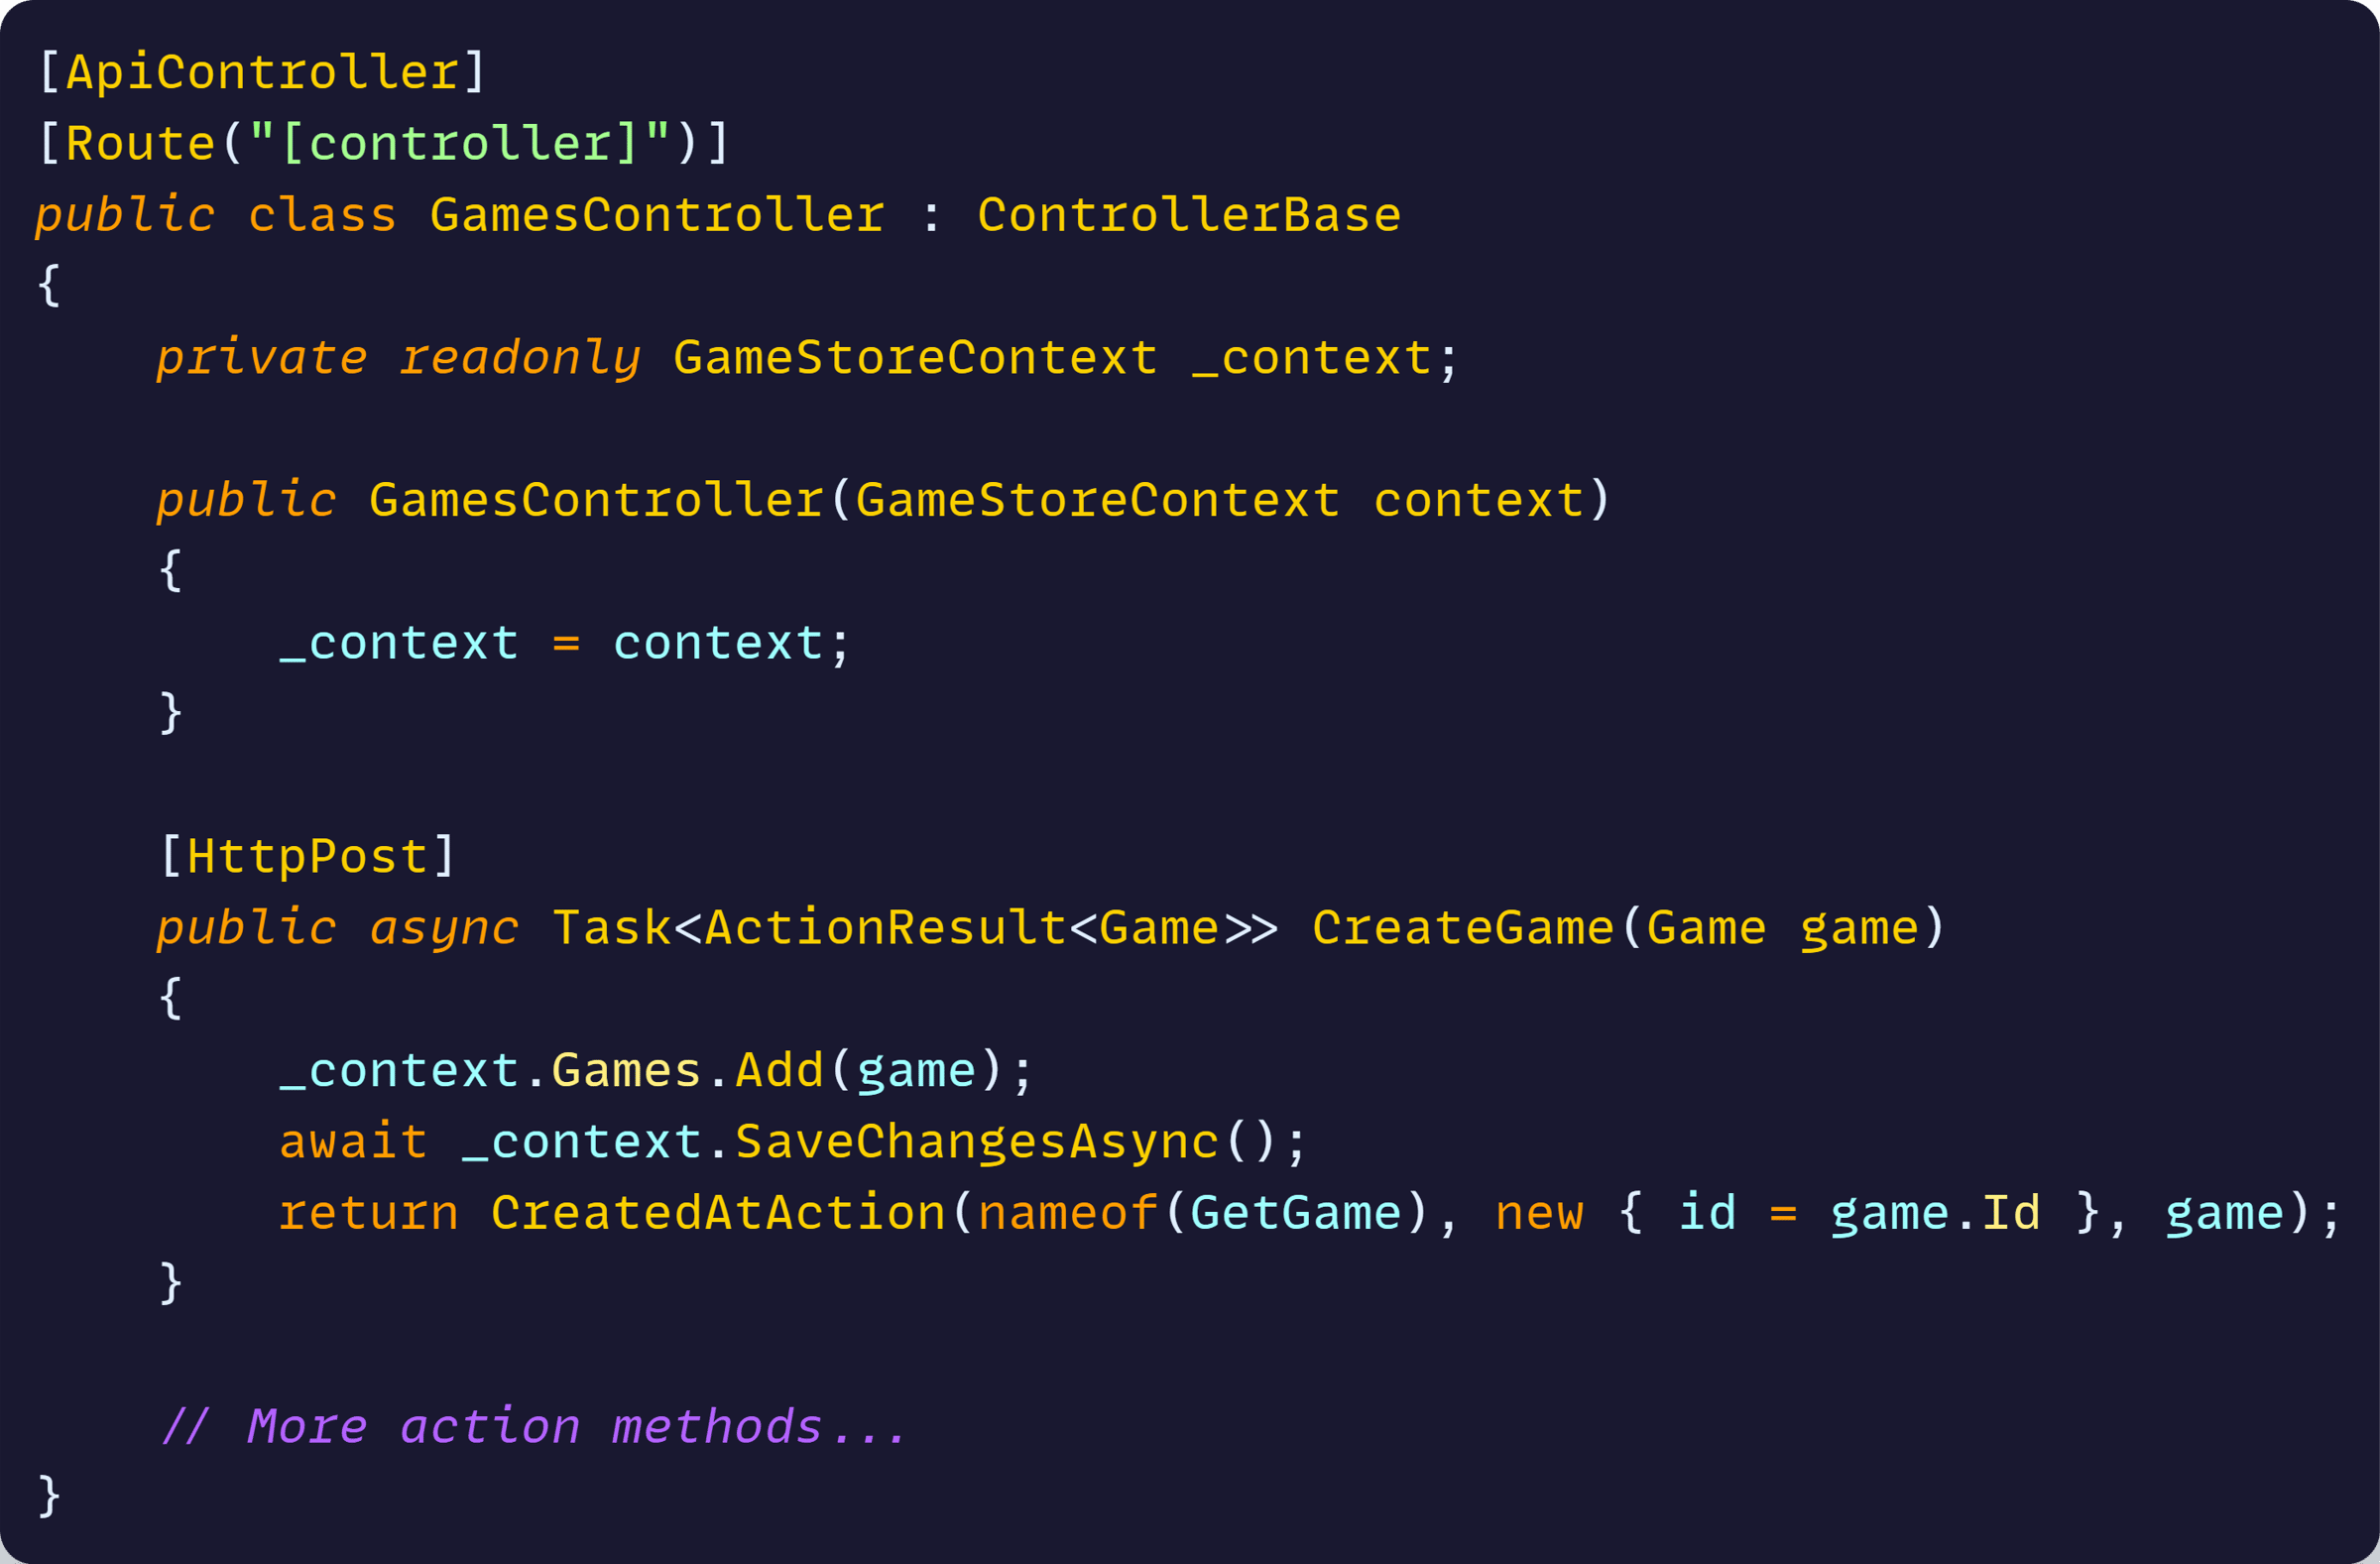
Controllers require this structure:
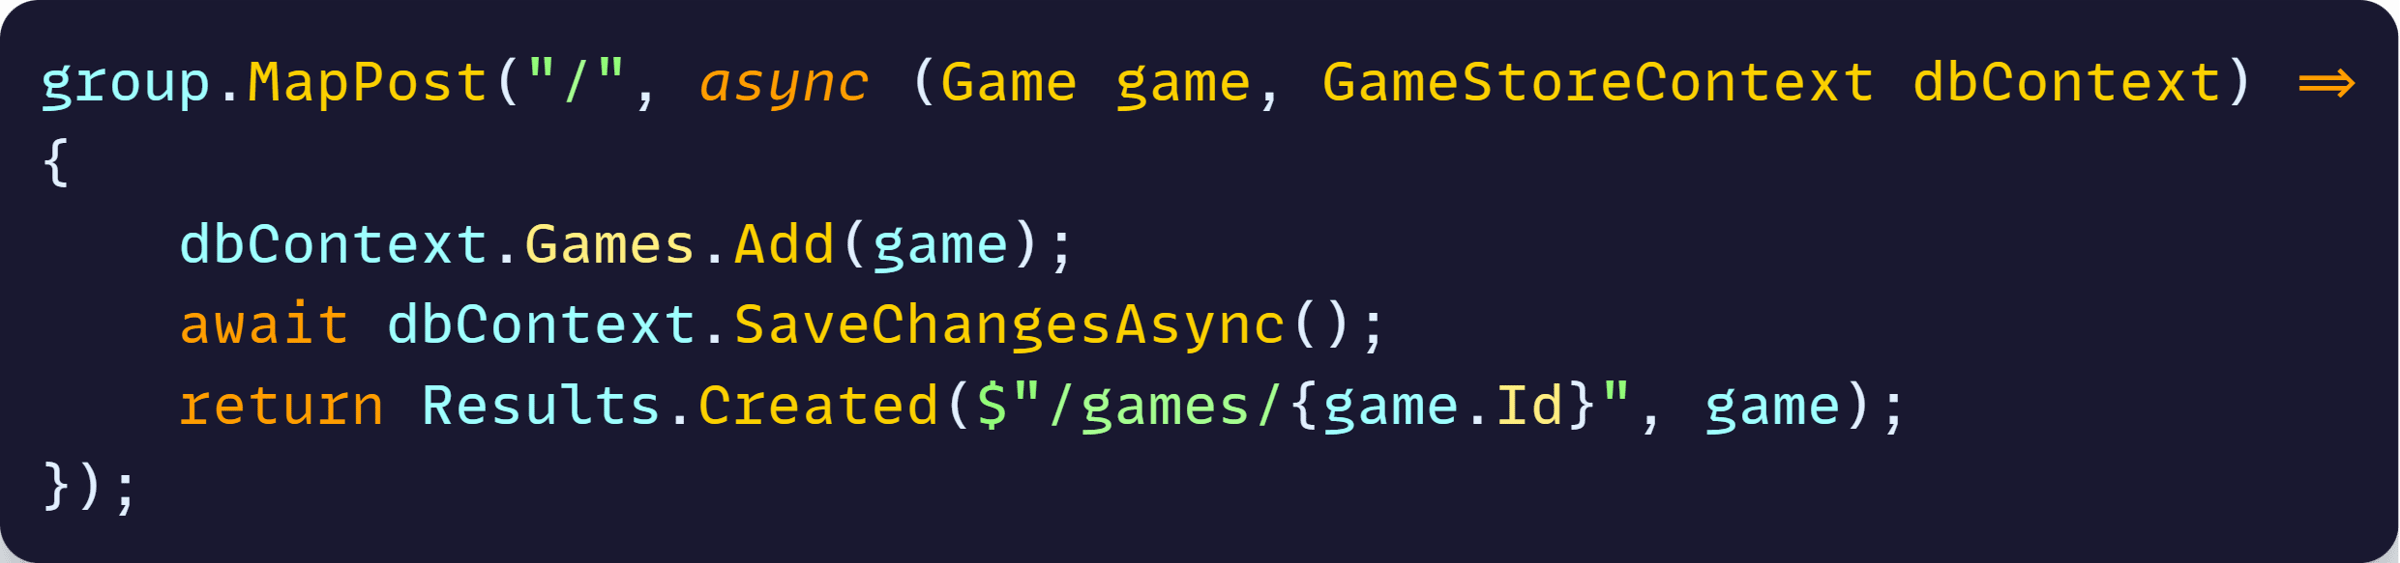
Minimal APIs just need:
Key differences:
- No inheritance: Minimal APIs don’t inherit from ControllerBase. Each endpoint is a standalone function.
- Dependency injection: Instead of constructor injection, dependencies are injected directly into the endpoint function parameters.
- No attributes: Routes and HTTP verbs are specified in the method call (MapPost, MapGet) rather than decorating methods with [HttpPost] and [Route] attributes.
- Direct returns: You return IResult objects directly instead of wrapping everything in ActionResult. IResult is simpler and more focused than the heavier ActionResult type that carries MVC baggage.
- No class ceremony: No class definition, no constructor, no private fields—just functions that handle HTTP requests.
The minimal API approach reduces boilerplate while making the relationship between routes and code more explicit.
Are minimal APIs faster than controllers?
You’ll often hear that minimal APIs are faster than controllers, but let’s look at actual numbers from the official ASP.NET Core benchmarks.
These charts show JSON serialization performance over several weeks of continuous testing:
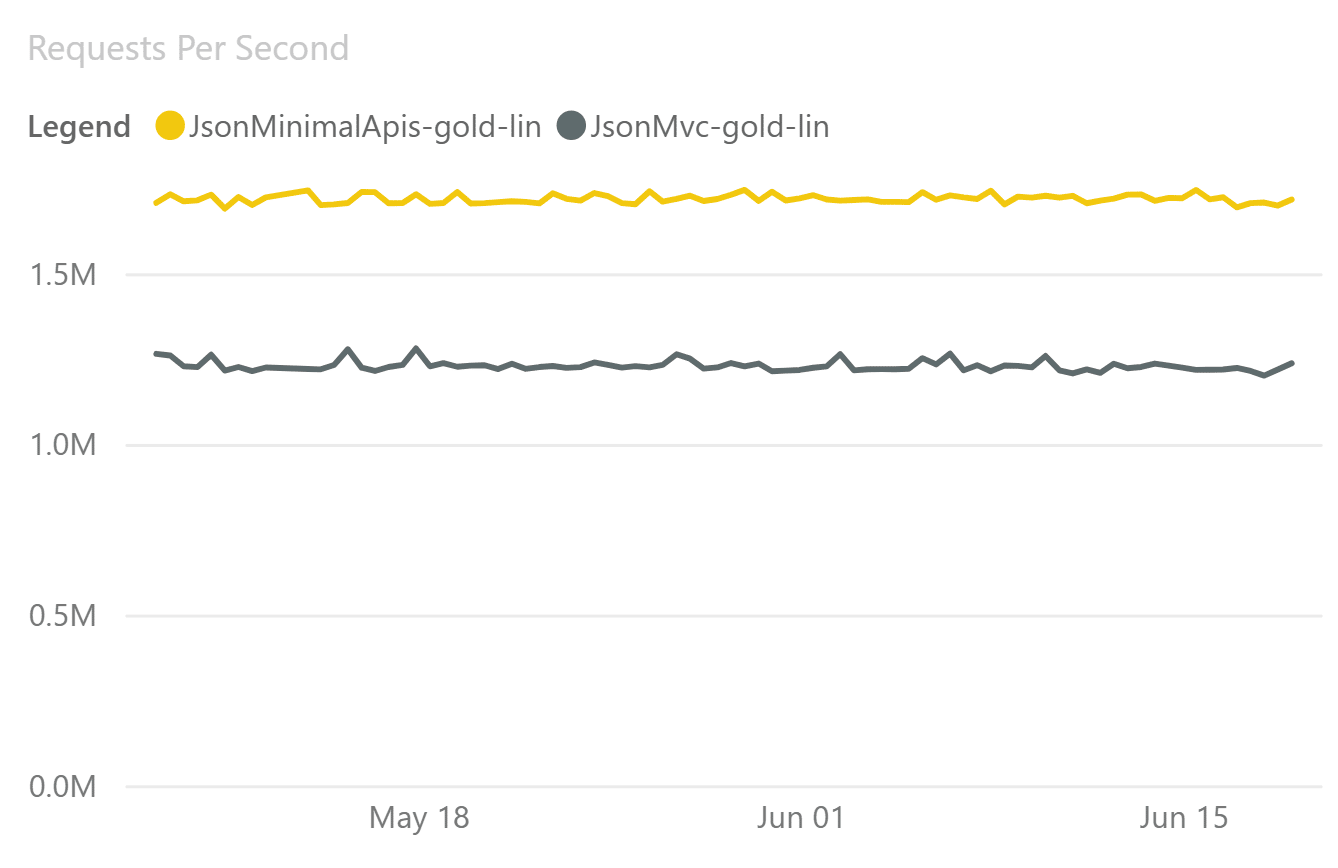
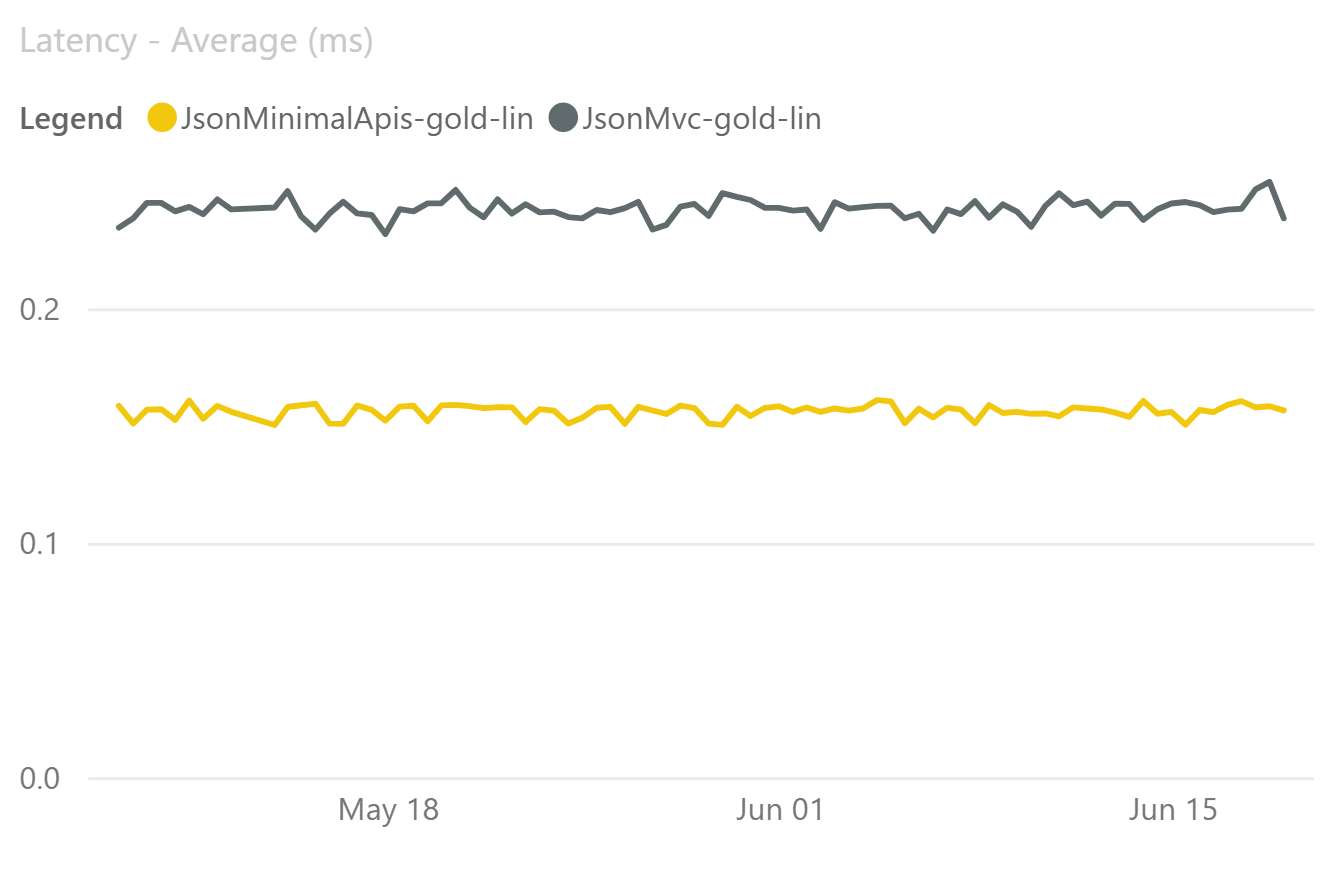
That’s 42% better throughput and 42% lower latency for minimal APIs. This isn’t a small difference—it’s substantial.
Why such a big performance gap?
Controllers go through the full MVC pipeline with action filters, model binding infrastructure, and route resolution designed for maximum flexibility.
Minimal APIs bypass most of this machinery and map requests directly to your functions with minimal overhead.
The performance difference is real and measurable. For high-throughput APIs or latency-sensitive applications, minimal APIs provide a significant advantage.
But remember: The real benefit is still simplicity and clarity. The performance gains are an excellent bonus.
So, when should you choose minimal APIs over controllers?
When to use minimal APIs vs controllers?
Use minimal APIs when:
- Building simple CRUD APIs (like our game store)
- Performance matters (minimal APIs have less overhead than controllers)
- You prefer a functional programming style over object-oriented patterns
Stick with controllers when:
- You have complex action filters that run before/after multiple endpoints
- You’re building MVC views (HTML pages) in addition to APIs—controllers handle both better
What about input validation?
Our API currently accepts any data you send it. In production, you need to validate incoming requests to prevent bad data from entering your system.
The easiest way to add validation to minimal APIs is with the MinimalApis.Extensions package:

Now add validation attributes to your Game model:
And enable validation on your route group:

Now invalid requests will automatically return 400 Bad Request with detailed validation errors.
The WithParameterValidation() method validates all parameters against their validation attributes before your endpoint functions even run.
And the future gets even better: .NET 10 will include built-in validation support for minimal APIs, eliminating the need for external packages.
Scaling beyond simple endpoints
As your API grows beyond a few endpoints, you’ll want to organize your code differently. Instead of a gigantic extensions file with multiple endpoints, consider organizing by business features.
This is called Vertical Slice Architecture, where each feature contains everything it needs—endpoints, business logic, and data access—in one focused area.
For example, instead of a single GamesEndpoints.cs file, you’d have:
- Features/Games/CreateGame/CreateGameEndpoint.cs
- Features/Games/GetGames/GetGameEndpoint.cs
- Features/Games/UpdateGame/UpdateGameEndpoint.cs
Each slice is self-contained and easier to understand, test, and modify. You can read more about this approach in my Vertical Slice Architecture article.
This organizational pattern works especially well with minimal APIs since you’re already thinking in terms of individual functions rather than controller classes.
Next steps
Minimal APIs aren’t just about writing less code—they’re about writing clearer code. Everything related to an endpoint lives in one place.
No hunting through controller constructors or figuring out which base class provides which functionality.
Just direct, obvious code that does exactly what it says.
For most API scenarios, this is all you need. Stop creating controllers when a simple function will do.
But what we’ve built today is just the foundation. Real production APIs need structured logging, global error handling, pagination and search, and secure file uploads.
If you want to master these advanced patterns, check out my ASP.NET Core Advanced course. It picks up exactly where this tutorial ends and shows you how to build bulletproof APIs for production.
Until next time!
Whenever you’re ready, here’s how I can help:
The .NET Developer Bootcamp: A complete path from ASP.NET Core fundamentals to building, containerizing, and deploying production-ready, cloud-native apps on Azure.
