Read time: 10 minutes
A few days ago, I released my brand new .NET Backend Blueprint, a complete template meant to accelerate the creation of production-ready .NET backends.
One of the key features of this template is the fully wired-up Keycloak integration, so you get enterprise-grade authentication out of the box (as opposed to demo-level ASP.NET Core Identity auth).
It took me a bit to get that working for local development, but the real challenge was to get it to work properly in Azure: a cloud-based Keycloak instance that your cloud-based .NET backend can talk to.
Such a setup usually requires many clicks and manual configurations to get right, but with .NET Aspire, you can wire it all up with code that deploys consistently every single time.
Today, I’ll show you how to do it, from start to finish.
Let’s dive in.
Adding Keycloak to your App Model
Running a local Keycloak server with .NET Aspire is pretty straightforward. I covered all the details in part 2 of my Keycloak tutorial.
But, to recap, all you need is the Aspire.Hosting.Keycloak NuGet package in your AppHost project:
<Project Sdk="Microsoft.NET.Sdk">

  <Sdk Name="Aspire.AppHost.Sdk" Version="9.4.1" />

  <PropertyGroup>
    <OutputType>Exe</OutputType>
    <TargetFramework>net9.0</TargetFramework>
    <ImplicitUsings>enable</ImplicitUsings>
    <Nullable>enable</Nullable>
    <UserSecretsId>92823f80-554d-4fd2-9ad2-b361574d1318</UserSecretsId>
  </PropertyGroup>

  <ItemGroup>
    <PackageReference Include="Aspire.Hosting.AppHost" Version="9.4.1" />
    <PackageReference Include="Aspire.Hosting.Keycloak" Version="9.4.1-preview.1.25408.4" />
  </ItemGroup>

</Project>
And then add a few lines to AppHost.cs to introduce Keycloak into your application model:
var builder = DistributedApplication.CreateBuilder(args);

var keycloakPassword = builder.AddParameter("KeycloakPassword",
                                            secret: true,
                                            value: "admin");

builder.AddKeycloak("keycloak", adminPassword: keycloakPassword)
        .WithDataVolume()
        .WithRealmImport("./realms");

builder.Build().Run();
The admin value used for Keycloak’s password parameter is just a handy default to be used exclusively for local development (won’t be reused when deploying).
As soon as we kick off our Azure deployment, the CLI will prompt us for the actual password to use, and then it will store it safely in the cloud.
The data volume and realm import are optional but pretty handy during local development.
Next, let’s modify a few Keycloak settings to run in the cloud.
Running behind the ingress
We will run Keycloak as a container in Azure, specifically in Azure Container Apps (ACA), and we will ask ACA to stand up an ingress so we get a public endpoint to access Keycloak.
An ingress is a service in front of your containers (including Keycloak) that acts as a front door for all incoming traffic, enabling several benefits such as TLS termination and load balancing across container replicas.
Keycloak’s container will run internally in ACA’s infrastructure, never publicly exposed to the wild Internet, so we need to set a few environment variables to fine-tune it for such an environment:
KC_HTTP_ENABLED: true. Let Keycloak receive plain HTTP traffic. Users will connect via HTTPS, which the ingress will terminate and transform into HTTP traffic.
KC_PROXY_HEADERS: xforwarded. Let Keycloak trust and use X-Forwarded headers that the end user originally connected with when talking to the external endpoint.
KC_HOSTNAME_STRICT: false. Let Keycloak accept requests even when the internal container hostname differs from your configured public hostname, which is expected in ACA.
In Aspire, you can set those 3 env vars like this:
builder.AddKeycloak("keycloak", adminPassword: keycloakPassword)
        .WithDataVolume()
        .WithRealmImport("./realms")
        .WithEnvironment("KC_HTTP_ENABLED", "true")
        .WithEnvironment("KC_PROXY_HEADERS", "xforwarded")
        .WithEnvironment("KC_HOSTNAME_STRICT", "false");
Now let’s switch to a real database.
Adding a real database
When you run Keycloak in your local box, it will use the dev-file database by default. This is only meant for development use-cases, but won’t work in a production deployment.
I mean, it will work if you only ever use one container replica for Keycloak, and never touch it. But as soon as you either destroy that container or need more than one replica, you’re out of luck.
Instead, it’s best to provision and use a real database in the cloud. Keycloak supports many, but here I’ll show you how to use Azure Postgres Flexible Server, a managed PostgreSQL DB.
Start by installing the Aspire.Hosting.Azure.PostgreSQL NuGet package to your AppHost:
<Project Sdk="Microsoft.NET.Sdk">

  <Sdk Name="Aspire.AppHost.Sdk" Version="9.4.1" />

    ...

  <ItemGroup>
    <PackageReference Include="Aspire.Hosting.AppHost" Version="9.4.1" />
    <PackageReference Include="Aspire.Hosting.Keycloak" Version="9.4.1-preview.1.25408.4" />
    <PackageReference Include="Aspire.Hosting.Azure.PostgreSQL" Version="9.4.1" />
  </ItemGroup>

</Project>
Then, define a couple of parameters to configure the user and password to be used for your PostgreSQL server:
var postgresUser = builder.AddParameter("PostgresUser");
var postgresPassword = builder.AddParameter("PostgresPassword", secret: true);
Next, let’s add the PostgreSQL resource, with a few special configurations:
var postgres = builder.AddAzurePostgresFlexibleServer("postgres")
                    .WithPasswordAuthentication(
                        userName: postgresUser,
                        password: postgresPassword)
                    .ConfigureInfrastructure(infra =>
                    {
                        var pg = infra.GetProvisionableResources()
                                      .OfType<PostgreSqlFlexibleServer>()
                                      .Single();

                        infra.Add(new ProvisioningOutput("hostname", typeof(string))
                        {
                            Value = pg.FullyQualifiedDomainName
                        });
                    });
We need the WithPasswordAuthentication call because otherwise Postgres will default to the standard Entra ID based authentication, which I have no idea how to use with Keycloak.
But the trickiest part there, which I could not figure out initially, was setting up that ConfigureInfrastructure call (a big shout out to David Fowler for helping me with this one!)
We need it so that, just after the Postgres instance is provisioned, an output parameter is set with the full hostname of the server, which we will use to provision Keycloak, as you’ll see soon.
Before that, let’s ask Postgres to provision a new database for Keycloak:
var keycloakDb = postgres.AddDatabase("keycloakDB", "keycloak");
And now we can form the full URL that Keycloak will need to reach out to the DB where it will store all its data:
var keycloakDbUrl = ReferenceExpression.Create(
    $"jdbc:postgresql://{postgres.GetOutput("hostname")}/{keycloakDb.Resource.DatabaseName}"
);
Such ReferenceExpression will be evaluated after the Postgres resource is fully provisioned on Azure, at which point we can retrieve that hostname output we defined earlier.
Now we can provide all the info that Keycloak will need to connect to and use PostgreSQL for all persistence purposes:
builder.AddKeycloak("keycloak", adminPassword: keycloakPassword)
        .WithDataVolume()
        .WithRealmImport("./realms")
        .WithEnvironment("KC_HTTP_ENABLED", "true")
        .WithEnvironment("KC_PROXY_HEADERS", "xforwarded")
        .WithEnvironment("KC_HOSTNAME_STRICT", "false")
        .WithEnvironment("KC_DB", "postgres")
        .WithEnvironment("KC_DB_URL", keycloakDbUrl)
        .WithEnvironment("KC_DB_USERNAME", postgresUser)
        .WithEnvironment("KC_DB_PASSWORD", postgresPassword);
The KC_DB env var **is just to tell Keycloak that ours is a PostgreSQL DB, and the other env vars are straightforward to understand.
Next, let’s remove one thing we don’t need in the cloud.
No volumes needed
Because all our Keycloak data will be stored in PostgreSQL, we won’t need the data volume we’ve been using for local development.
In fact, data volumes and bind mounts won’t quite work with our ACA deployment, so we need to account for that:
var keycloak = builder.AddKeycloak(
            "keycloak",
            adminPassword: keycloakPassword)
        .WithEnvironment("KC_HTTP_ENABLED", "true")
        .WithEnvironment("KC_PROXY_HEADERS", "xforwarded")
        .WithEnvironment("KC_HOSTNAME_STRICT", "false")
        .WithEnvironment("KC_DB", "postgres")
        .WithEnvironment("KC_DB_URL", keycloakDbUrl)
        .WithEnvironment("KC_DB_USERNAME", postgresUser)
        .WithEnvironment("KC_DB_PASSWORD", postgresPassword);

if (builder.ExecutionContext.IsRunMode)
{
    keycloak.WithDataVolume()
            .WithRealmImport("./realms");
}
That will ensure the data volume and the bind mount to import the realm file are only used when running the app locally, but are completely skipped when deploying to Azure.
Now, one more thing to complete our Keycloak configuration.
Adding the external endpoint
By default, ACA’s ingress will assign an internal-only endpoint to our Keycloak container, meaning that it’s reachable only within ACA’s infrastructure.
We, however, need an external endpoint, or we won’t be able to access the Admin Console, plus our users would not be able to reach Keycloak’s login page.
Here’s how we can enable that external endpoint:
var keycloak = builder.AddKeycloak(
            "keycloak",
            adminPassword: keycloakPassword)
        .WithEnvironment("KC_HTTP_ENABLED", "true")
        .WithEnvironment("KC_PROXY_HEADERS", "xforwarded")
        .WithEnvironment("KC_HOSTNAME_STRICT", "false")
        .WithEnvironment("KC_DB", "postgres")
        .WithEnvironment("KC_DB_URL", keycloakDbUrl)
        .WithEnvironment("KC_DB_USERNAME", postgresUser)
        .WithEnvironment("KC_DB_PASSWORD", postgresPassword)
        .WithEndpoint("http", e => e.IsExternal = true);
Normally, you would make a call to WithExternalHttpEndpoints, but it won’t work here because Keycloak is preconfigured with two HTTP endpoints (one of them for management), and having more than one external endpoint is not supported.
One last thing before kicking off that deployment.
Targeting Azure Container Apps
One of the beautiful things about .NET Aspire is that you don’t have to think too much about your compute environment until you are ready for your first deployment.
At this point, we are ready to target ACA, so let’s start by bringing in the Aspire.Hosting.Azure.AppContainers NuGet package:
<Project Sdk="Microsoft.NET.Sdk">

  <Sdk Name="Aspire.AppHost.Sdk" Version="9.4.1" />

    ...

  <ItemGroup>
    <PackageReference Include="Aspire.Hosting.AppHost" Version="9.4.1" />
    <PackageReference Include="Aspire.Hosting.Azure.AppContainers" Version="9.4.1" />
    <PackageReference Include="Aspire.Hosting.Keycloak" Version="9.4.1-preview.1.25408.4" />
    <PackageReference Include="Aspire.Hosting.Azure.PostgreSQL" Version="9.4.1" />
  </ItemGroup>

</Project>
And now add one line to our application model to target ACA:
builder.AddAzureContainerAppEnvironment("cae");
Let’s try this out.
Deploying Keycloak to Azure
Let’s kick off the deployment with an azd up call:
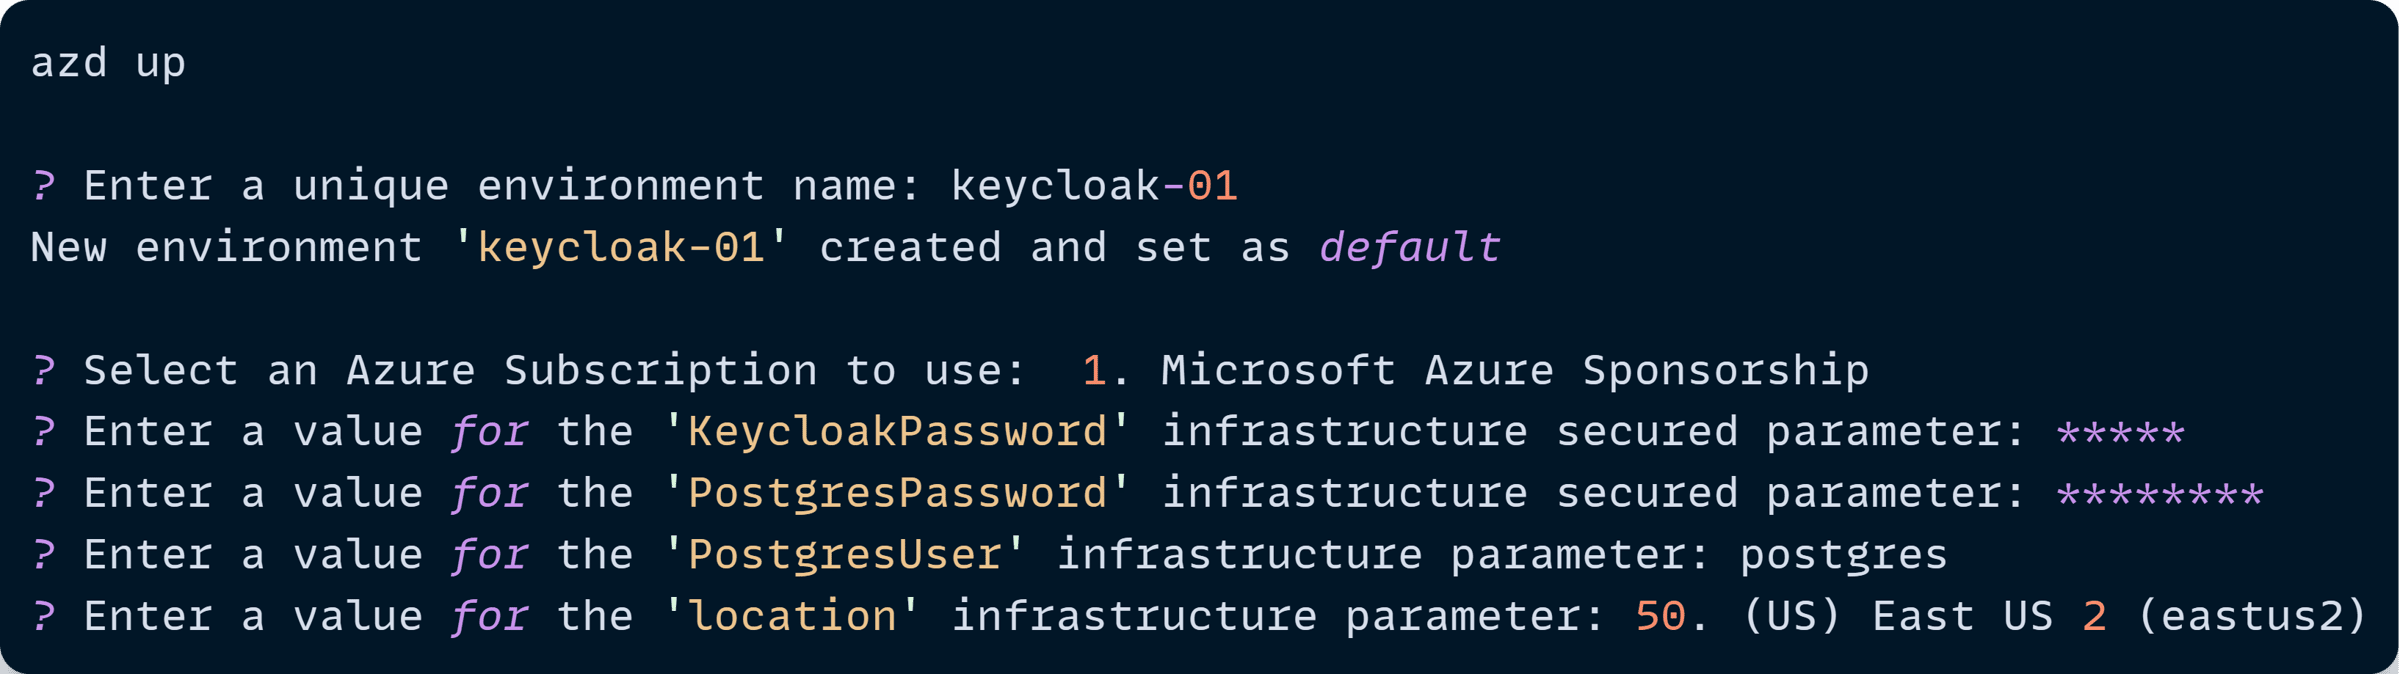
Notice how azd prompts us for several things, including our KeycloakPassword, PostgresPassword, and PostgresUser parameters, which it will store in ACA.
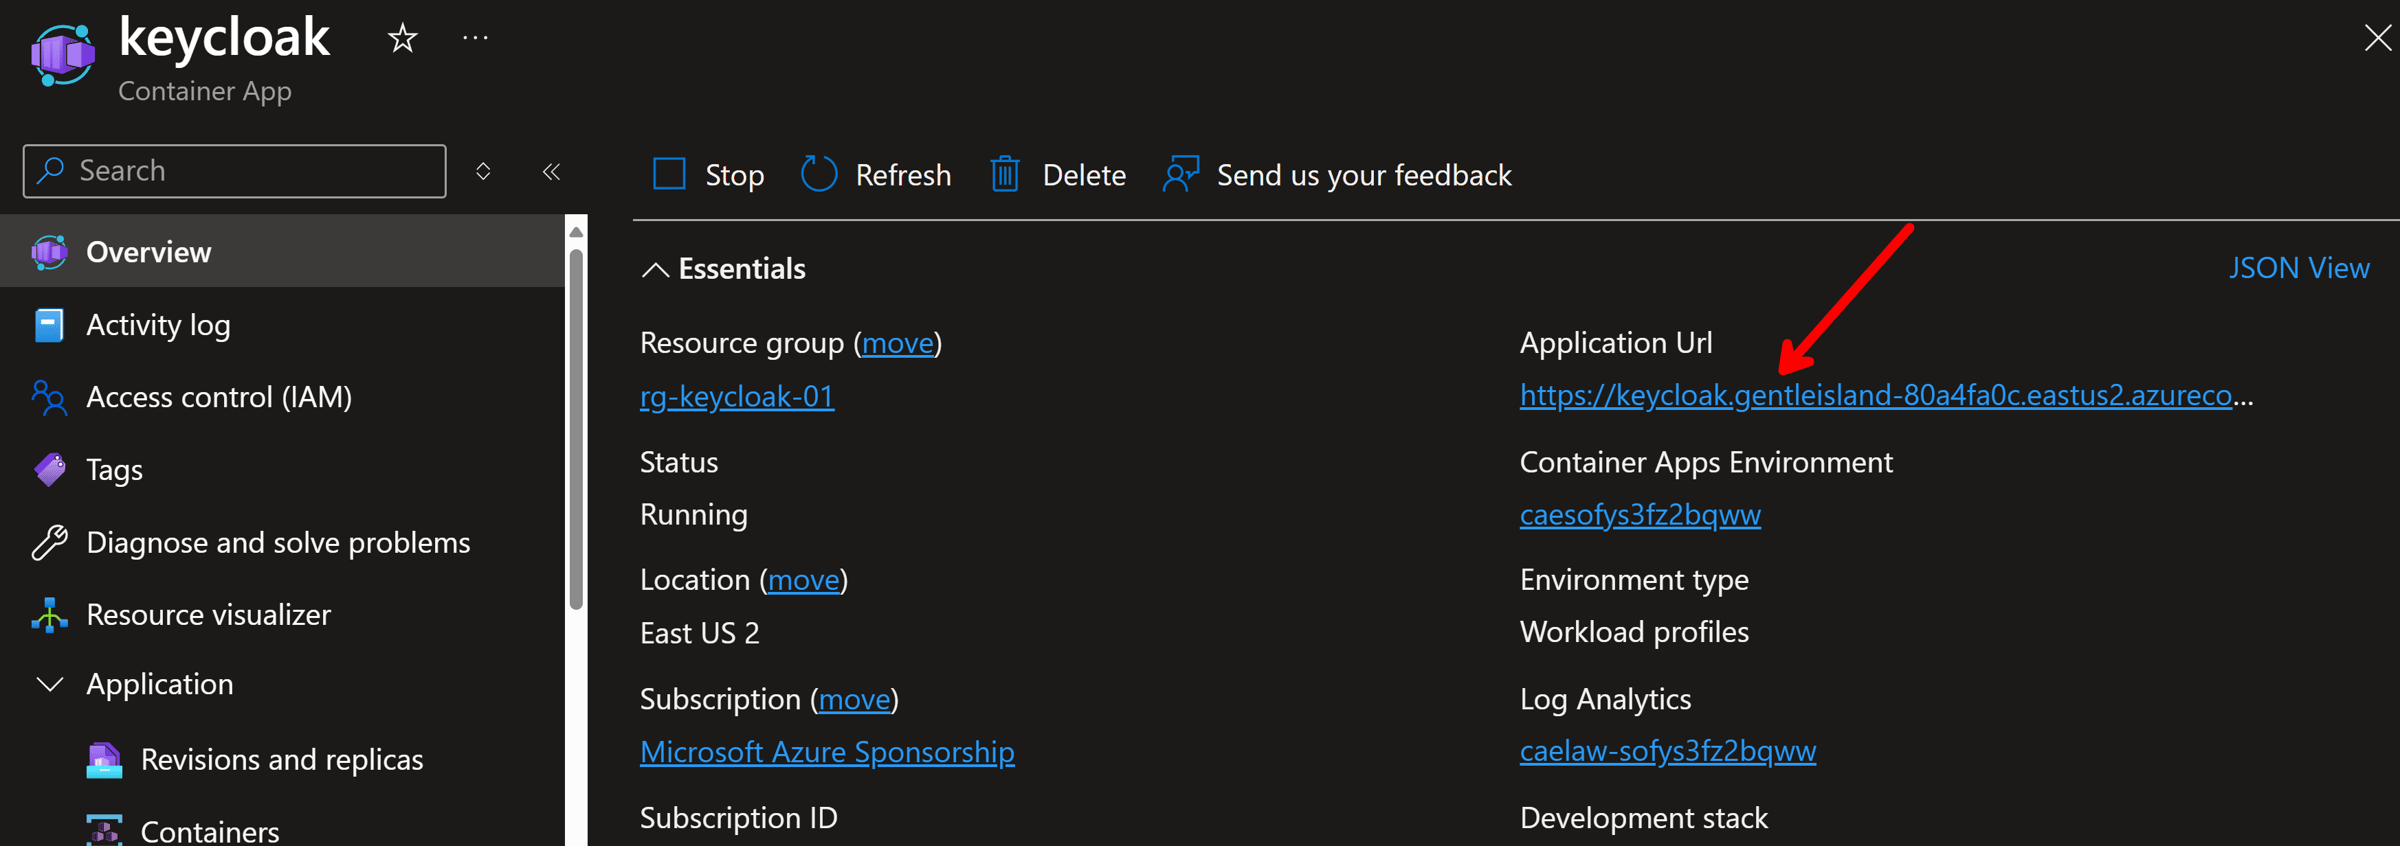
Once the deployment completes, we can find our new Keycloak container (and its supporting Postgres DB) up and ready to go:

Going into the Keycloak resource will reveal the requested external endpoint:
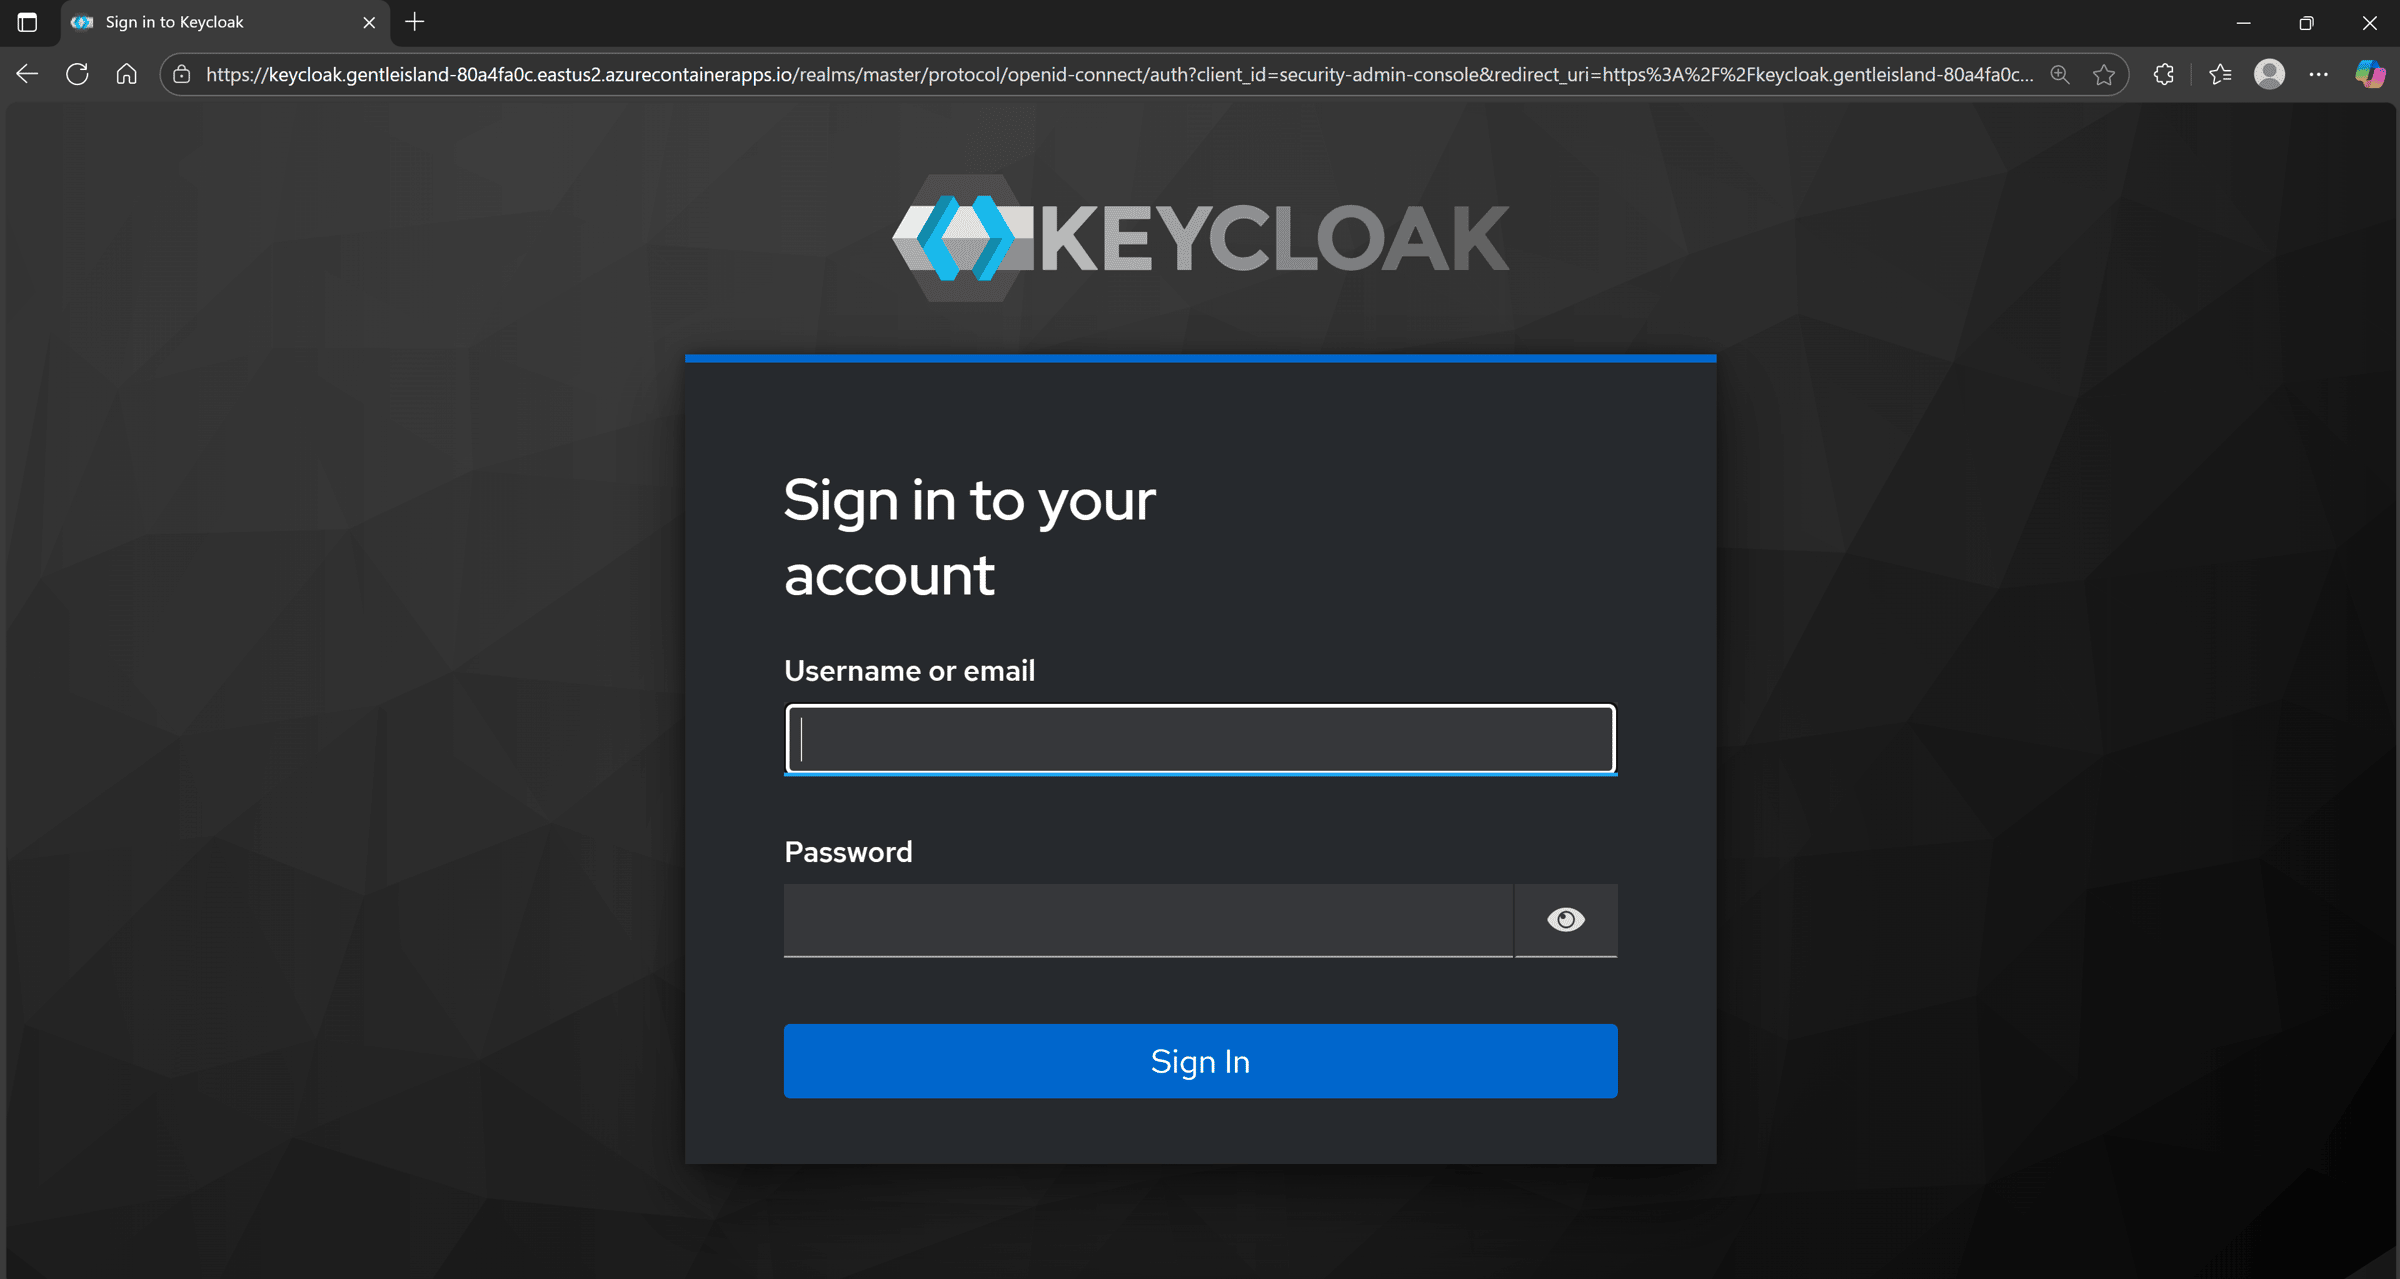
And, if we click that, we’ll be greeted by Keycloak’s sign-in screen:
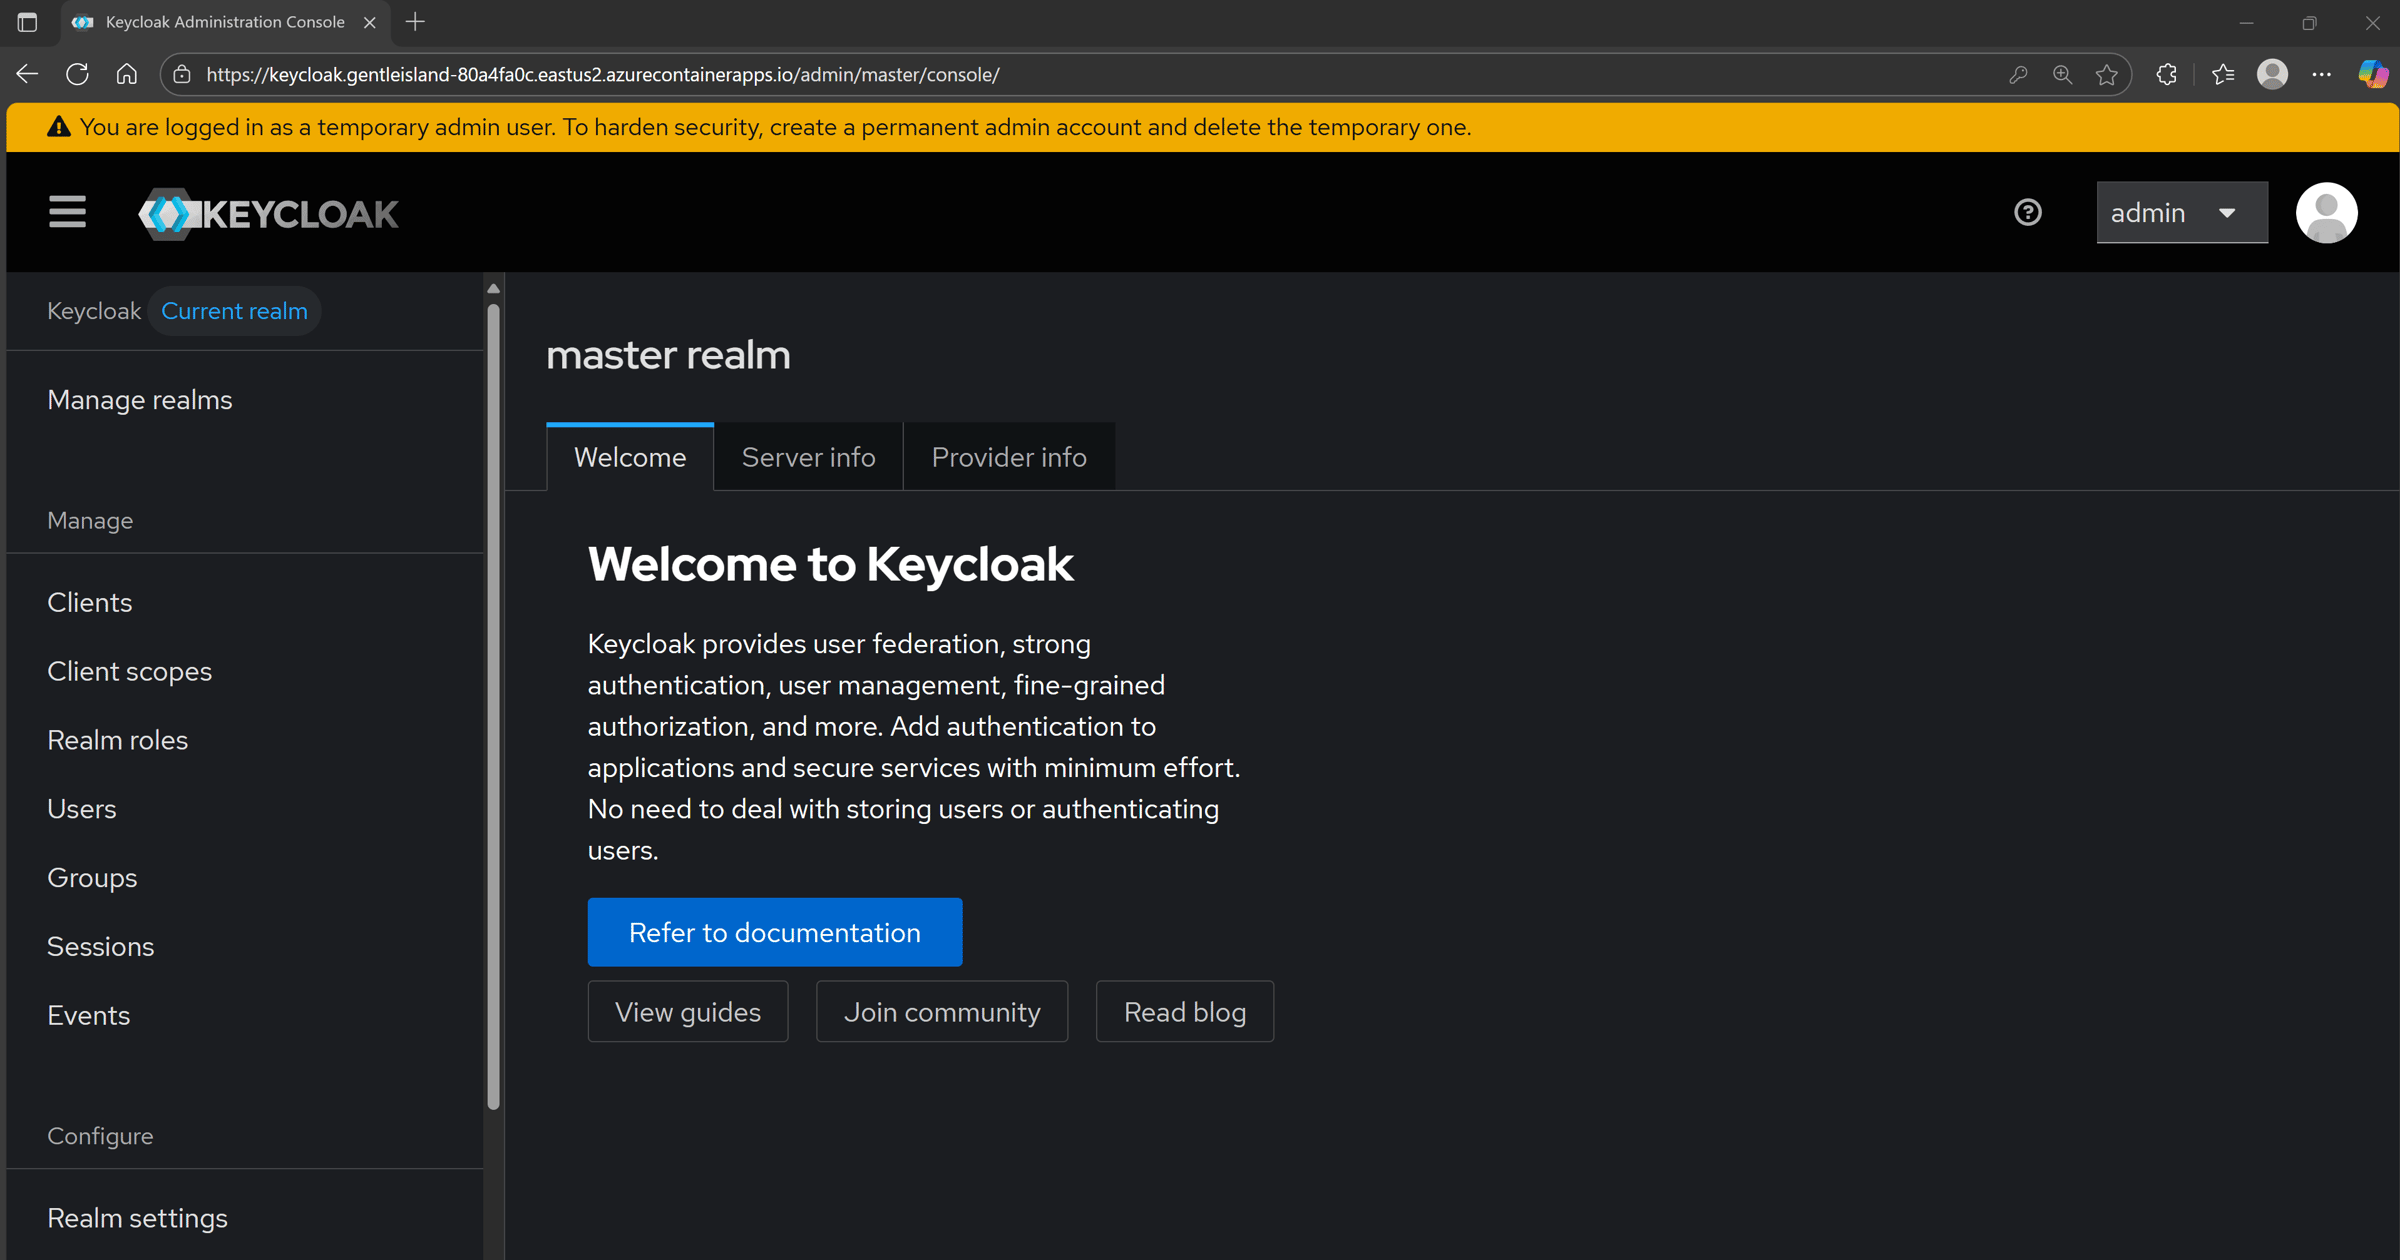
You can then use the admin password you just provisioned to sign in, and you’ll be good to go:
And, as a side detail that I find pretty cool, if you look closely at your ACA replica count, you might notice more than one replica already running for your Keycloak server:
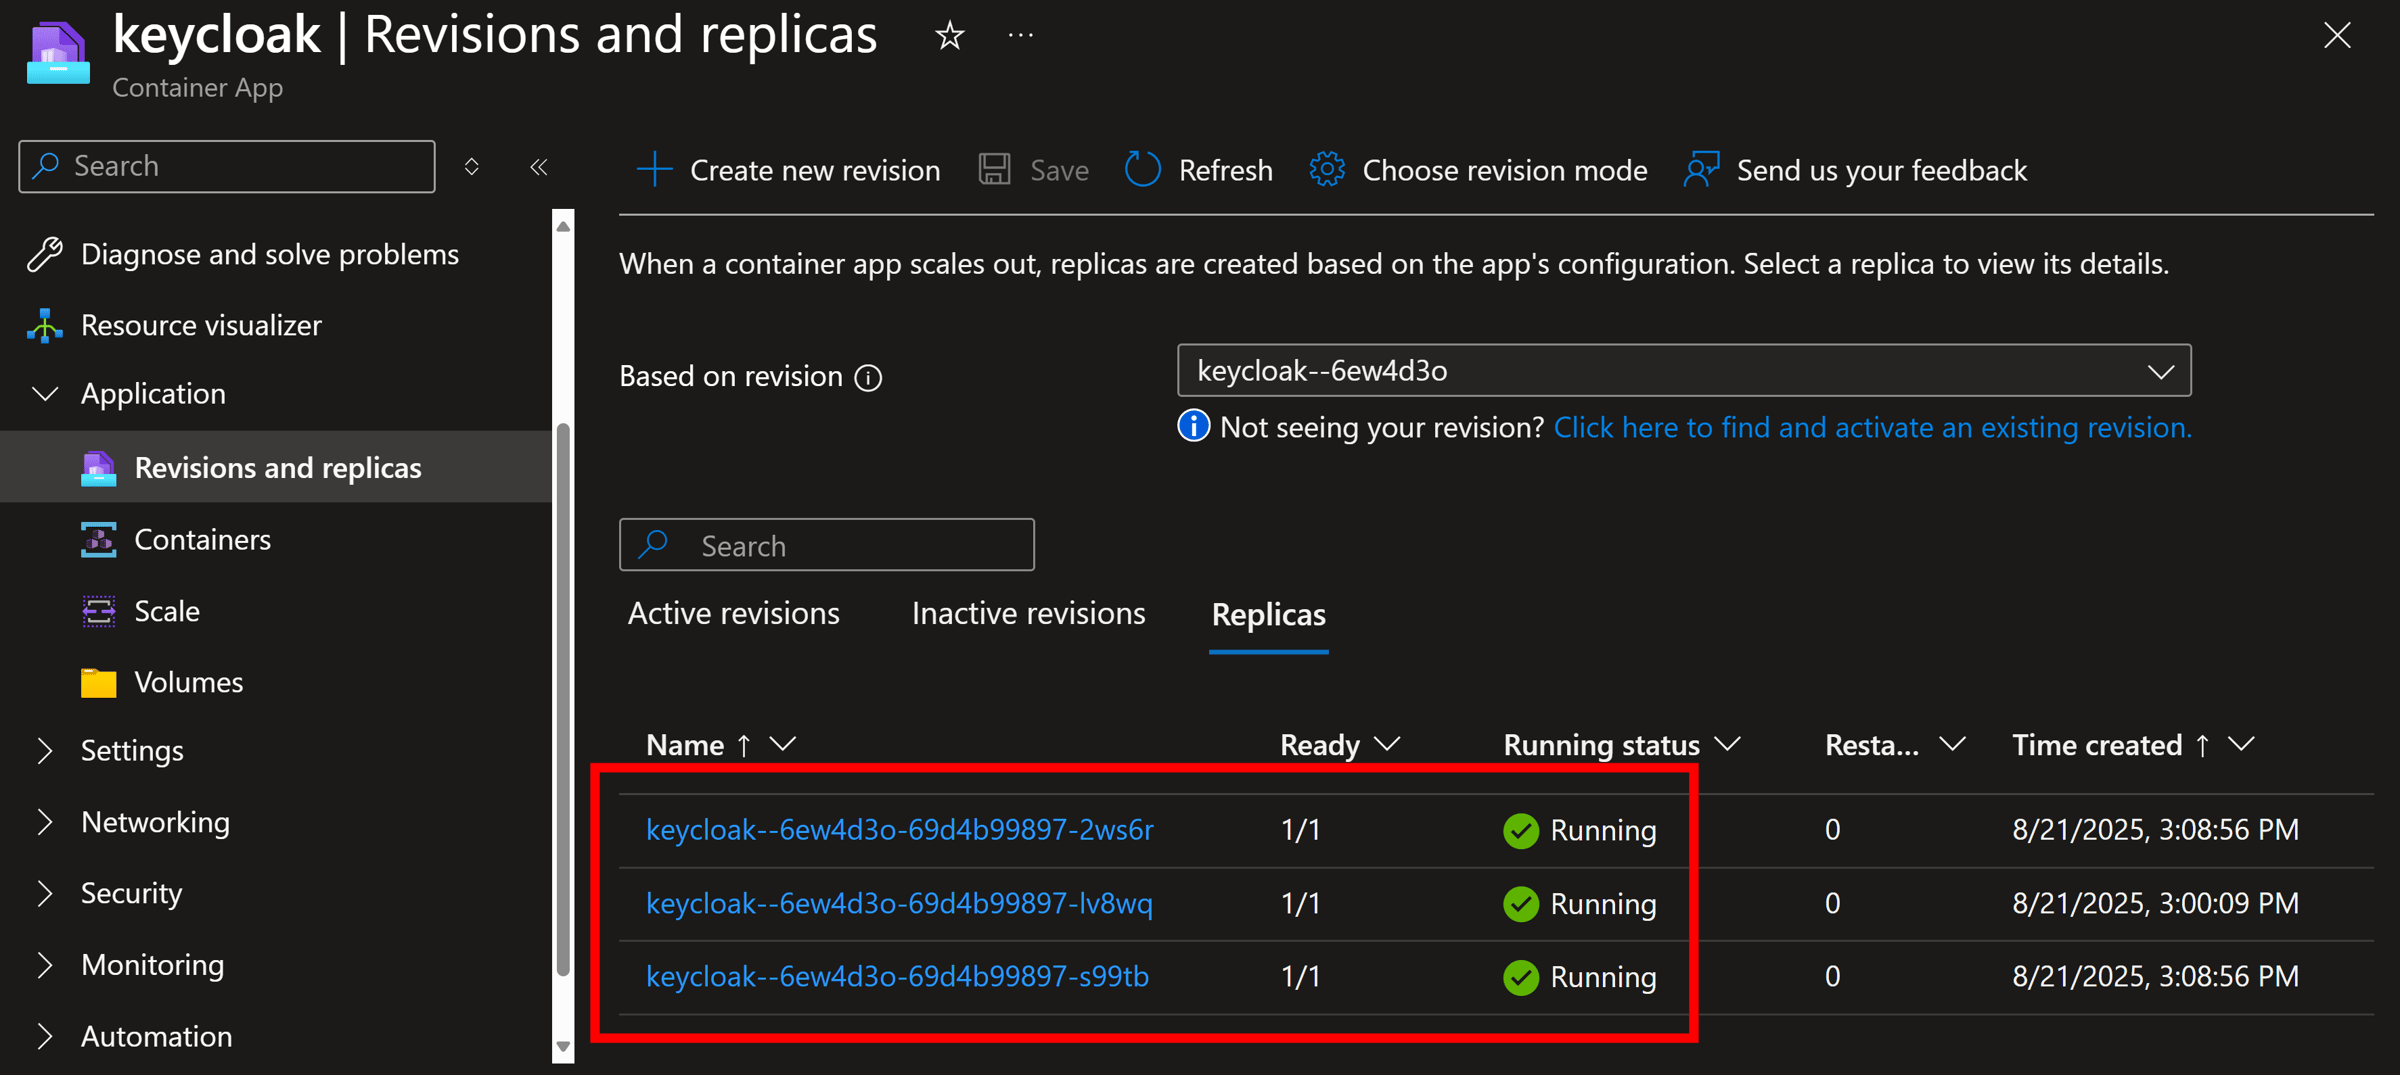
And, since all of them report a Running state, it means we now have 3 healthy Keycloak containers properly load-balanced by ACA and backed up by our production-grade Azure PostgreSQL DB.
Mission accomplished!
Wrapping Up
Getting Keycloak running locally is not too hard, but deploying it to Azure with the right configuration and a production level database is where the real challenge starts.
But with .NET Aspire, your entire Keycloak infrastructure becomes code and deploys consistently every single time.
And when the complexity of identity management is solved, you can focus on what really matters: building secure features for your users instead of wrestling with infrastructure headaches.
And that’s all for today.
See you next Saturday.
P.S. If you want to go deeper into fine-tuned Azure deployments with .NET Aspire, and secure a complete e-commerce system with Keycloak, it’s all covered in my Containers & Aspire course.
Whenever you’re ready, here’s how I can help:
The .NET Developer Bootcamp: A complete path from ASP.NET Core fundamentals to building, containerizing, and deploying production-ready, cloud-native apps on Azure.
