Read time: 10 minutes
My Keycloak tutorial became one of my most popular blog posts so far, and for good reason: It worked.
But let’s be honest about what “worked” actually meant.
Sure, authentication was running locally. But every new team member had to manually configure Keycloak realms from scratch.
And you had to remember to run docker-compose up before hitting F5.
We connected a local Keycloak server with our .NET app, but we didn’t solve the ‘works on my machine’ problem.
What if Keycloak could start automatically with your app, pre-configured with the exact realms and clients your application needs?
What if all connection details were wired up automatically for both backend and frontend?
That’s exactly what .NET Aspire makes possible.
Today, I’ll show you how to take everything we built in the previous tutorial and make it truly clone-and-F5 ready.
Just clone, run, and authenticate.
Let’s dive in.
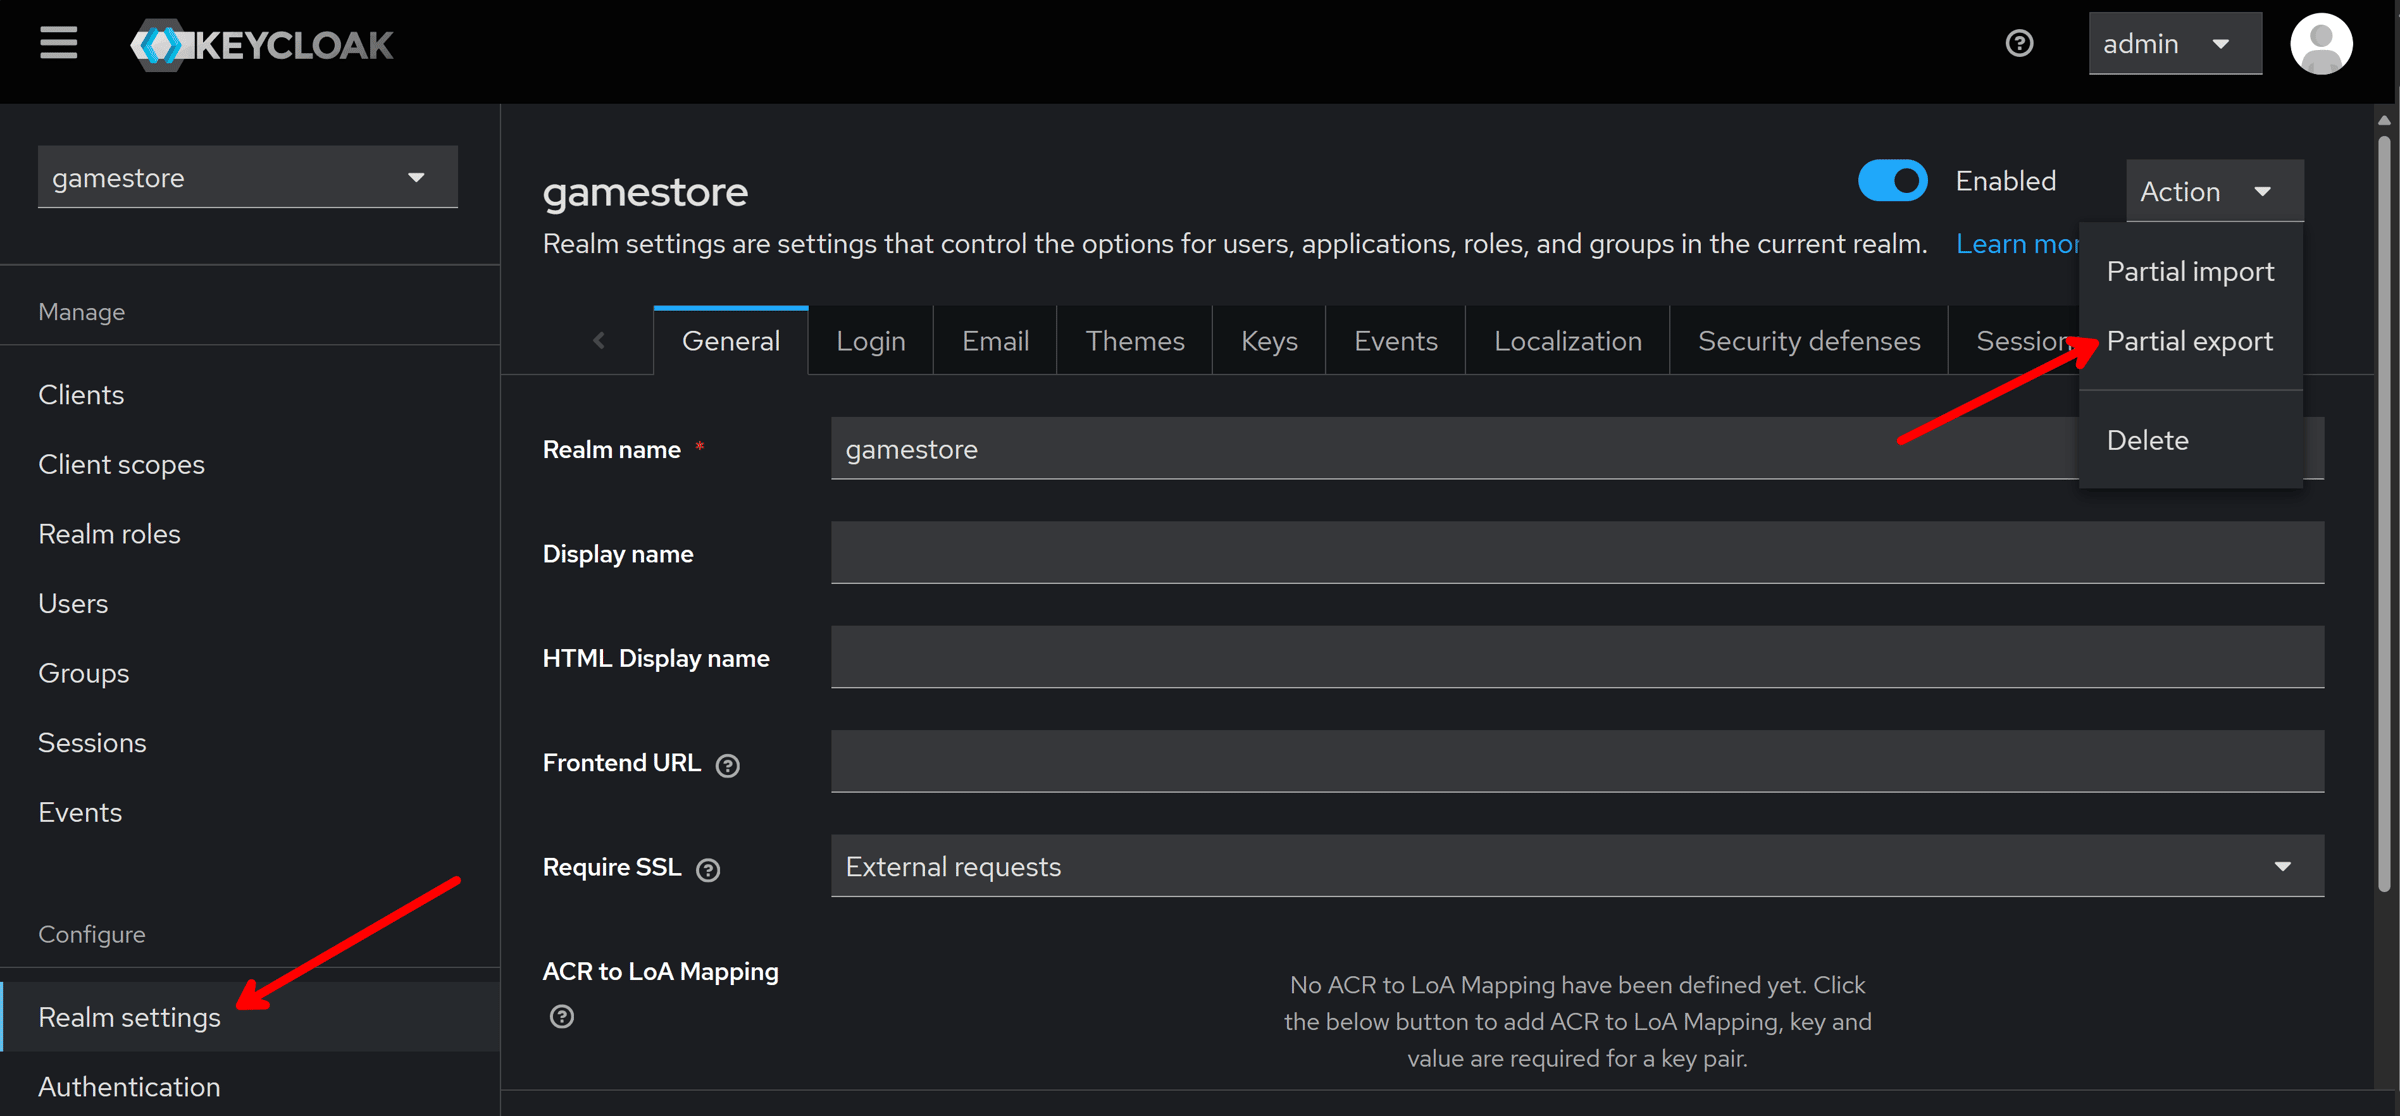
Step 1: Export your Keycloak realm
We want to avoid having to configure a new Keycloak realm every time we (or our teammates) clone our application.
So let’s start by exporting our existing realm from the Admin Console:
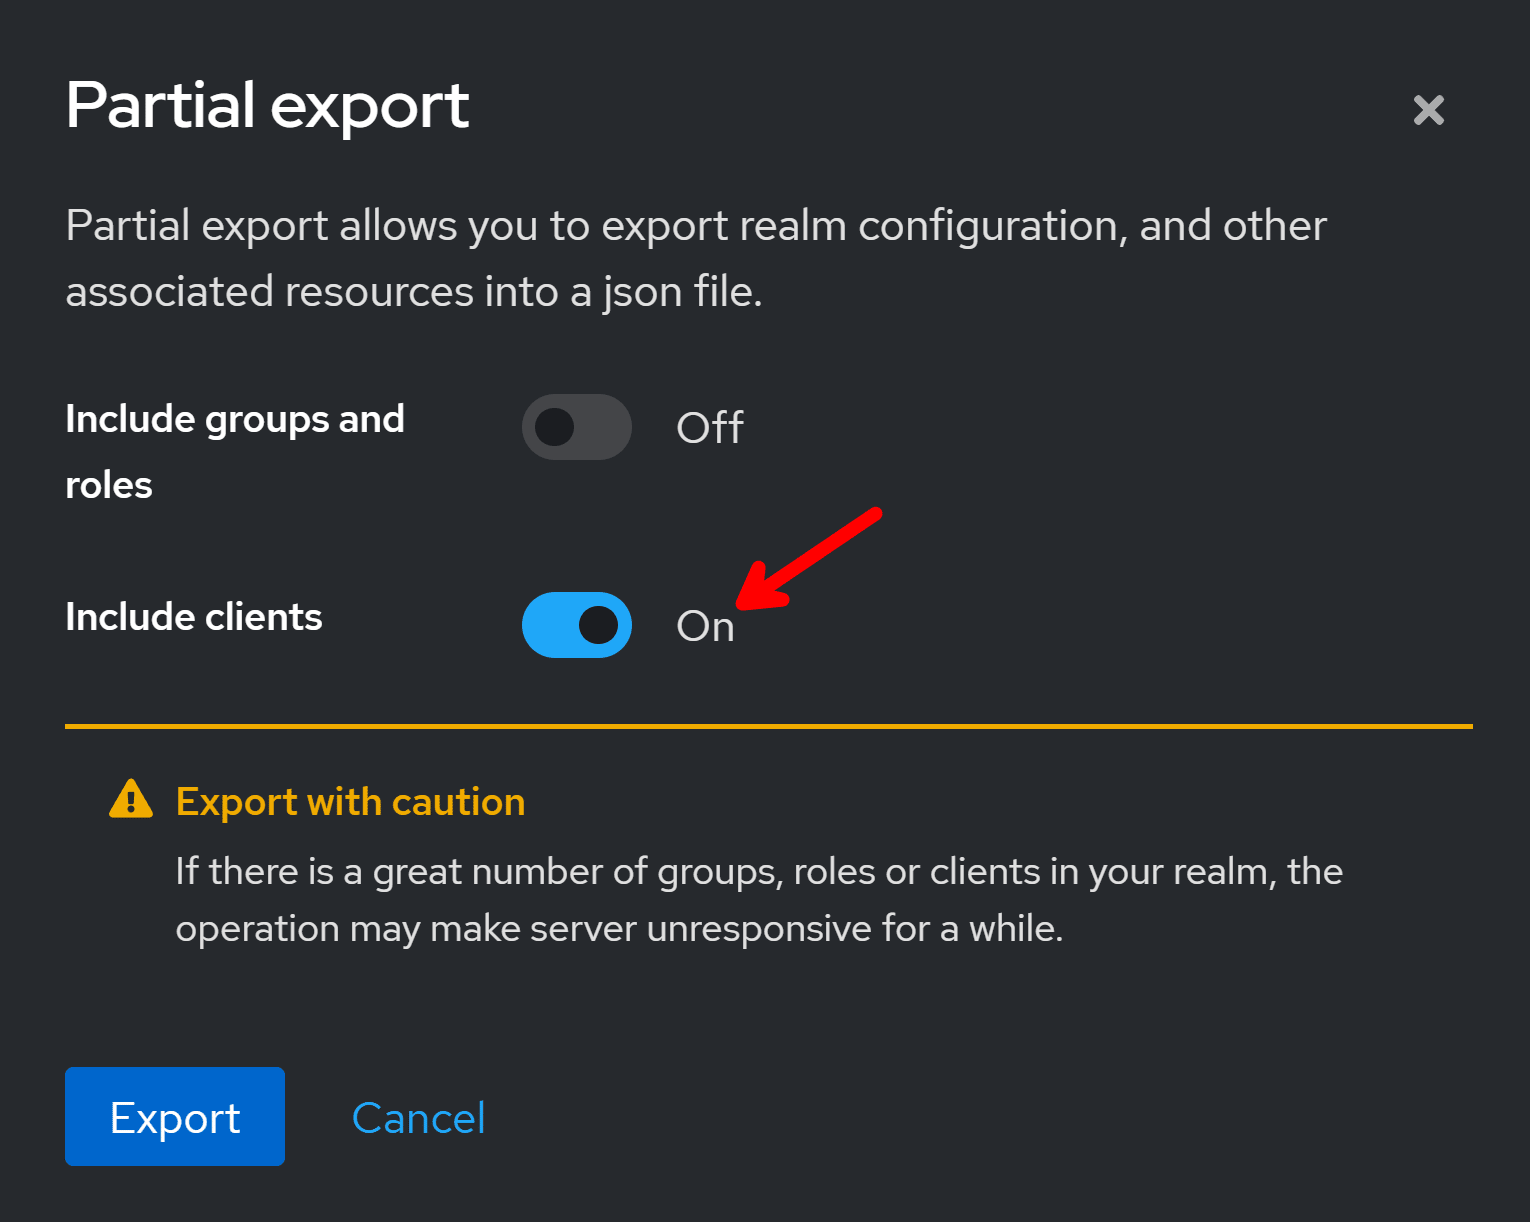
In the export dialog, we also want to include the API and Frontend clients we already configured:
The result of the export is a big json file that you should give a proper name and place somewhere in your repository, like the new infra\realms folder I created in mine:
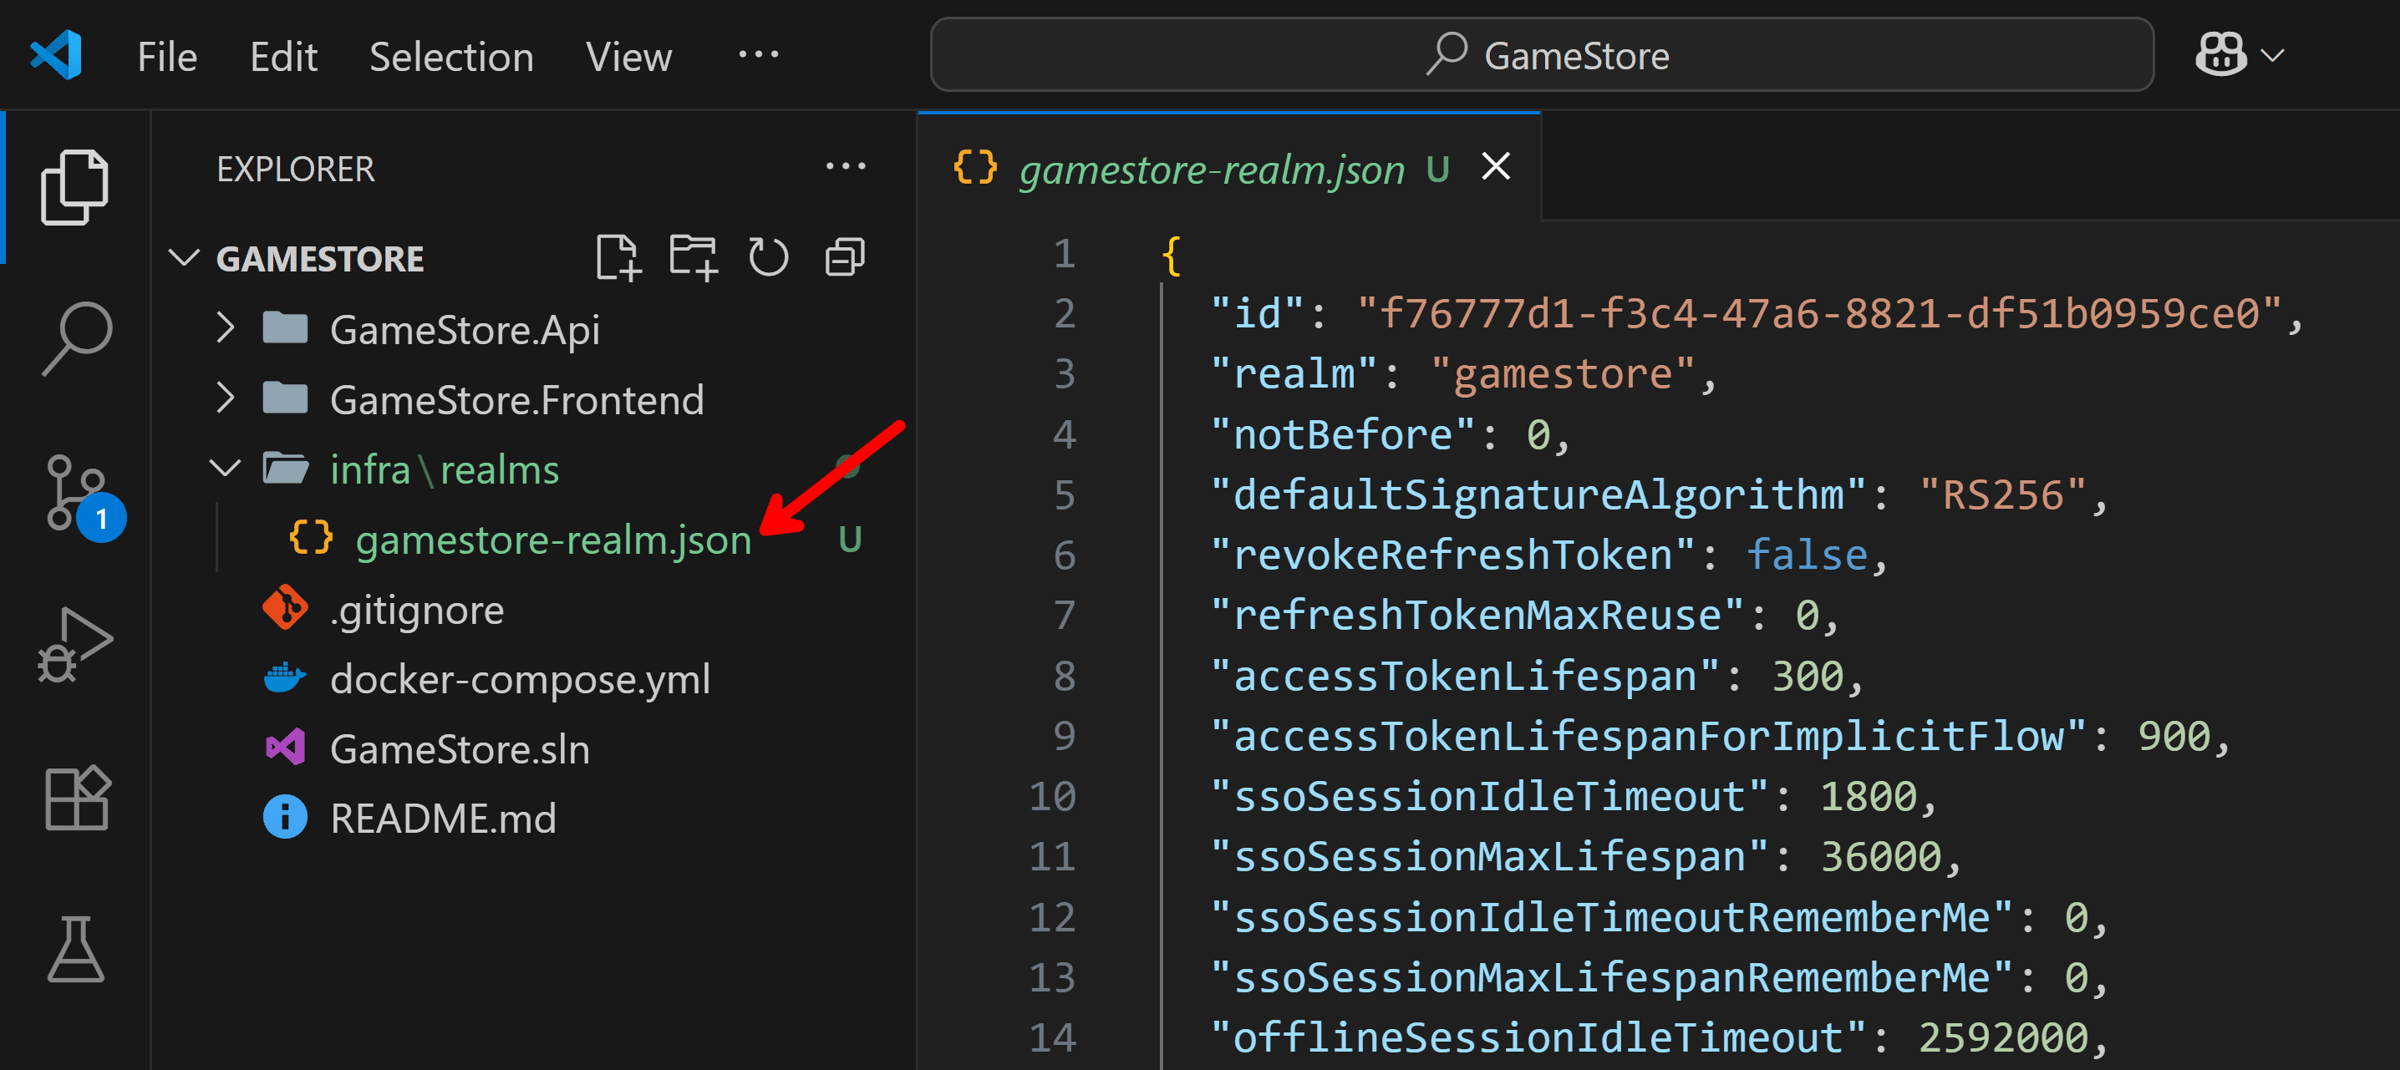
As you’ll see later, we will be able to provide this json file to our Aspire app model so it boots Keycloak with a ready-to-go realm, no manual setup required (other than creating users).
Next, let’s introduce Aspire to our repo.
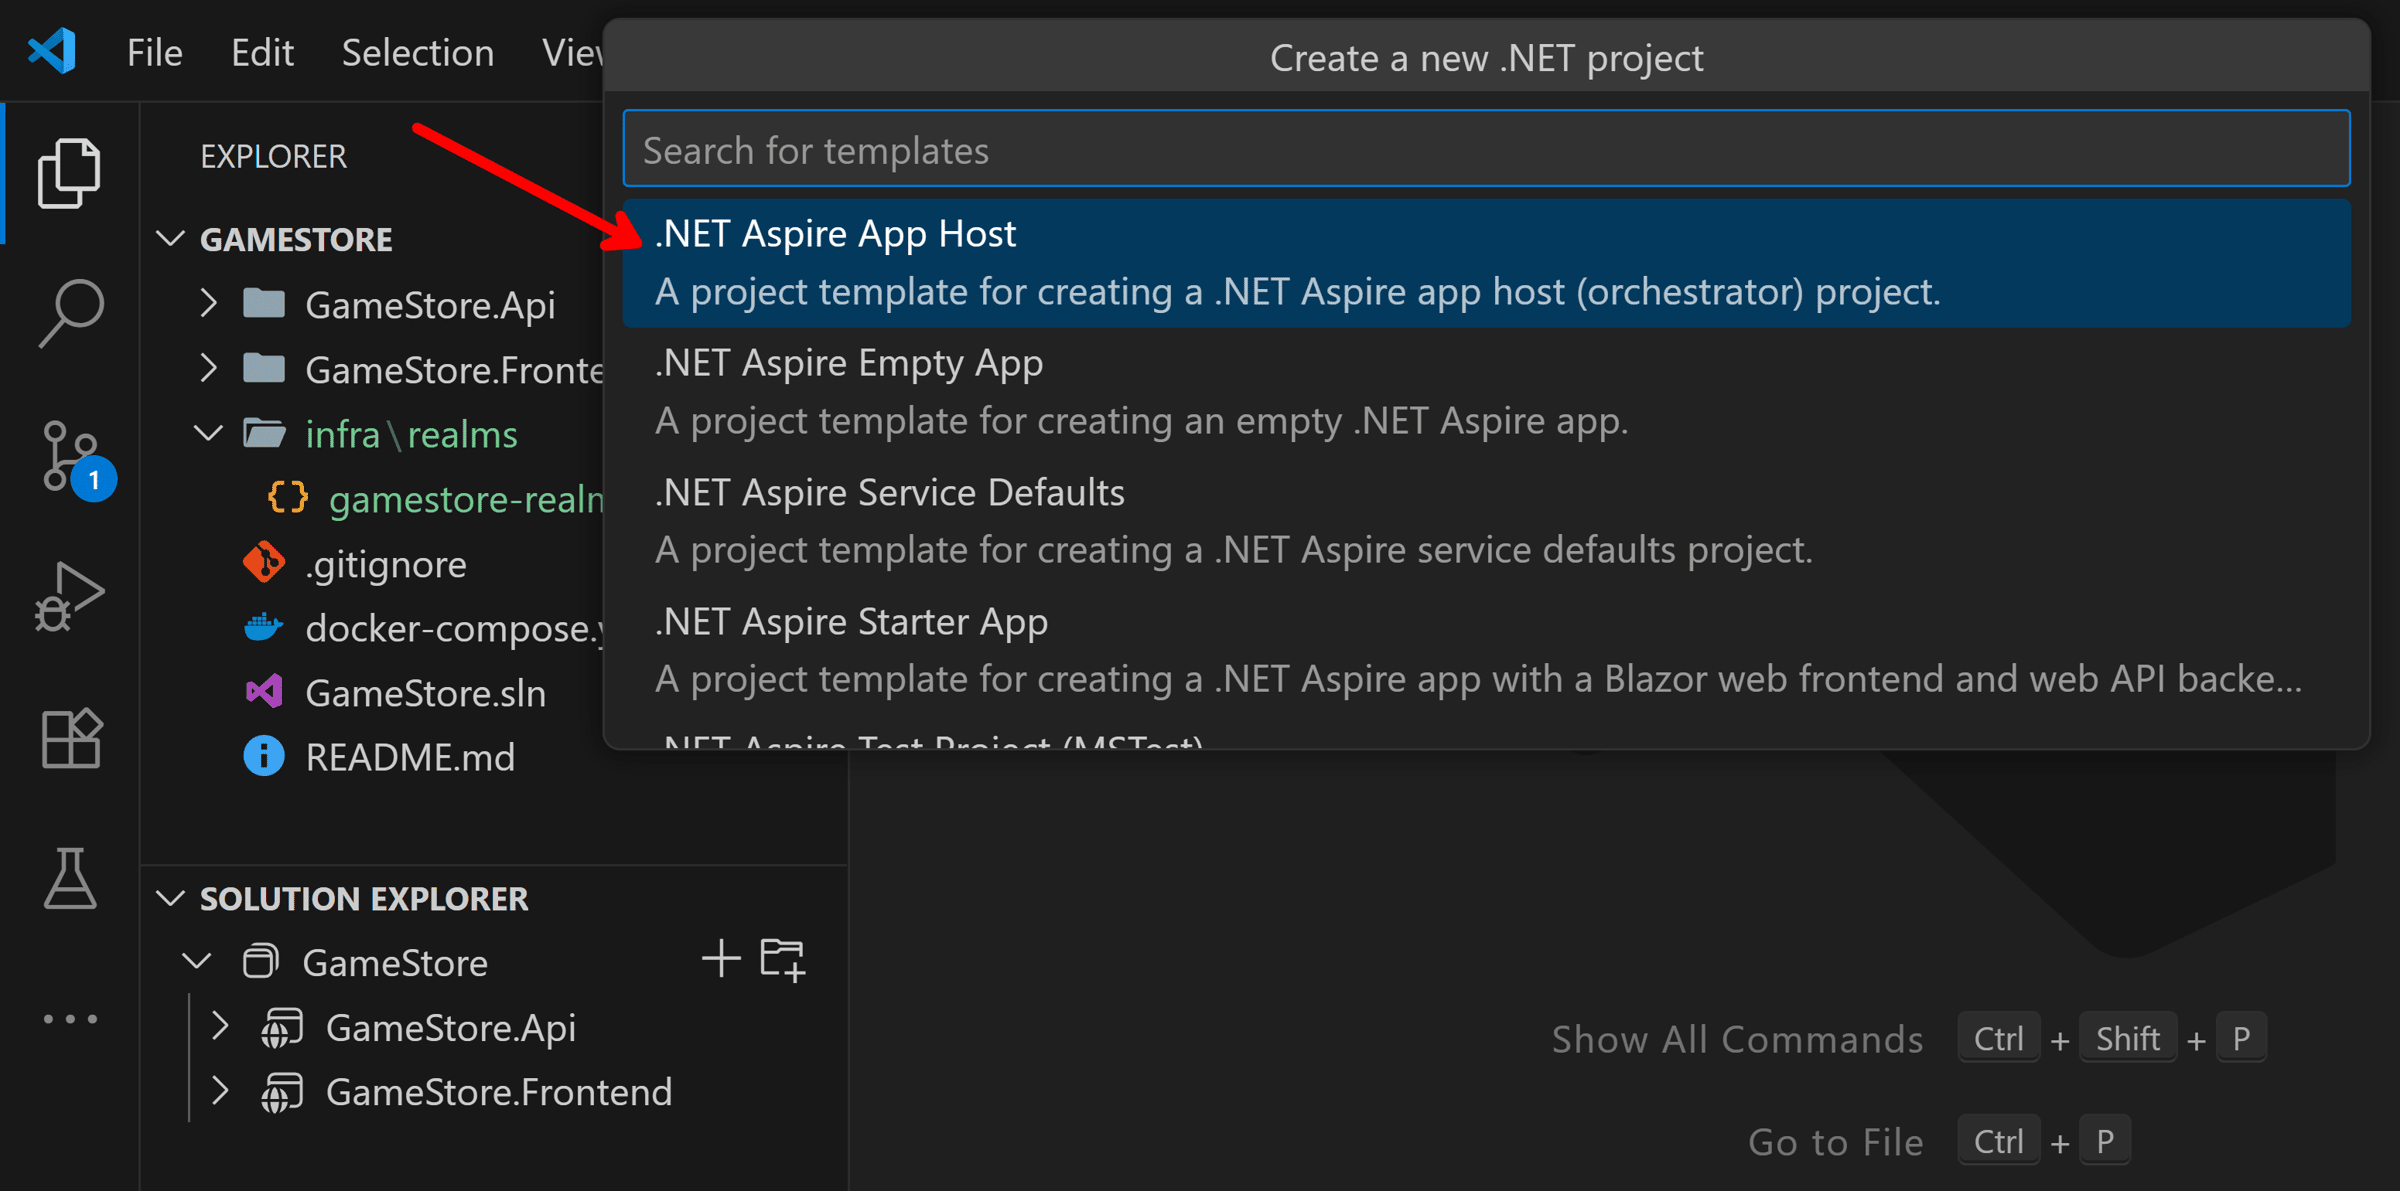
Step 2: Add .NET Aspire
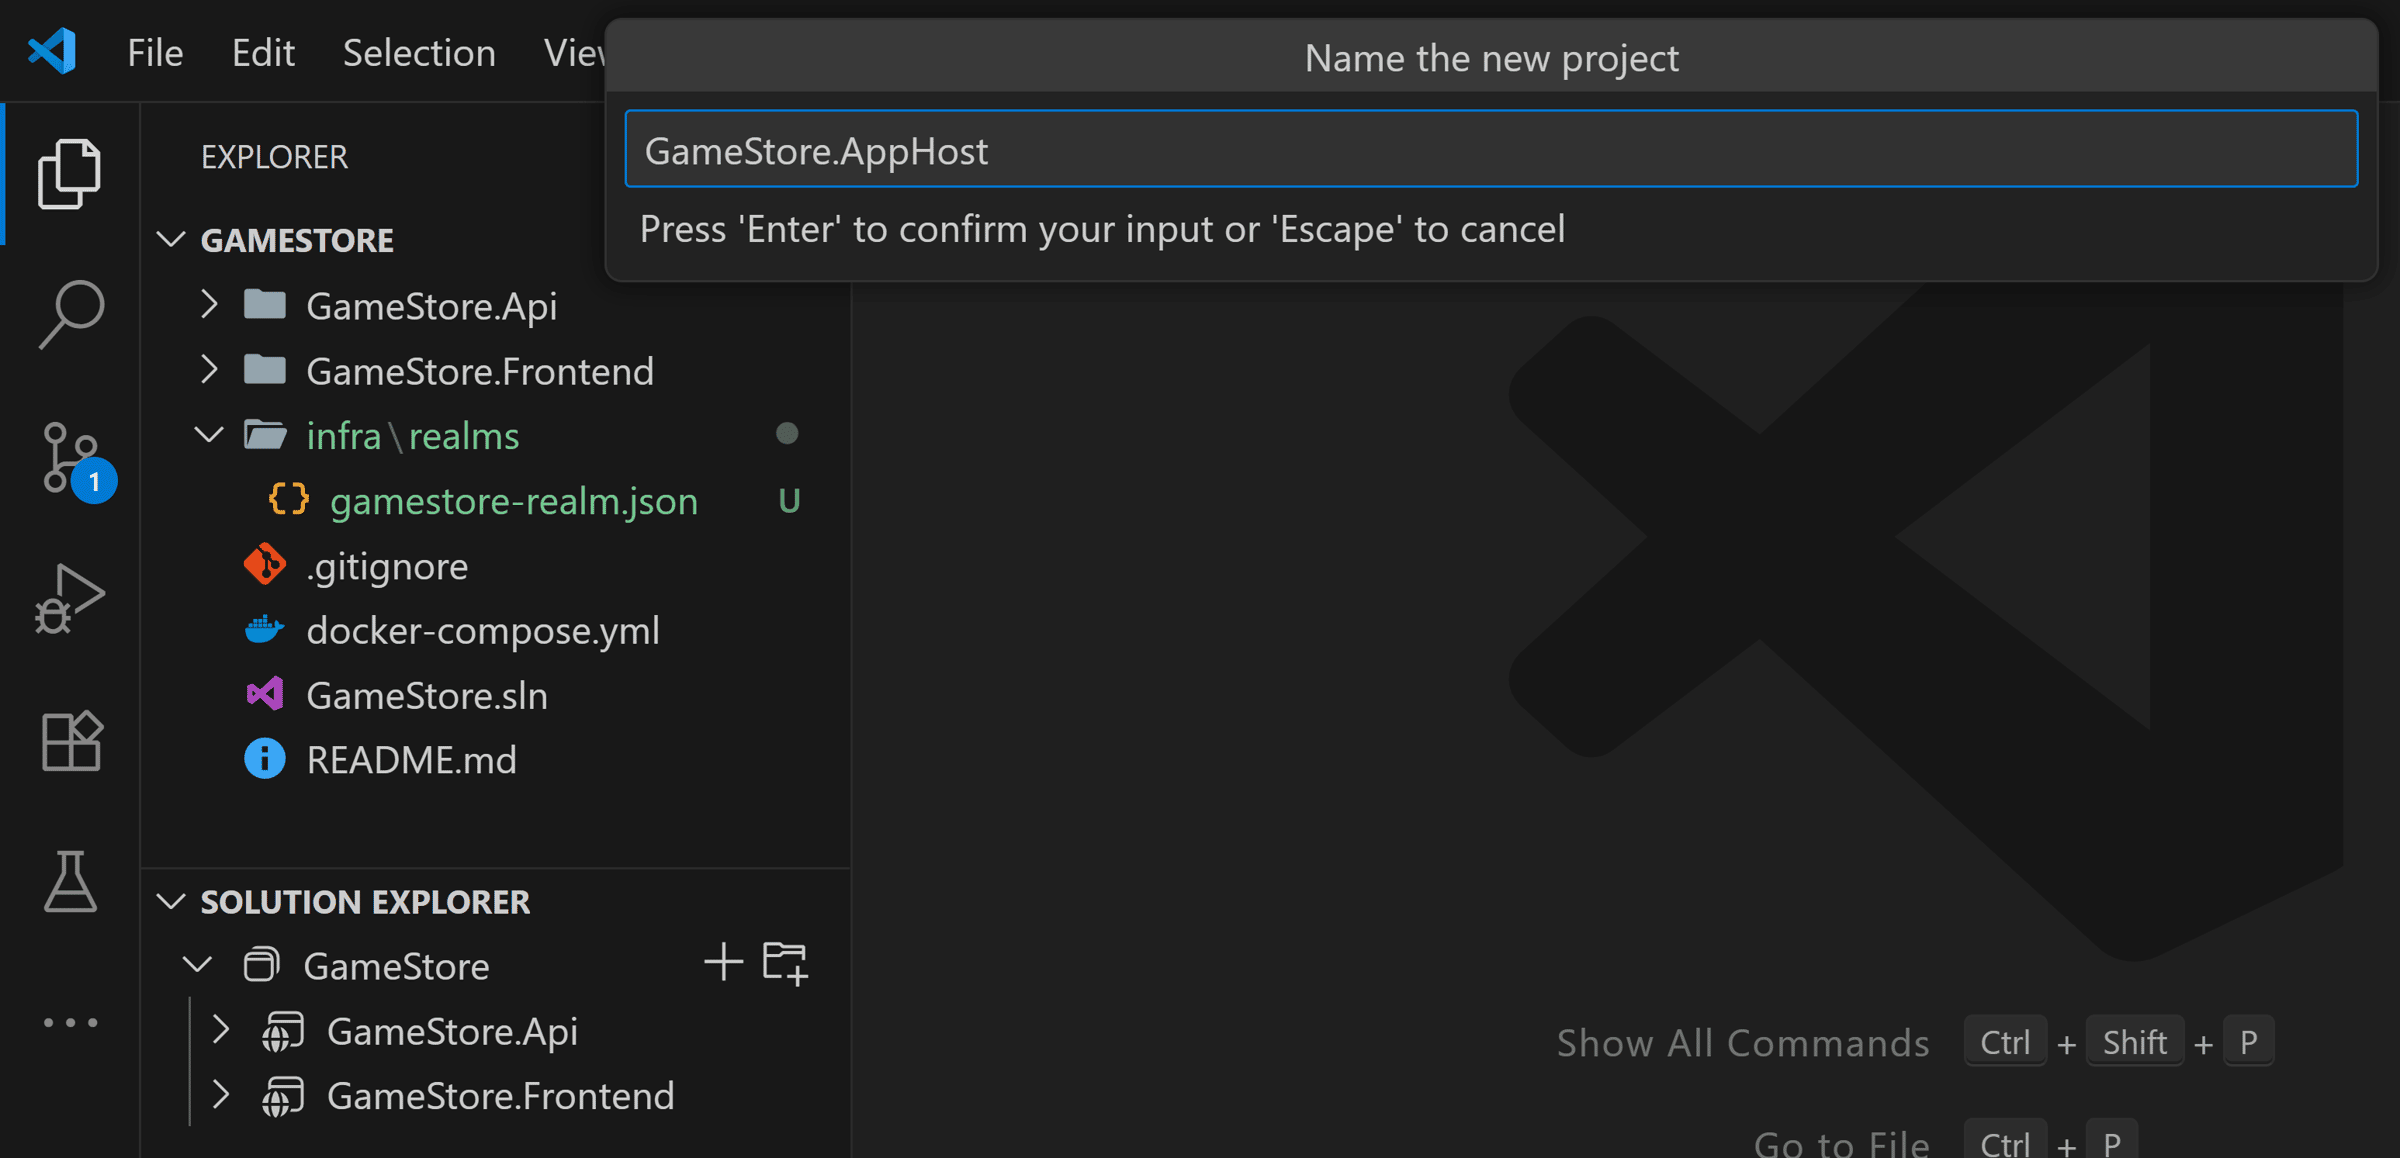
Let’s start by adding our Aspire AppHost project, where we will define our application model:
Give it a proper name:
And let’s make sure it targets .NET 8, same as the rest of our projects:
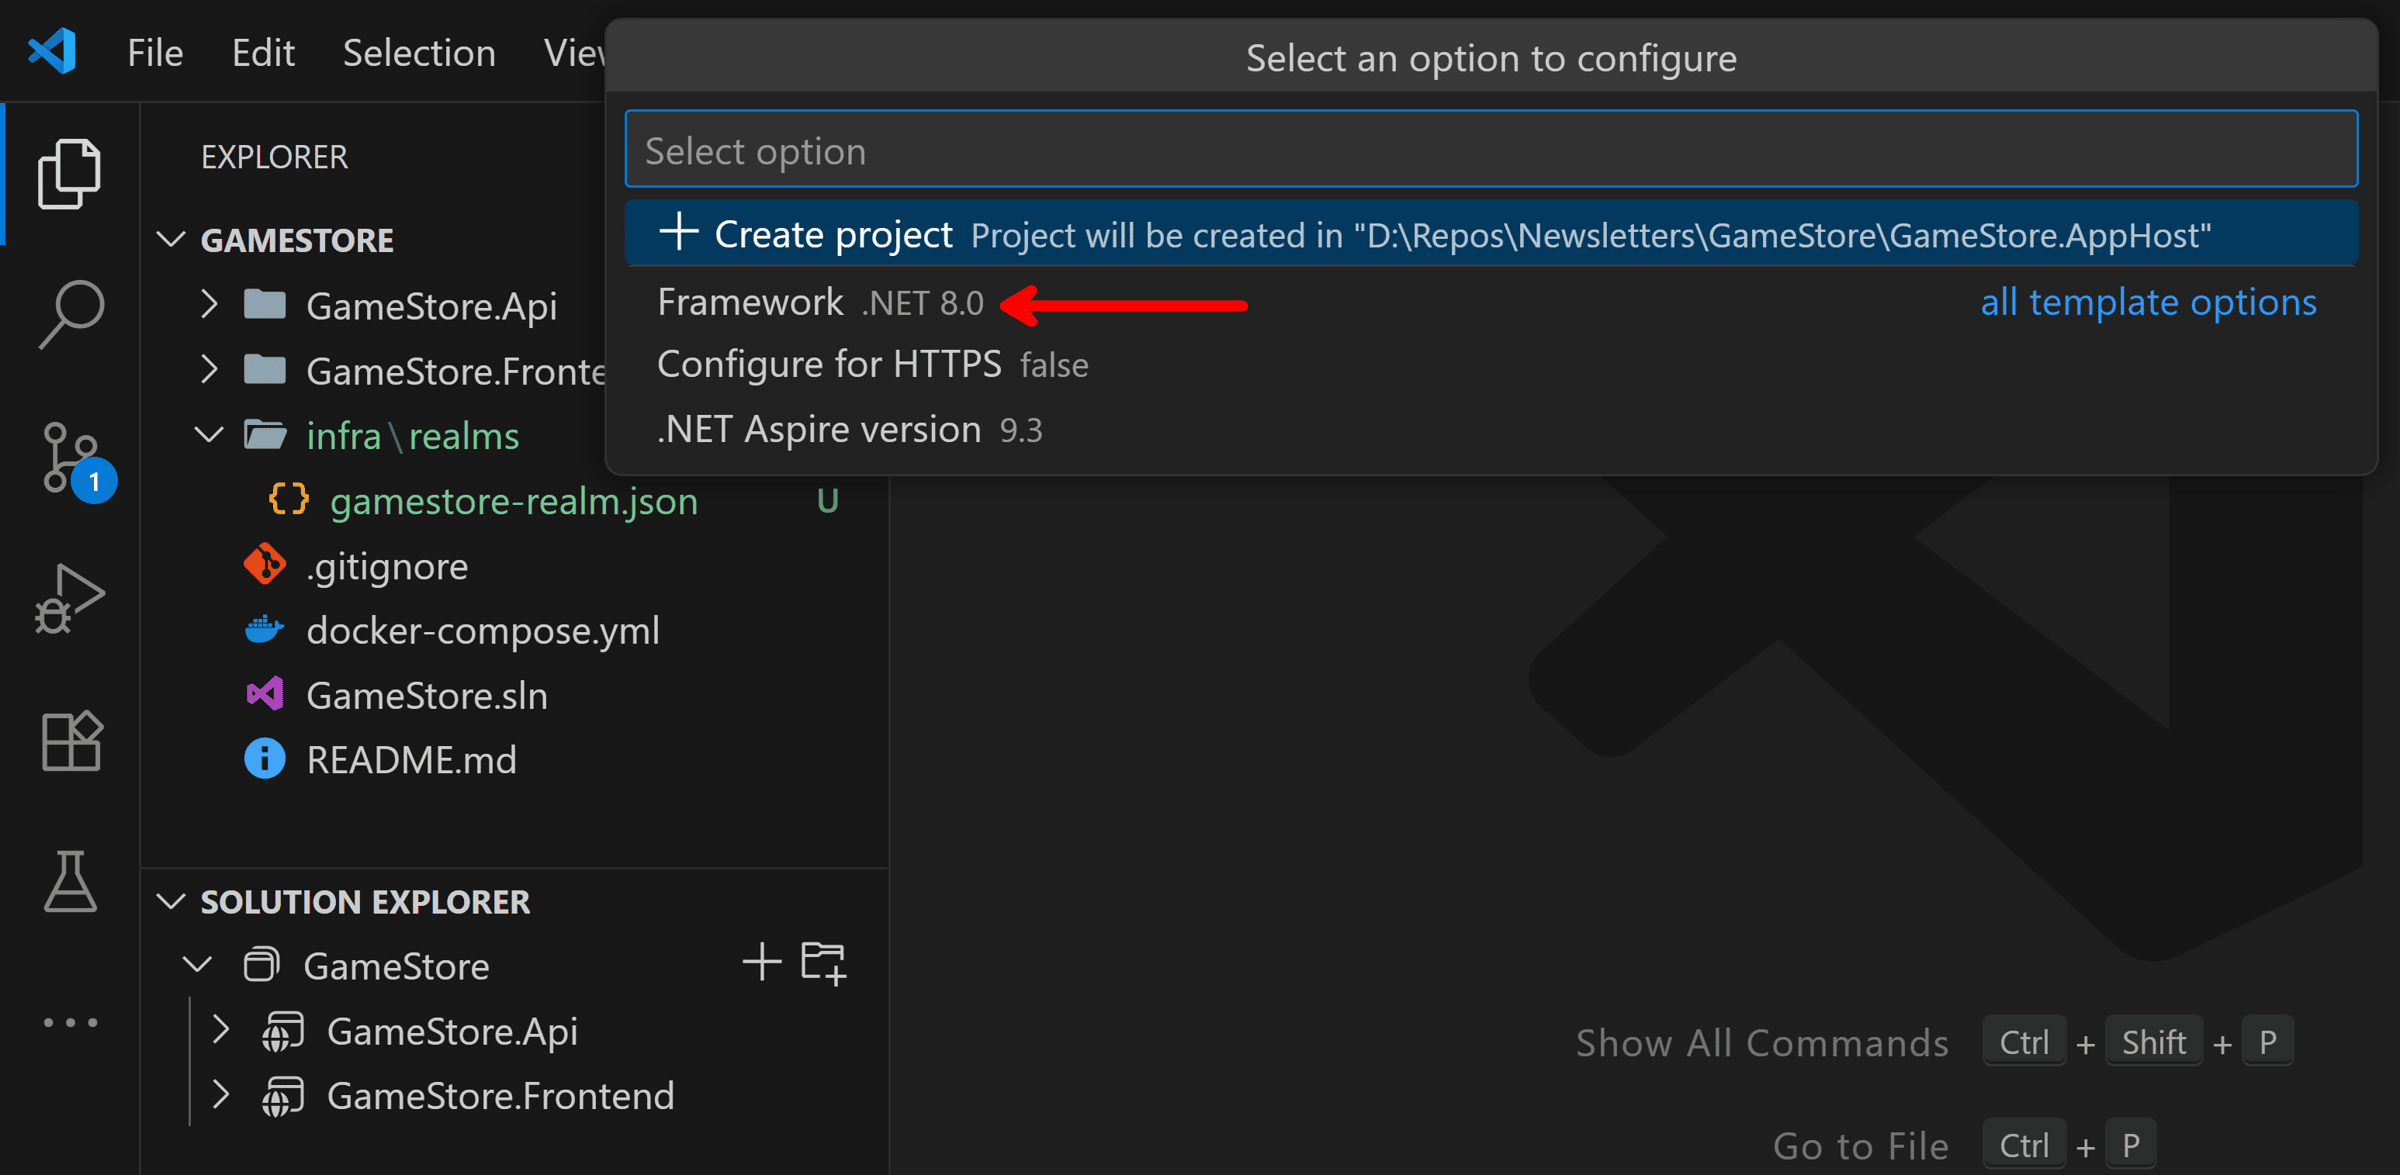
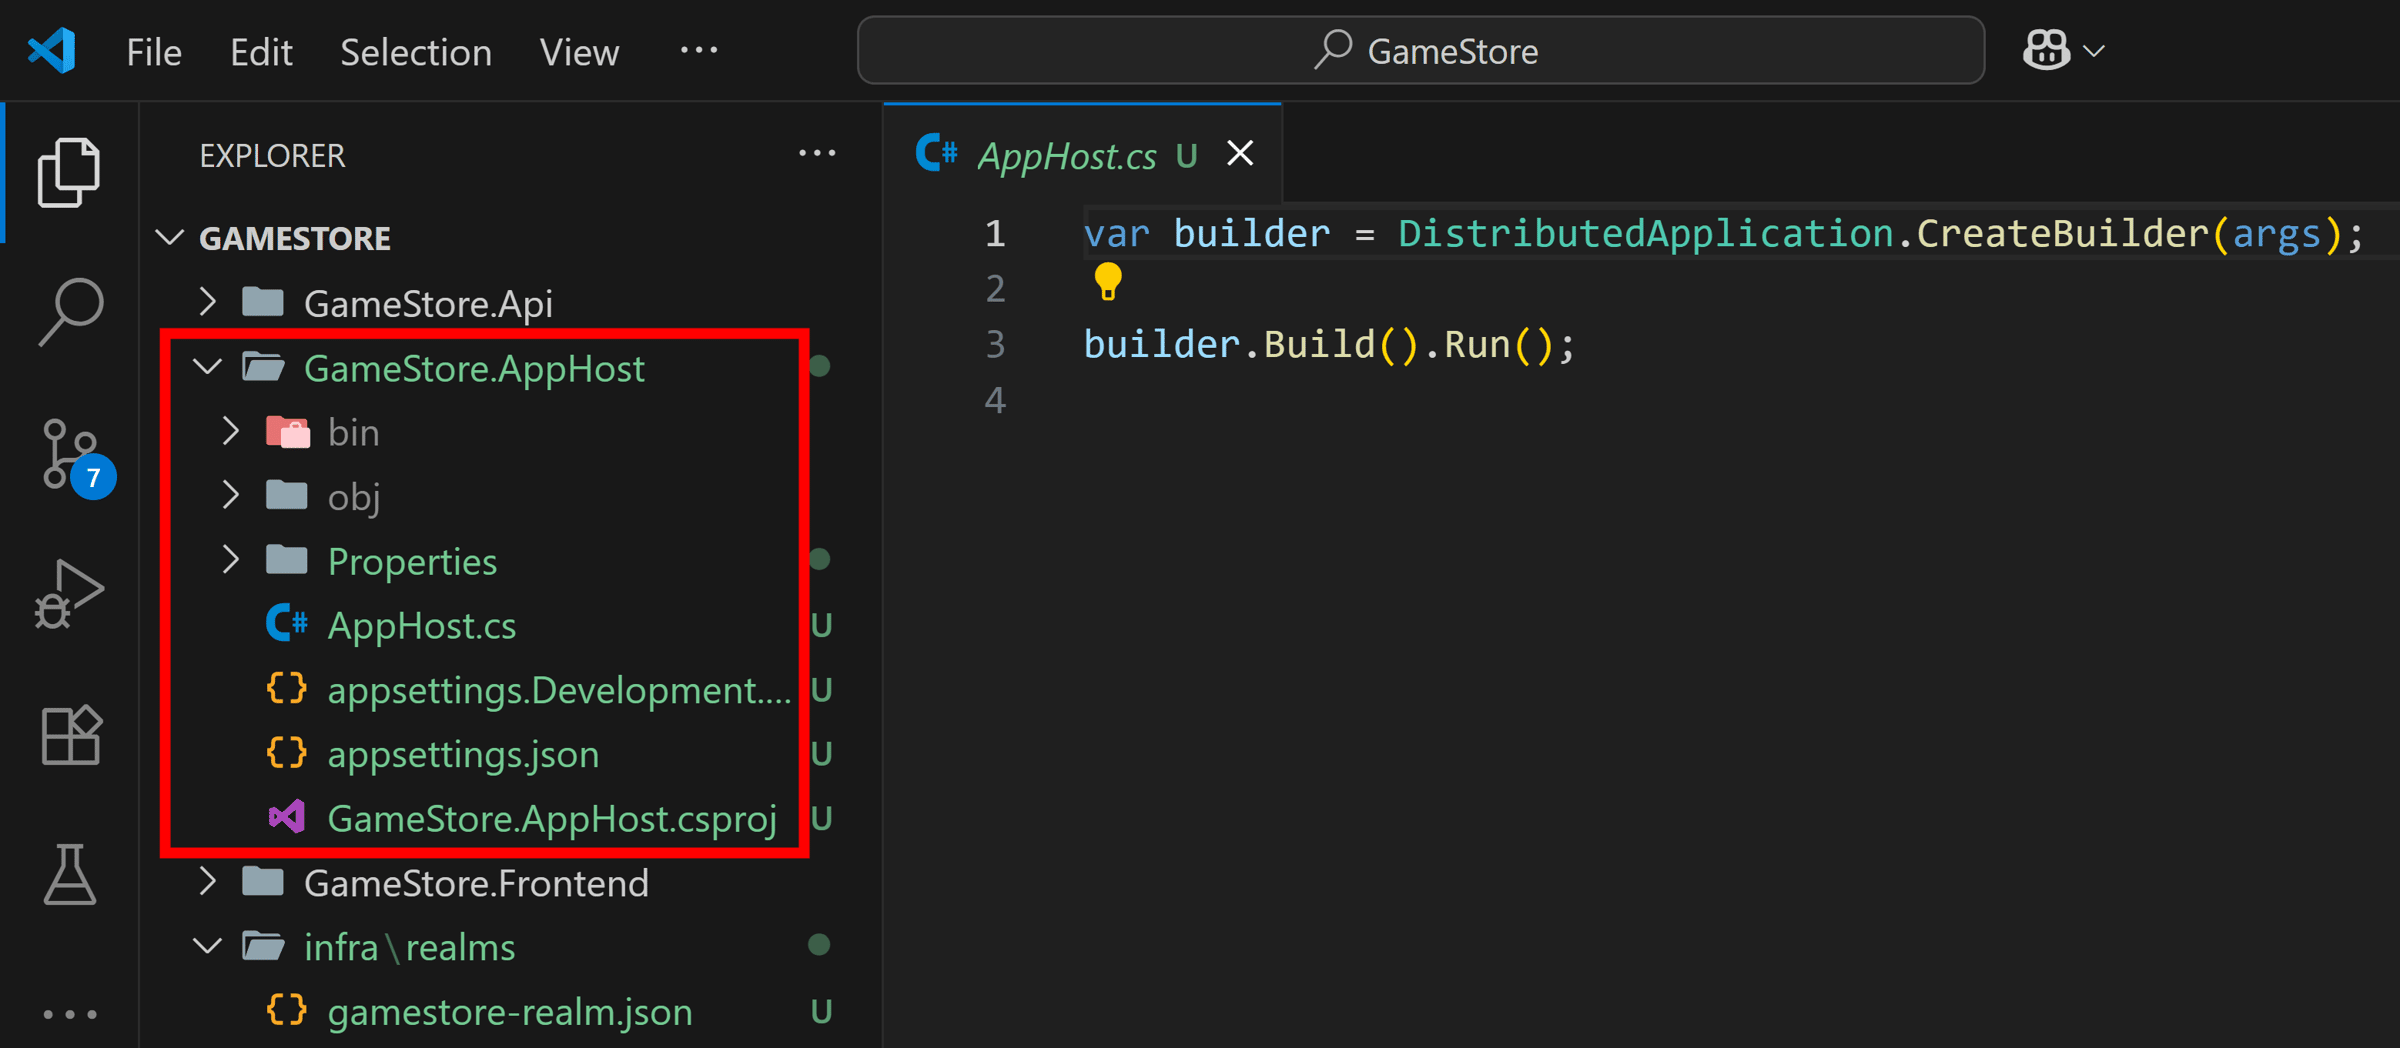
The new AppHost project is ready:
Now, let’s bring in Keycloak.
Step 3: Add Keycloak to your App Model
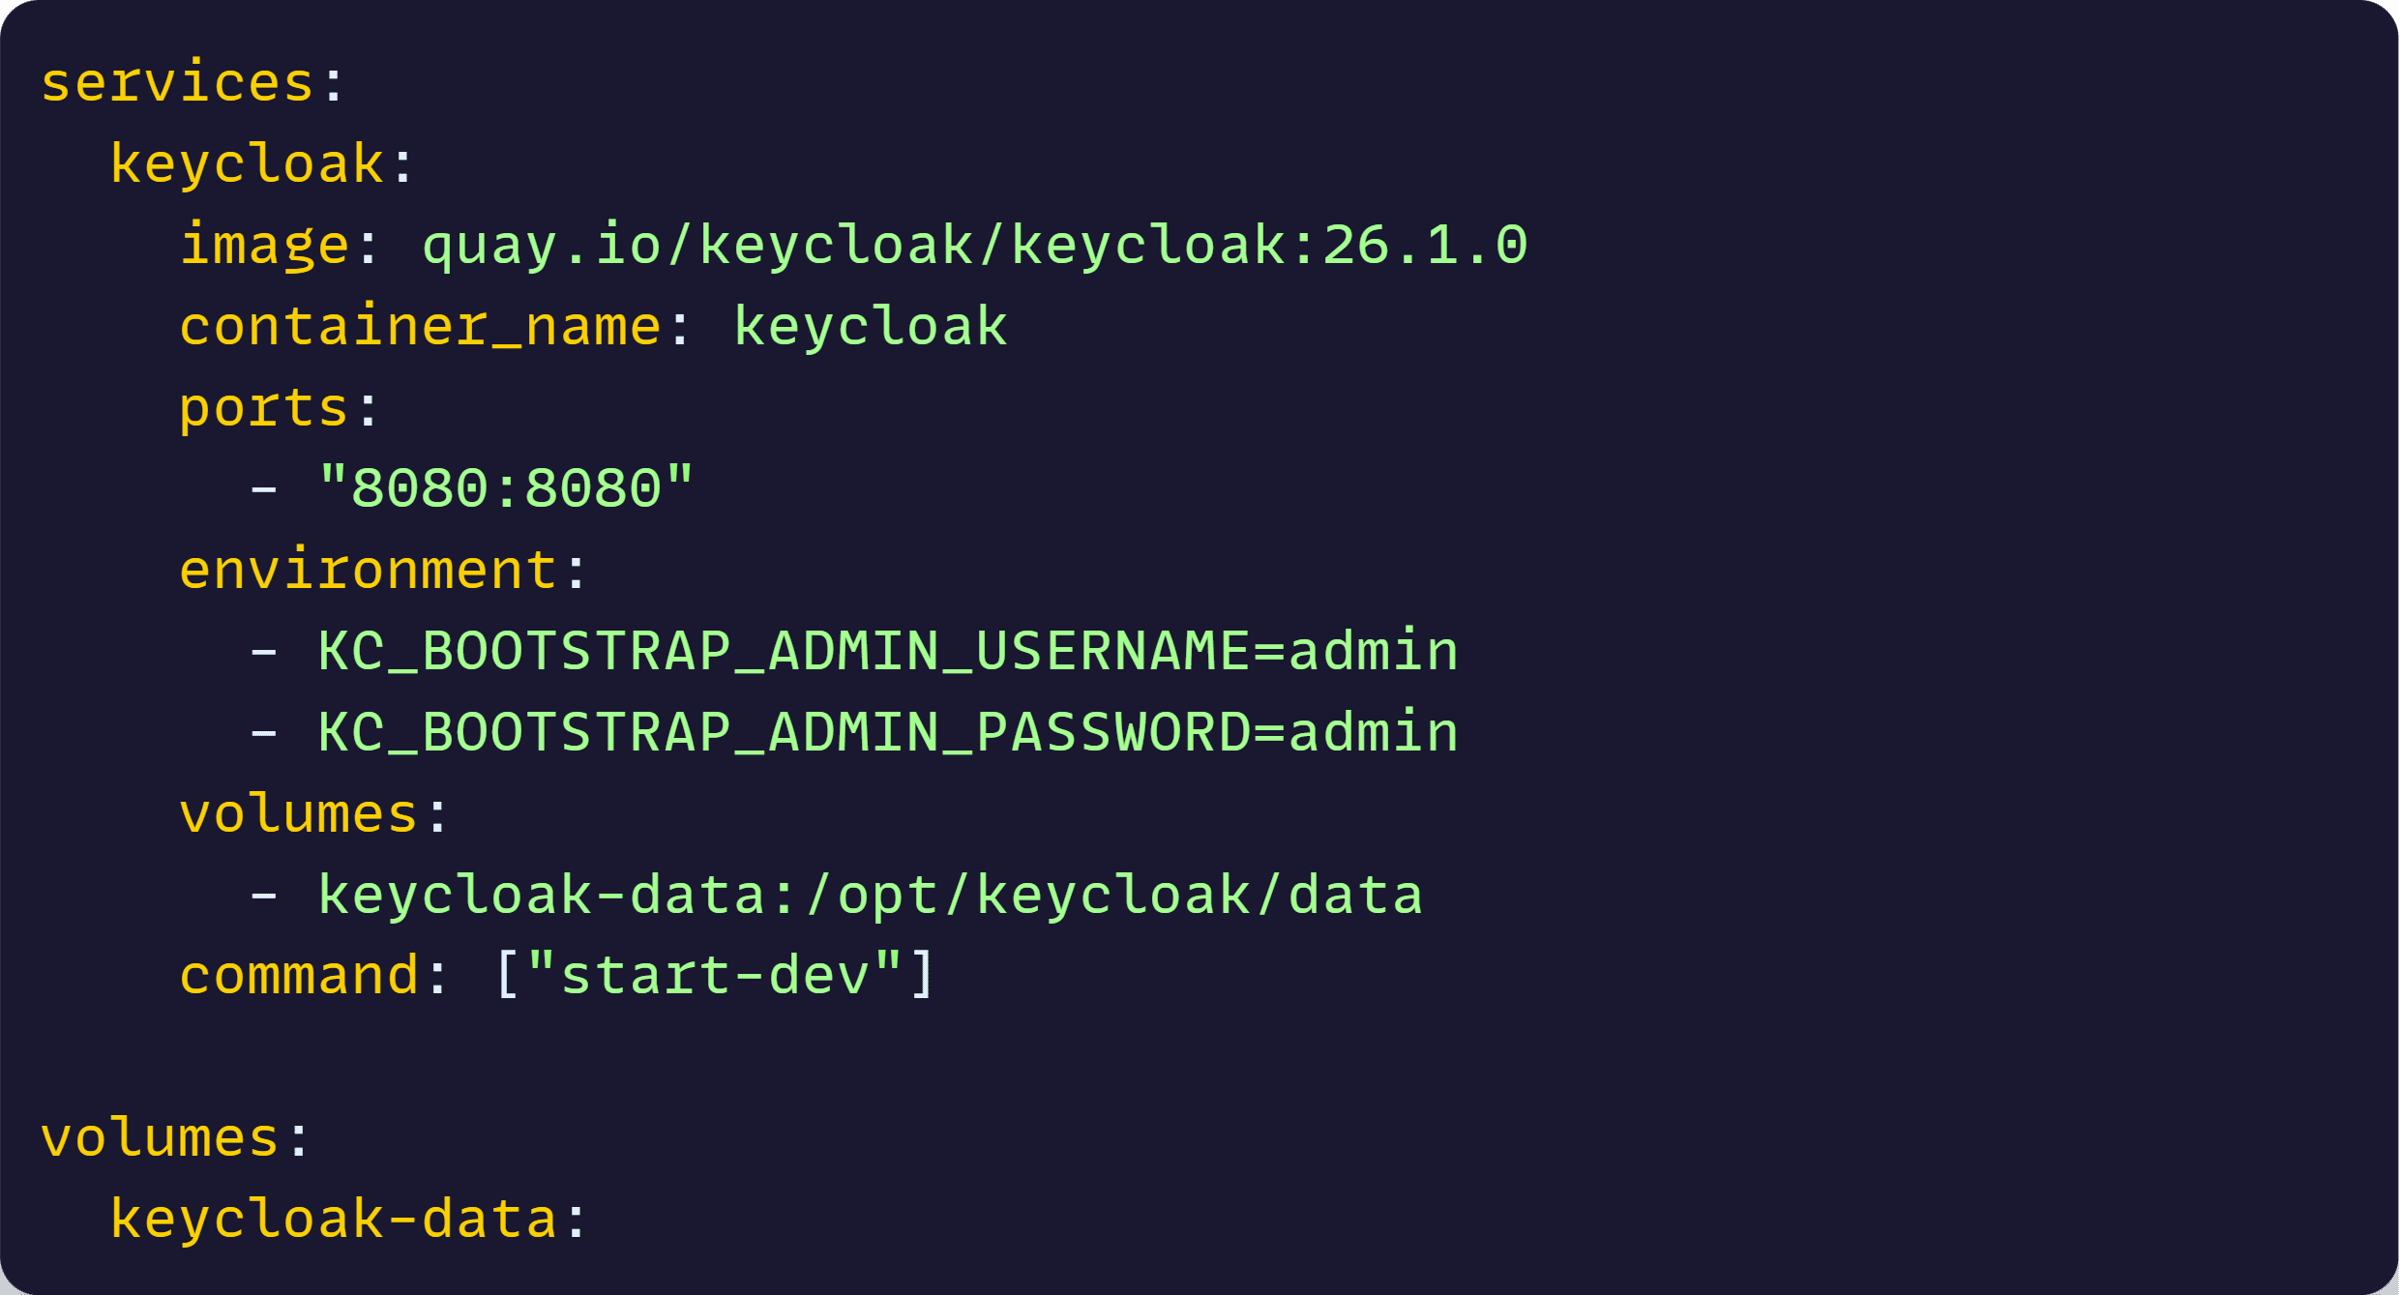
So far, we are standing up our Keycloak server locally via our docker-compose.yml file:
But with .NET Aspire, we can move all that directly into our application model, so Keycloak is always available when our .NET system starts, no extra steps required.
Let’s install the required Keycloak hosting integration into our AppHost project:

Now let’s add a few lines to our AppHost.cs file:
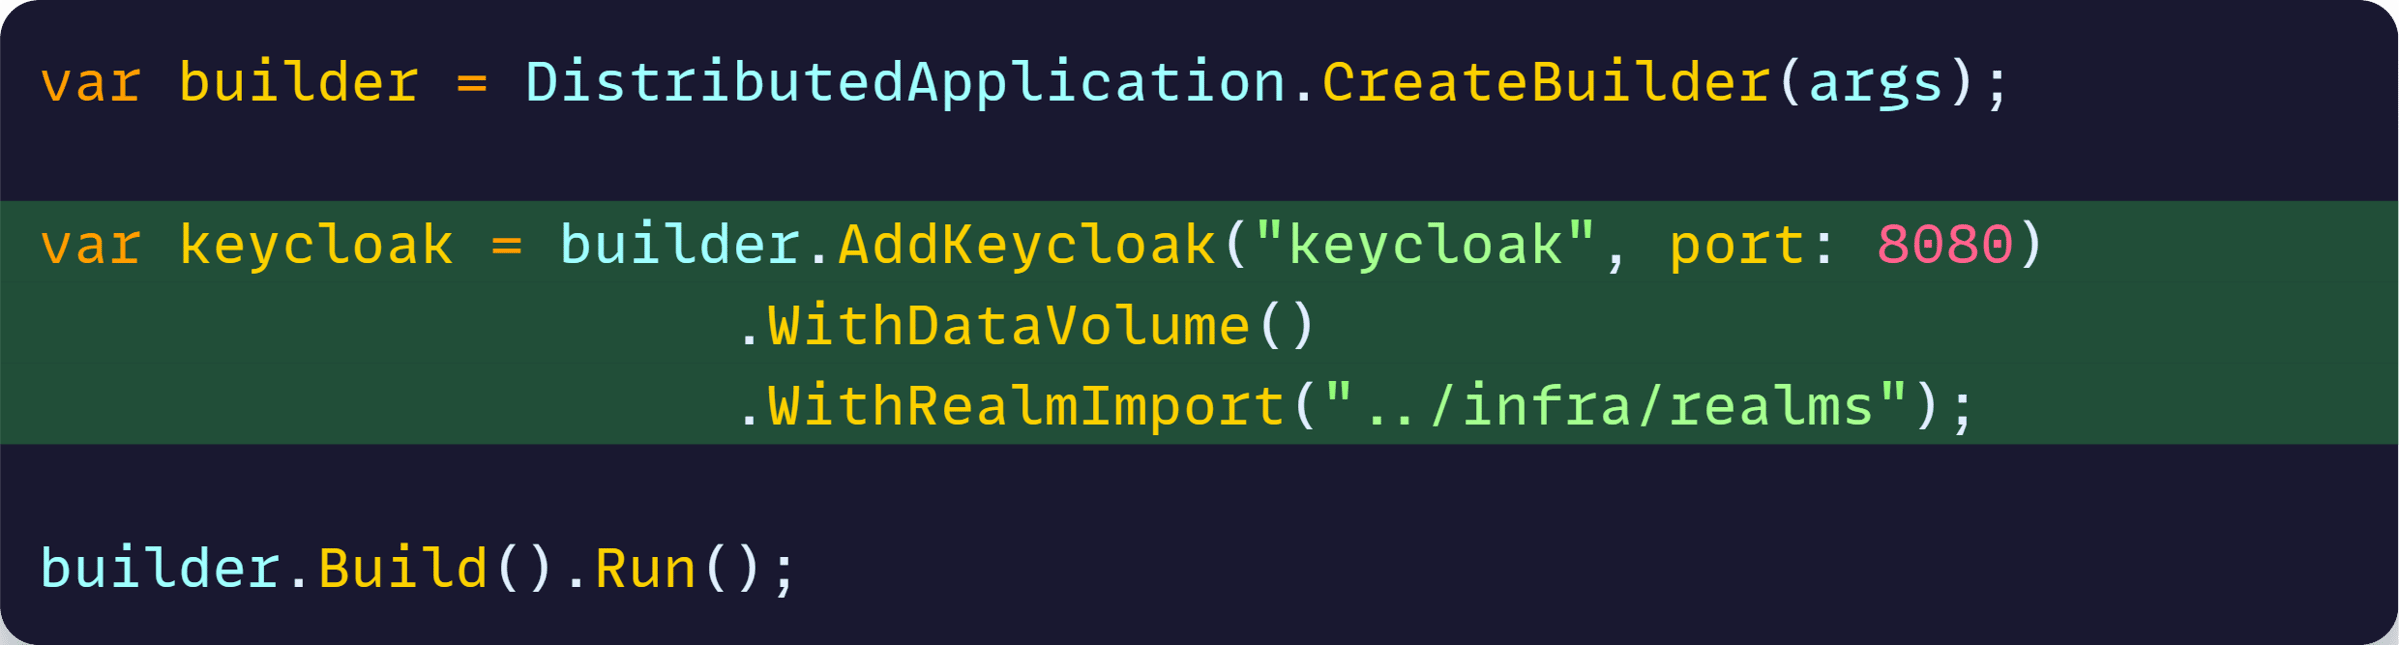
That makes Keycloak part of our application model, not just a separate infra service, also ensuring that when running as a container, it should:
- Listen on port 8080
- Have a data volume
- Import the realm configuration we exported in Step 1
What about things like the container image to use, admin credentials, and where exactly to map the volume?
Well, Aspire has good, opinionated defaults for those, which you can change if you wish, or accept and move on.
Now, let’s try this out.
Step 4: Running Keycloak with .NET Aspire
Let’s run the AppHost project (which from here on is our new local orchestrator):
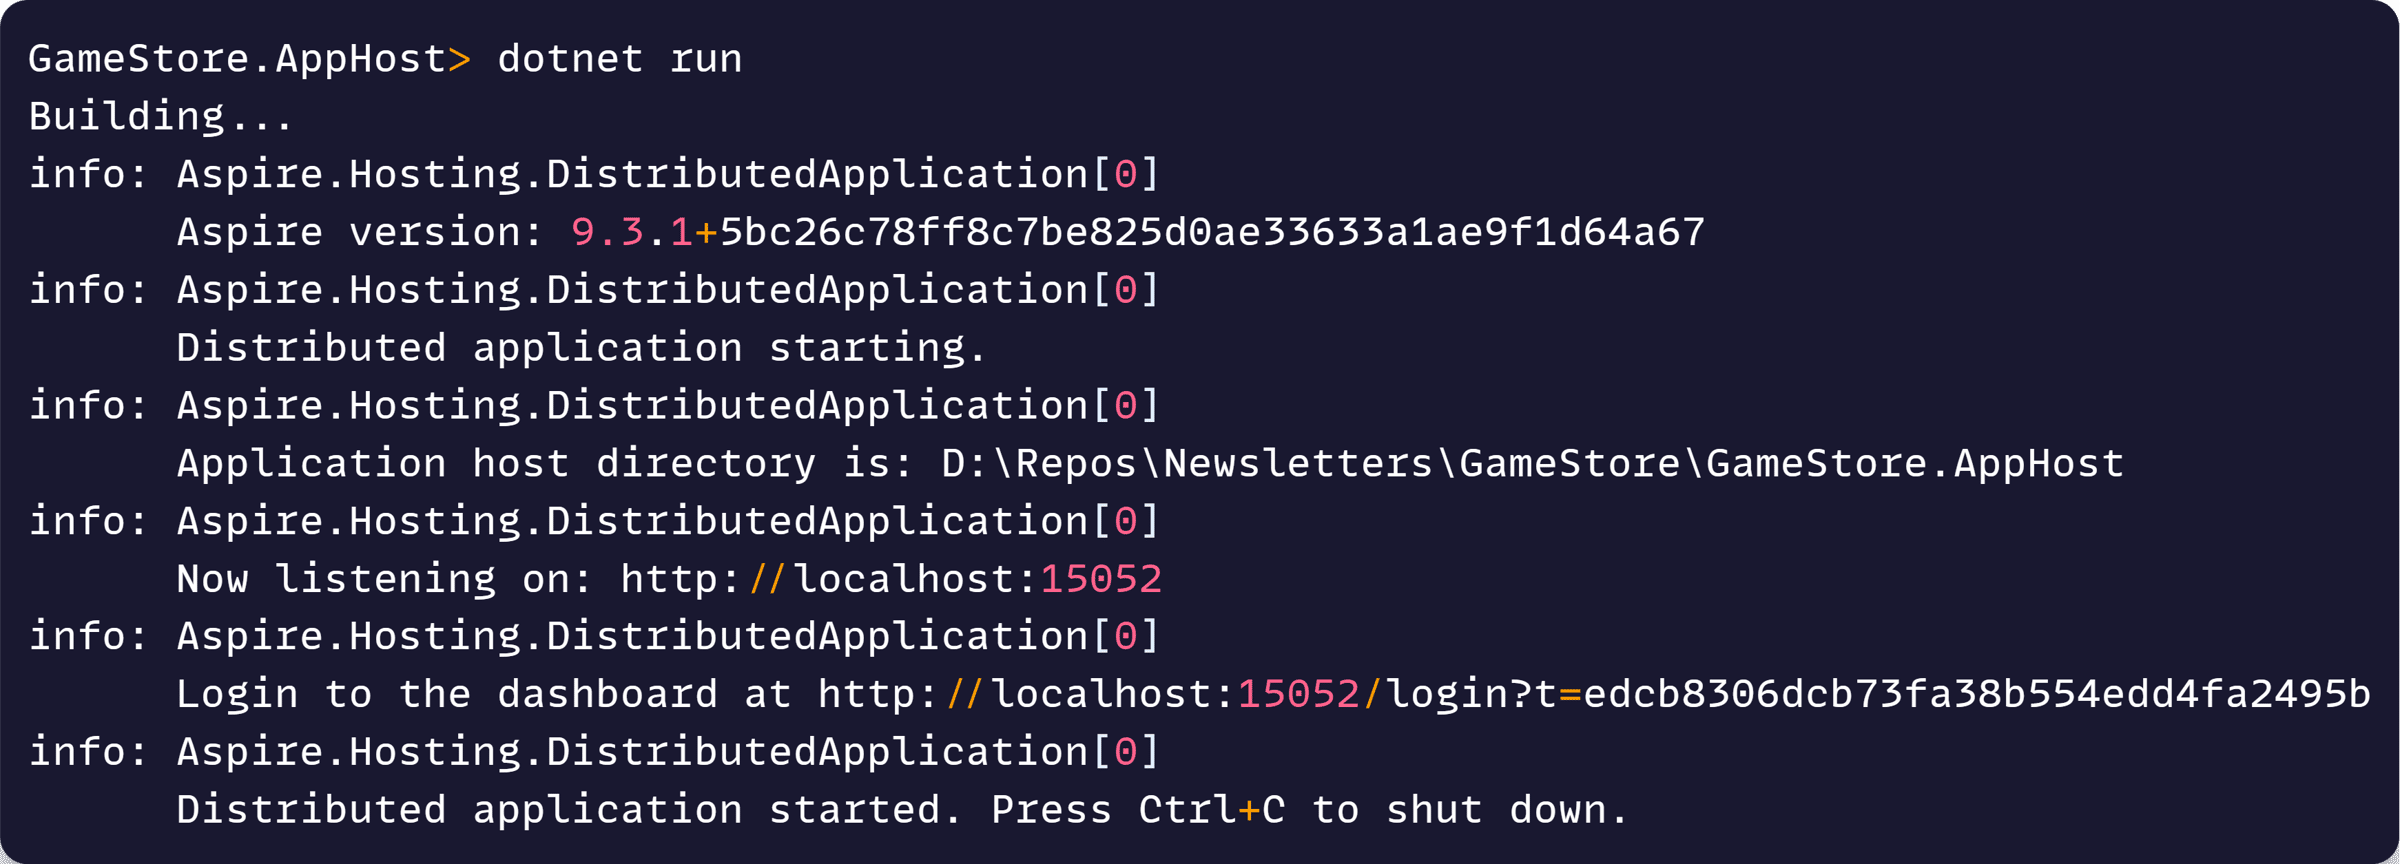
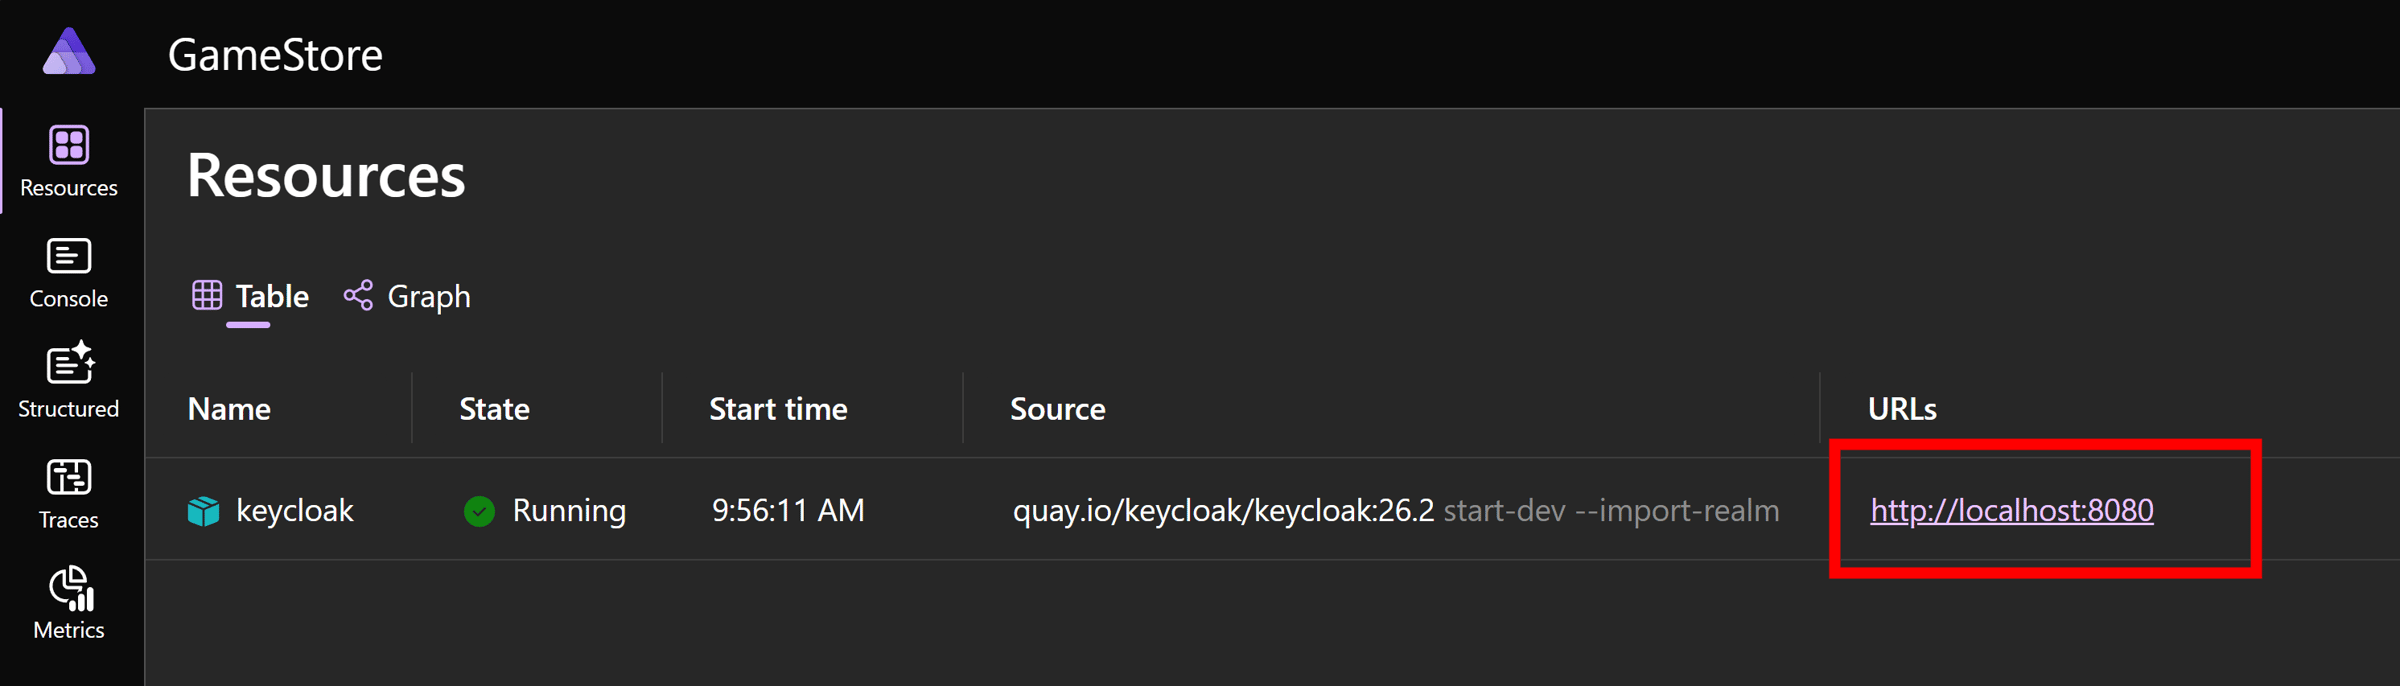
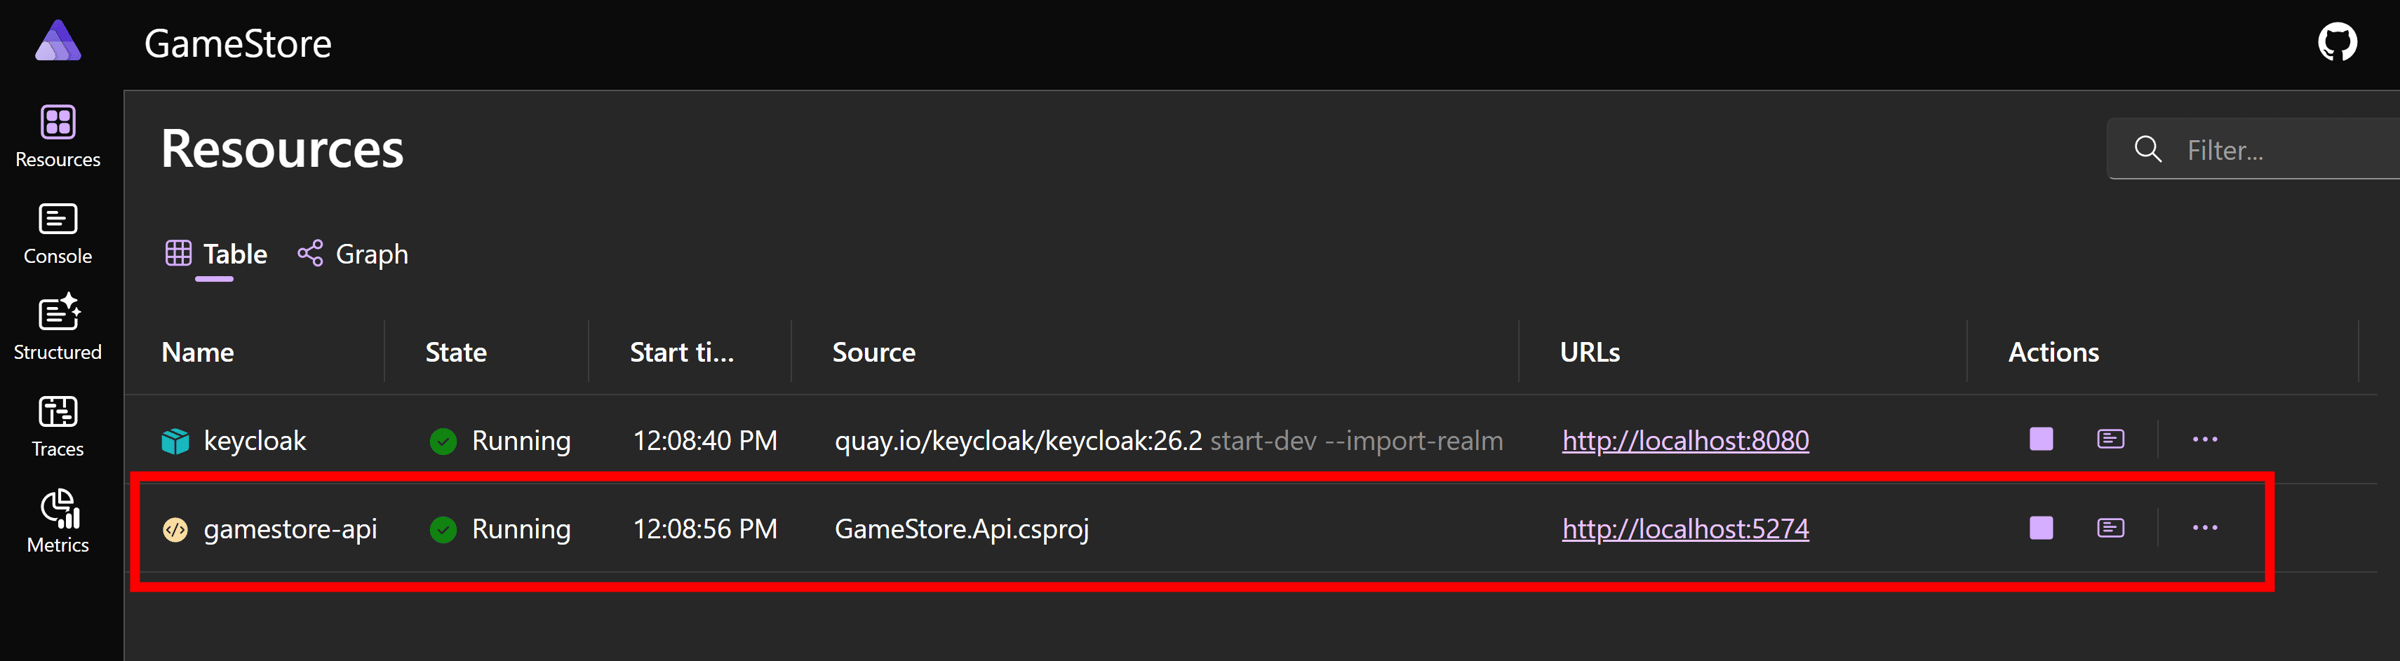
And if we open our Aspire Dashboard (from that link in the console) we’ll see Keycloak up and running as a container, no Docker Compose required, with a URL ready to access Keycloak’s Admin Console:
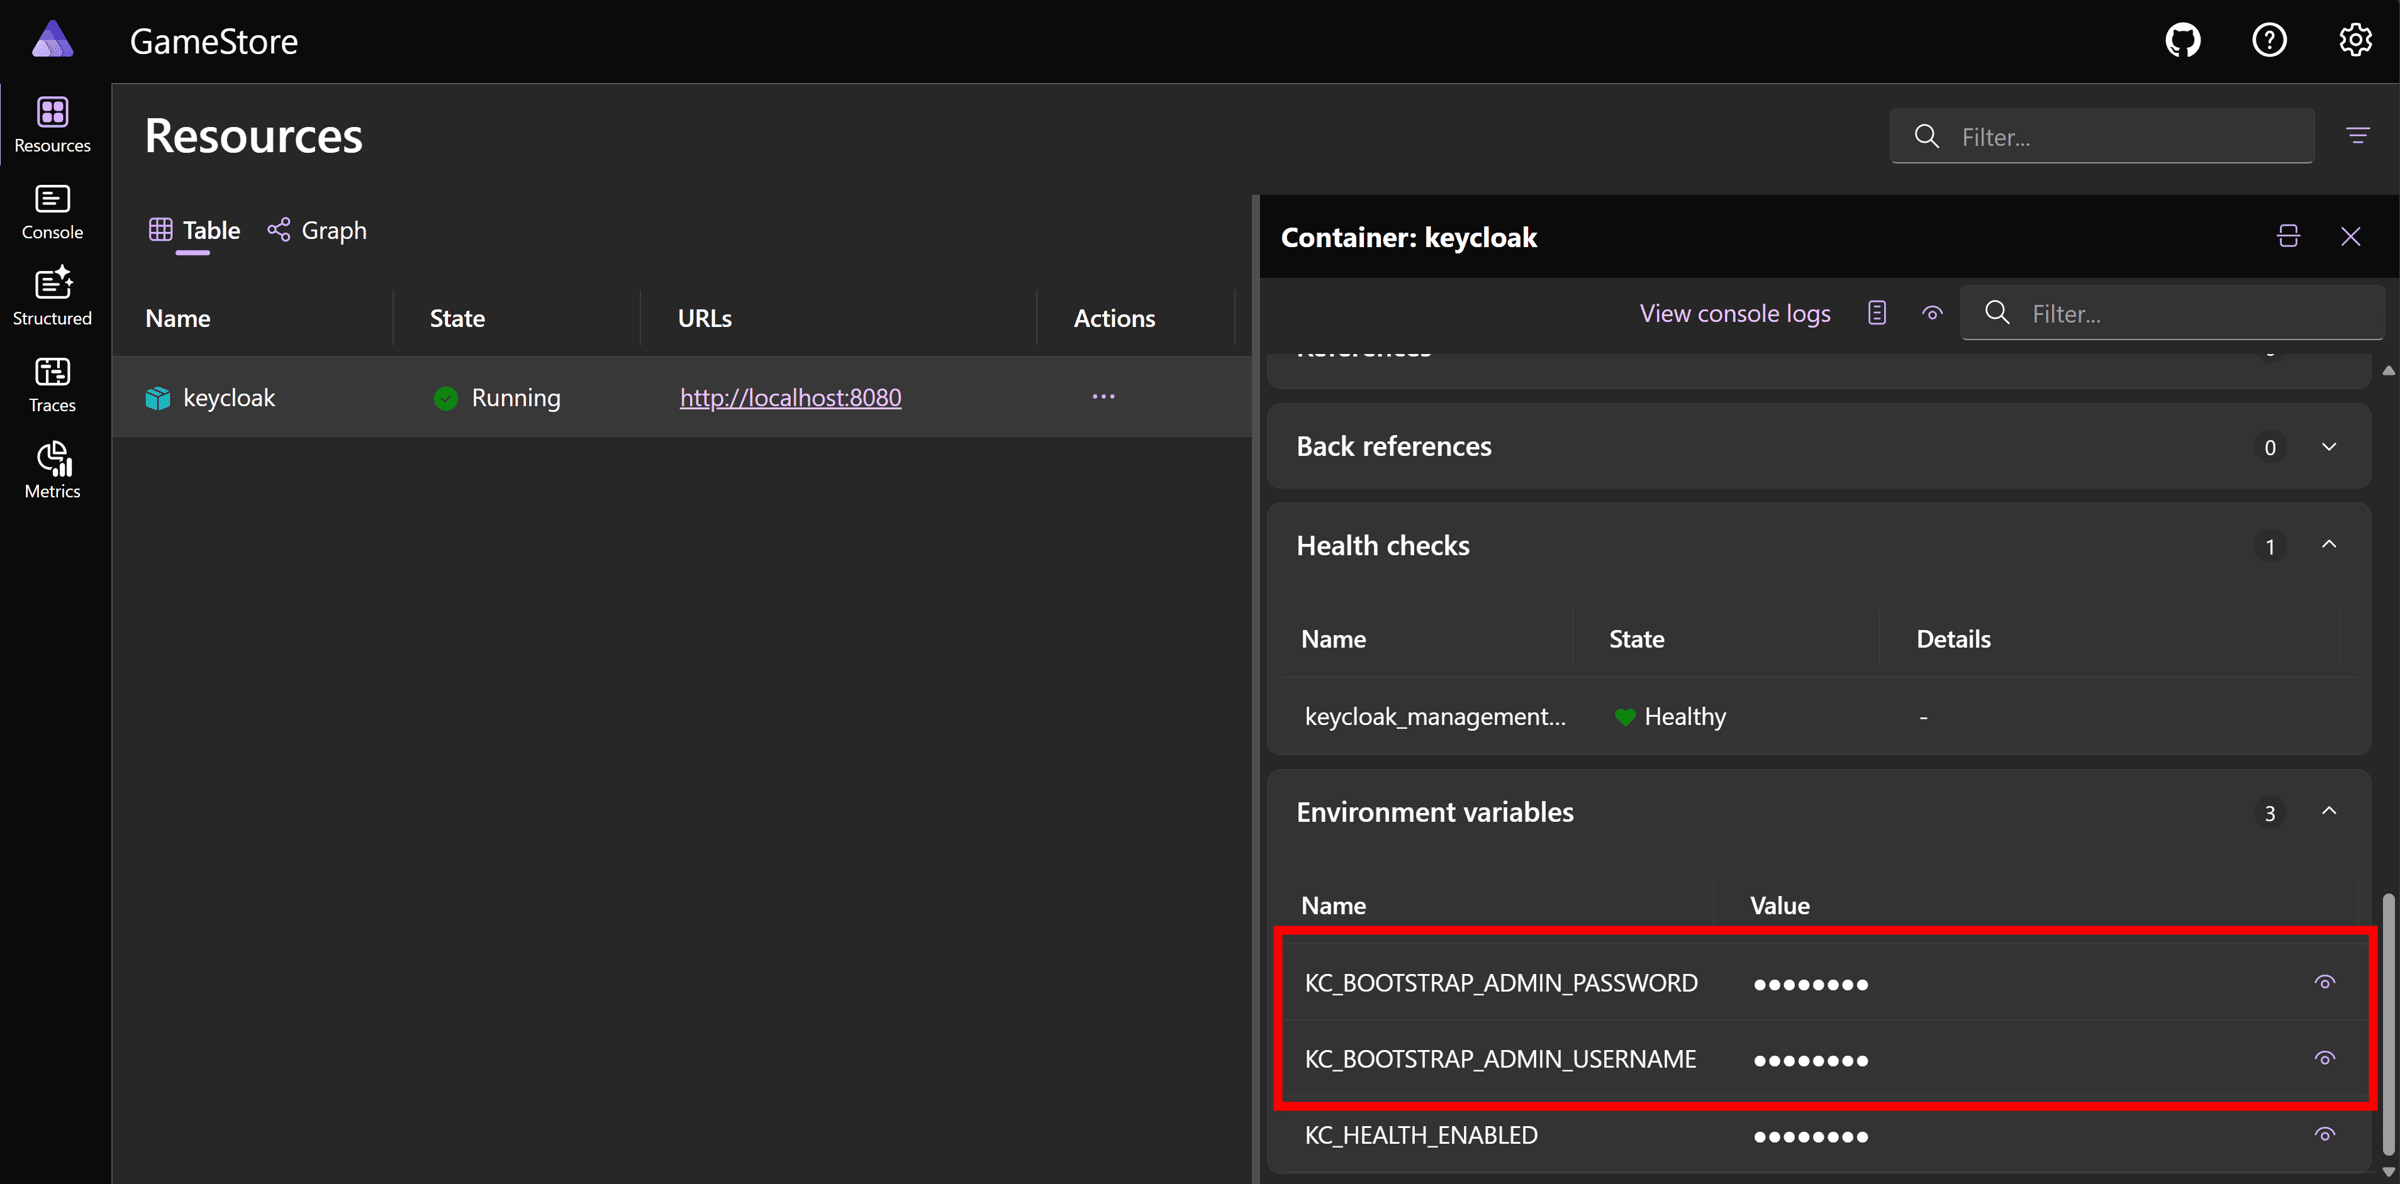
But wait, we’ll need admin credentials to login to Keycloak.
Where to get those?
.NET Aspire will come up with a default admin and password, and you can get them by clicking on the Keycloak resource and scrolling down to the Environment Variables section:
Now, click on the Keycloak resource URL (http://localhost:8080 here) and enter those credentials:
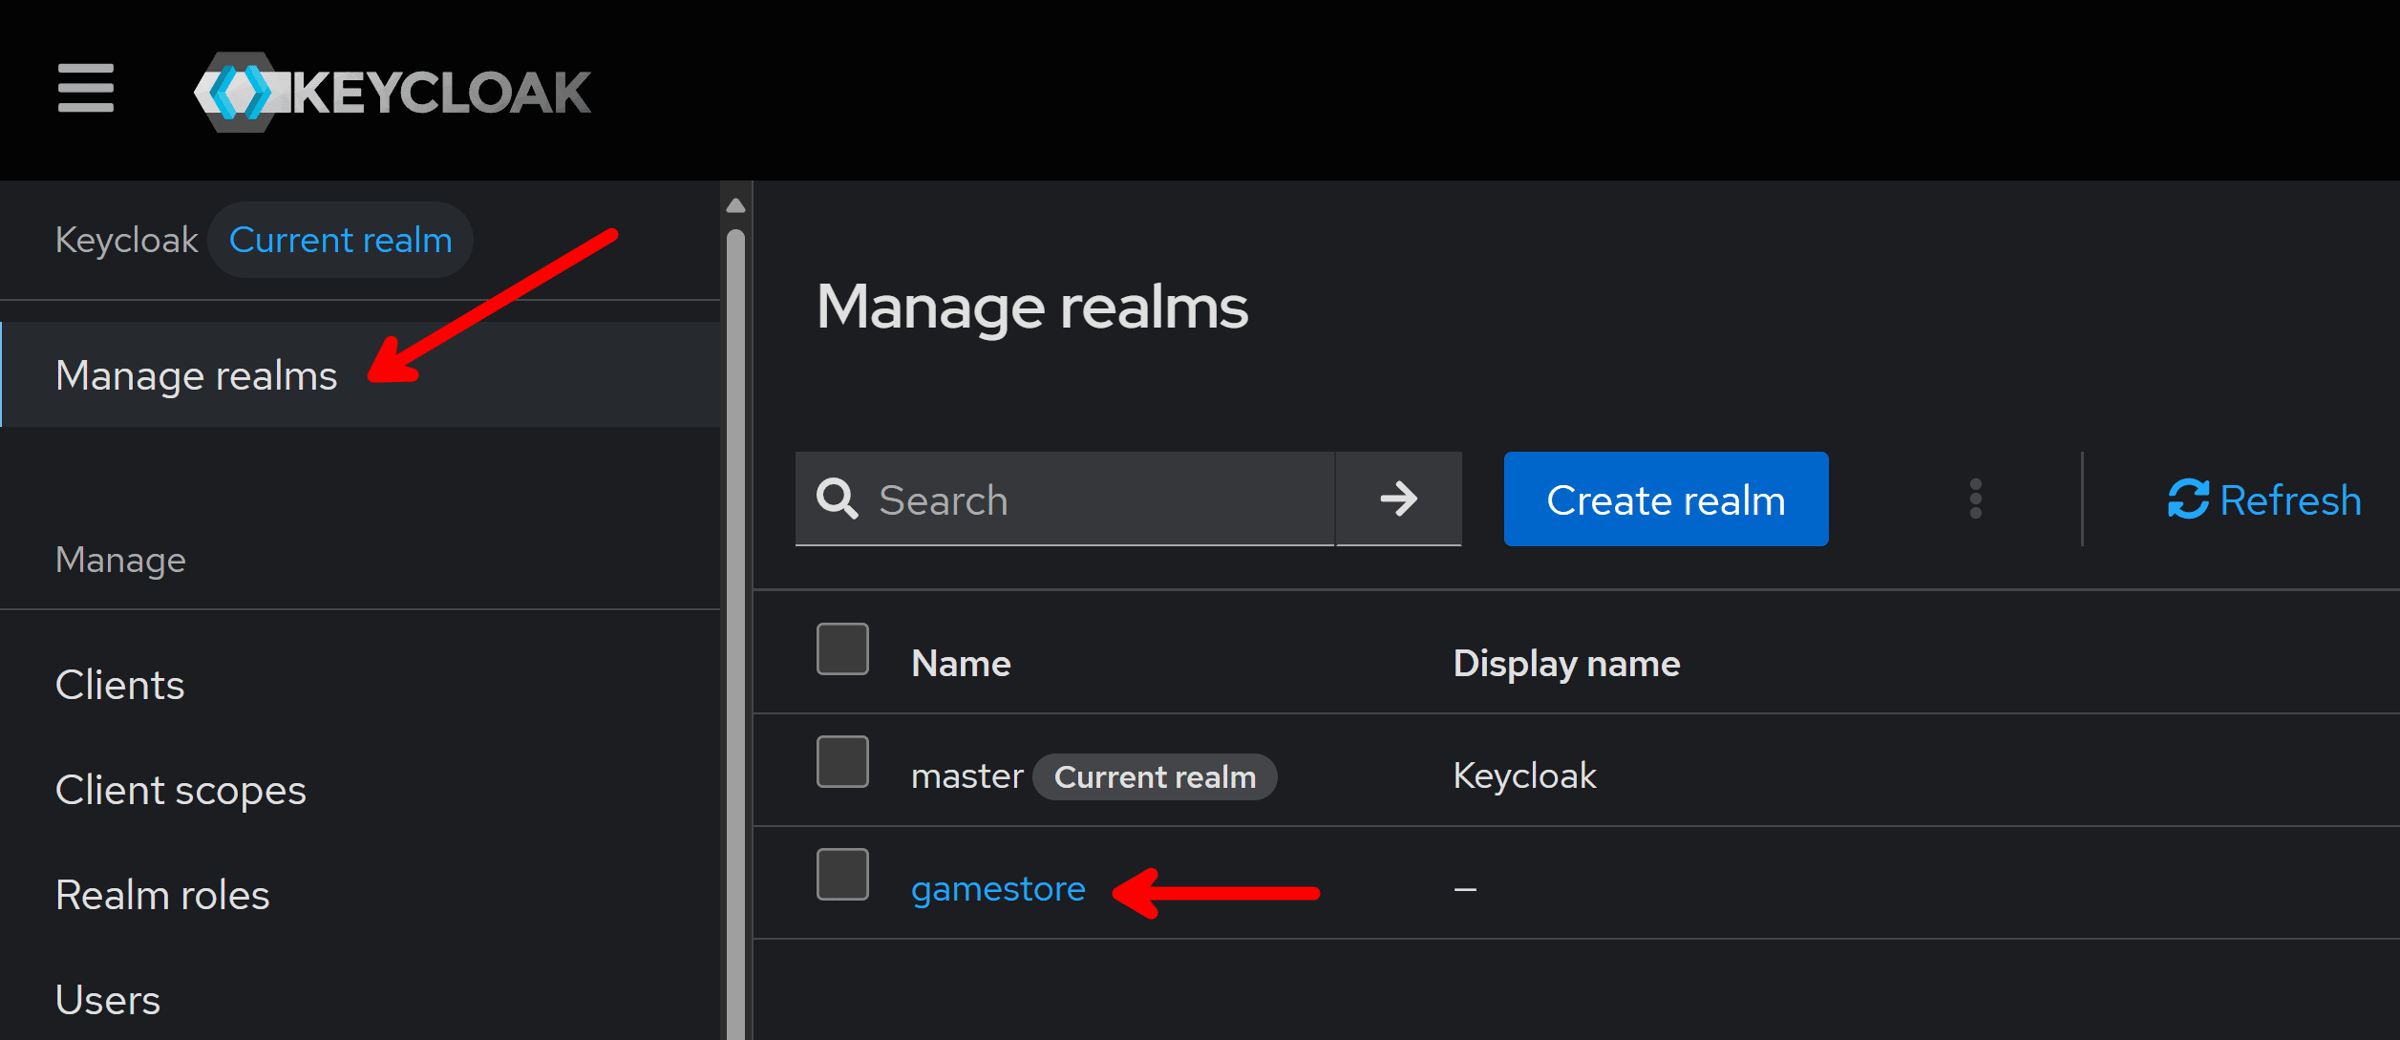
After signing in, we land on Keycloak’s familiar UI, and if we go to the realms management section, we’ll see our Game Store realm is already there:
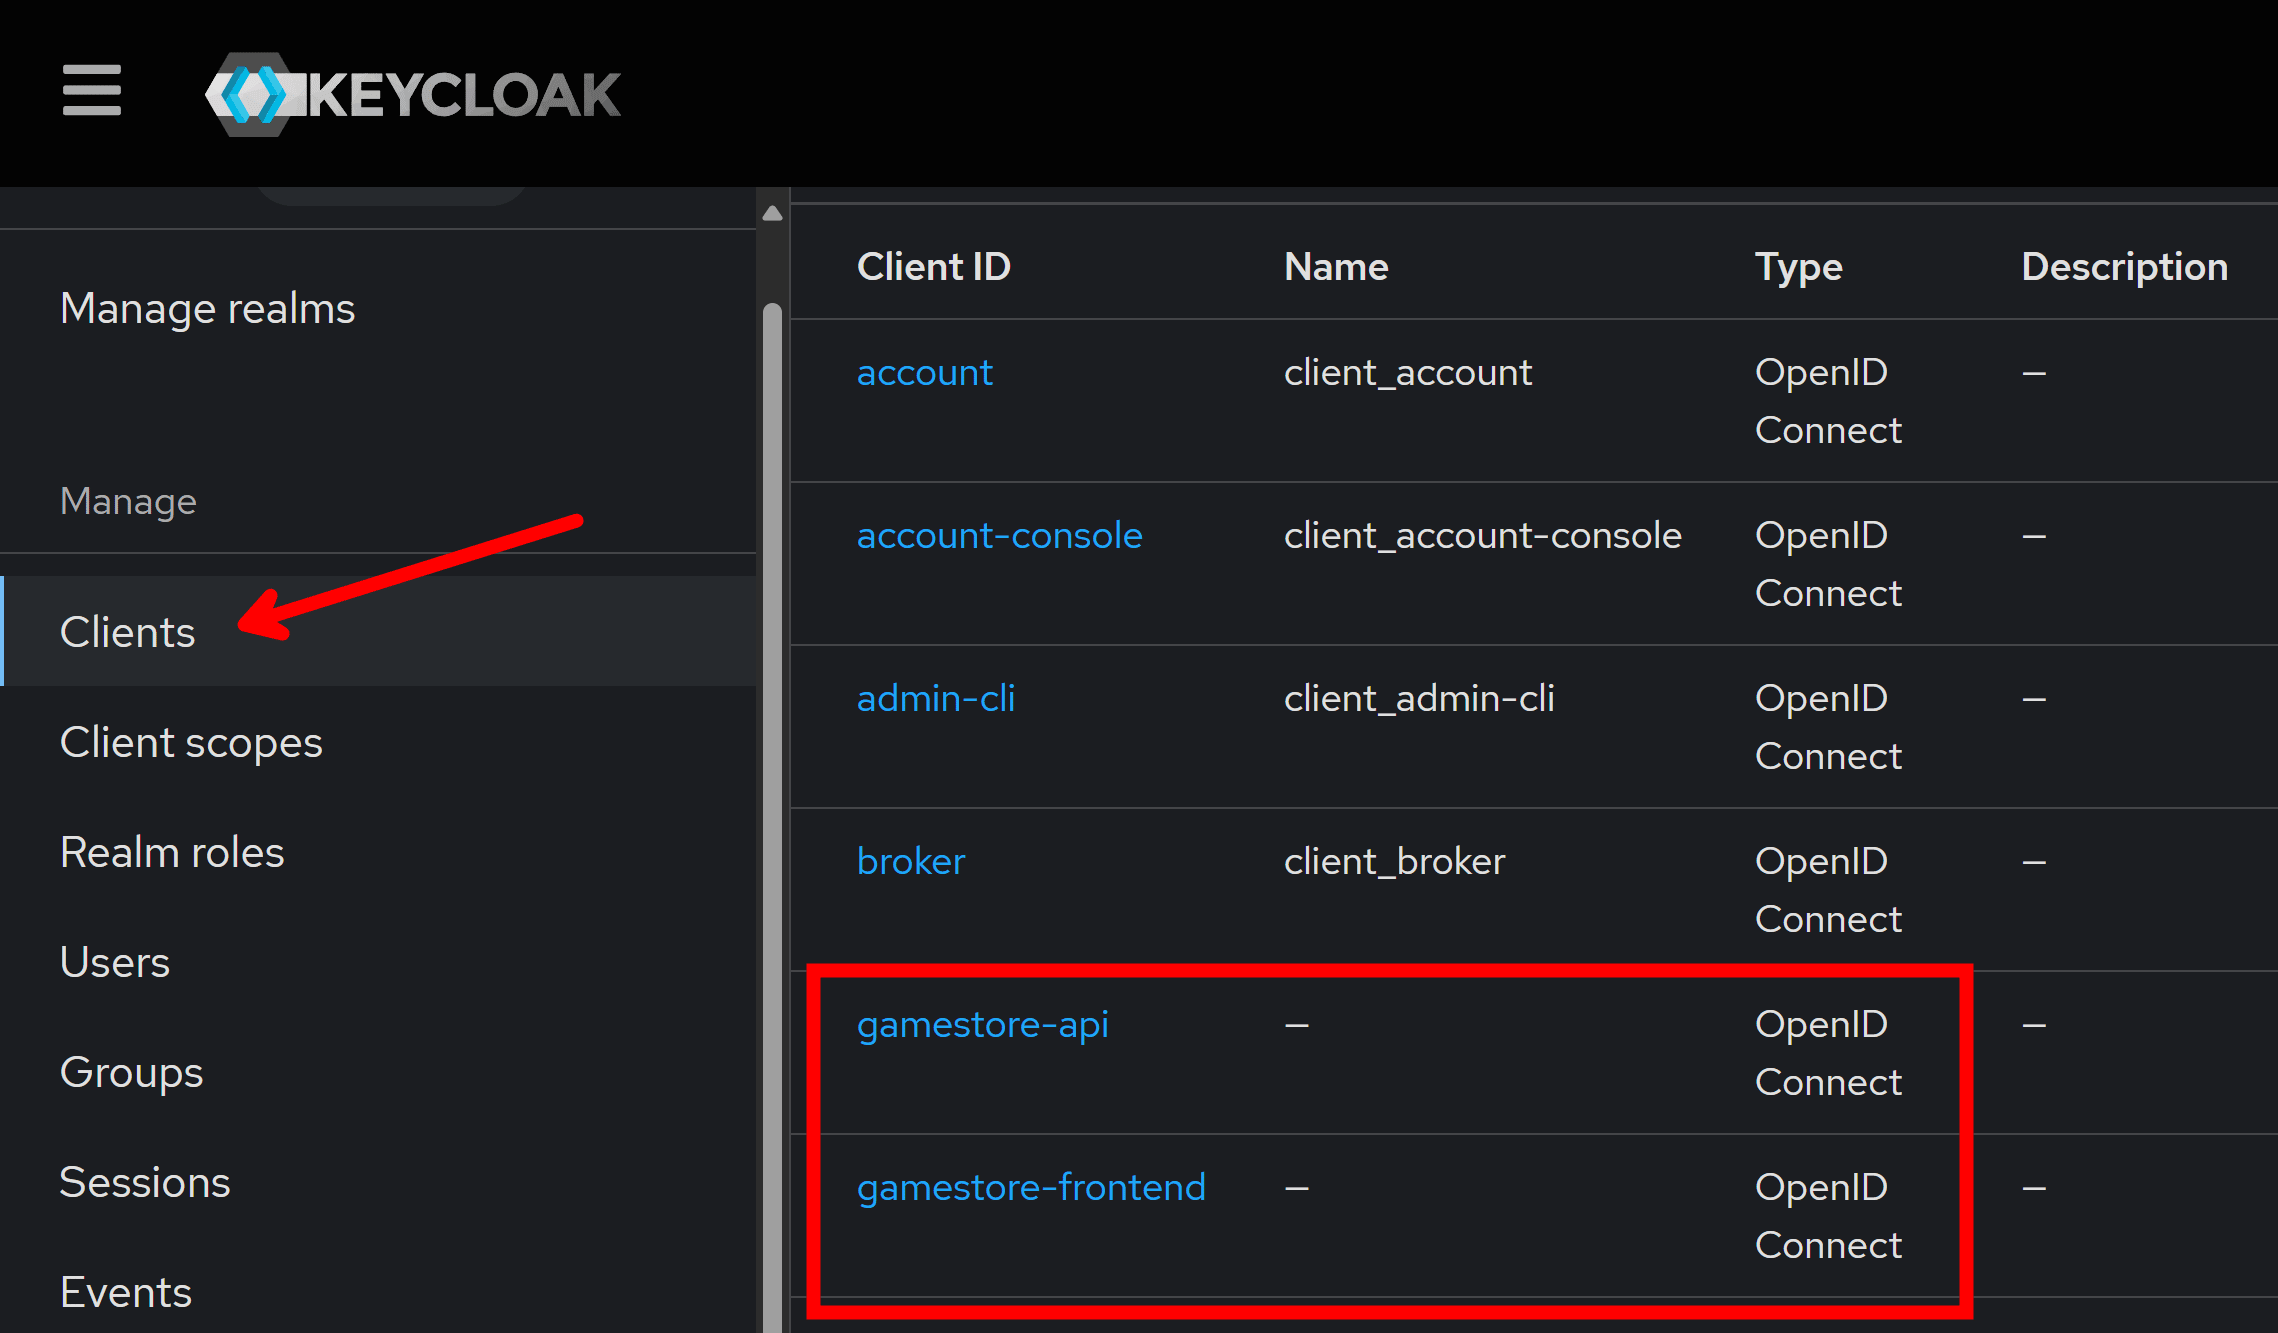
If we switch to our realm, and explore the configured clients, we will find our familiar gamestore-api and gamestore-frontend clients ready to go:
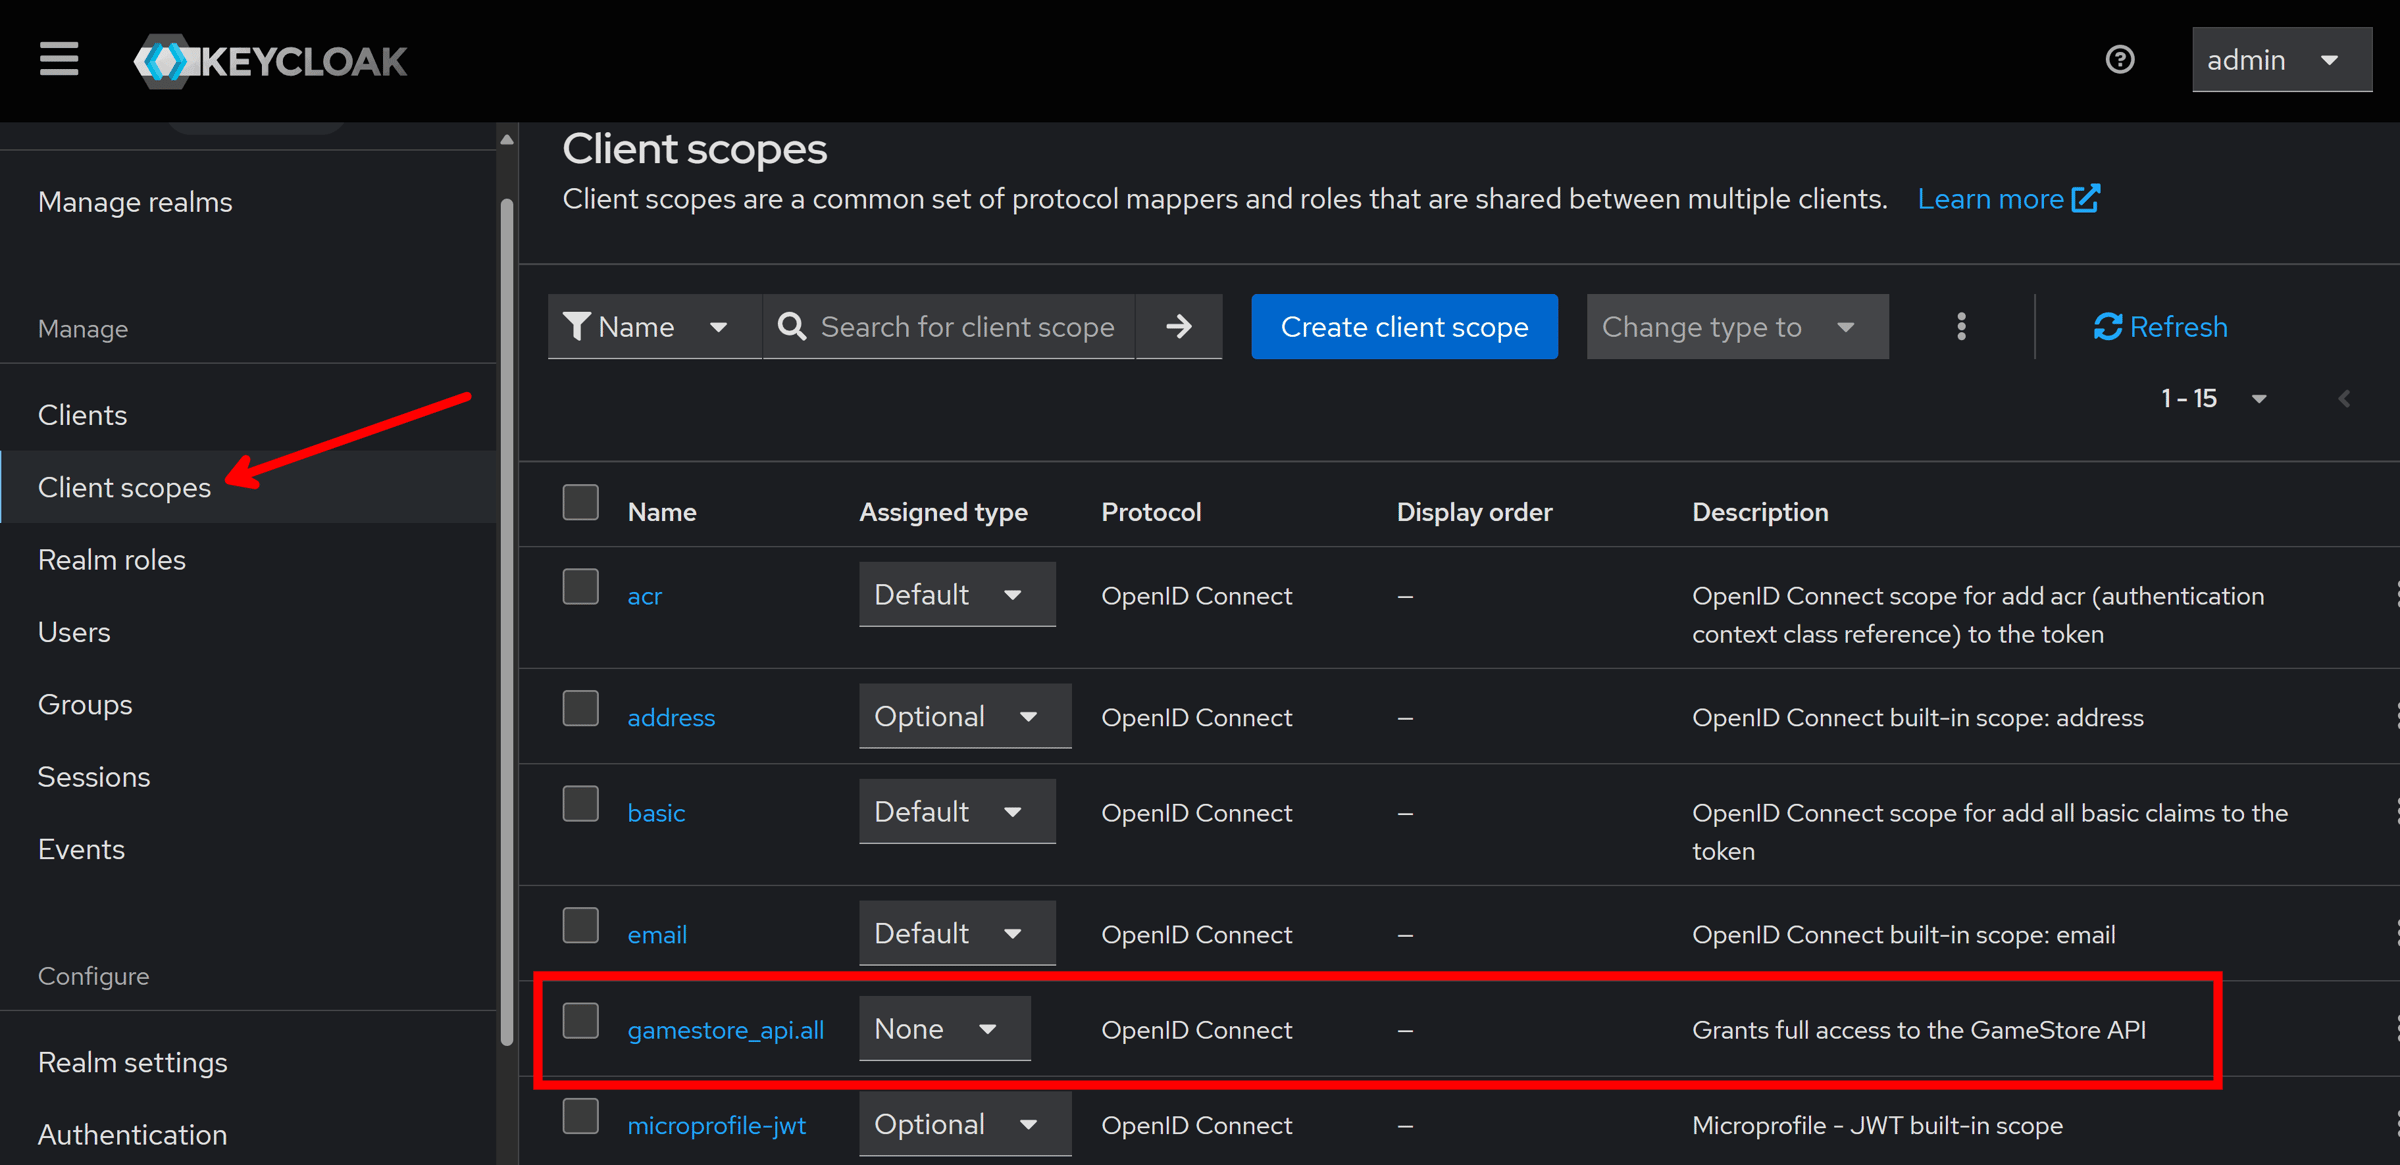
Hop into the Client scopes section, and you’ll see our required gamestore-api.all scope is also configured there:
Neat! Keycloak is all good to go, although at this point, you may want to also create at least one Keycloak user that you can use for testing later.
Now the best part: delete that docker-compose.yml file, which we will no longer need:
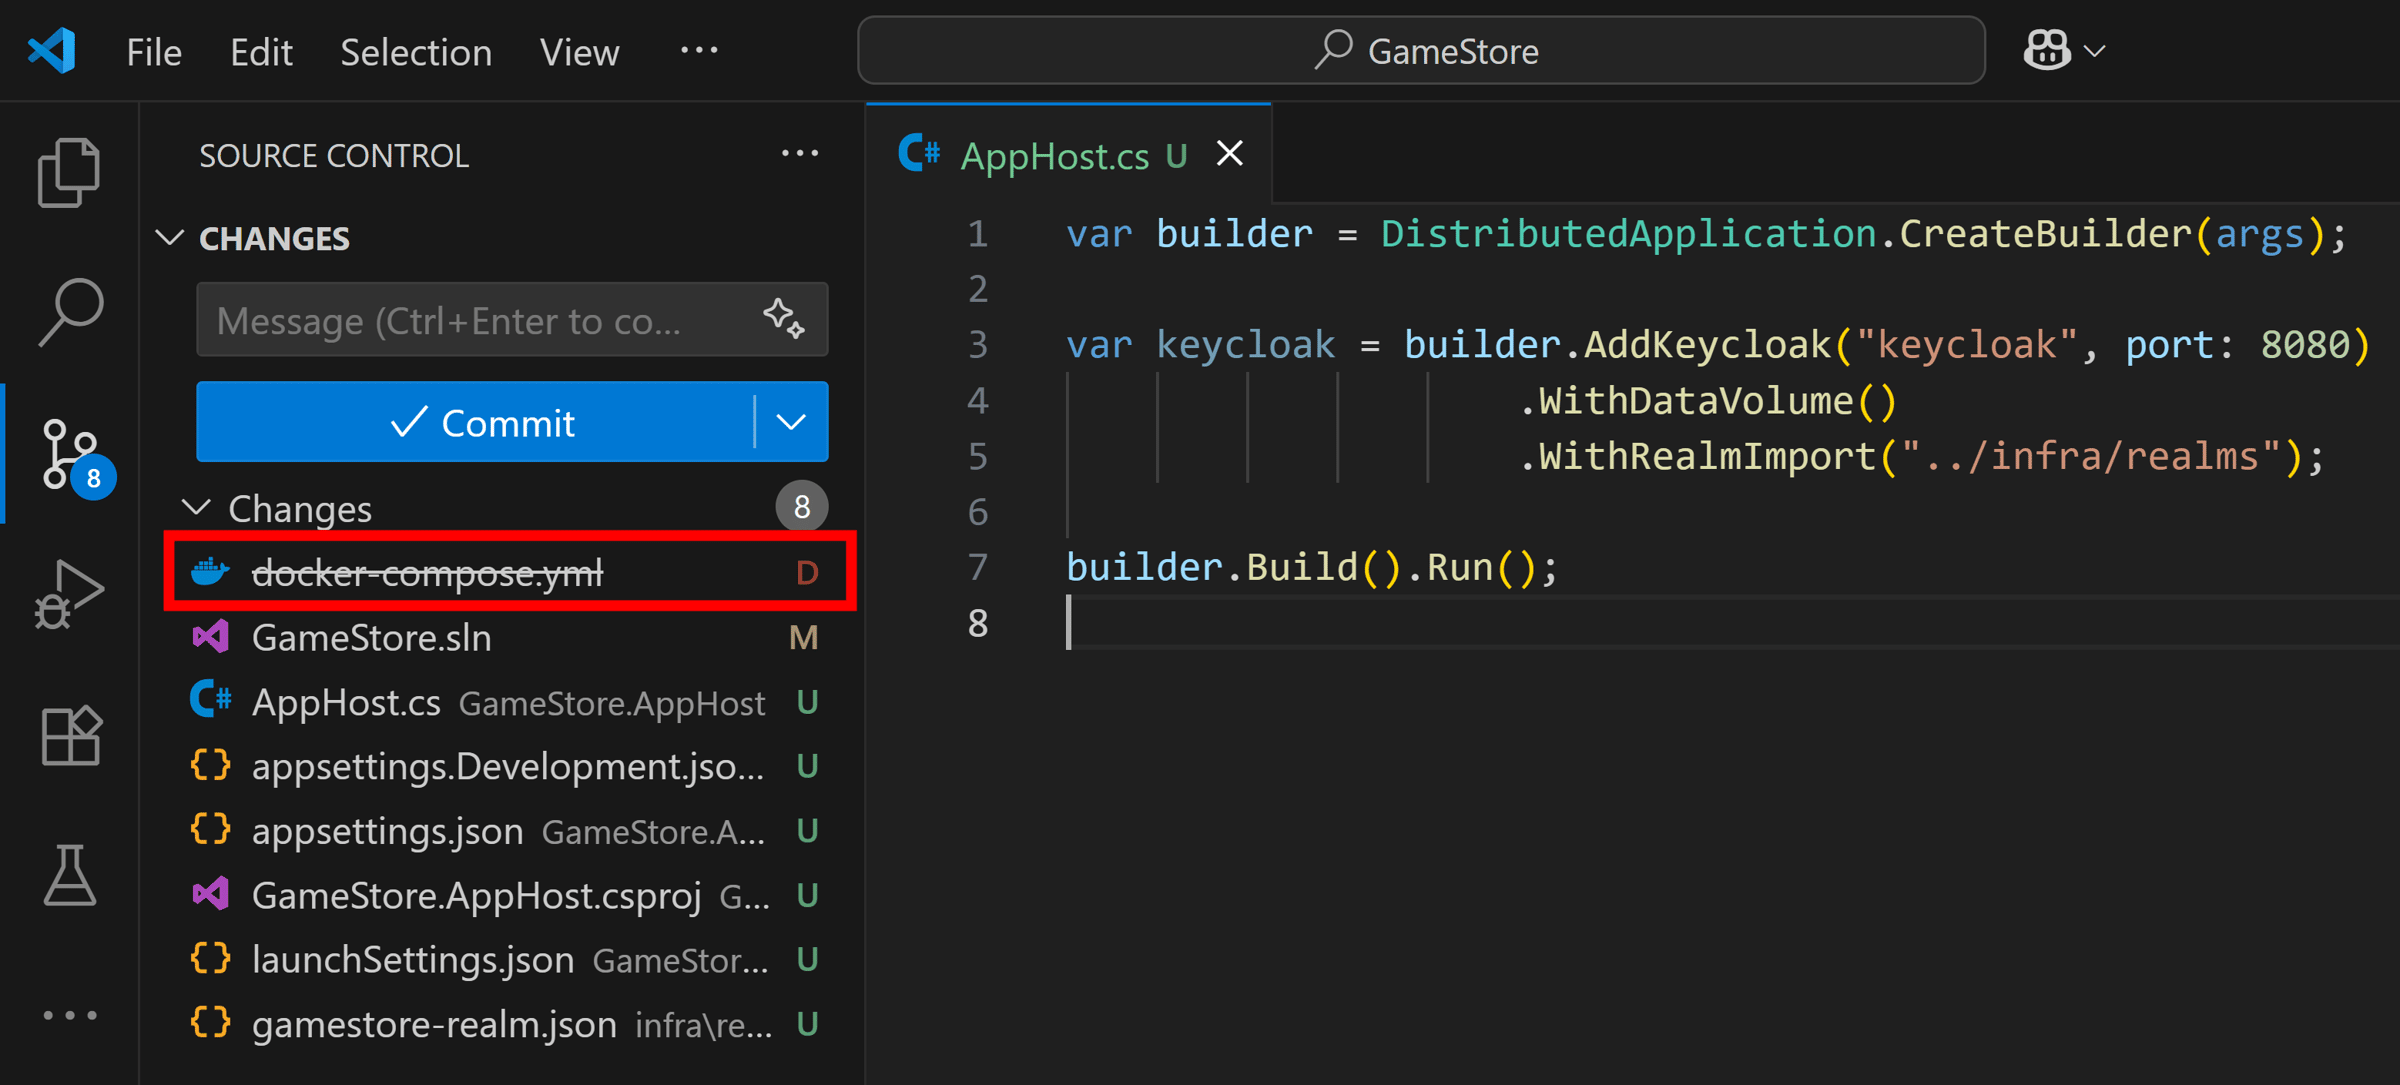
Now, let’s start bringing our actual application to our app model, starting with the backend.
Step 5: Add the backend API
We want to bring in our API to the Aspire app model so that it can take advantage of the Keycloak instance we have already configured there.
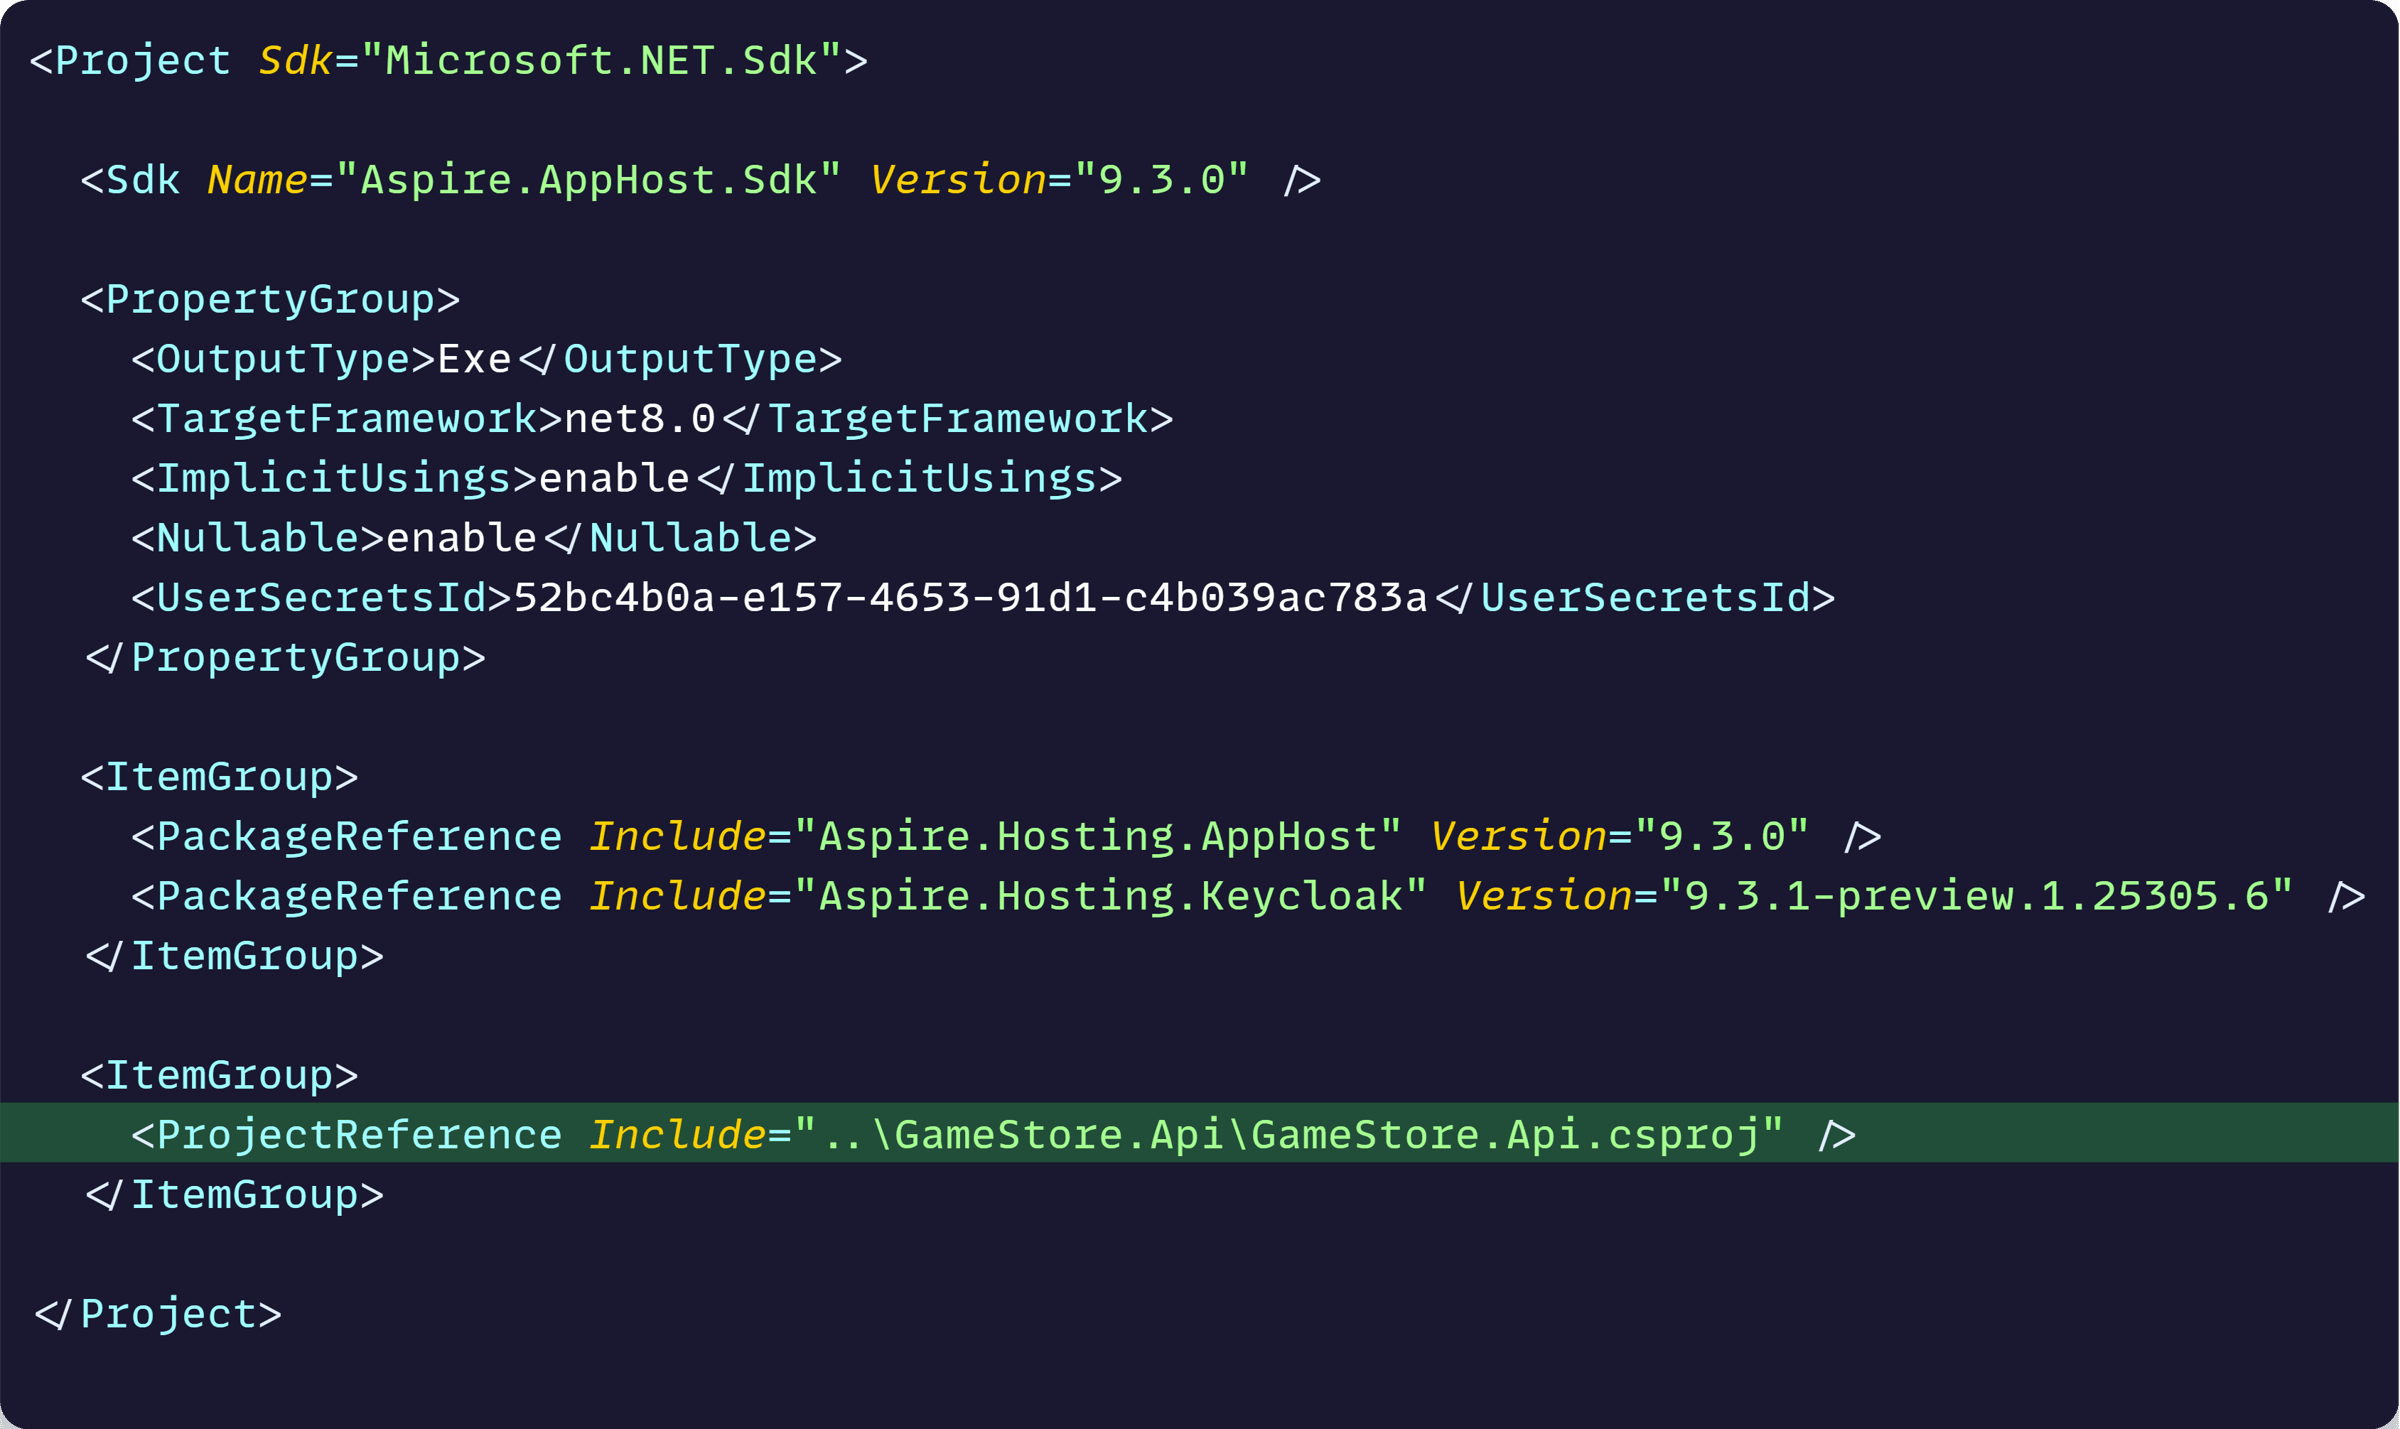
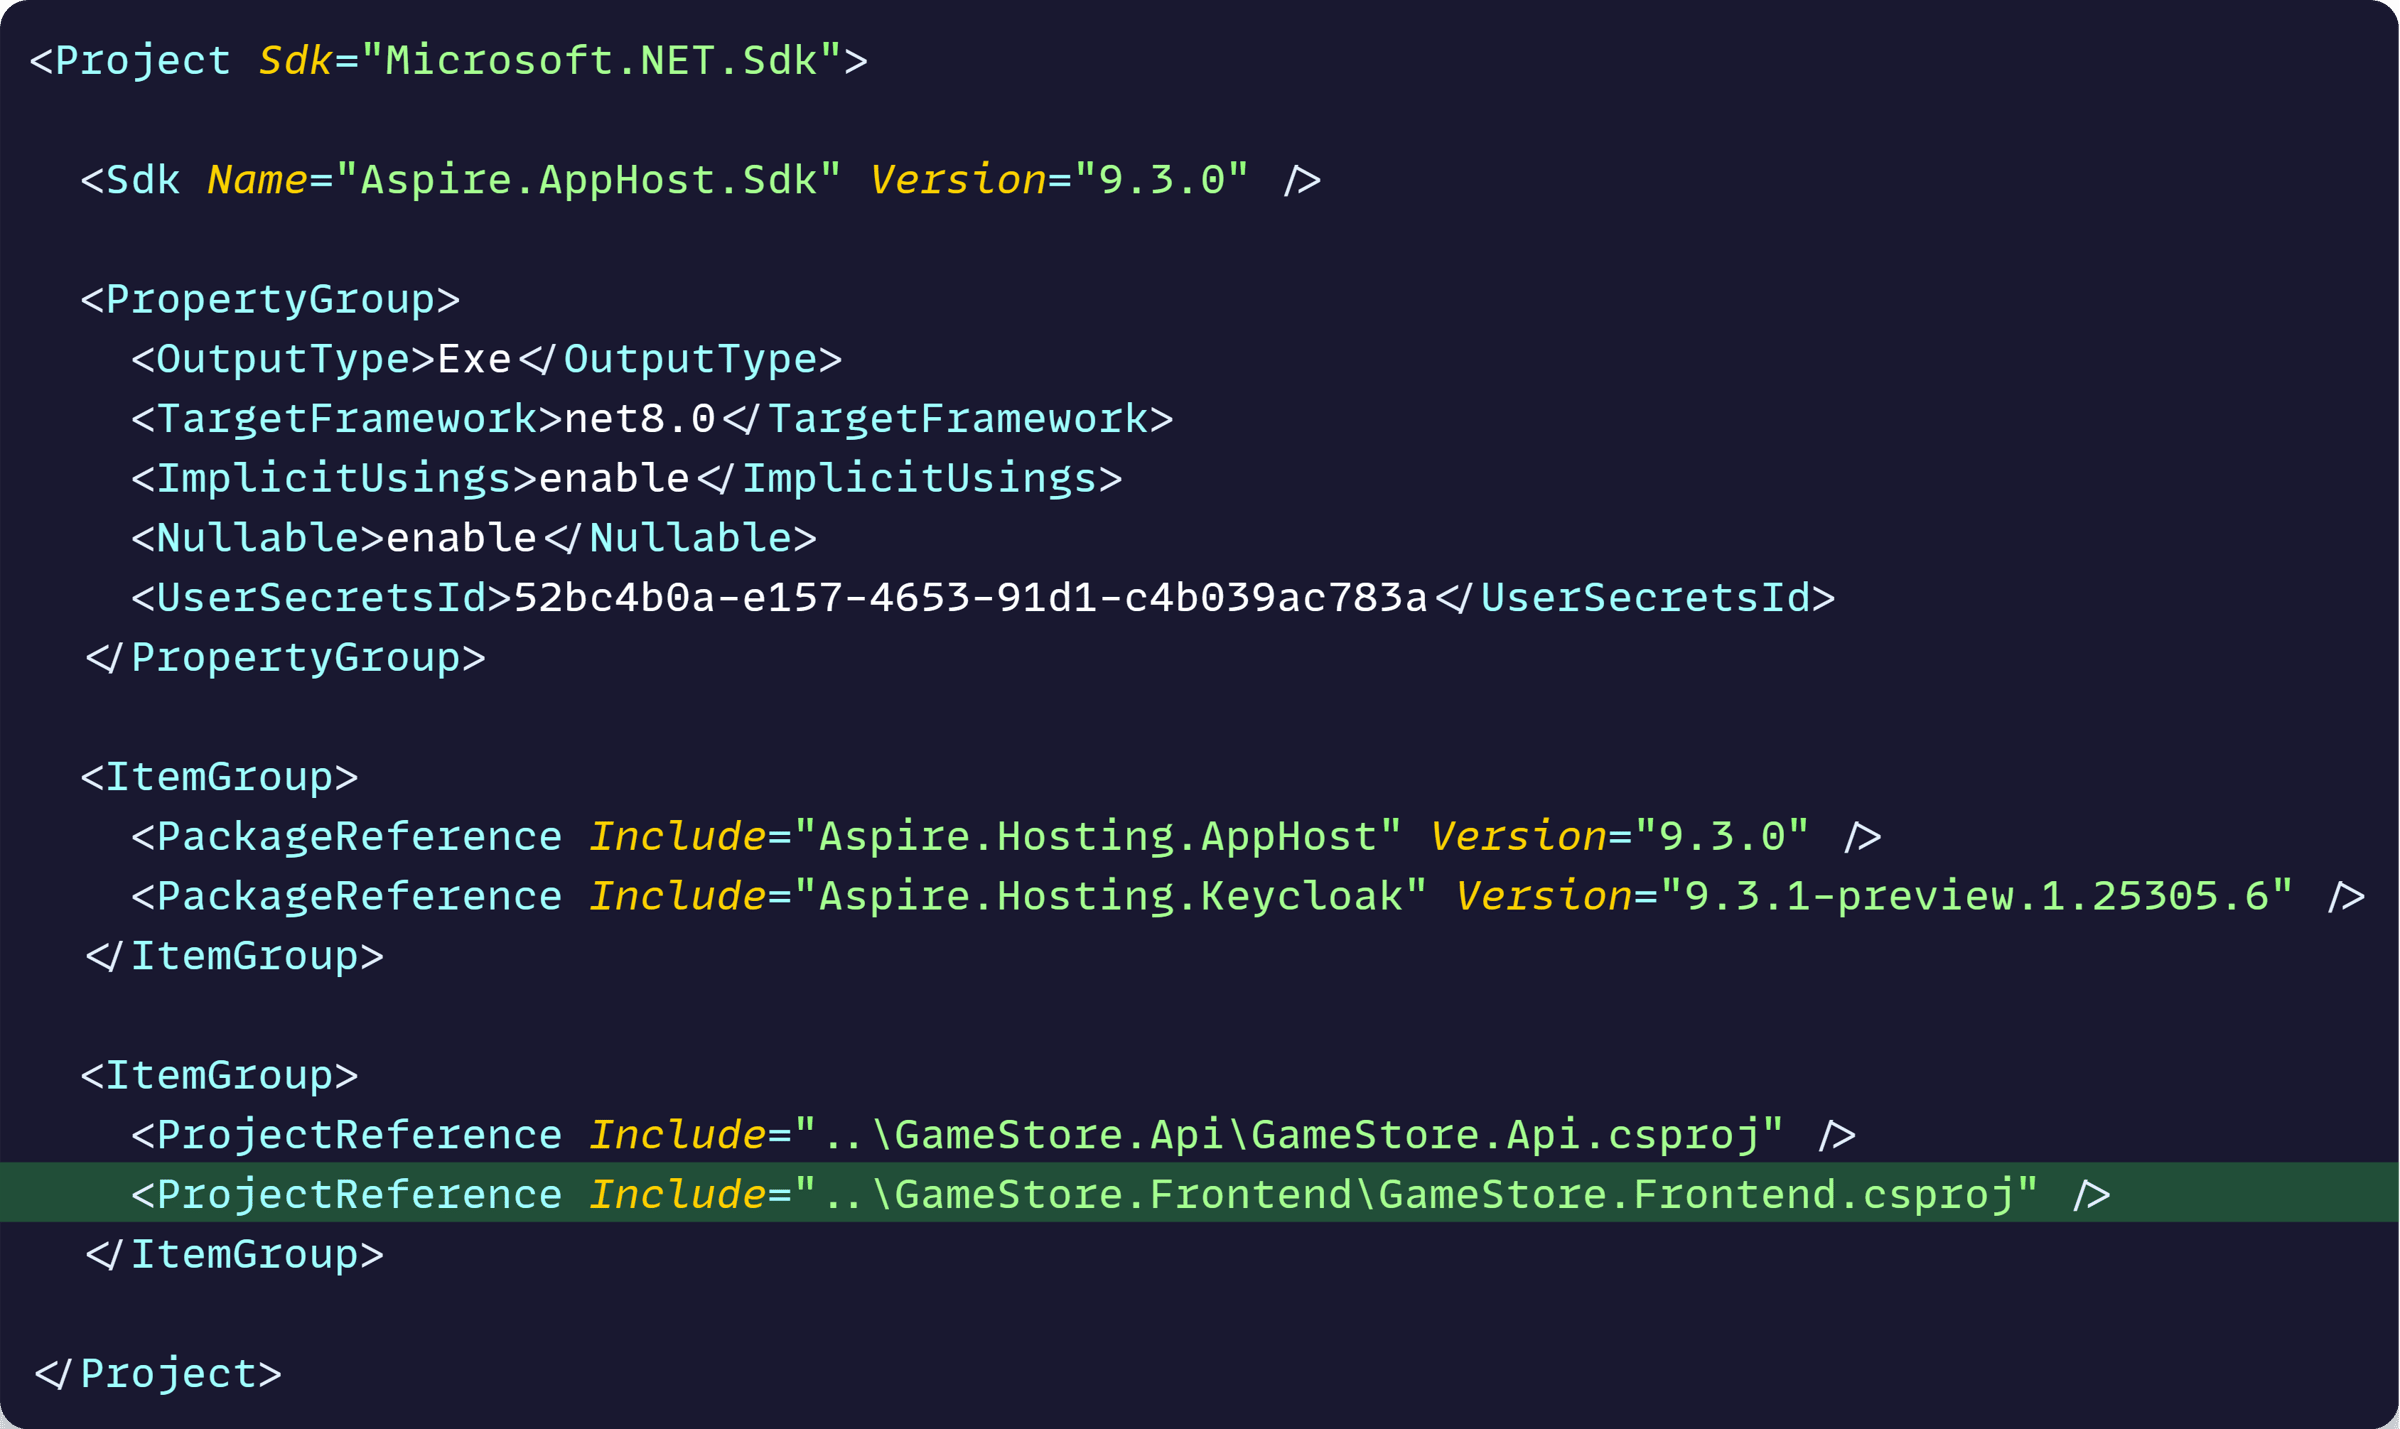
Let’s start by referencing the API project from the AppHost project:
Now let’s introduce the API to the app model, and make it aware of the address of our Keycloak instance, so it can use it as its Authority:
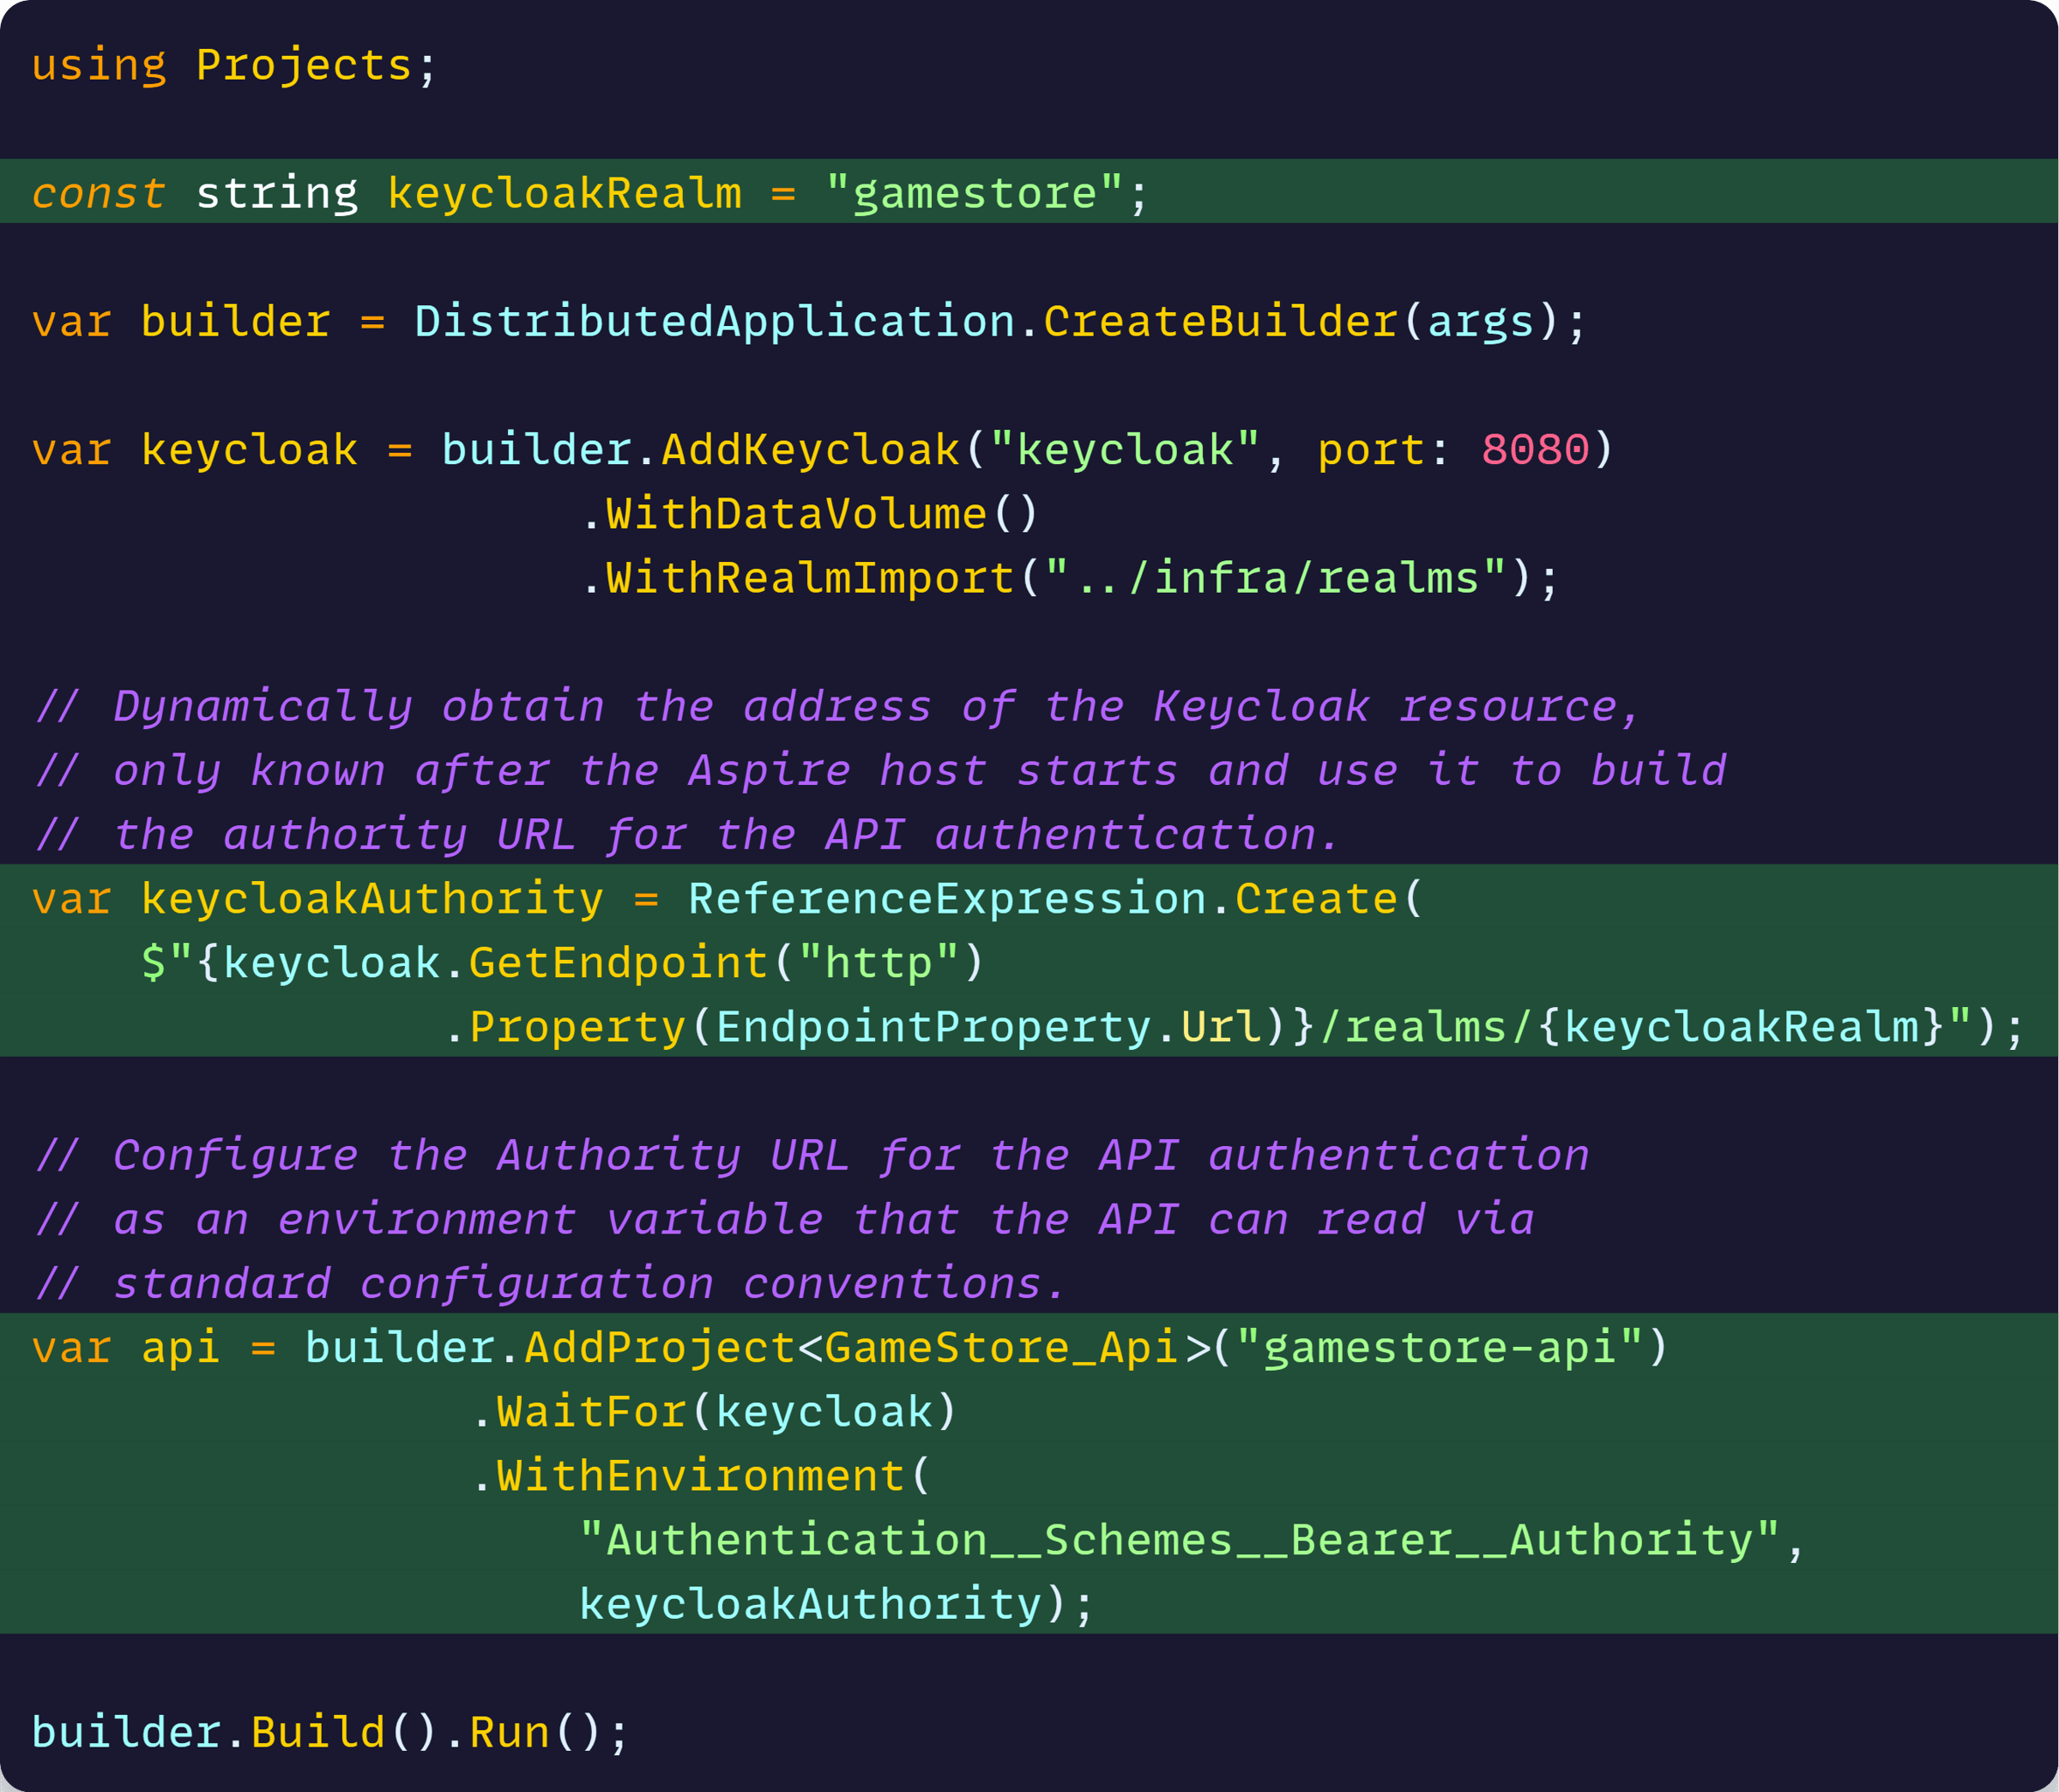
The comments I left there should clarify what’s going on, but here’s the key thing:
The API project no longer needs to worry about how to build the Authority URL. All it needs to do is read it via the standard Configuration system from the provided env var.
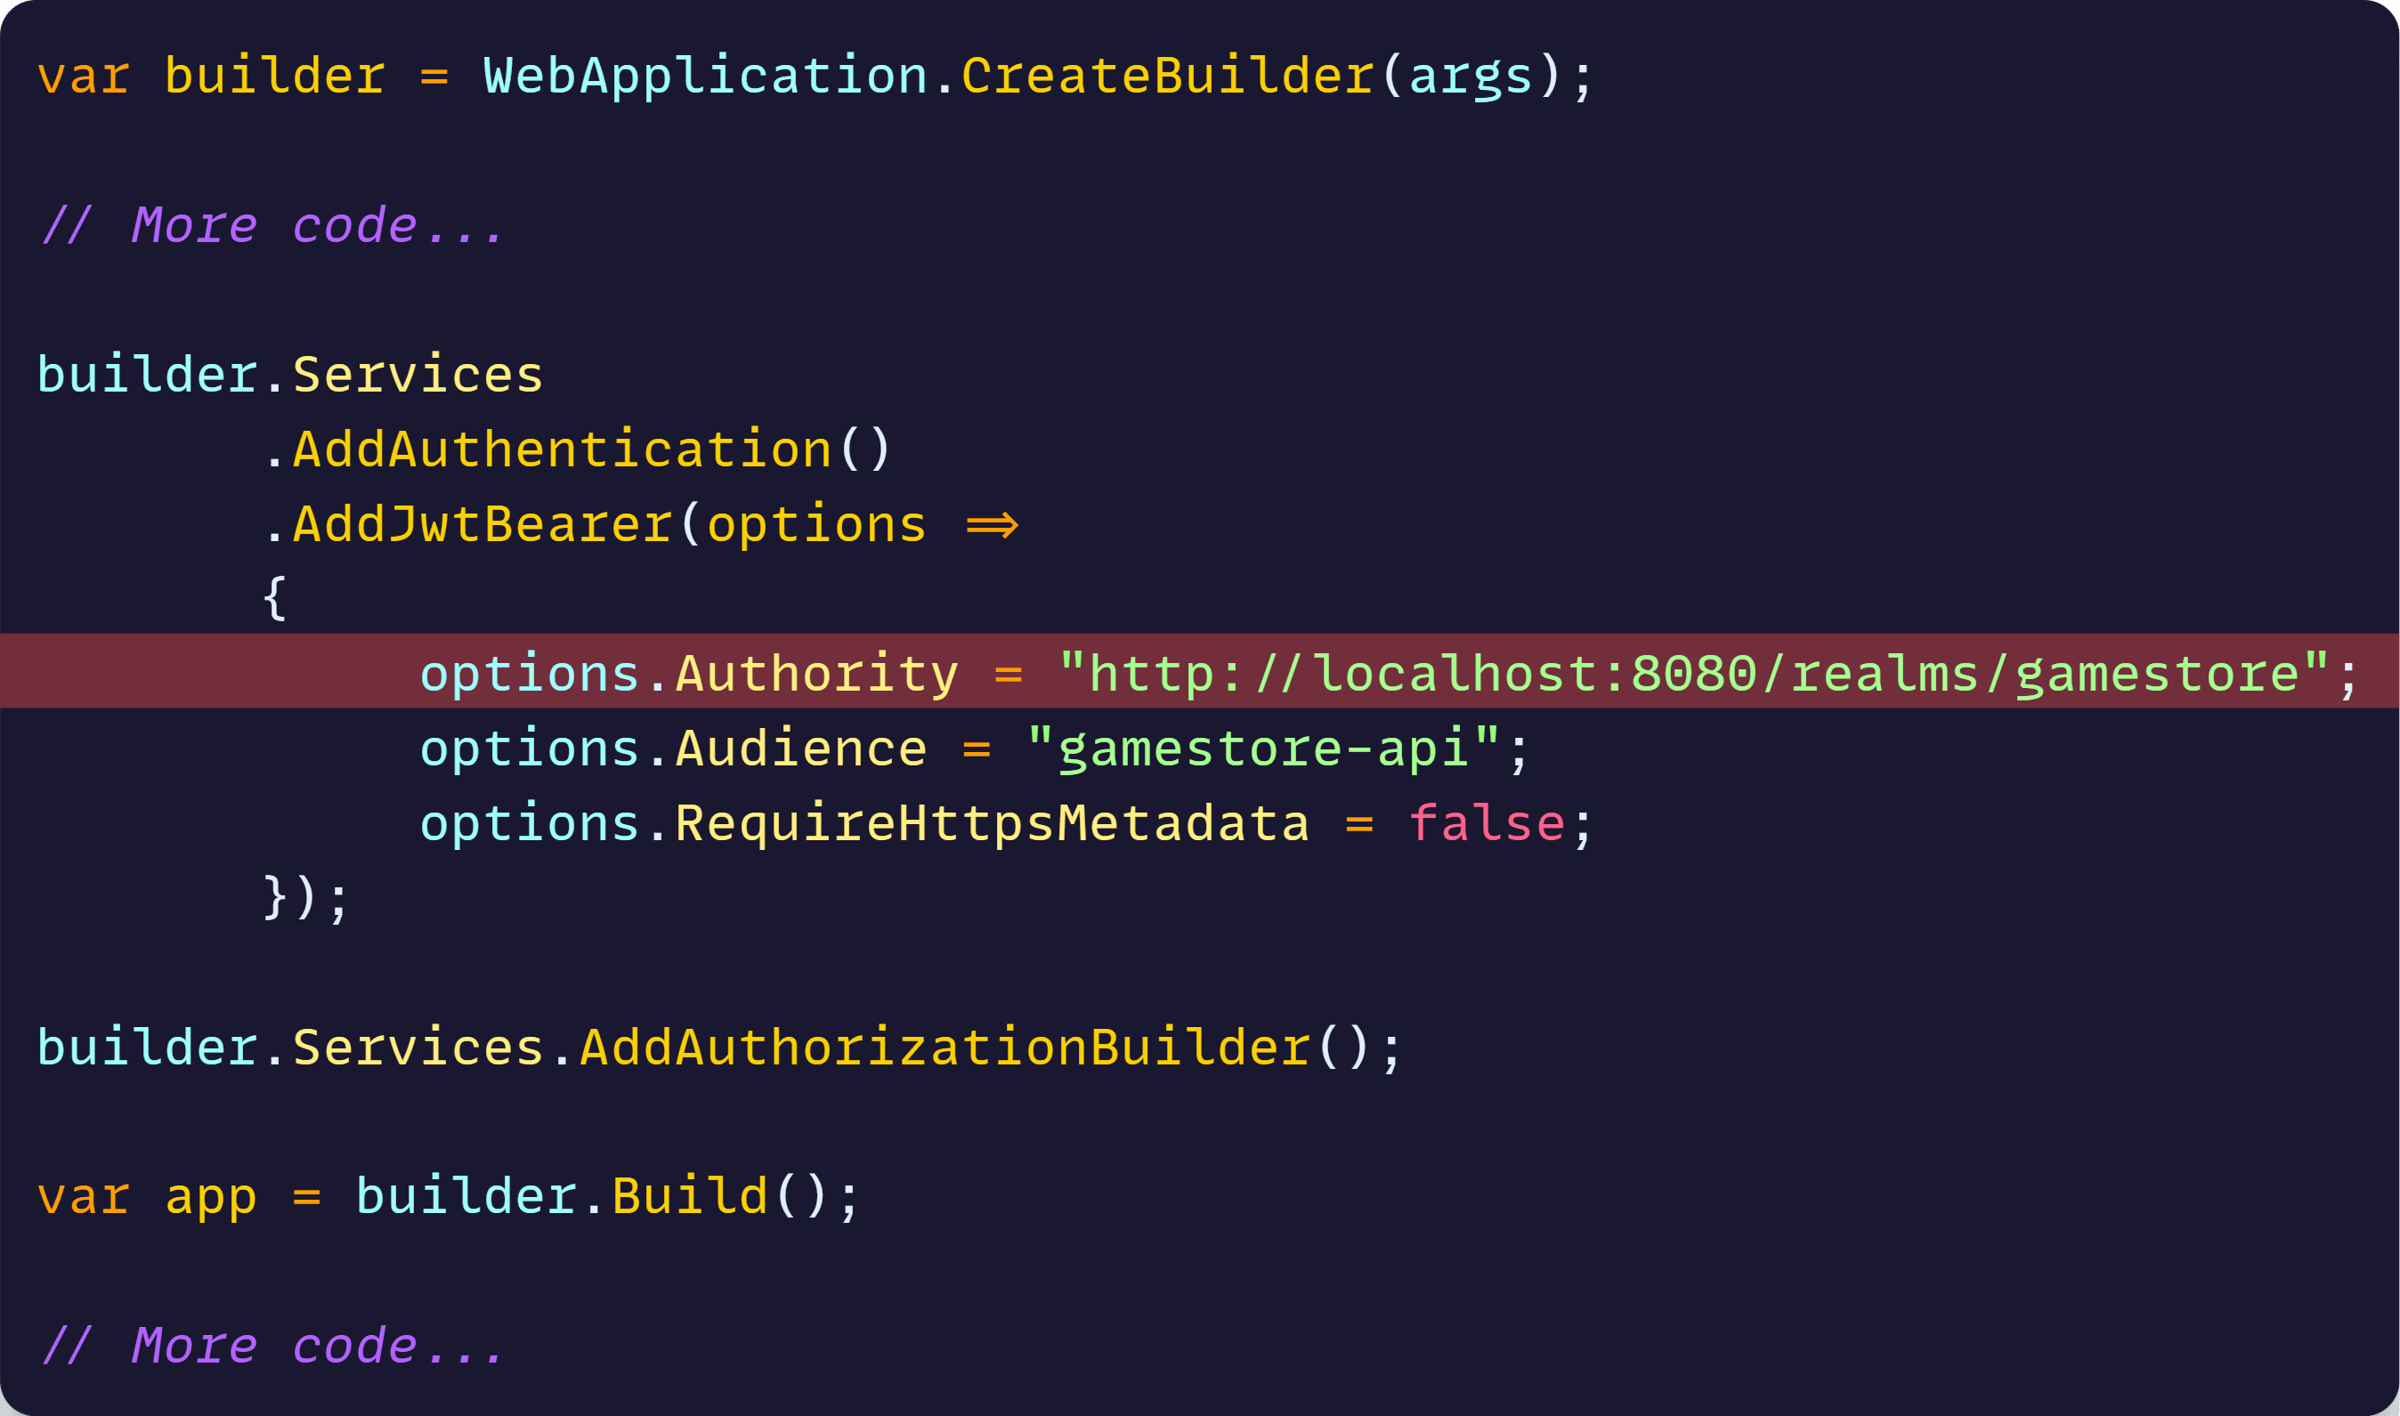
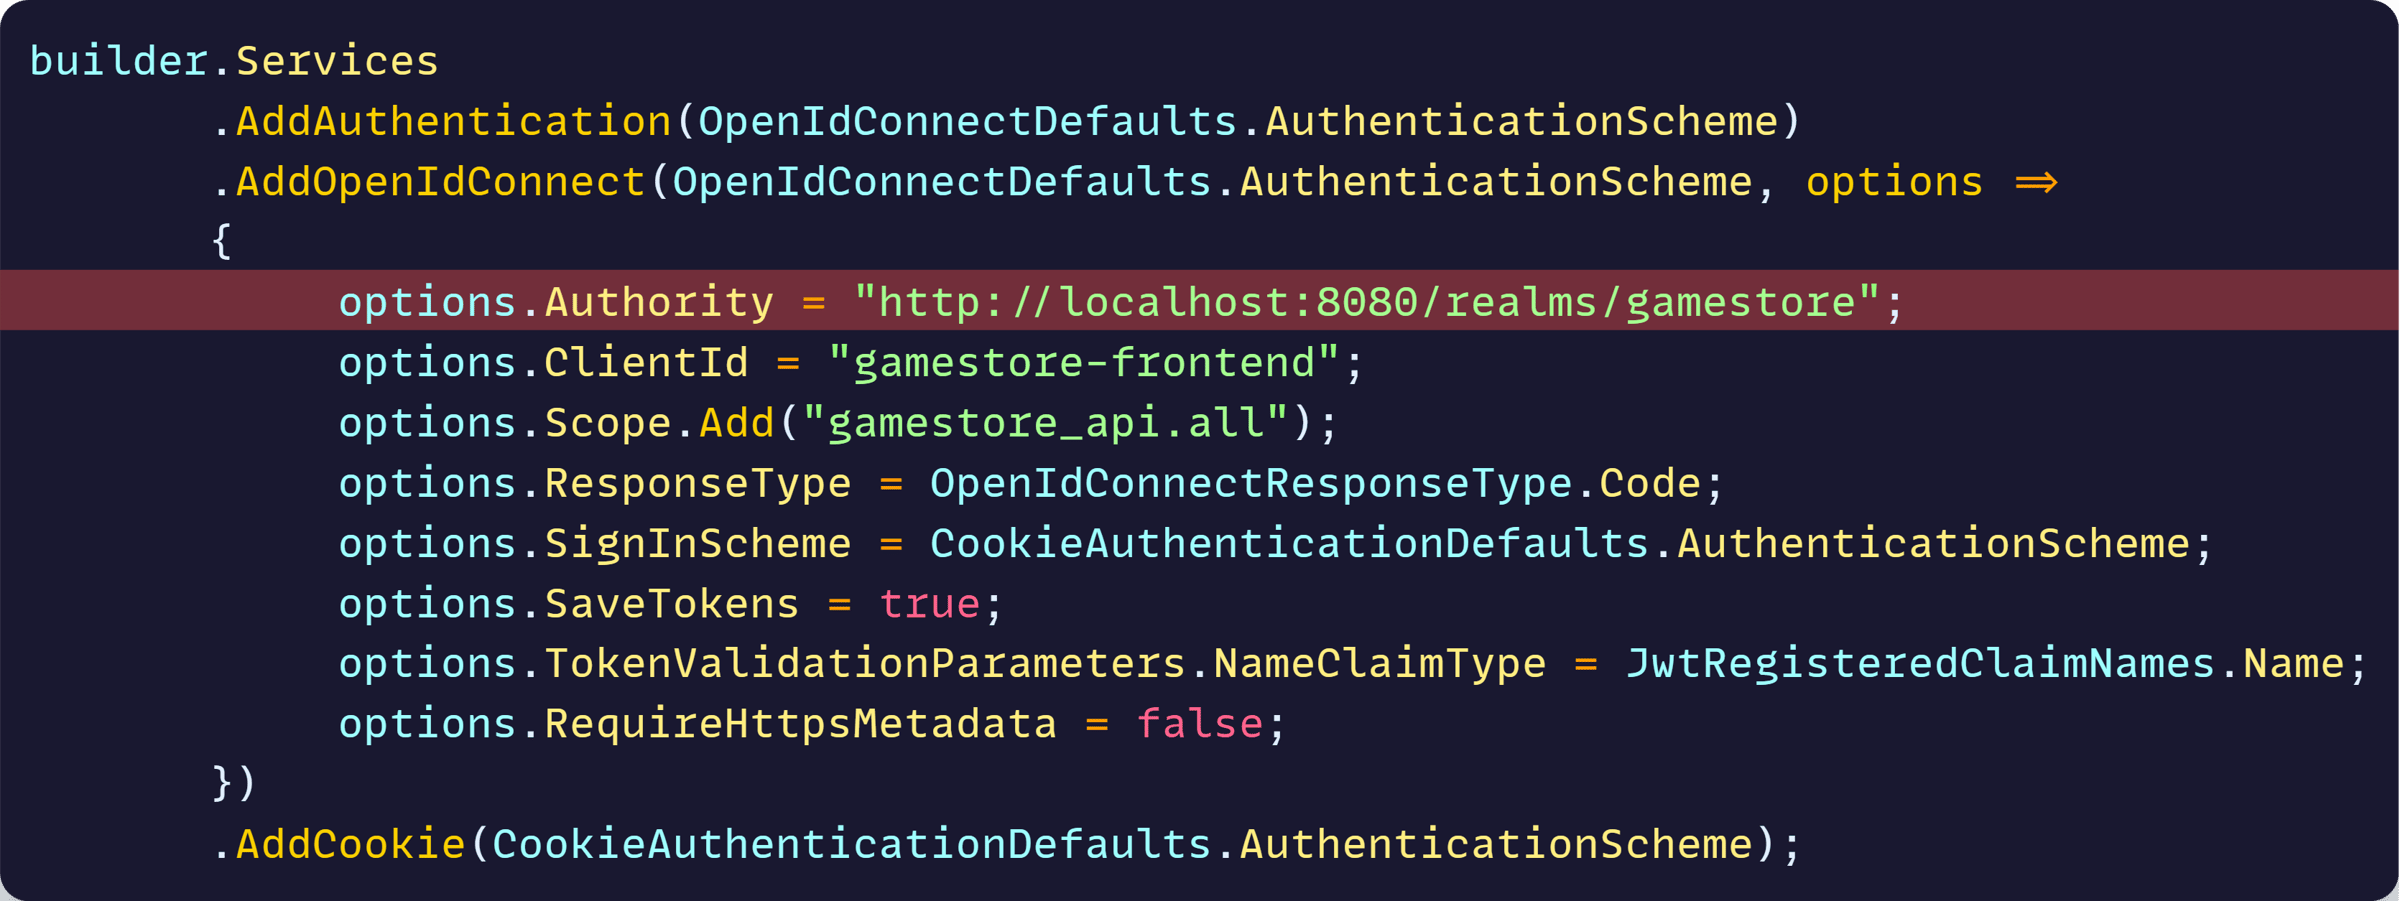
What this means is that, on our API project, we can now remove the line where we previously hardcoded the Authority for our default auth scheme:
Now let’s run our Aspire application, with a debugger attached this time, and notice our API shows up in the Dashboard:
And then let’s send any valid request to the API via Postman or any HTTP client so it hits the breakpoint I put in the auth scheme configuration:
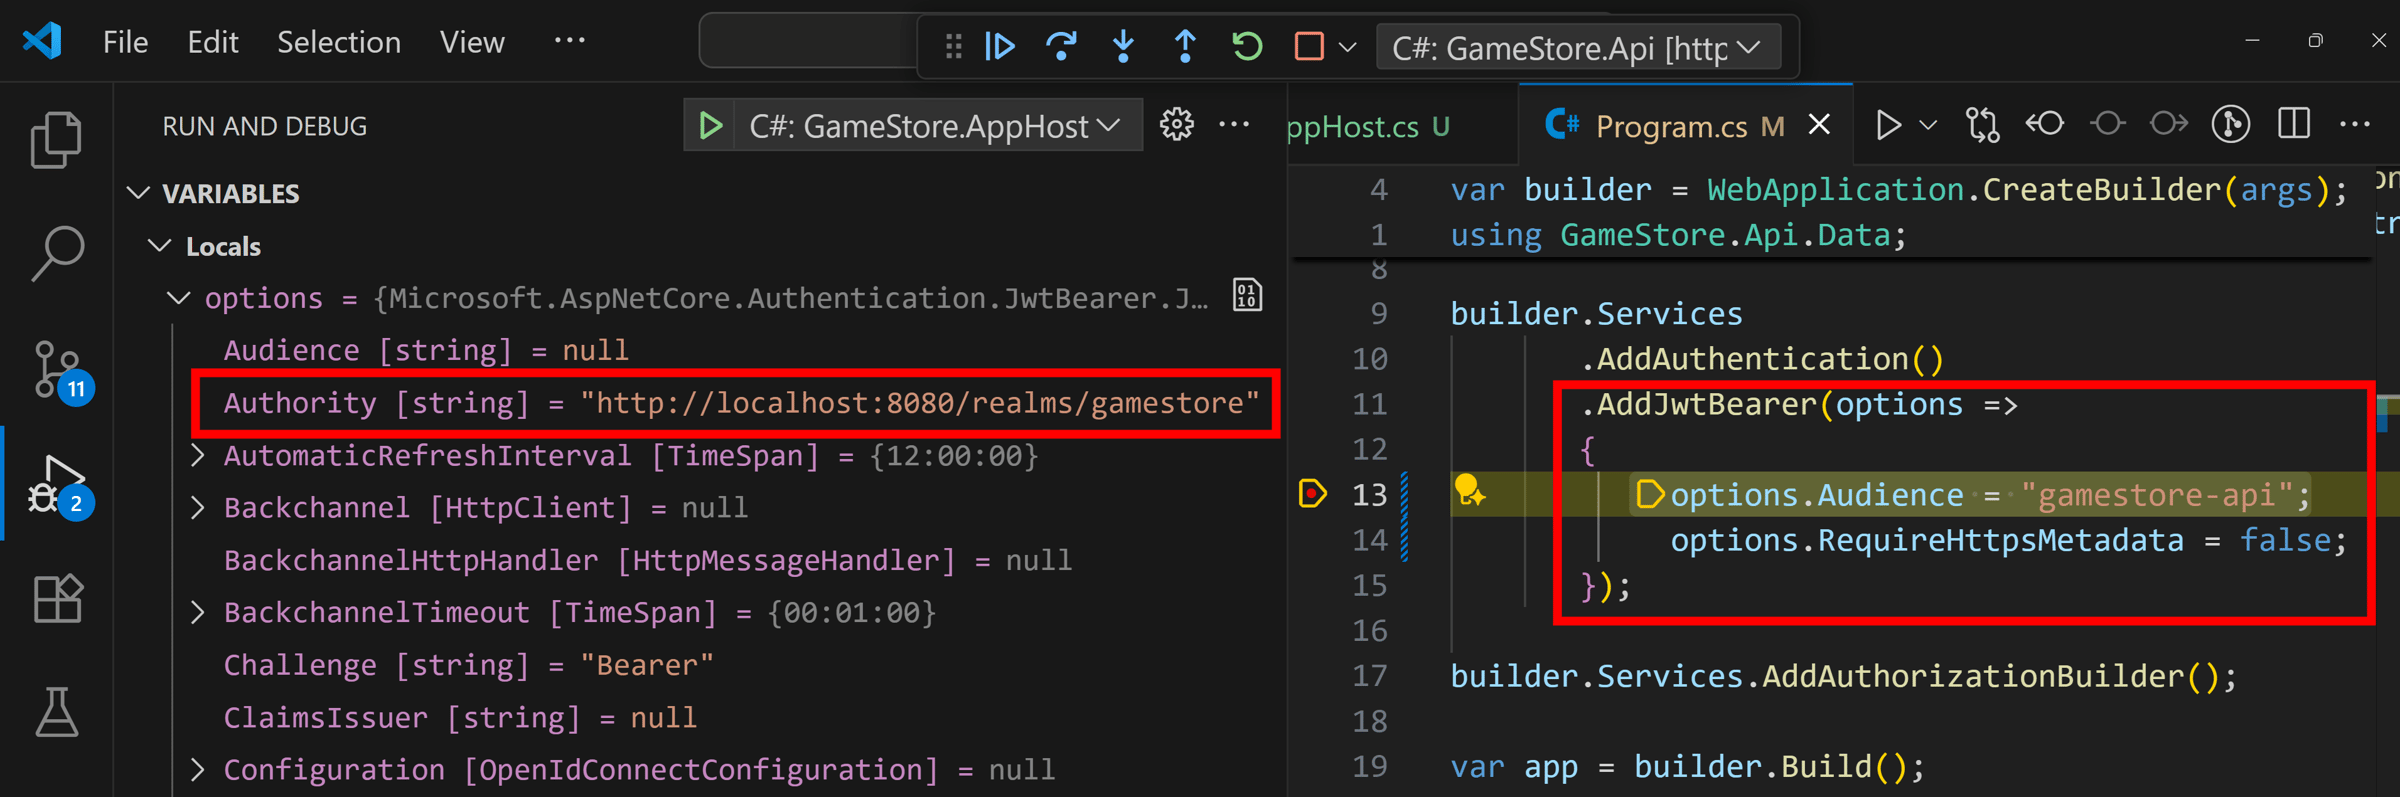
Notice that even when the API is not doing anything about the Authority in its auth scheme configuration, the Authority property has been set to the correct value for our Aspire-managed Keycloak server.
This is very powerful because:
- Developers no longer need to worry about how to connect the app to external services. Aspire will take care of that.
- The app can now work with Keycloak servers hosted anywhere, without ever having to touch the app itself.
Now, let’s take care of the frontend.
Step 6: Add the frontend
I don’t usually keep backend and frontend in the same repo and AppHost, but will do it here since it makes it easier to follow along.
Let’s start by referencing the Frontend project from AppHost:
Then let’s add the frontend to our application model:
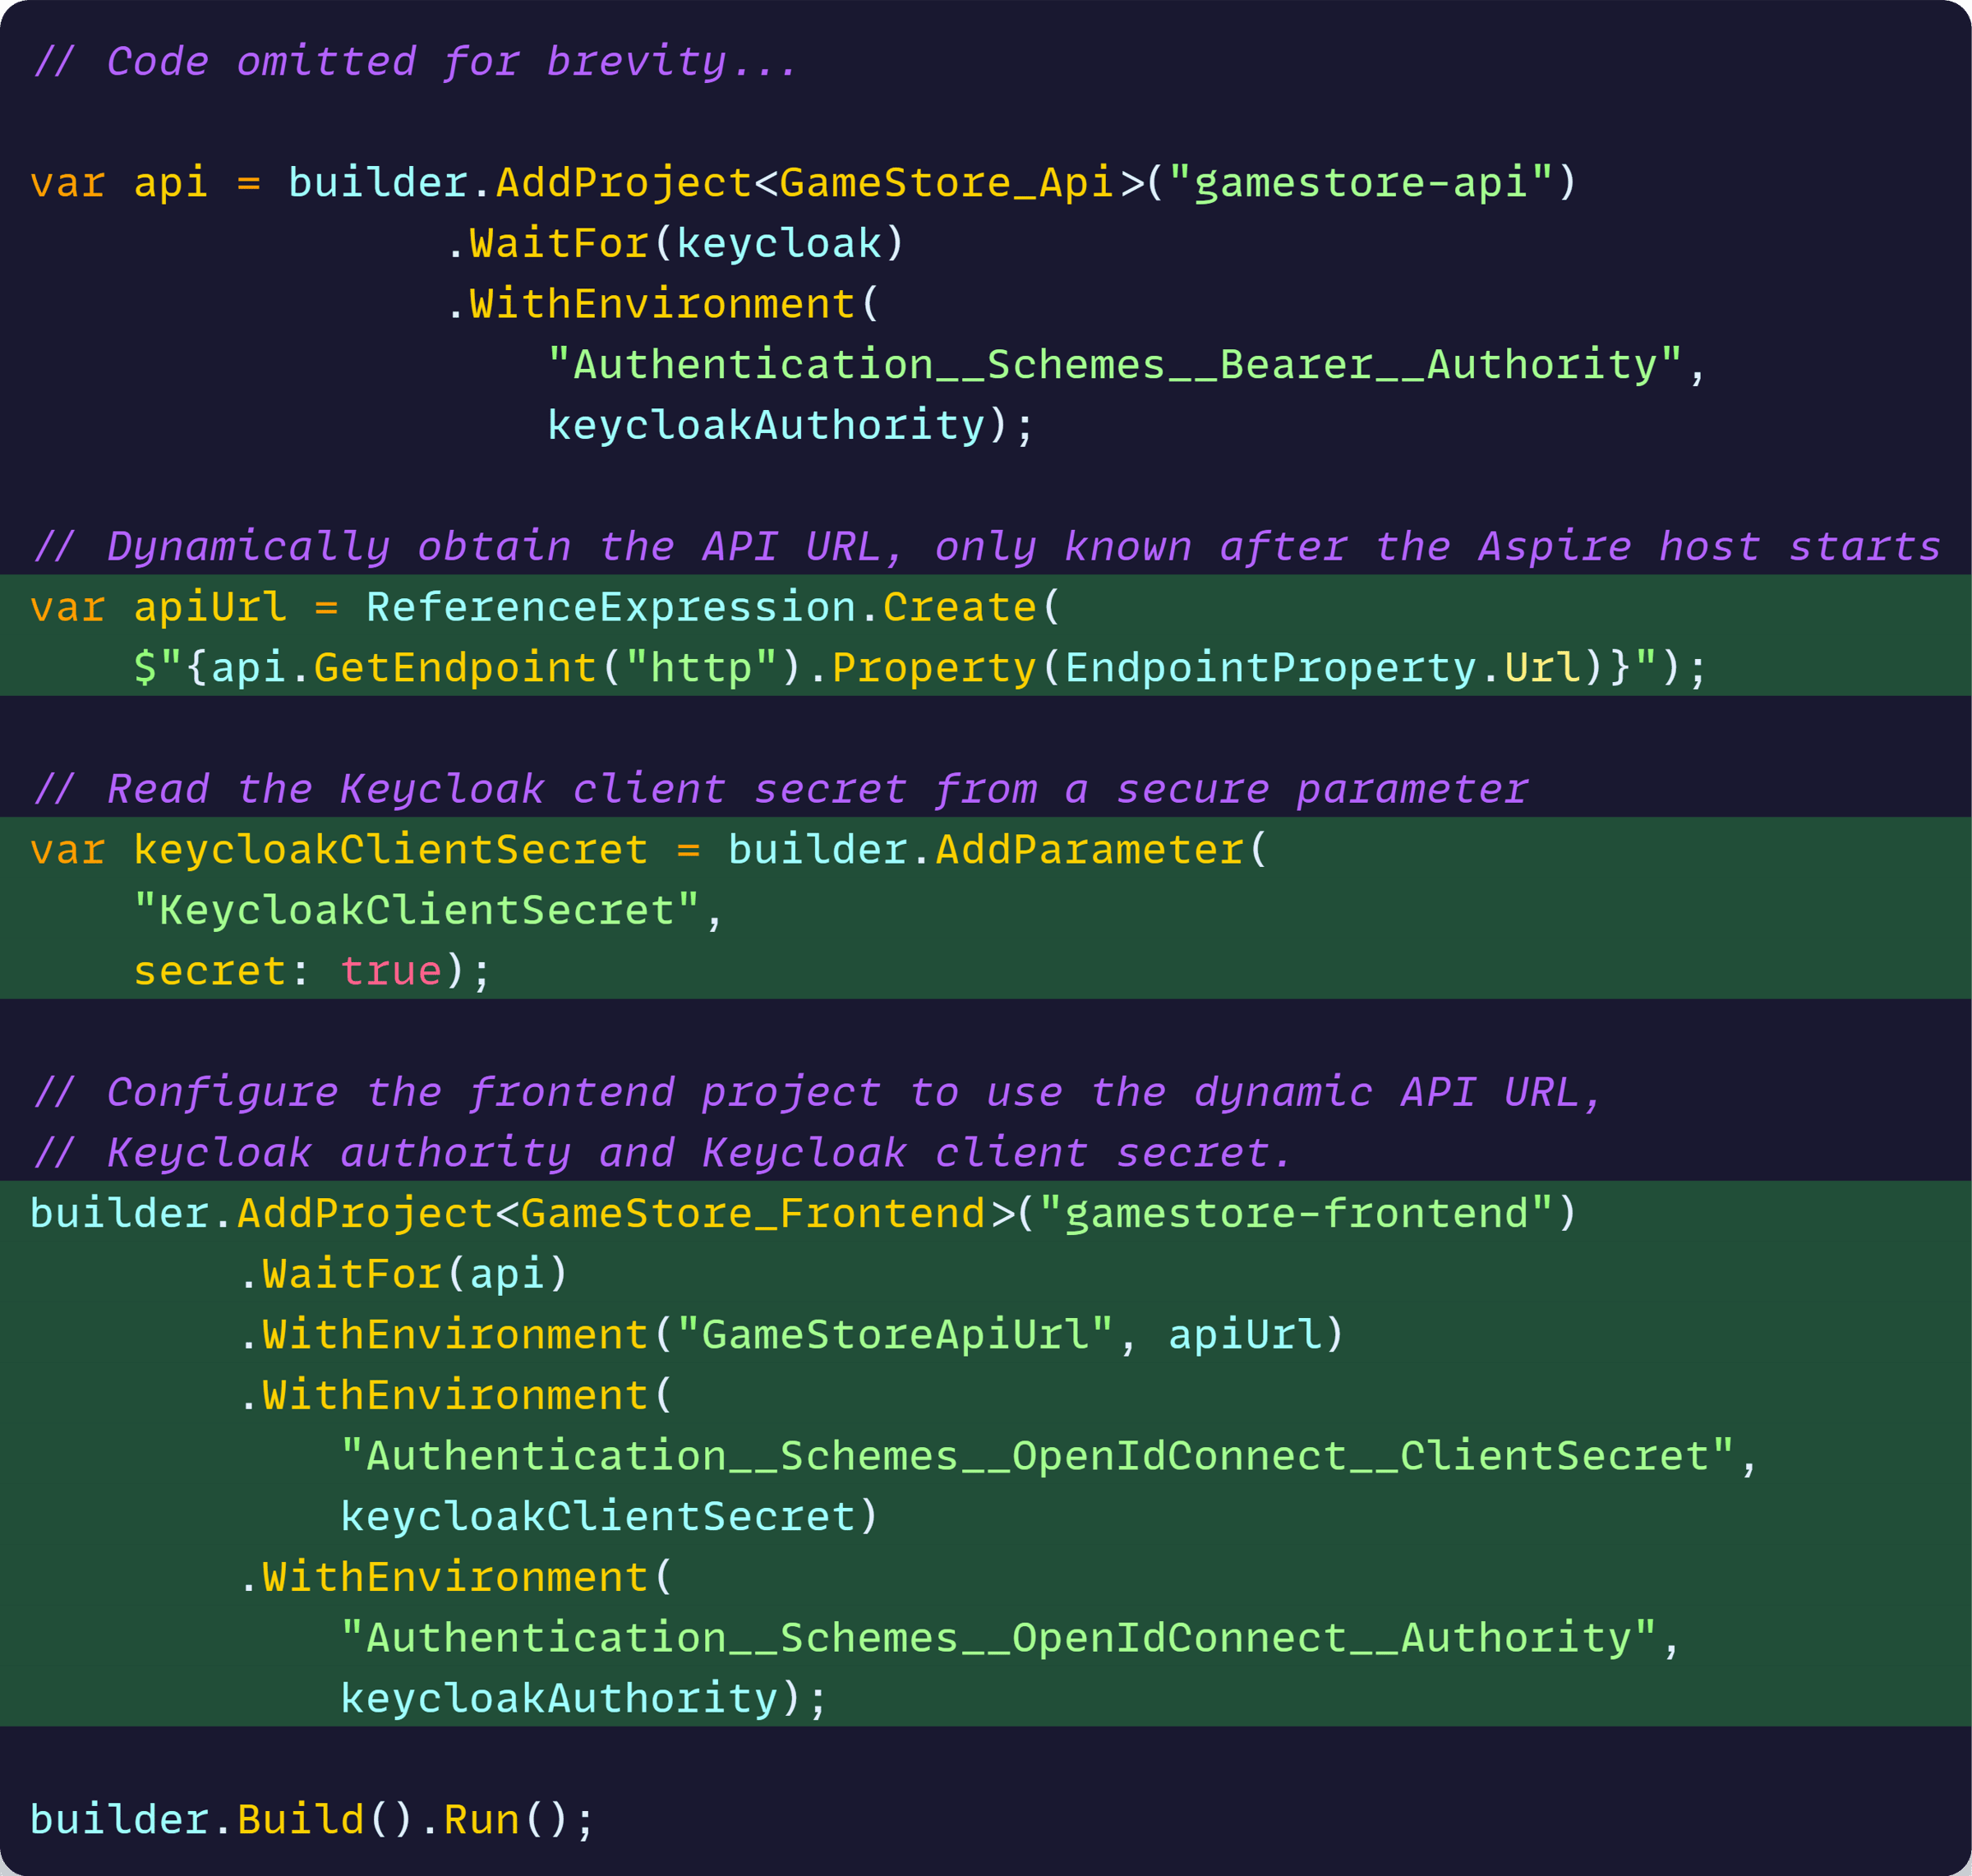
As you can see, we set the Authority on the frontend the same way as with the backend. But we can also:
- Set the backend URL with an env var populated from the dynamically generated API endpoint
- Set the required client secret via a secret parameter
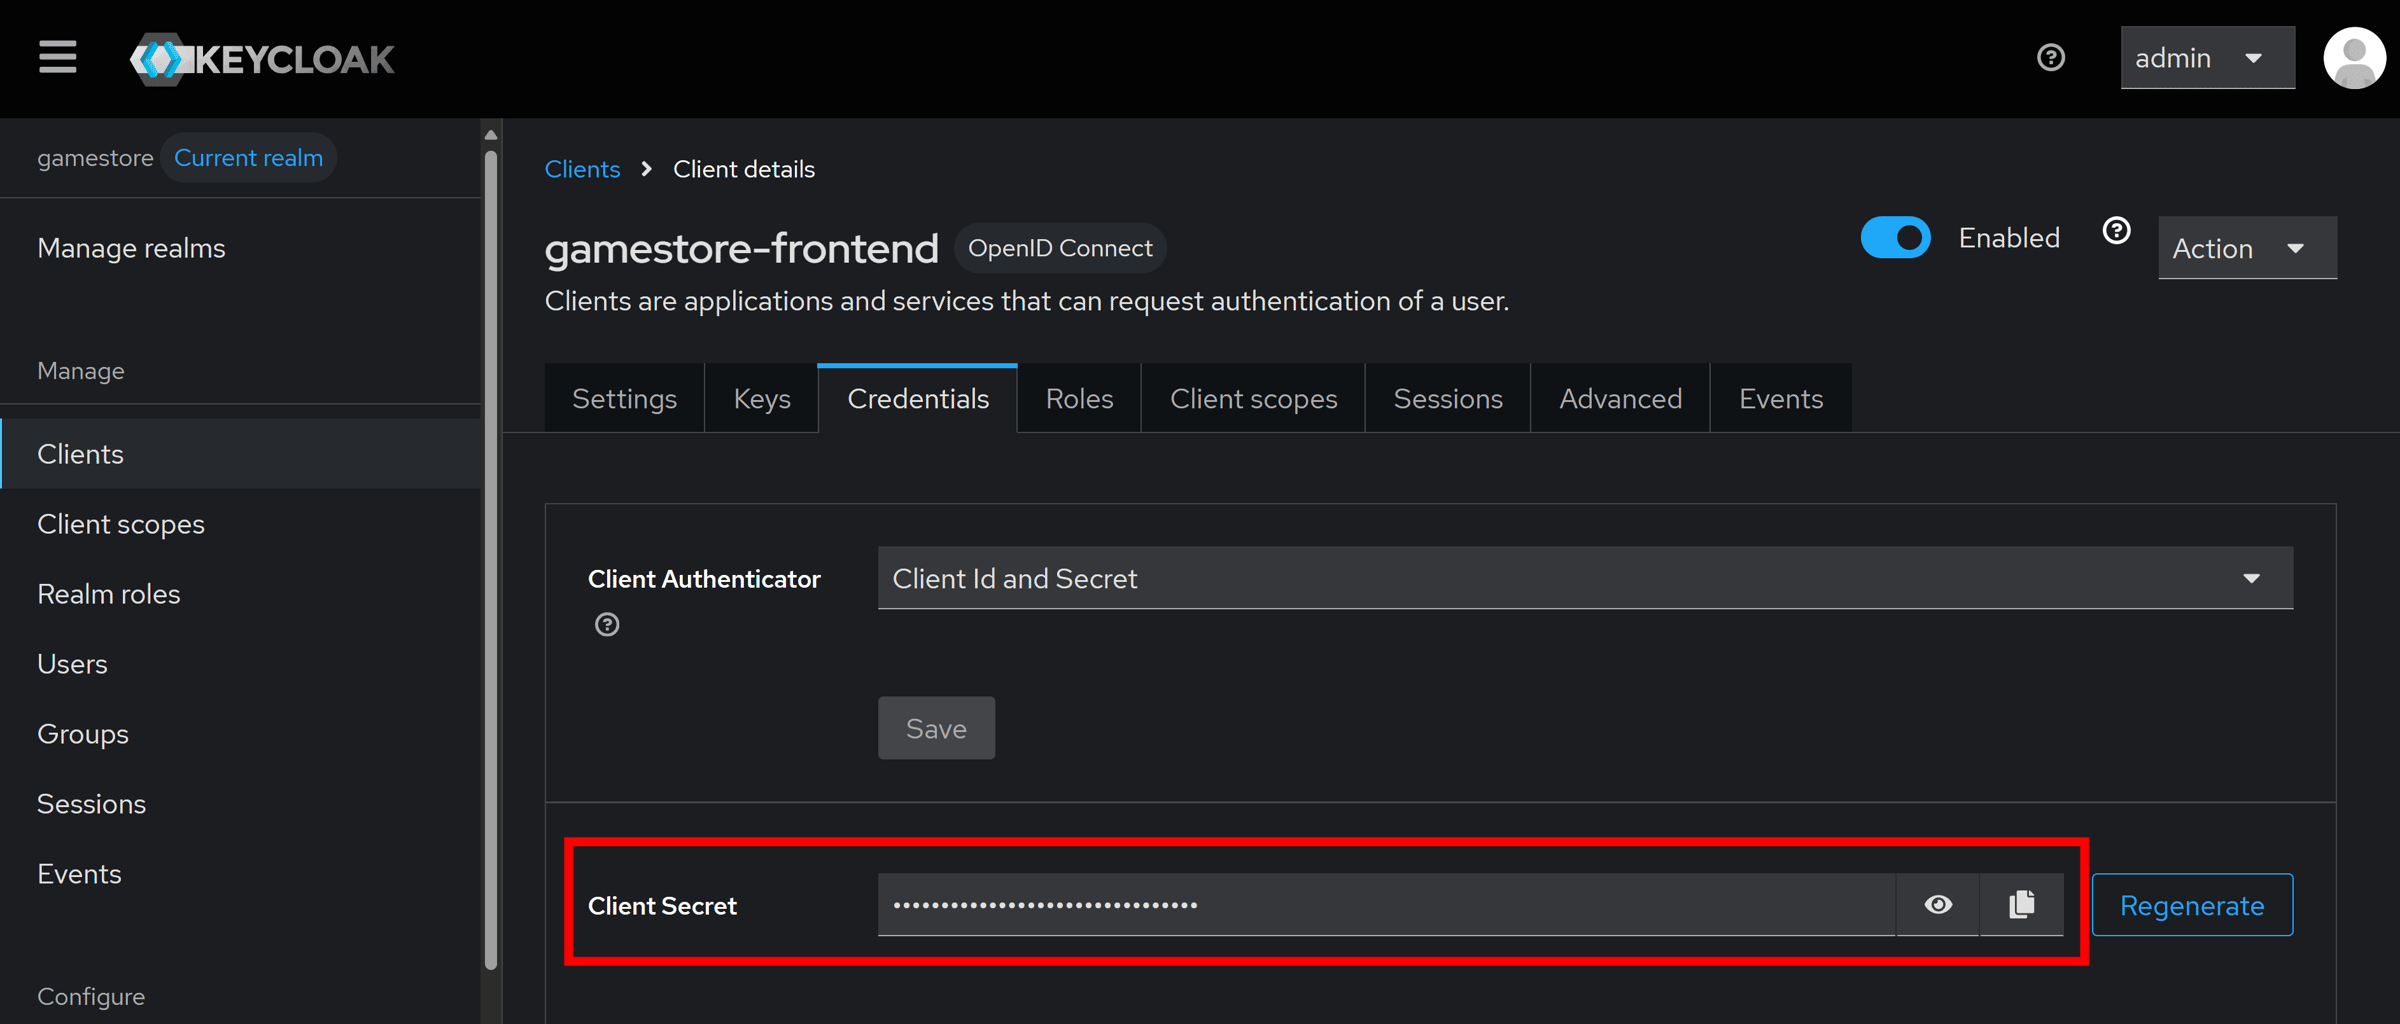
Now, that secret parameter won’t be auto-generated. First, we need to get the Client Secret assigned to our gamestore-frontend client in our new Keycloak instance:
Then, we can provide it to our app model, for local development at least, by running this in a terminal set to your AppHost dir:

If you had set that secret directly in your frontend project before, it’s safe to remove it now.
Plus, you can also get rid of the hardcoded Authority URL in the frontend’s OIDC configuration:
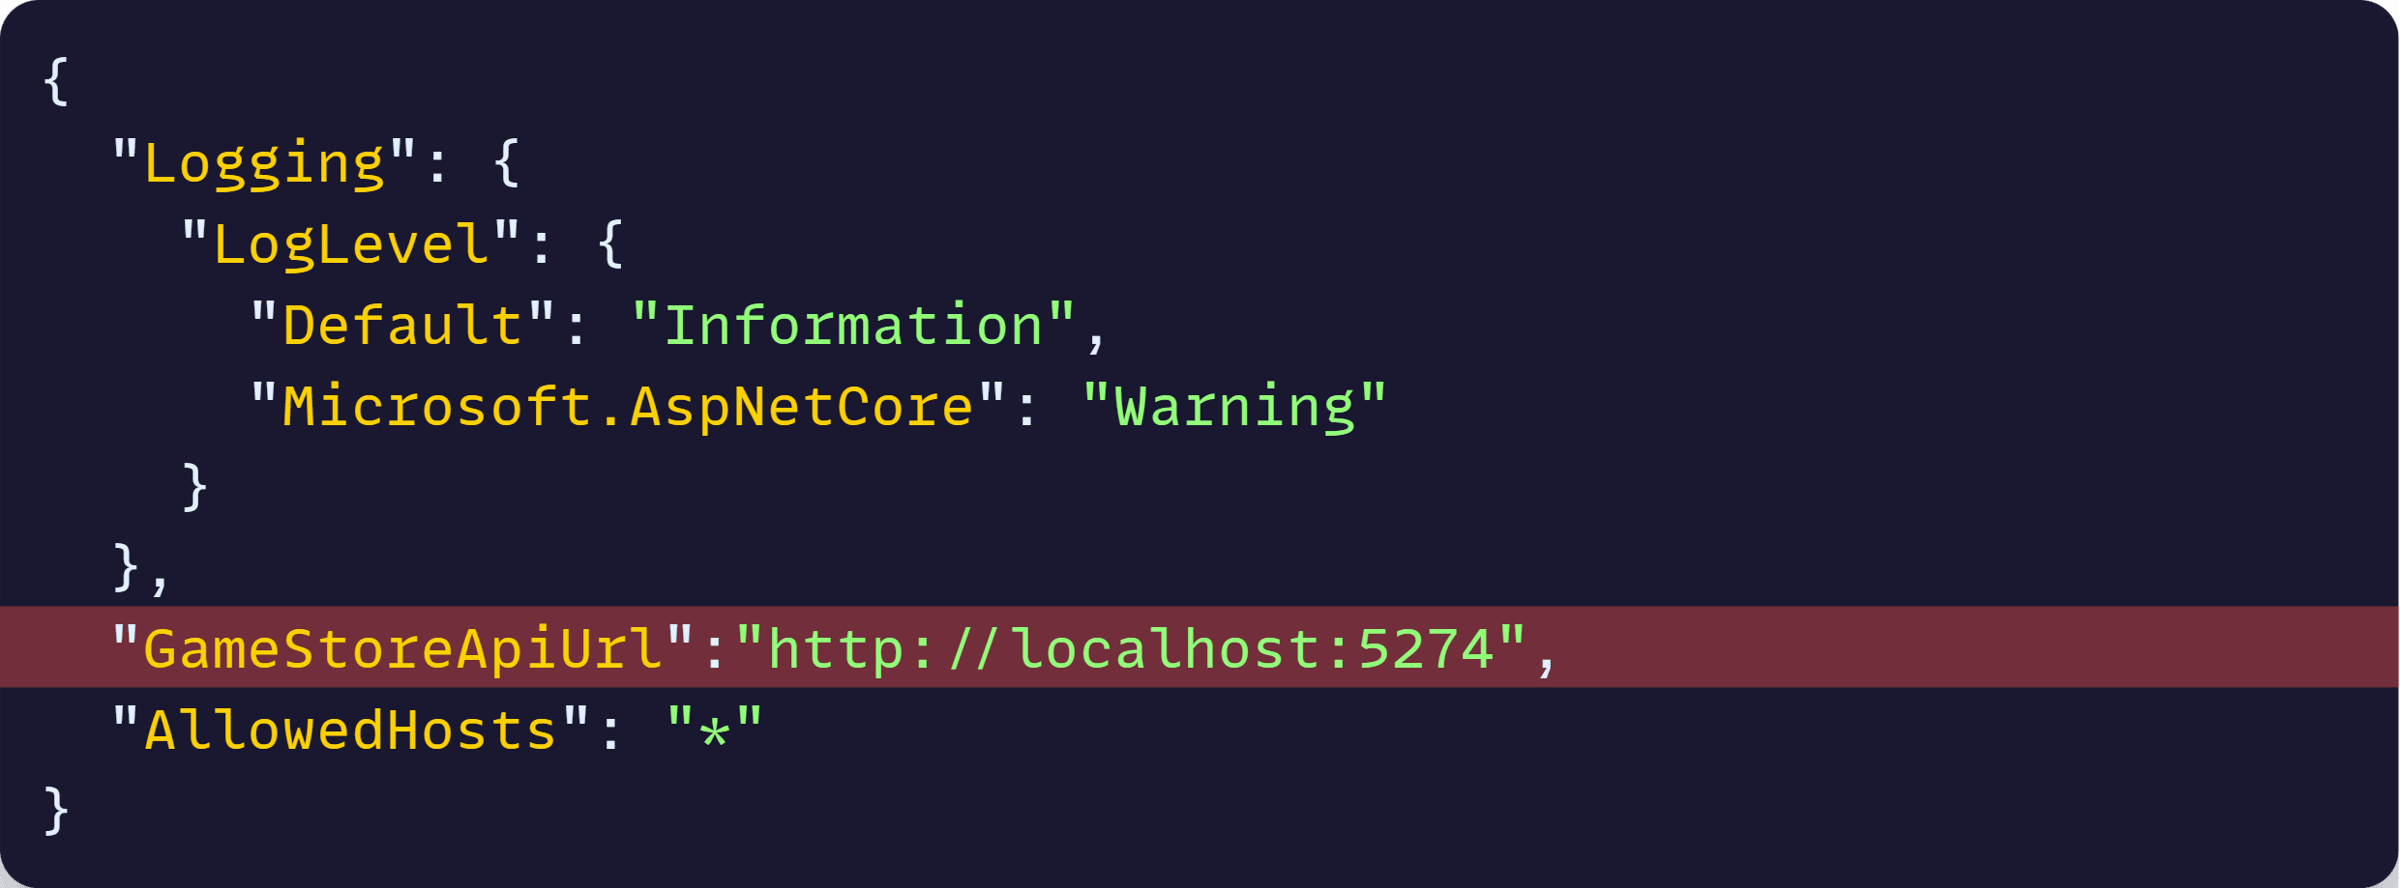
Finally, remove the hardcoded GameStoreApiUrl in the frontend’s appsettings.json file:
And with that, we are ready for an end-to-end test.
Step 7: End-To-End Test
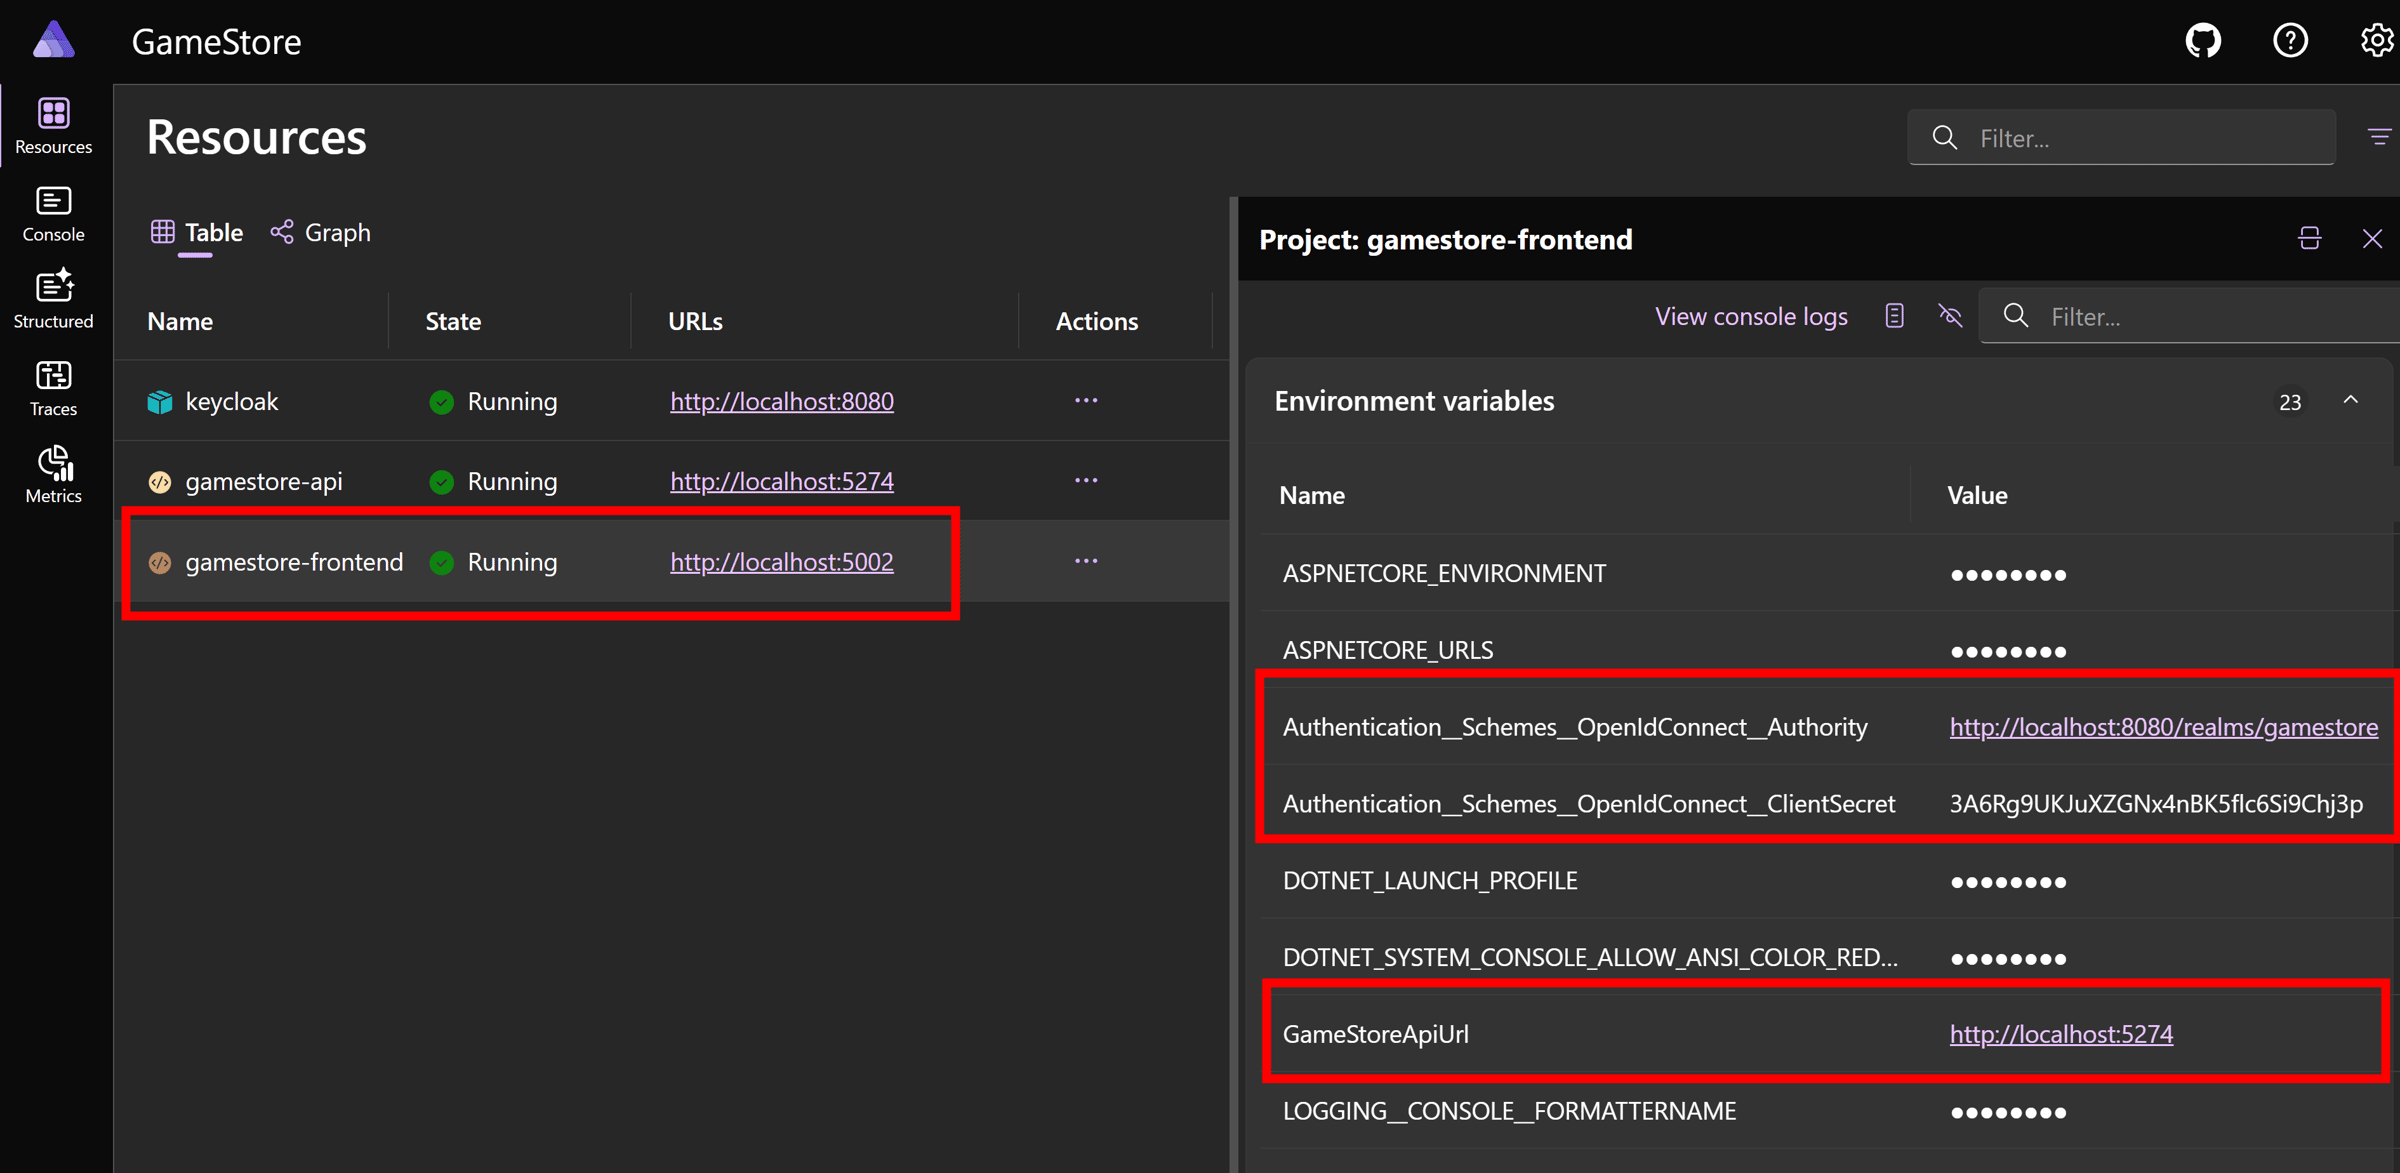
Once again, run your AppHost project and notice our Frontend has not just joined our other 2 resources, but also has been populated with the configured environment variables:
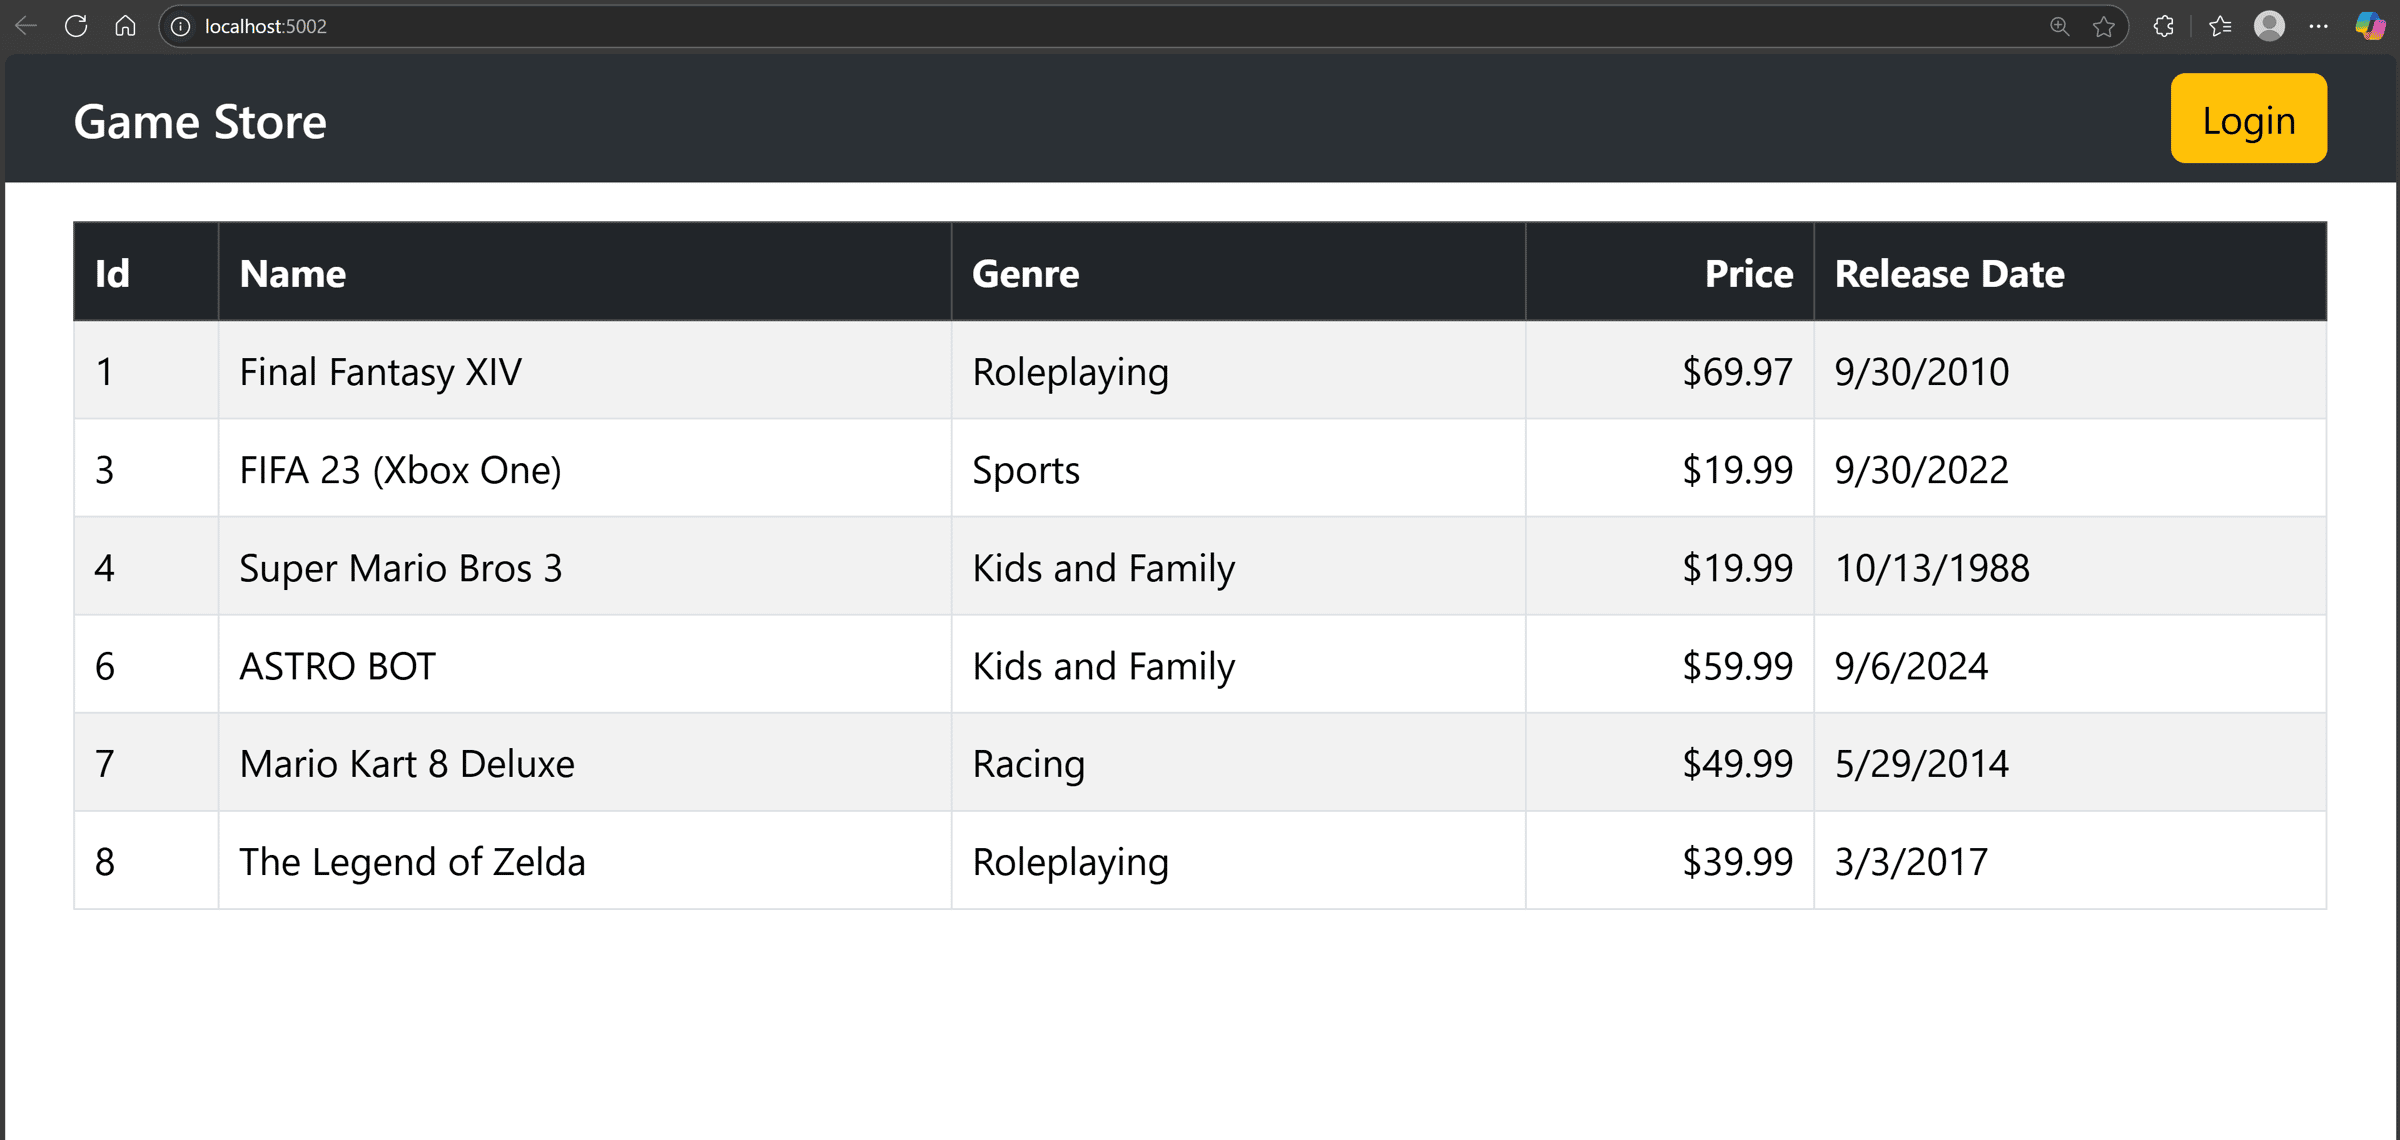
Clicking on the project URL takes us to our home page, which should load data from the backend without issues:
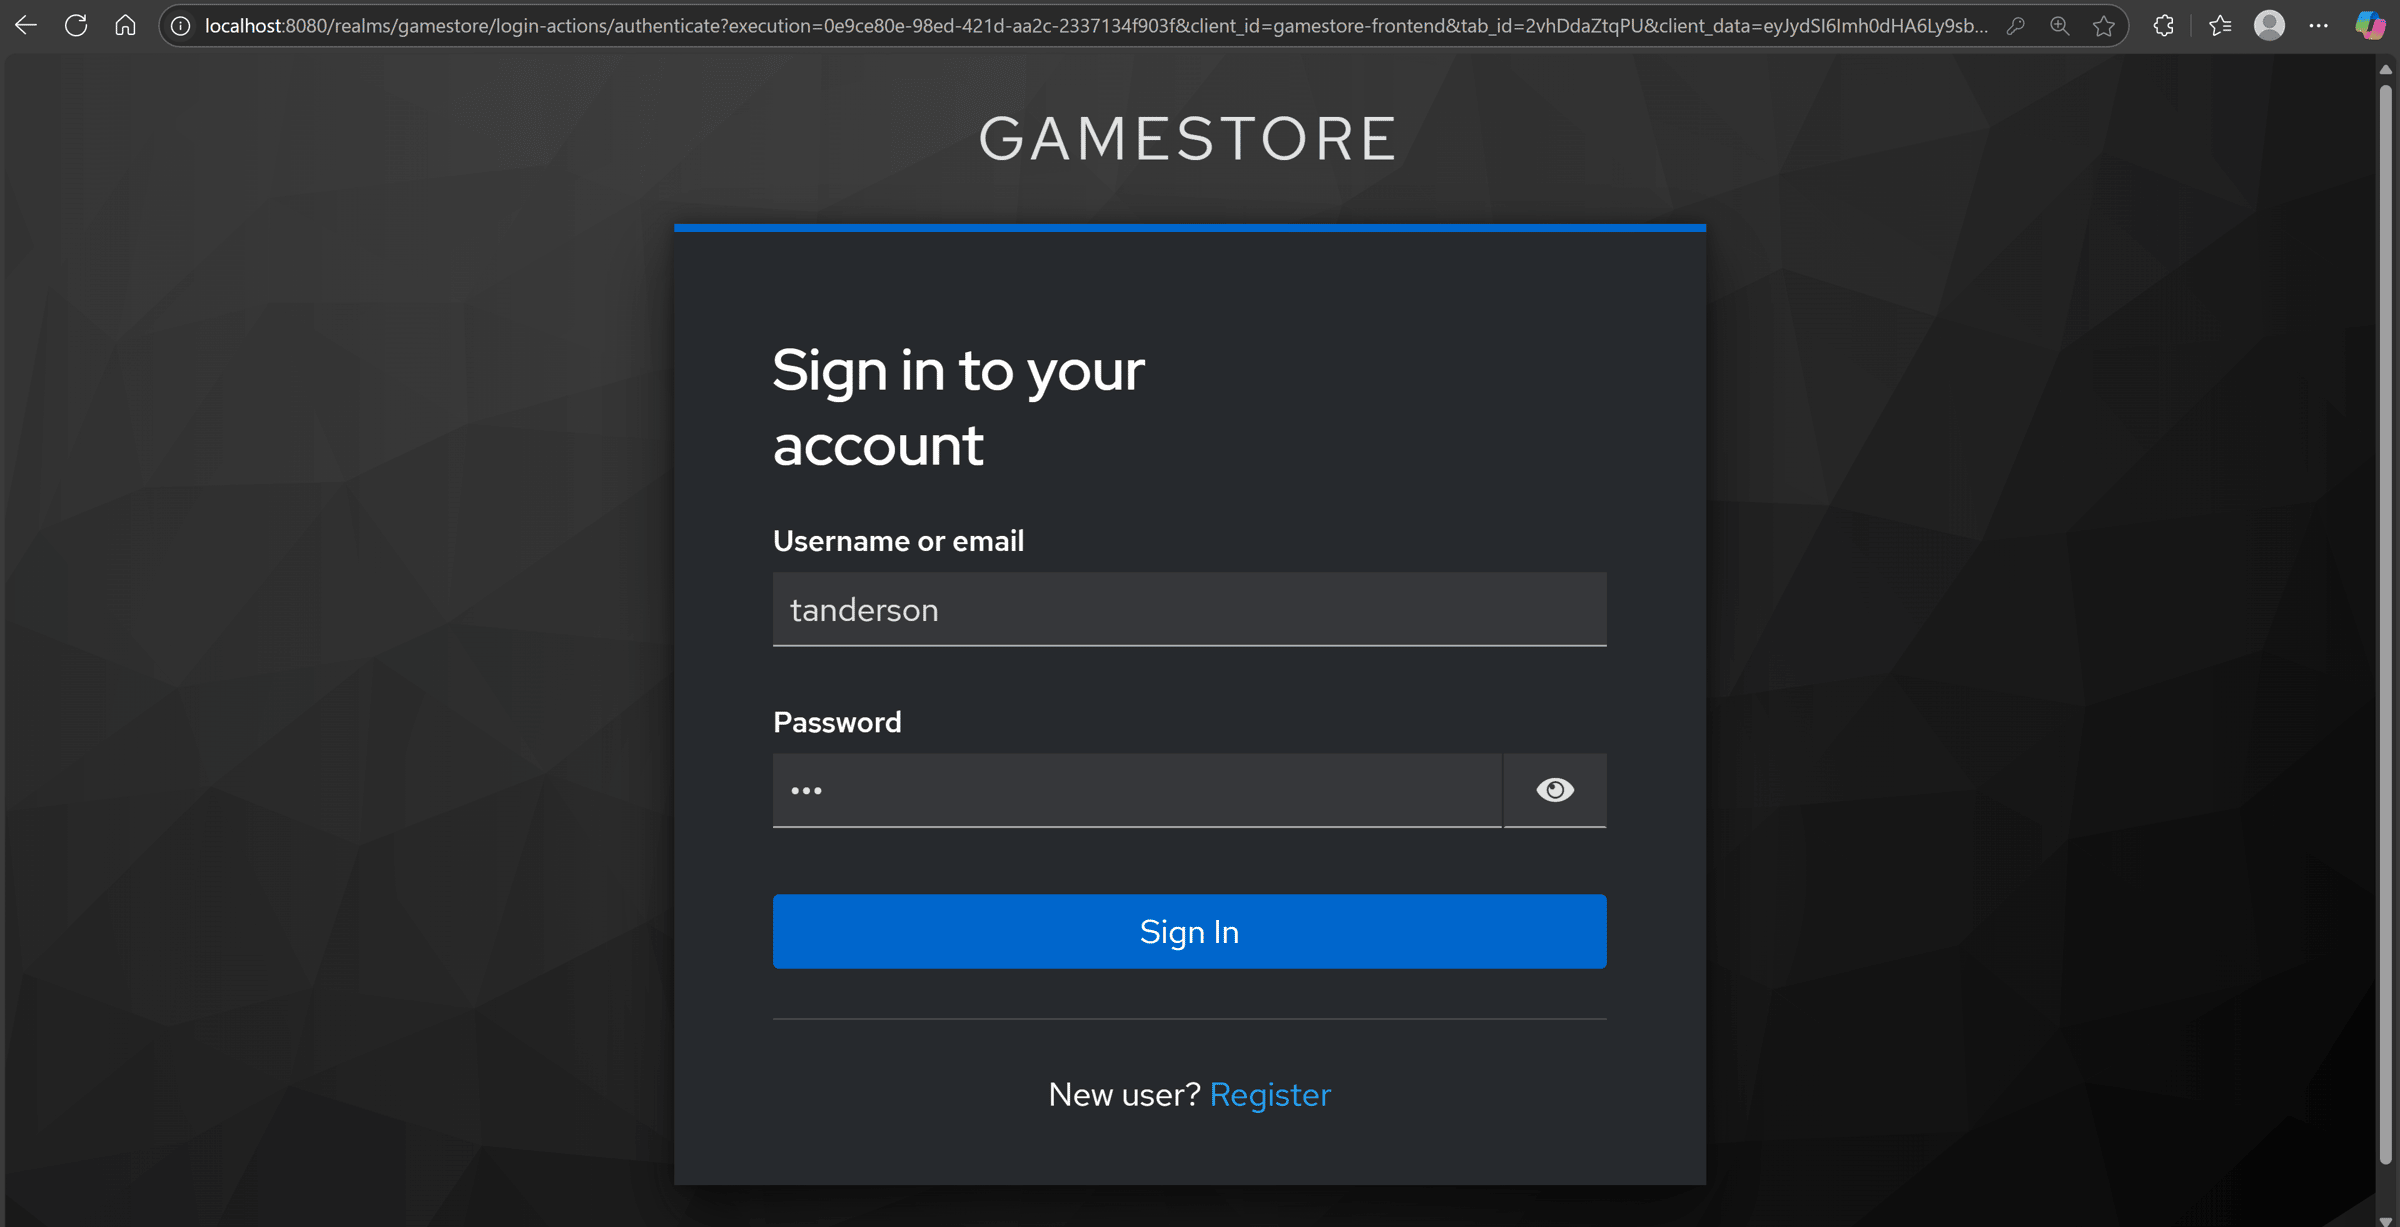
Clicking the Login button will take us to our Aspire-hosted Keycloak instance:
And, after login, we are taken back to our frontend, which now receives the identity information that allows it to light up a few new UI elements:
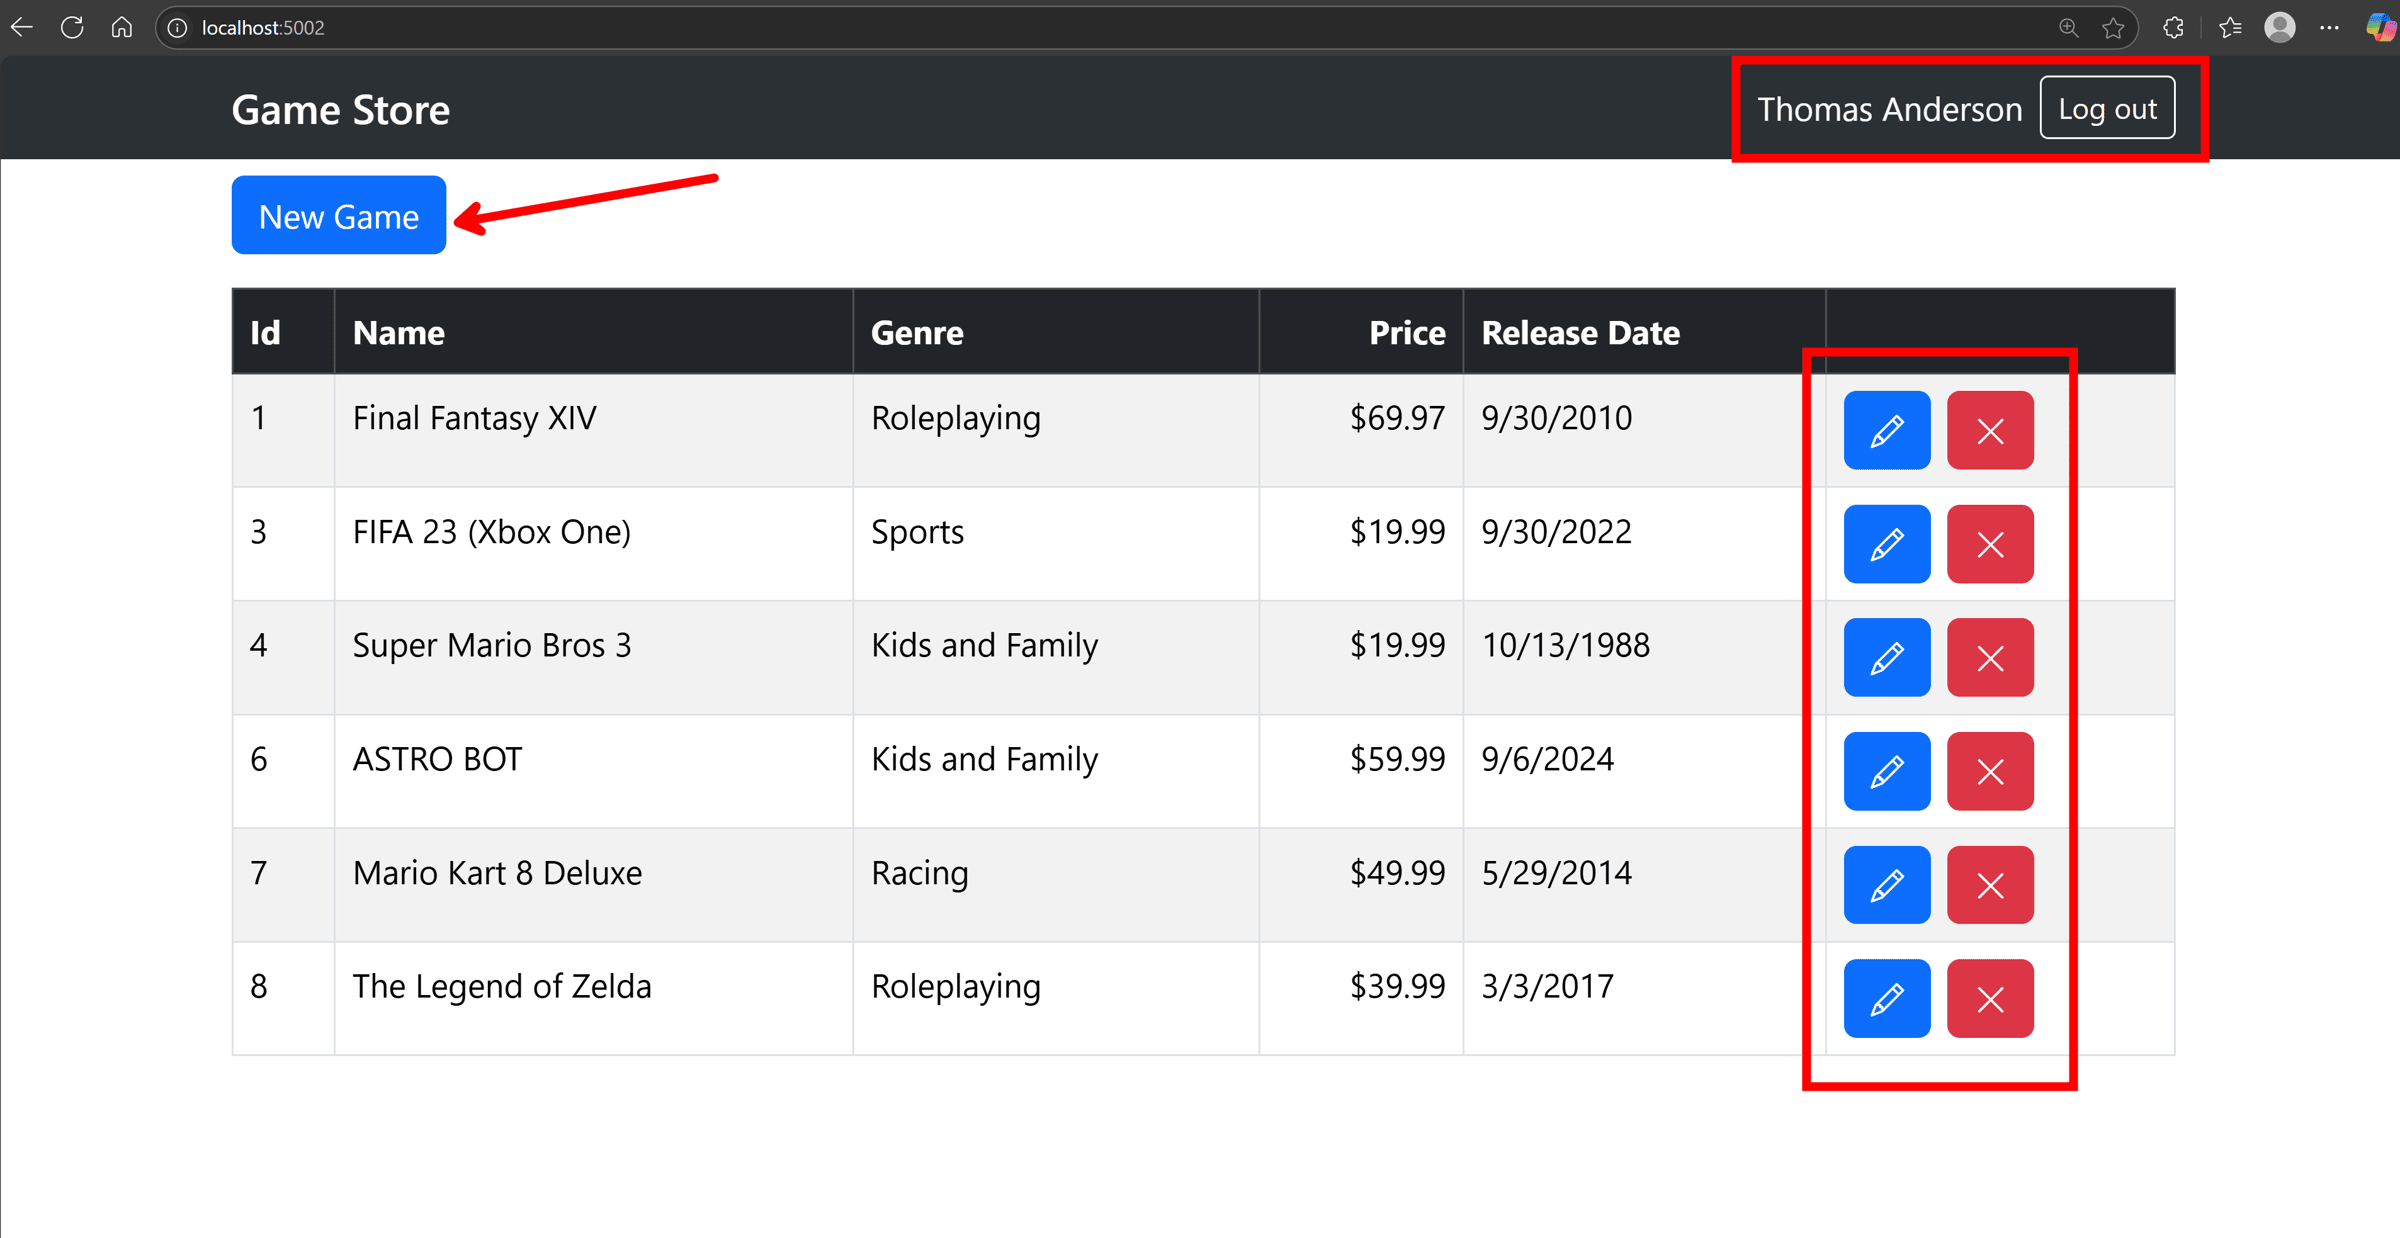
Mission accomplished!
Wrapping Up
This is what modern .NET development should look like.
No more lengthy onboarding documentation. No more Docker Compose files that developers forget to start. No more hardcoded connection details scattered across your repo.
Just clone, F5, and authenticate. Every single time.
The “works on my machine” problem just became a thing of the past.
And that’s all for today.
See you next Saturday.
P.S. If you’re ready to take this containerized, production-ready approach beyond just Keycloak, my Containers & Aspire course shows you how to build bulletproof .NET applications from day 1.
Whenever you’re ready, here’s how I can help:
The .NET Developer Bootcamp: A complete path from ASP.NET Core fundamentals to building, containerizing, and deploying production-ready, cloud-native apps on Azure.
