Read time: 10 minutes
The .NET Saturday is brought to you by:
Here’s a classic engineering problem: your API saves an order in the DB, then publishes an “OrderCreated” message to a queue. It works until a tiny network hiccup or a crash lands between those two lines.
Now you’ve got a paid order with no message (or a message with no order). An inconsistent state that will surely generate lots of support calls.
This isn’t bad luck. It’s a design problem.
Any time you dual-write (DB + queue) in one request, you’re betting on flawless I/O. With retries, timeouts, and restarts, that bet loses.
The fix is the popular Outbox Pattern: Commit once to your database and let a background dispatcher publish messages from an outbox table.
Today, I’ll show you how to implement the outbox pattern in a few simple steps.
Let’s dive in.
What is the Outbox Pattern?
Imagine this classic distributed systems problem, where you need to both make a database update to store a new order and also publish a message to a queue so your queue processor can eventually work on fulfilling the order:
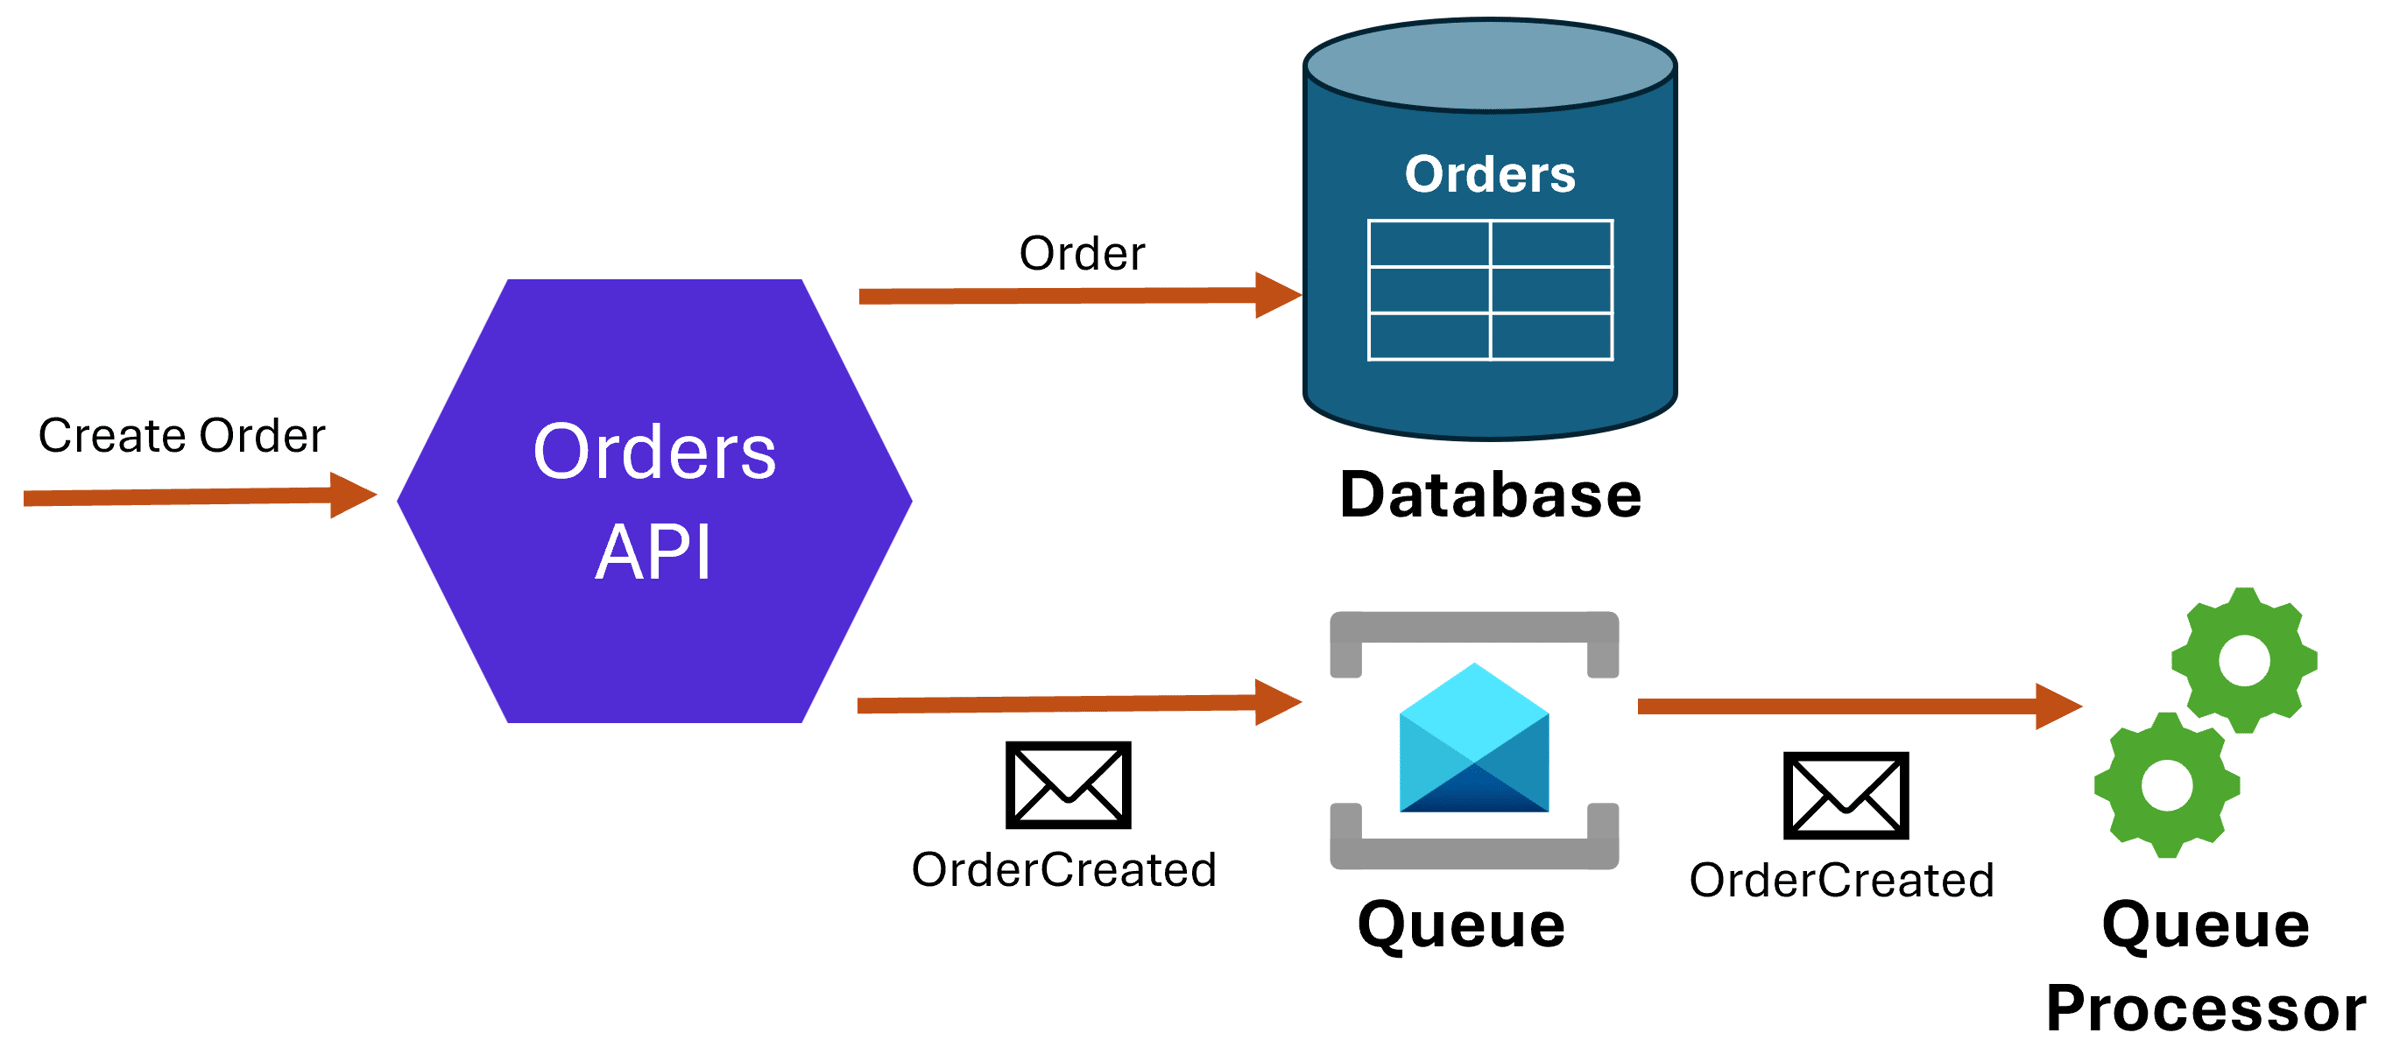
The problem is that we need to ensure both that the order is saved in the DB and that the message is published. If either of those operations fails, the other must fail too, or we get into an inconsistent state.
This is known as the dual-write problem, which happens because the database and the queue are separate systems where we can’t guarantee both writes succeed or fail together.
The best way to tackle this is by turning this dual-write scenario into two steps that can occur in a reliable sequence with the help of database transactions:
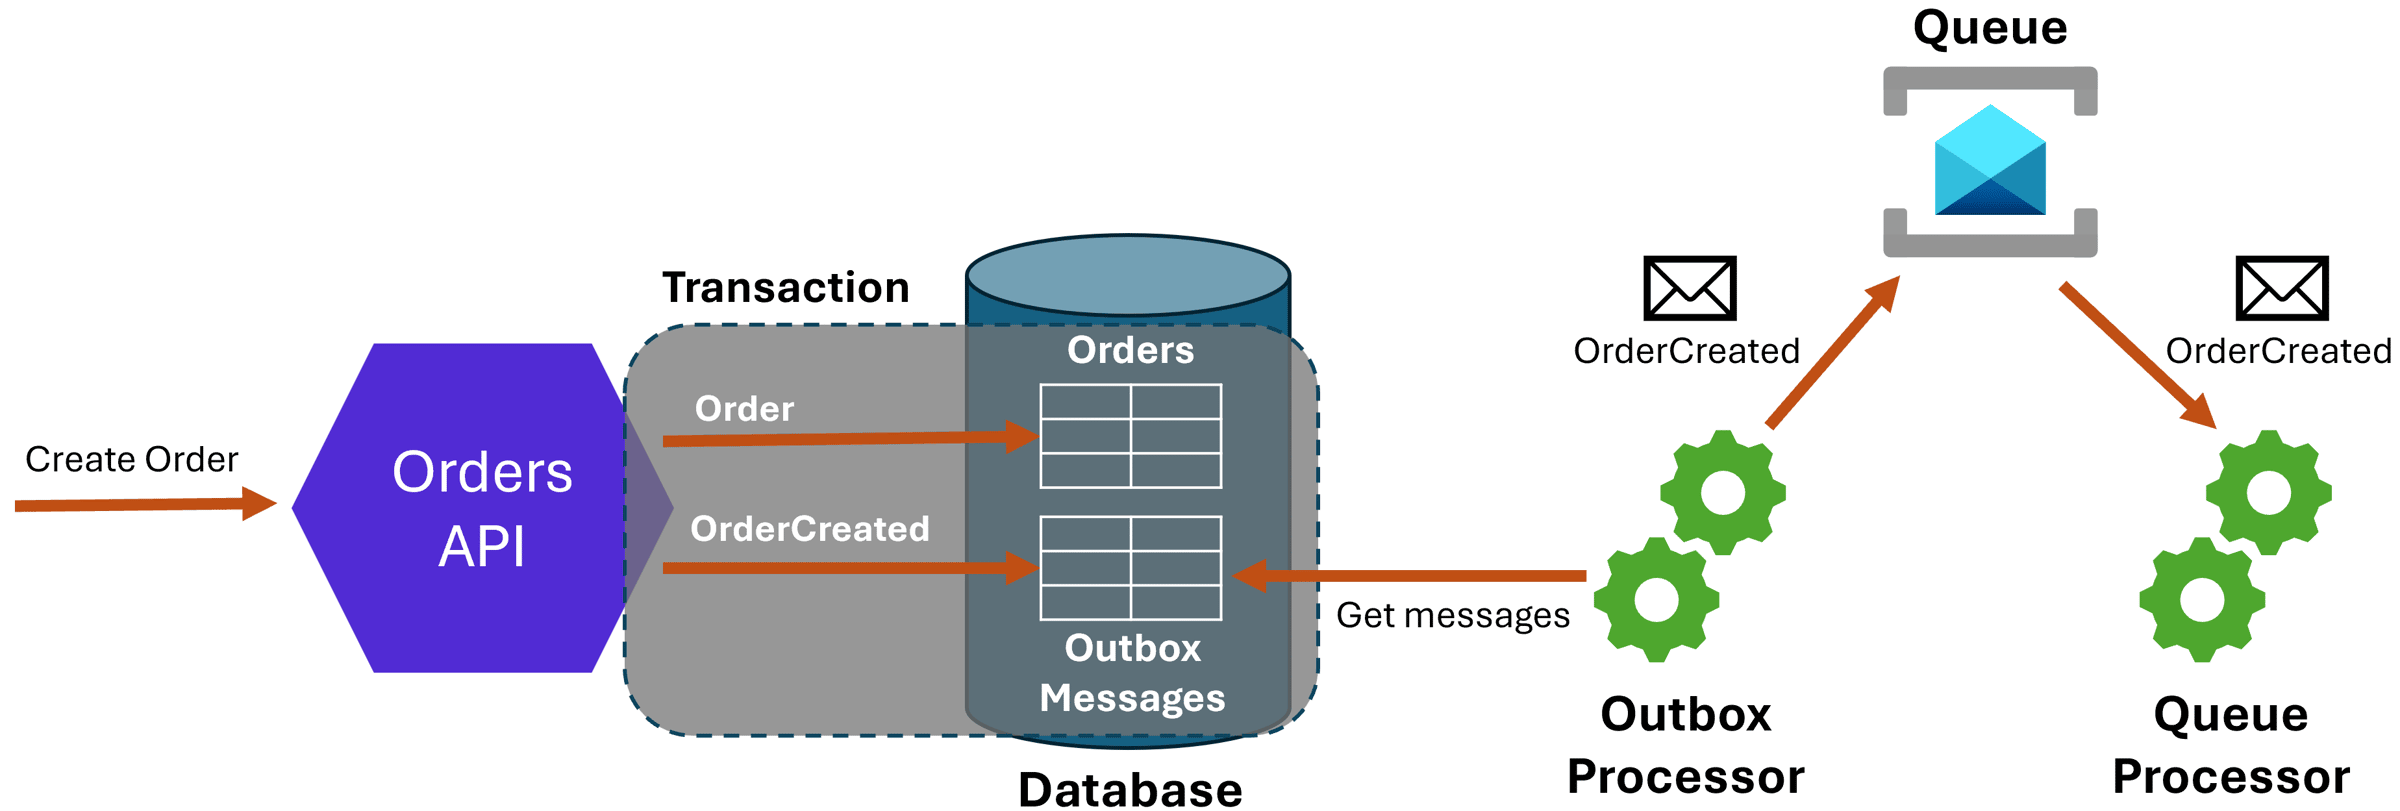
- Step 1: Store the outgoing message in a new database table (OutboxMessages) along with the order, but as part of a single database transaction.
- Step 2: Scan the OutboxMessage table periodically and publish any pending messages to the queue
This is known as the Outbox Pattern and is one of the best ways to deal with the dual-write problem.
Let’s see how to implement it.
Step 1: Update the data model
First, you’ll need a new OutboxMessages table. I’m using EF Core, so I’ll introduce a new OutboxMessage model:
public class OutboxMessage
{
    public Guid Id { get; set; }
    public required string MessageType { get; set; }
    public required string QueueName { get; set; }
    public required string Payload { get; set; }
    public string? MessageId { get; set; }
    public string? CorrelationId { get; set; }
    public DateTime CreatedAt { get; set; }
    public DateTime? ProcessedAt { get; set; }
}
And the corresponding OutboxMessages DBSet in my DBContext:
public class AppDbContext(DbContextOptions<AppDbContext> options)
    : DbContext(options)
{
    public DbSet<Order> Orders => Set<Order>();

    public DbSet<OutboxMessage> OutboxMessages => Set<OutboxMessage>();
}
Now, let’s start storing messages there.
Step 2: Store messages in the outbox
Here’s the message I’d like to publish, which I have defined as a simple record type:
public record OrderCreated(Guid OrderId, string CustomerName, decimal TotalAmount);
Next, as part of our POST Orders endpoint, we will create and store the message in our OutboxMessages table, just after creating our Order:
app.MapPost("/orders", async (
    CreateOrderRequest request,
    AppDbContext context,
    TimeProvider timeProvider,
    ILogger<Program> logger) =>
{
    Guid orderId = Guid.Empty;
    var strategy = context.Database.CreateExecutionStrategy();

    await strategy.ExecuteAsync(async () =>
    {
        // Use a transaction to ensure atomicity
        using var transaction = await context.Database.BeginTransactionAsync();

        // 1. Create the order
        var order = new Order
        {
            CustomerName = request.CustomerName,
            TotalAmount = request.TotalAmount,
            CreatedAt = timeProvider.GetUtcNow().UtcDateTime
        };
        context.Orders.Add(order);
        await context.SaveChangesAsync();

        orderId = order.Id;

        // 2. Store the event in the outbox (same transaction!)
        var orderCreatedEvent = new OrderCreated(
            orderId,
            request.CustomerName,
            request.TotalAmount);

        var outboxMessage = new OutboxMessage
        {
            Id = Guid.NewGuid(),
            MessageType = nameof(OrderCreated),
            QueueName = "orders",
            Payload = JsonSerializer.Serialize(orderCreatedEvent),
            MessageId = orderId.ToString(),
            CorrelationId = orderId.ToString(),
            CreatedAt = timeProvider.GetUtcNow().UtcDateTime
        };
        context.OutboxMessages.Add(outboxMessage);
        await context.SaveChangesAsync();

        // 3. Commit the transaction
        await transaction.CommitAsync();

        logger.LogInformation(
            "Order {OrderId} created and message added to outbox",
            orderId);
    });

    return Results.Created(
        $"/orders/{orderId}",
        new { orderId, message = "Order created successfully" });
});
The key part here, as you can see, is the use of a database transaction. With that, either we store the order and the outbox message successfully, or we fail, and everything is rolled back.
Now, let’s publish those messages.
Step 3: Process and publish messages
Now we can safely go through each of those messages and publish them to our queue, an Azure Service Bus queue in this case, one by one.
For this, we can implement a simple background service:
public class OutboxProcessor(
    IServiceProvider serviceProvider,
    ILogger<OutboxProcessor> logger) : BackgroundService
{
    private readonly TimeSpan pollingInterval = TimeSpan.FromSeconds(10);

    protected override async Task ExecuteAsync(CancellationToken stoppingToken)
    {
        logger.LogInformation("Outbox Processor started. Polling every {Interval} seconds",
                                pollingInterval.TotalSeconds);

        while (!stoppingToken.IsCancellationRequested)
        {
            try
            {
                await ProcessOutboxMessagesAsync(stoppingToken);
            }
            catch (Exception ex)
            {
                logger.LogError(ex, "Error processing outbox messages");
            }

            await Task.Delay(pollingInterval, stoppingToken);
        }

        logger.LogInformation("Outbox Processor stopped");
    }

    private async Task ProcessOutboxMessagesAsync(CancellationToken cancellationToken)
    {
        using var scope = serviceProvider.CreateScope();
        var context = scope.ServiceProvider
                           .GetRequiredService<AppDbContext>();
        var serviceBusClient = scope.ServiceProvider
                                    .GetRequiredService<ServiceBusClient>();

        // Get unprocessed messages
        var messages = await context.OutboxMessages
            .Where(m => m.ProcessedAt == null)
            .OrderBy(m => m.CreatedAt)
            .ToListAsync(cancellationToken);

        if (messages.Count == 0)
        {
            return;
        }

        logger.LogInformation("Processing {Count} outbox messages", messages.Count);

        foreach (var message in messages)
        {
            try
            {
                await using var sender = serviceBusClient.CreateSender(message.QueueName);

                var serviceBusMessage = new ServiceBusMessage(message.Payload)
                {
                    MessageId = message.MessageId ?? message.Id.ToString(),
                    CorrelationId = message.CorrelationId,
                    ContentType = "application/json"
                };
                serviceBusMessage.ApplicationProperties["MessageType"] = message.MessageType;

                await sender.SendMessageAsync(serviceBusMessage, cancellationToken);

                // Mark as processed
                message.ProcessedAt = DateTime.UtcNow;

                logger.LogInformation("Published outbox message {MessageId}",
                    message.MessageId);
            }
            catch (Exception ex)
            {
                logger.LogError(
                    ex,
                    "Failed to publish outbox message {MessageId}.",
                    message.MessageId);
            }
        }

        await context.SaveChangesAsync(cancellationToken);
    }
}
Our publishing logic will run every 10 seconds on all unprocessed messages. We mark processed messages with the ProcessedAt property, which, btw, you will want to index.
If you expect a large number of messages there, you may want to take small batches on each iteration as opposed to the full list. Could avoid running out of memory.
Let’s not forget to register our background service on startup:
builder.Services.AddHostedService<OutboxProcessor>();
Now, let’s try this out.
Trying it out
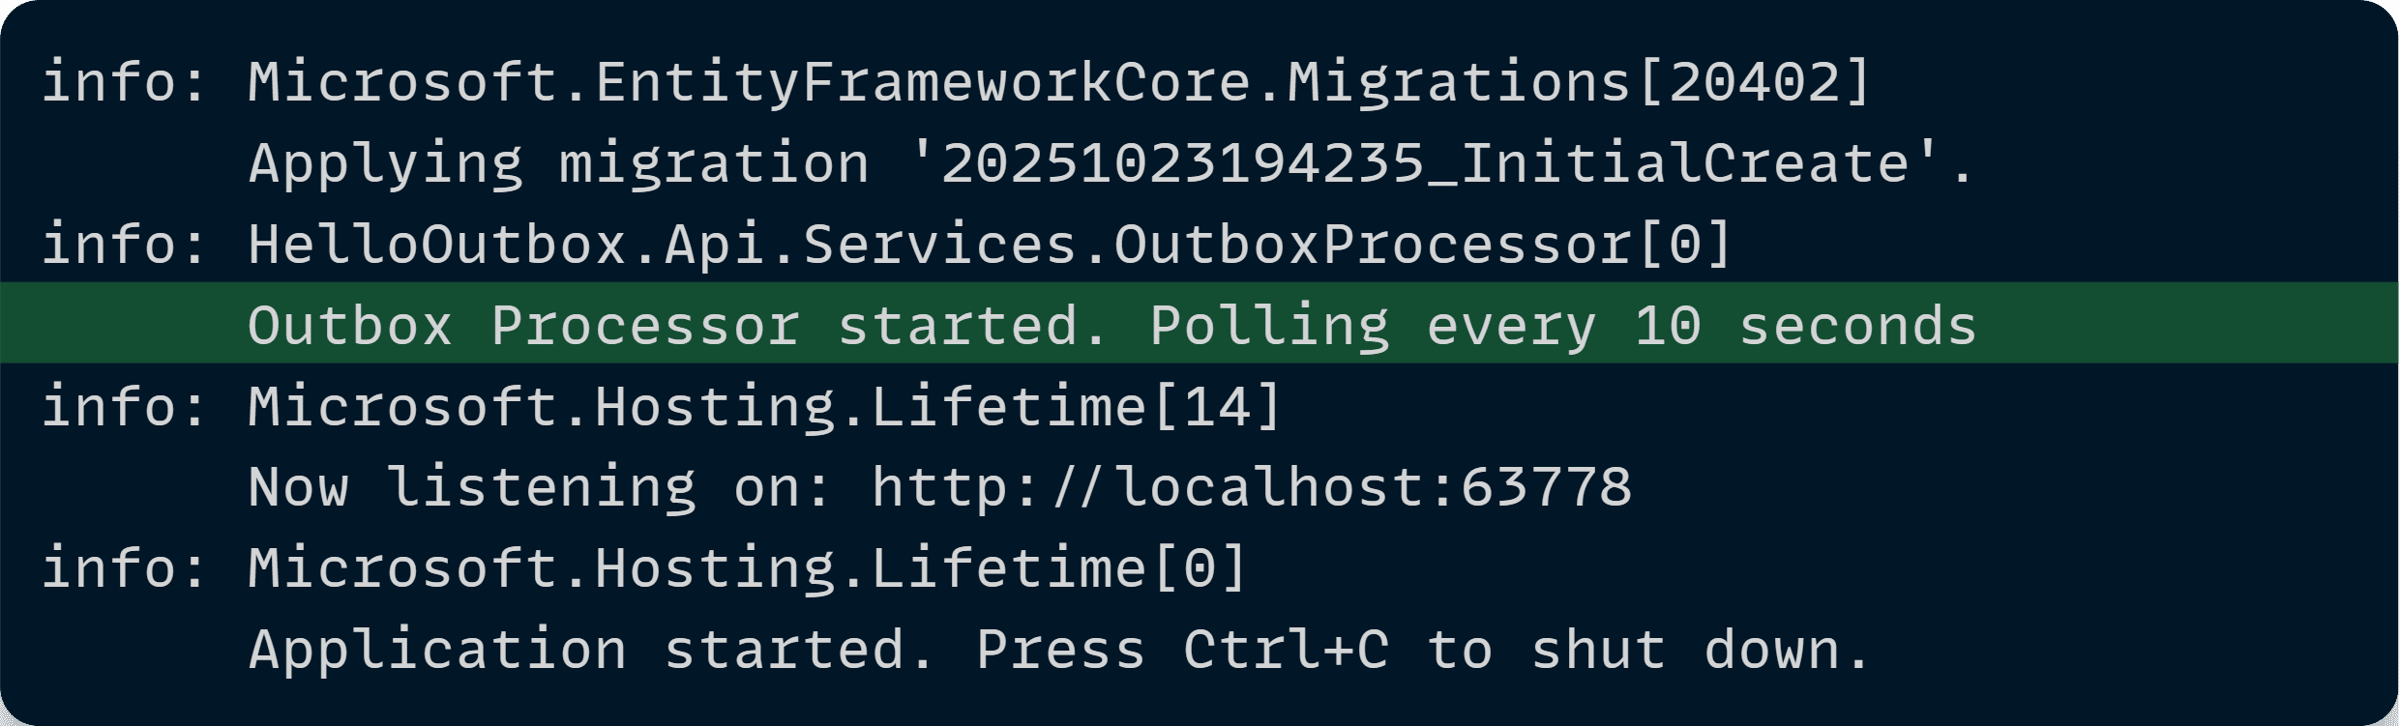
After starting the application, we can see the Outbox Processor is already polling for new messages:
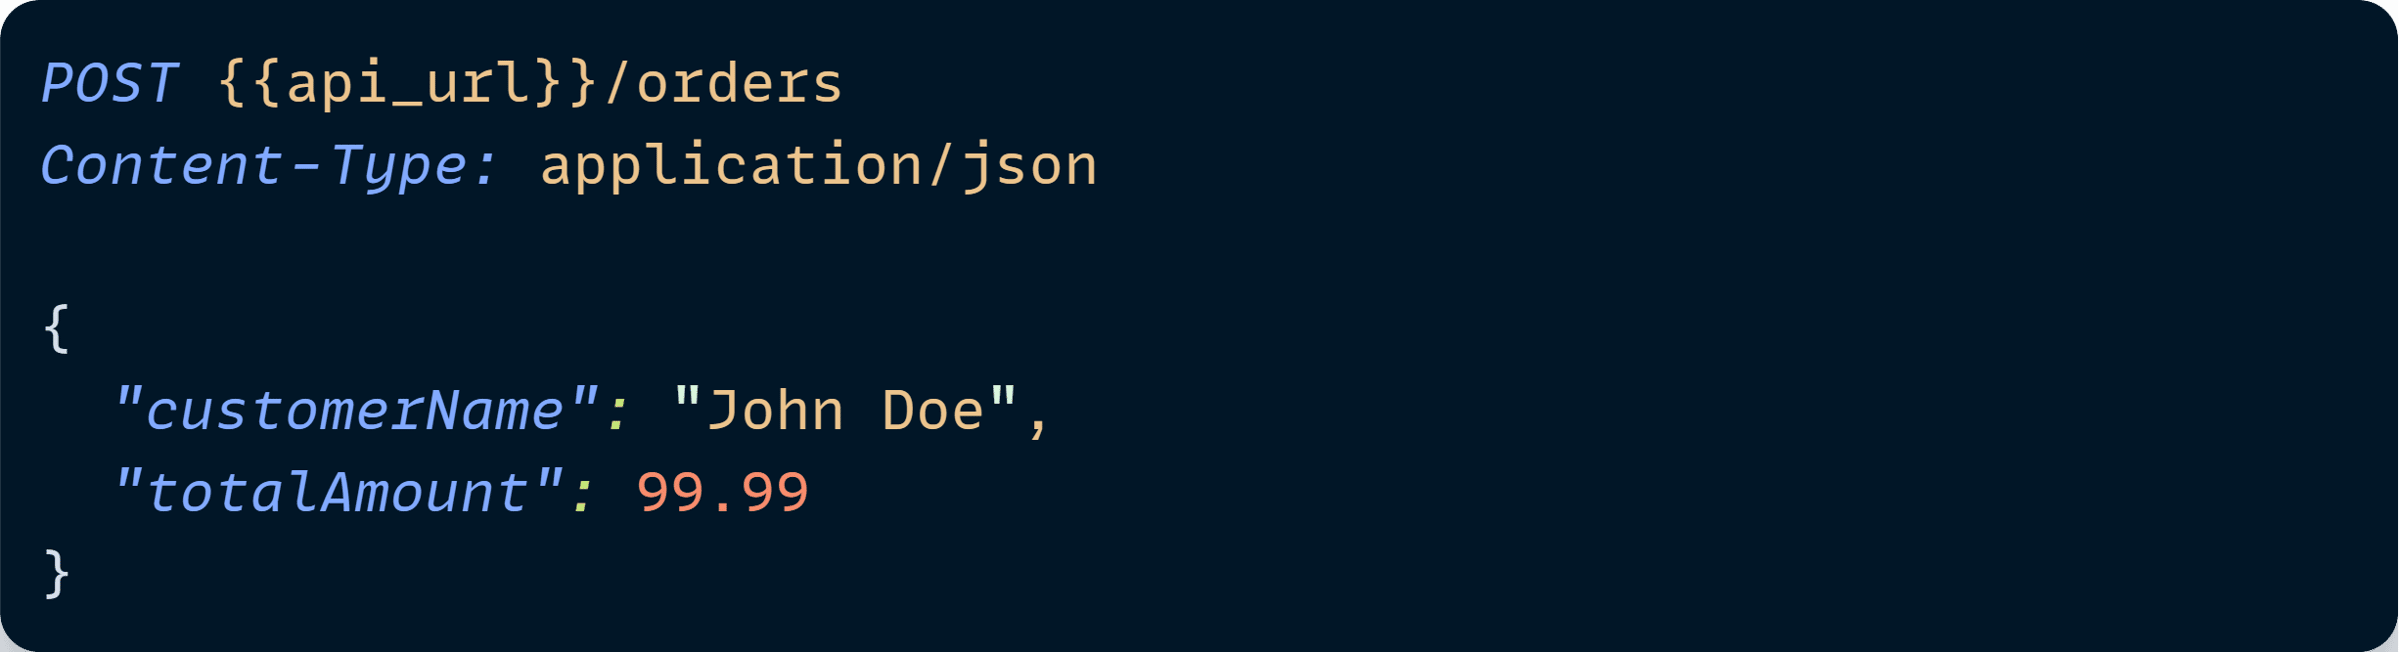
Now, let’s post a new order:
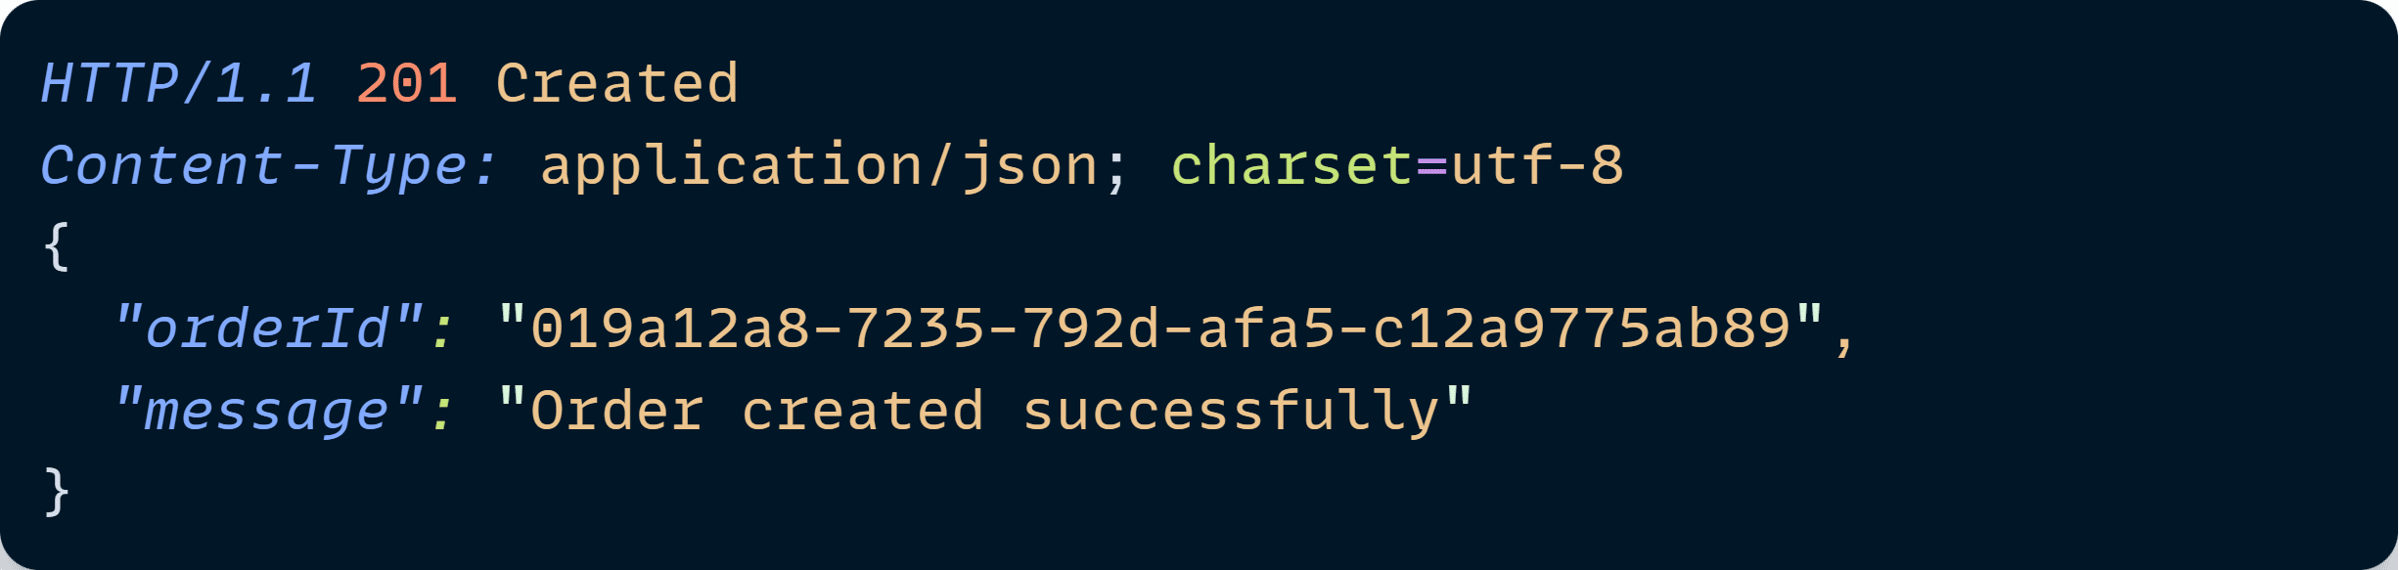
We get a success on the client side:
And, on the API logs, we can see our processor found and published the new message:

Mission accomplished!
Wrapping Up
The dual-write problem isn’t some edge case you can ignore. It’s a ticking time bomb in every system that tries to update a database and publish a message in the same request.
The Outbox Pattern isn’t clever—it’s just honest about distributed systems. One atomic write to your database. One background worker that publishes what’s in the outbox. That’s it.
When you stop fighting reality and work with it instead, your system becomes predictable.
And predictable systems are the ones that actually ship features instead of constantly firefighting production incidents.
And that’s it for today.
See you next Saturday.
P.S. This is just a small summary of Module 8 of my Payments, Queues & Workers course, where I cover many other classic gotchas of distributed systems.
Whenever you’re ready, here’s how I can help:
The .NET Developer Bootcamp: A complete path from ASP.NET Core fundamentals to building, containerizing, and deploying production-ready, cloud-native apps on Azure.
